
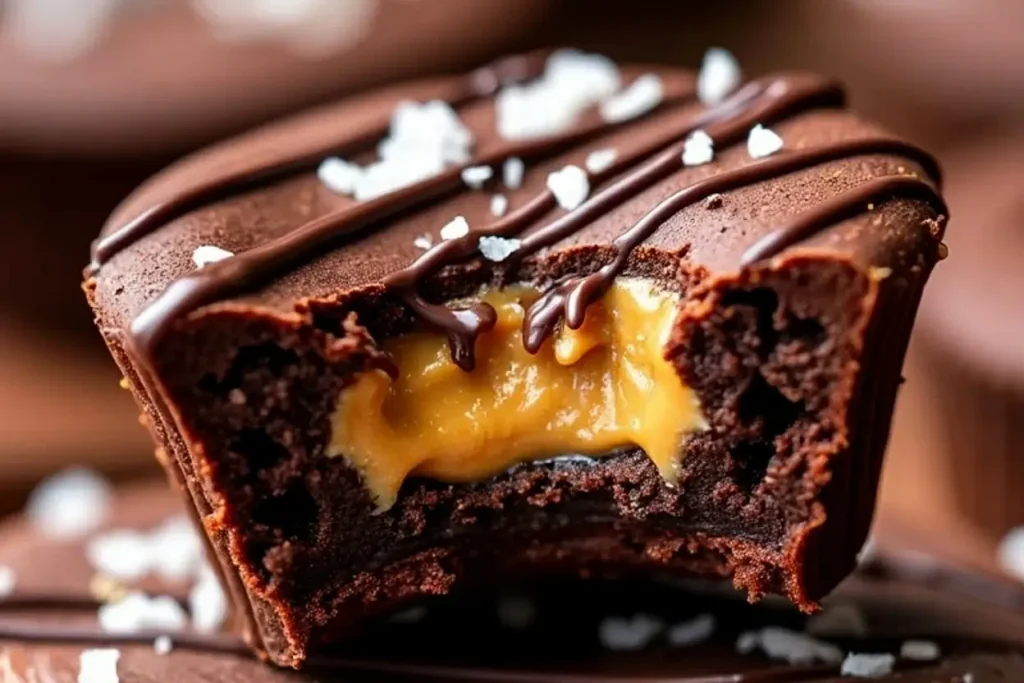
If you’re a chocoholic (like me!) and a peanut butter lover, you’re about to meet your new favorite treat: Ultimate Triple Chocolate Brownie Peanut Butter Cups. These decadent little cups combine layers of rich chocolate, fudgy brownie, and creamy peanut butter to create a dessert so indulgent, you’ll find yourself savoring every bite. Imagine biting into a crisp chocolate shell, followed by gooey brownie goodness and a peanut butter center that melts in your mouth. Yep, they’re as good as they sound.
What makes this recipe so special? It’s all about the triple chocolate factor. With dark chocolate, milk chocolate, and white chocolate all making an appearance, these peanut butter cups hit every chocolate note perfectly. Whether you’re making these for a party, a holiday treat, or just a sweet snack for yourself, trust me, they won’t last long!
Oh, and bonus: these are surprisingly easy to make with just a few steps. Let’s dive in and create something delicious that’s guaranteed to impress.
The Story Behind Triple Chocolate Peanut Butter Cups
Peanut butter cups have always been a classic, but as someone who’s obsessed with brownies and chocolate, I wanted to take the idea to the next level. I first started experimenting with this recipe after a family baking day around the holidays. We already had brownies on the table, and someone brought store-bought peanut butter cups. That’s when the lightbulb moment hit—why not combine the two?
These ultimate cups are inspired by my love for layering flavors and textures. The gooey brownie layer is a nod to my childhood, where boxed brownies were a staple in my home. The peanut butter layer? Well, that’s just because peanut butter makes everything better. And the triple chocolate? That’s all about balance—dark chocolate for richness, milk for creaminess, and white for a sweet finish.
Over time, I fine-tuned the recipe to nail the perfect ratios. The result is a dessert that feels like a gourmet treat but is approachable enough for any home baker. And while I love making these year-round, they’re especially fun to whip up for Halloween, Christmas, or Valentine’s Day. Honestly, they’re perfect any time you need a little chocolate therapy.
Ingredients You’ll Need
Let’s talk ingredients! Each component of this recipe plays an important role, and I’ve got tips for selecting the best options and making substitutions if needed.
- Dark Chocolate: Use a high-quality dark chocolate (70% cocoa works great) for the outer shell. It provides that slightly bitter richness that balances the sweetness of the layers inside. If you’re in a pinch, semi-sweet chocolate chips will work too.
- Milk Chocolate: This goes into the brownie layer to add creaminess. Choose a good-quality milk chocolate bar or chips for the best results.
- White Chocolate: The drizzle on top is optional but adds a lovely sweetness and visual contrast. White chocolate chips or a baking bar work perfectly here.
- Unsalted Butter: Butter is key for the brownie layer. If you only have salted butter on hand, just omit the added salt in the recipe.
- Granulated Sugar and Brown Sugar: A combination of the two gives the brownie layer its chewy texture and deep flavor. Don’t skip the brown sugar—it’s a game-changer.
- Egg: One large egg binds the brownie batter together. Make sure it’s room temperature for best results.
- All-Purpose Flour: Just a small amount for structure. You can substitute with a gluten-free 1:1 baking mix if needed.
- Peanut Butter: Creamy peanut butter works best here. If you’re using natural peanut butter, make sure it’s well stirred to avoid separation.
- Salt: A pinch of salt in the brownie and peanut butter layers enhances the flavors.
- Vanilla Extract: Adds warmth and depth to the brownie layer. Use pure vanilla if you can.
Pro Tip: For a fun twist, try adding a sprinkle of sea salt or crushed peanuts on top for texture and a salty-sweet combo.
Equipment Needed For Triple Chocolate Peanut Butter Cups
- Mini Muffin Tin: This is essential for shaping your peanut butter cups. If you don’t have one, you can use a regular muffin tin for larger cups, but the portions will be different.
- Silicone Muffin Liners: These make it super easy to pop the cups out once they’re set. If you don’t have silicone liners, paper liners will work too.
- Microwave-Safe Bowls: For melting the chocolate layers.
- Small Spoon or Scoop: To evenly portion the brownie batter and peanut butter layers.
- Offset Spatula or Butter Knife: For spreading and smoothing layers.
And don’t forget a wire rack for cooling! It’ll help the chocolate set evenly.
How to Make Ultimate Triple Chocolate Peanut Butter Cups
- Melt the Dark Chocolate: In a microwave-safe bowl, melt 1 cup (170g) of dark chocolate chips in 30-second increments, stirring between each interval until smooth. Spoon about 1 teaspoon of melted chocolate into the bottom of each mini muffin liner, spreading it up the sides. Freeze for 10 minutes to set.
- Prepare the Brownie Layer: In a small saucepan, melt 2 tablespoons (30g) of unsalted butter over low heat. Stir in 1/4 cup (50g) of granulated sugar and 1 tablespoon (15g) of brown sugar. Remove from heat, then whisk in 1 tablespoon (15g) cocoa powder, 1/4 cup (30g) all-purpose flour, and a pinch of salt. Add 1 beaten egg and 1/2 teaspoon vanilla extract, mixing until smooth.
- Add the Brownie Layer: Spoon 1 teaspoon of brownie batter over the set chocolate layer. Freeze for another 10 minutes until firm.
- Prepare the Peanut Butter Filling: In a small bowl, mix 1/4 cup (60g) creamy peanut butter with 1 tablespoon (10g) powdered sugar and a pinch of salt. Drop 1 teaspoon of the mixture onto the brownie layer, smoothing it slightly.
- Top with More Chocolate: Melt another 1/2 cup (85g) of dark chocolate and spread it over the peanut butter layer, sealing the edges. Freeze again for 10 minutes.
- Decorate: Melt white chocolate (about 1/4 cup or 40g) and drizzle it over the tops. Add a sprinkle of sea salt or chopped peanuts, if desired.
- Chill and Serve: Let the cups set in the fridge for 30 minutes before serving. Store leftovers in an airtight container in the fridge for up to 1 week.
Cooking Tips & Techniques
Here are a few tricks I’ve learned while perfecting this recipe:
- Use room-temperature ingredients for the brownie layer. Cold eggs or butter can cause the batter to split.
- If your chocolate seizes while melting, add a teaspoon of vegetable oil to smooth it out.
- Don’t overfill the liners—each layer should be thin to keep the perfect balance of flavors.
- Work quickly when assembling the layers to prevent the peanut butter from softening too much.
And remember, practice makes perfect! Even if your first batch isn’t picture-perfect, they’ll still taste amazing.
Variations & Adaptations
- Gluten-Free Version: Use a gluten-free brownie mix or substitute the all-purpose flour with a gluten-free 1:1 blend.
- Nut-Free Option: Swap the peanut butter for sunflower seed butter or cookie butter for a fun twist.
- Seasonal Flavors: Add a dash of cinnamon and nutmeg to the brownie layer for a holiday vibe, or mix in crushed peppermint candy for a festive touch.
Feel free to get creative! I’ve even tried adding a caramel layer between the brownie and peanut butter, and it was divine.
Serving & Storage Suggestions
These peanut butter cups are best served chilled, straight from the fridge. They pair beautifully with a glass of cold milk, a hot cup of coffee, or even a scoop of vanilla ice cream for an over-the-top dessert.
Store any leftovers in an airtight container in the fridge for up to 1 week. For longer storage, you can freeze them for up to 3 months. Just let them thaw at room temperature for 10-15 minutes before serving.
Nutritional Information & Benefits
These treats are indulgent, so enjoy them as a special occasion dessert. Each cup is packed with rich chocolate and protein from the peanut butter, making them a satisfying treat. However, they do contain common allergens like peanuts, dairy, and gluten, so keep that in mind if you’re serving a crowd.
If you’re calorie-conscious, you can make smaller portions using mini liners to enjoy all the flavor in a bite-sized treat.
Conclusion
So there you have it—Ultimate Triple Chocolate Brownie Peanut Butter Cups, a dessert that’s as fun to make as it is to eat. Whether you’re a die-hard chocolate fan or just looking for a sweet treat to share, these cups are guaranteed to win you over.
I’d love to hear how yours turn out! Leave a comment below or share your version on social media. Don’t forget to tag me so I can see your creations. Happy baking!
FAQs: Triple Chocolate Peanut Butter Cups
Can I use a regular muffin tin for this recipe?
Yes, but the portions will be larger, and the layers may take longer to set.
What’s the best way to melt chocolate?
Use a microwave in 30-second intervals, stirring in between, or a double boiler for more control.
Can I make these ahead of time?
Absolutely! These store well in the fridge or freezer, making them perfect for prepping in advance.
What if I don’t have white chocolate for the drizzle?
No problem! You can skip the drizzle or use dark or milk chocolate instead.
How do I prevent the chocolate from sticking to the liners?
Silicone liners are the easiest way to avoid sticking, but you can also lightly spray paper liners with non-stick spray.
TABLE OF CONTENTS
Table of Contents
Triple Chocolate Peanut Butter Cups
Decadent peanut butter cups with layers of dark, milk, and white chocolate, fudgy brownie, and creamy peanut butter.
- Total Time: 50 minutes
- Yield: 12 cups 1x
Ingredients
- 200g dark chocolate (70% cocoa)
- 150g milk chocolate
- 50g white chocolate (for drizzle, optional)
- 1 batch of your favorite brownie mix
- 1 cup creamy peanut butter
- 2 tbsp powdered sugar
Instructions
- Melt the dark chocolate and coat the inside of silicone muffin cups to form the outer shell. Chill until set.
- Prepare the brownie mix according to package instructions and bake. Let cool completely.
- Cut the brownies into small circles to fit inside the chocolate shells.
- Mix the peanut butter with powdered sugar until smooth.
- Layer a brownie circle inside each chocolate shell, followed by a layer of peanut butter mixture.
- Melt the milk chocolate and pour over the peanut butter layer to seal the cups. Chill until set.
- Drizzle with melted white chocolate for decoration, if desired.
- Carefully remove the cups from the molds and serve.
Notes
For best results, use high-quality chocolate. These cups can be stored in the refrigerator for up to a week.
- Prep Time: 20 minutes
- Cook Time: 30 minutes
- Category: Dessert
- Method: Layering
- Cuisine: American
- Diet: Vegetarian
Nutrition
- Serving Size: 1 cup
- Calories: 320
- Sugar: 18g
- Sodium: 120mg
- Fat: 20g
- Saturated Fat: 10g
- Unsaturated Fat: 8g
- Trans Fat: 0g
- Carbohydrates: 30g
- Fiber: 2g
- Protein: 6g
- Cholesterol: 15mg
Keywords: chocolate, peanut butter, dessert, brownie, easy recipe


