

The crackle of a late-night campfire, the smell of toasted marshmallows, and—if you’re lucky—a plate of warm, chewy campfire kitchen sink cookies loaded with pretzels and M&Ms. Honestly, these cookies are my go-to for every outdoor gathering (and, let’s face it, a few indoor movie nights too). The first time I whipped up a batch, I was surrounded by hungry campers who devoured them before I could even grab a second. There’s just something about the salty crunch of pretzels and the pop of chocolate candy that makes these cookies a crowd favorite.
I started making campfire kitchen sink cookies when I realized that, no matter what, someone always forgets something on a camping trip—but never the snacks. You know how it goes: a handful of this, a scoop of that, and suddenly you’ve got a cookie that’s as wild as your weekend plans. What I love most is that this recipe is forgiving and flexible—perfect for tossing in whatever “extras” you’ve got in your pantry. And let’s be honest, who can resist a treat packed with gooey chocolate chips, crunchy pretzels, and colorful M&Ms?
These cookies are the ultimate comfort food for busy families, sweet-tooth snackers, or anyone who wants to bring a little magic to a backyard fire. I’ve made this recipe more times than I can count, and each batch seems to get better (and a little crazier) than the last. If you’re looking for a campfire kitchen sink cookies recipe that’s easy, fun, and absolutely irresistible, you’re in the right place. Trust me—after one bite, you’ll be sneaking back to the cookie jar, too.
Why You’ll Love This Recipe
If you’re anything like me, you want a recipe that’s as reliable as it is delicious. I’ve tested these campfire kitchen sink cookies in everything from a tiny cabin oven to a cast iron skillet over open flames, and they never disappoint. Here’s why these cookies have a permanent place in my family’s treat rotation:
- Quick & Easy: You can have a batch ready in under 30 minutes—perfect for spontaneous cravings or last-minute gatherings.
- Simple Ingredients: No fancy grocery runs required. The stars are pantry staples like flour, brown sugar, and, of course, those leftover pretzels and M&Ms from the snack stash.
- Perfect for Any Occasion: Whether it’s a cozy campfire, a potluck, or a rainy day at home, these cookies fit right in.
- Crowd-Pleaser: I’ve never met a kid (or grown-up) who didn’t go back for seconds. There’s something about the sweet and salty combo that’s just plain addictive.
- Unbelievably Delicious: Each cookie bursts with melty chocolate, crunchy pretzel bits, buttery dough, and pops of colorful candy—like a party in every bite.
What sets my version apart? I blend the butter and sugars just right for a chewy center, and I don’t skimp on the mix-ins. The ratio is key: every bite is loaded with something fun. Plus, I love mixing in a handful of marshmallows for a true campfire twist. These aren’t just cookies; they’re a memory-maker. You’ll find yourself smiling when you pull them out of the oven—promise.
Honestly, baking these campfire kitchen sink cookies with pretzels and M&Ms is a little like making edible joy. They’re great for impressing friends without any fuss, and they’re the kind of comfort food that makes you close your eyes in happiness after the first bite. Go ahead and make a double batch—these disappear faster than you’d think!
What Ingredients You Will Need
This campfire kitchen sink cookies recipe uses a mix of classic cookie ingredients and all your favorite “extras.” The beauty here? You can tweak it based on what’s in your pantry, but here’s my tried-and-true combo for irresistible results:
- For the Cookie Dough:
- 1 cup (226g) unsalted butter, softened (for that rich, melt-in-your-mouth feel)
- 3/4 cup (150g) packed brown sugar (adds chewy texture and caramel undertones)
- 1/2 cup (100g) granulated sugar
- 2 large eggs, room temperature (helps everything bind together)
- 2 teaspoons pure vanilla extract (use real vanilla if possible—it makes a difference!)
- 2 1/4 cups (280g) all-purpose flour
- 1 teaspoon baking soda
- 1/2 teaspoon baking powder
- 1/2 teaspoon kosher salt (balances the sweetness perfectly)
- For the Mix-Ins (“Kitchen Sink” Goodies):
- 1 cup (170g) semi-sweet or milk chocolate chips (I love Ghirardelli for extra gooeyness)
- 1 cup (100g) M&Ms, any variety (the color and crunch are so fun—use seasonal colors if you like!)
- 1 cup (50g) mini pretzel twists, roughly chopped (for that salty crunch)
- 1/2 cup (50g) chopped toasted pecans or walnuts (totally optional, but adds nice texture)
- 1/2 cup (25g) mini marshmallows (for extra gooey, campfire vibes)
- 1/2 cup (40g) shredded coconut (optional, but it gives a little tropical twist)
Ingredient Tips: For the best results, use fresh, soft butter and real vanilla extract. If you’re out of brown sugar, you can make your own by mixing granulated sugar with a splash of molasses. I’ve tried these with both regular and gluten-free all-purpose flour (Bob’s Red Mill 1-to-1 is my pick for gluten-free). The mix-ins are delightfully flexible: swap in butterscotch chips, white chocolate, or even dried cherries if you’re feeling adventurous. Just make sure the total “extras” is around 3 cups for the right dough-to-goodies ratio.
When I’m camping, I raid the snack bag for anything that looks fun—potato chips, chopped candy bars, you name it. These cookies are a great way to use up odds and ends! Don’t overthink it—the magic is in the mix.
Equipment Needed
- Large mixing bowl – You’ll need plenty of room to fold in all those mix-ins. If you’re making these at the campsite, any big bowl works.
- Hand mixer or stand mixer – For creaming the butter and sugars to fluffy perfection, but you can use a sturdy spoon and elbow grease if you’re off-grid (I’ve done it, and it works!).
- Baking sheets – Standard half-sheet pans work best. If you only have one, just bake in batches.
- Parchment paper or silicone baking mats – These help with easy cleanup and prevent sticking, especially with all those gooey marshmallows.
- Measuring cups and spoons – Accuracy counts for baking, but I’ve been known to eyeball the mix-ins when I’m feeling wild.
- Cookie scoop or tablespoon – Makes portioning easy and keeps the cookies a uniform size.
- Wire cooling rack – For cooling the cookies (if you can wait that long!).
If you’re baking these campfire kitchen sink cookies over an actual fire, a well-seasoned cast iron skillet is your best friend. I’ve even made a giant skillet cookie right on the coals—just keep an eye so it doesn’t burn. For easy cleanup, line your pan with parchment or foil. Don’t worry about having the “perfect” tools—half the fun is making do with what you’ve got. Just remember to keep your mixer clean (sticky marshmallows are no joke to wash off!).
Preparation Method
- Prep your oven and pans: Preheat your oven to 350°F (175°C). Line two large baking sheets with parchment paper or silicone baking mats. This helps the cookies come off easily and prevents the marshmallows from sticking hard.
- Cream the butter and sugars: In a large bowl, beat 1 cup (226g) unsalted butter with 3/4 cup (150g) brown sugar and 1/2 cup (100g) granulated sugar until light and fluffy. This takes about 2-3 minutes with a mixer on medium. If mixing by hand, use a wooden spoon and give it some muscle!
- Add eggs and vanilla: Crack in 2 large eggs, one at a time, mixing well after each. Pour in 2 teaspoons vanilla extract. The dough should look smooth and a little glossy.
- Mix dry ingredients: In a separate bowl, whisk together 2 1/4 cups (280g) all-purpose flour, 1 teaspoon baking soda, 1/2 teaspoon baking powder, and 1/2 teaspoon salt. This helps everything mix evenly.
- Combine wet and dry: Gradually add the dry ingredients to the butter mixture, mixing on low speed or gently by hand. The dough should be thick but not dry. If it seems crumbly, add a splash of milk.
- Fold in the mix-ins: Dump in 1 cup (170g) chocolate chips, 1 cup (100g) M&Ms, 1 cup (50g) chopped pretzels, 1/2 cup (50g) nuts (if using), 1/2 cup (25g) mini marshmallows, and 1/2 cup (40g) coconut (if using). Fold gently so you don’t crush the candies too much. The dough should be studded with goodies in every scoop.
- Scoop the dough: Use a cookie scoop or heaping tablespoon to drop balls of dough onto the prepared baking sheets. Leave about 2 inches (5cm) between each—they spread a bit. If you want bakery-style cookies, press a few extra M&Ms and pretzel pieces on top of each ball.
- Bake: Pop the sheets into the oven and bake for 10-12 minutes. The edges should be lightly golden, but the centers might look a bit soft—that’s perfect. If you like crispier cookies, bake an extra 2 minutes, but watch closely.
- Cool: Let the cookies cool on the baking sheets for 5 minutes (they’ll be fragile because of the marshmallows). Then transfer to a wire rack to cool completely—or eat one warm, because you deserve it.
- Troubleshooting: If your cookies are spreading too much, chill the dough for 30 minutes before baking. If they’re too puffy, gently flatten the balls before baking. If you’re baking over a campfire in a skillet, cover loosely with foil and let them cook over indirect heat for about 20-25 minutes, checking often.
Pro tip: Don’t overmix the dough after adding the flour, or you’ll end up with tough cookies. If you’re baking with kids, let them handle the mix-ins—they love seeing all the colors and textures go in. And always taste-test your first batch—sometimes the campfire adds its own “flavor.”
Cooking Tips & Techniques
Making campfire kitchen sink cookies with pretzels and M&Ms might seem foolproof, but a few little tweaks make a huge difference. Here’s what I’ve learned from dozens of batches (and a few cookie fails):
- Don’t skimp on creaming: Creaming butter and sugar until fluffy is key for chewy cookies. If you rush this, the cookies can turn dense.
- Watch your oven temp: All ovens run a bit differently. If your cookies are browning too fast, lower the temp by 10°F (5°C). Use an oven thermometer if you have one.
- Chill the dough for thicker cookies: If you like thick, bakery-style cookies, chill the dough for at least 30 minutes.
- Add marshmallows at the end: If you mix marshmallows in too early, they can melt and disappear. Press a few into the tops right before baking for gooey pockets.
- Mix-ins should be evenly distributed: Fold gently but thoroughly. No one wants a naked cookie!
- Don’t overbake: Take the cookies out when they look slightly underdone in the center. They’ll finish setting as they cool.
- Rotate your pans: For even baking, switch your pans’ positions halfway through. Especially important if you’re baking multiple sheets.
- Use parchment for sticky mix-ins: Marshmallows and caramel bits can melt and stick. Parchment or silicone mats make cleanup so much easier.
I’ve made the mistake of packing in too many salty snacks (hello, potato chips!), and it made the dough fall apart. Stick to about 3 cups of mix-ins total for best results. And if you’re baking at the campsite, keep the skillet off direct flames—slow and steady wins the cookie race. Last but not least, don’t be afraid to get creative with what you toss in. That’s what “kitchen sink” is all about!
Variations & Adaptations
One of the best things about campfire kitchen sink cookies is how easy they are to adapt. Here are a few of my favorite ways to switch things up:
- Gluten-Free: Swap the all-purpose flour for a 1:1 gluten-free blend (I like Bob’s Red Mill). Make sure your pretzels and M&Ms are gluten-free too.
- Nut-Free: Skip the nuts entirely, or use sunflower seeds for a little crunch. Double up on pretzels or candy instead.
- Vegan: Use plant-based butter, flax eggs (2 tablespoons ground flax + 5 tablespoons water), and dairy-free chocolate and candies. There are vegan pretzels and marshmallows out there too!
- Seasonal Flavors: In fall, add pumpkin spice and swap in caramel chips. Around the holidays, use peppermint M&Ms and crushed candy canes. For summer, toss in dried cherries or blueberries.
- Campfire Skillet Cookie: Skip individual cookies—spread the dough in a greased cast iron skillet and bake over the fire (or in the oven) for a giant, shareable cookie cake.
- Allergen Substitutions: To avoid dairy, use coconut oil or non-dairy butter; for egg allergies, a commercial egg replacer works just fine.
My personal favorite? I once made a batch with chopped peanut butter cups, pretzel sticks, and rainbow sprinkles for my niece’s birthday. Not a crumb left by the end of the night! The beauty is you can customize these cookies to fit your pantry, your occasion, and your cravings.
Serving & Storage Suggestions
Campfire kitchen sink cookies are best served warm, with the chocolate still a little melty and the marshmallows gooey. If you’re not at the campsite, pop them in the microwave for 10 seconds to revive that fresh-baked magic. I love piling them high on a rustic tray lined with parchment—so cozy for sharing around the fire or at your kitchen counter.
Pair these cookies with mugs of hot cocoa, coffee, or icy cold milk. They’re also fantastic sandwiched with a scoop of vanilla ice cream for a next-level dessert (trust me, it’s a crowd-pleaser!).
To store, let the cookies cool completely, then keep in an airtight container at room temperature for up to 5 days. If you want to make them ahead, freeze baked cookies for up to 2 months—just thaw at room temp or reheat gently. The dough also freezes beautifully; scoop it onto a sheet, freeze until firm, then bag up the dough balls for easy, fresh cookies anytime. The flavors actually deepen after a day or two, so don’t be afraid to make them ahead—if you can resist eating them all at once!
Nutritional Information & Benefits
Each campfire kitchen sink cookie (about 2 tablespoons dough) has roughly 180 calories, 8g fat, 25g carbohydrates, and 2g protein. The real nutritional perks come from the mix-ins: pretzels add a little extra fiber and crunch, while the nuts (if used) give a boost of healthy fats and protein. If you use dark chocolate chips, you’ll sneak in some antioxidants as well.
These cookies can be made gluten-free or nut-free with easy swaps, so they’re friendly for most diets (just double-check your candies and pretzels). Allergens to watch for include wheat, dairy, eggs, nuts, and soy, depending on your mix-ins. As a baker who likes a treat that feels “worth it,” I love that these cookies deliver pure joy without being over-the-top heavy. Moderation is key, but honestly—life’s too short not to enjoy a cookie by the fire!
Conclusion
If you’ve been searching for the ultimate campfire kitchen sink cookies recipe, this is the one you’ll come back to again and again. Whether you’re baking in a cabin, under the stars, or just bringing a bit of campfire fun into your kitchen, these cookies deliver on flavor, fun, and flexibility.
Don’t be afraid to play around with your favorite snacks and candies—these cookies are all about making the most of what you have. I love sharing them because they always bring smiles, and there’s something a little magical about the blend of salty, sweet, and chewy in every bite.
Try the recipe, put your own spin on it, and let me know how it goes! Leave a comment with your favorite mix-ins, share your cookie creations, or tag me if you try them at your next campout. Here’s to warm cookies, happy campers, and memories that last long after the last crumb is gone. Happy baking!
Frequently Asked Questions
Can I make campfire kitchen sink cookies without a campfire?
Absolutely! These cookies bake up perfectly in a regular oven. If you want the campfire vibe, bake them in a cast iron skillet or toss in some marshmallows for extra gooeyness.
What can I use instead of pretzels?
Try potato chips, chopped crackers, or even cornflakes for a different crunch. The key is to use something salty and crispy.
How do I keep the cookies from spreading too much?
If your cookies are spreading, chill the dough for 30 minutes before baking. Also, make sure your butter isn’t too soft or melted.
Can I freeze the dough or baked cookies?
Yes! Freeze cookie dough balls on a tray, then store in a zip-top bag. Bake straight from frozen, adding 1-2 minutes to the baking time. Baked cookies freeze well, too—just let them cool before storing.
Are these cookies safe for people with nut allergies?
You can easily leave out the nuts or replace them with seeds or extra pretzels. Always check your mix-ins for allergens and label carefully if you’re sharing with others.
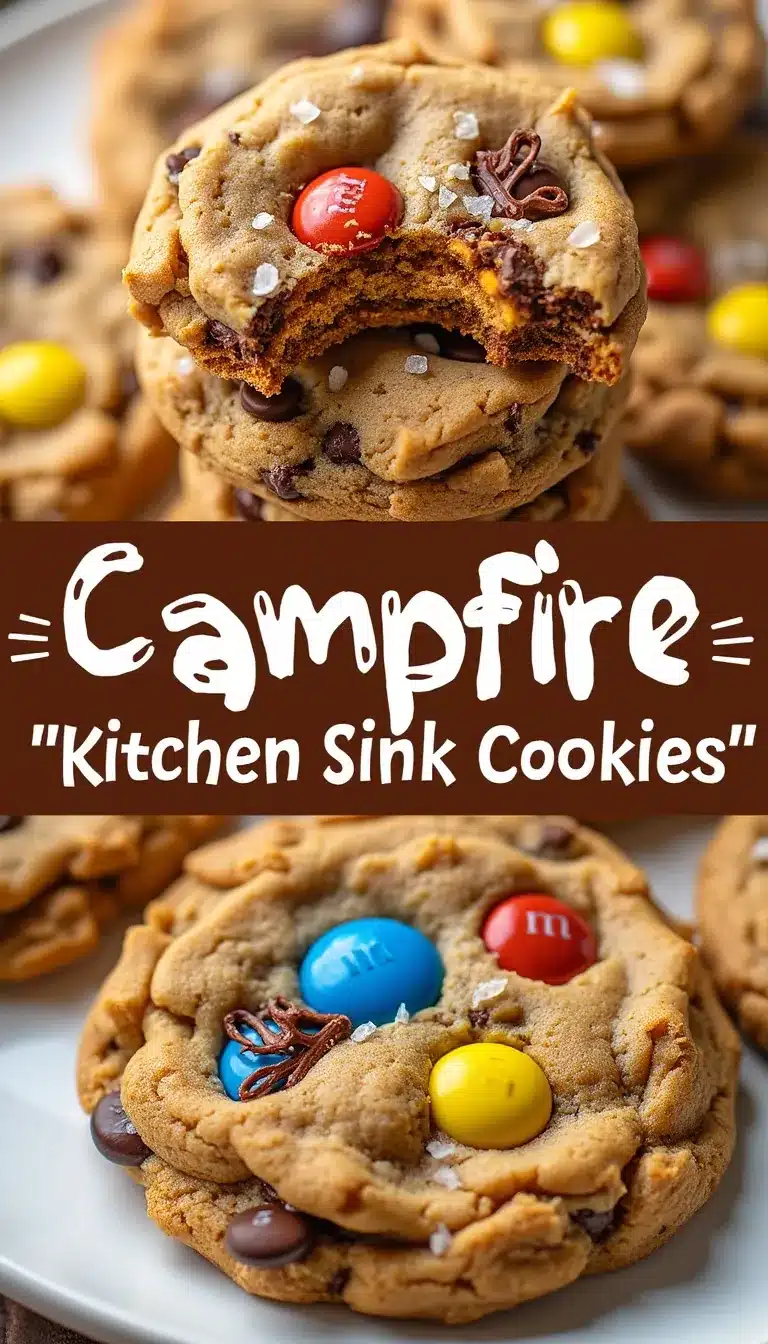

Campfire Kitchen Sink Cookies
These chewy, crowd-pleasing cookies are loaded with pretzels, M&Ms, chocolate chips, and marshmallows for the ultimate sweet-and-salty campfire treat. Flexible and easy, they’re perfect for outdoor gatherings or cozy nights in.
- Total Time: 27 minutes
- Yield: 30 cookies 1x
Ingredients
- 1 cup (226g) unsalted butter, softened
- 3/4 cup (150g) packed brown sugar
- 1/2 cup (100g) granulated sugar
- 2 large eggs, room temperature
- 2 teaspoons pure vanilla extract
- 2 1/4 cups (280g) all-purpose flour
- 1 teaspoon baking soda
- 1/2 teaspoon baking powder
- 1/2 teaspoon kosher salt
- 1 cup (170g) semi-sweet or milk chocolate chips
- 1 cup (100g) M&Ms, any variety
- 1 cup (50g) mini pretzel twists, roughly chopped
- 1/2 cup (50g) chopped toasted pecans or walnuts (optional)
- 1/2 cup (25g) mini marshmallows
- 1/2 cup (40g) shredded coconut (optional)
Instructions
- Preheat your oven to 350°F (175°C). Line two large baking sheets with parchment paper or silicone baking mats.
- In a large bowl, beat the butter, brown sugar, and granulated sugar until light and fluffy (about 2-3 minutes with a mixer on medium).
- Add eggs one at a time, mixing well after each. Stir in vanilla extract.
- In a separate bowl, whisk together flour, baking soda, baking powder, and salt.
- Gradually add the dry ingredients to the butter mixture, mixing on low speed or by hand until just combined. If dough is crumbly, add a splash of milk.
- Fold in chocolate chips, M&Ms, chopped pretzels, nuts (if using), mini marshmallows, and coconut (if using) until evenly distributed.
- Use a cookie scoop or heaping tablespoon to drop balls of dough onto prepared baking sheets, leaving about 2 inches between each.
- For bakery-style cookies, press a few extra M&Ms and pretzel pieces on top of each dough ball.
- Bake for 10-12 minutes, until edges are lightly golden and centers look slightly soft. For crispier cookies, bake an extra 2 minutes.
- Let cookies cool on baking sheets for 5 minutes, then transfer to a wire rack to cool completely.
Notes
For thicker cookies, chill the dough for 30 minutes before baking. Add marshmallows at the end or press into the tops for gooey pockets. Mix-ins are flexible—swap in your favorite candies, chips, or nuts, but keep total mix-ins around 3 cups. If baking over a campfire, use a cast iron skillet and cook over indirect heat for 20-25 minutes, checking often.
- Prep Time: 15 minutes
- Cook Time: 12 minutes
- Category: Dessert
- Cuisine: American
Nutrition
- Serving Size: 1 cookie (about 2 tablespoons dough)
- Calories: 180
- Sugar: 15
- Sodium: 120
- Fat: 8
- Saturated Fat: 5
- Carbohydrates: 25
- Fiber: 1
- Protein: 2
Keywords: campfire cookies, kitchen sink cookies, pretzel M&M cookies, easy cookie recipe, campfire dessert, chewy cookies, sweet and salty cookies, skillet cookie, outdoor baking


