
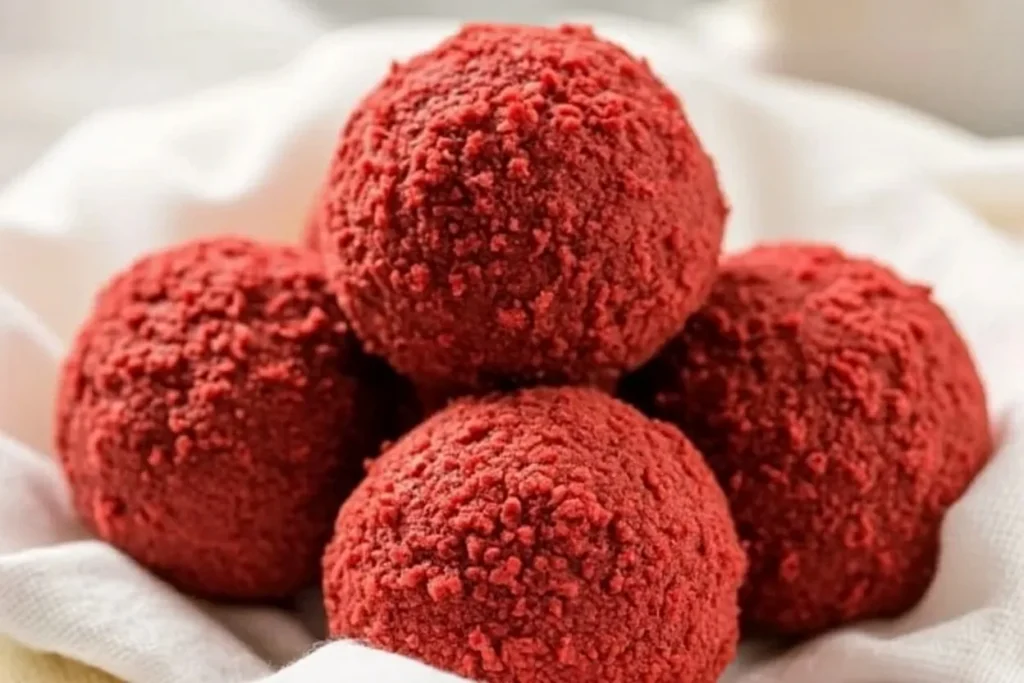
There’s something magical about red velvet, isn’t there? The deep red hue, the subtle cocoa flavor, and that velvety texture—it’s a dessert lover’s dream. Now imagine combining that with the creamy richness of cheesecake. Enter: Red Velvet Cheesecake Bites. These bite-sized treats are not only stunning to look at, but they’re also downright addictive. Whether you’re hosting a party, attending a potluck, or just treating yourself, this recipe is your golden ticket.
Why are these bites so special? For starters, they’re easy to make and have that perfect balance of flavors and textures. Plus, their size makes them ideal for gatherings—no need for plates or forks! Let’s dive into this irresistible recipe and see what makes it such a crowd-pleaser.
The Story Behind Red Velvet Cheesecake Bites
Red velvet cake has a rich history that dates back to the Victorian era when it was considered a luxurious dessert. The “velvet” in the name refers to the cake’s soft, almost silky crumb. Fast forward to modern times, and red velvet has become synonymous with special occasions like Valentine’s Day, weddings, and holiday celebrations.
Cheesecake, on the other hand, boasts an even longer history, with origins tracing back to ancient Greece. It’s a dessert that’s loved worldwide, with countless variations. Combining red velvet and cheesecake may sound like a modern idea, but it’s a match made in dessert heaven. The slight tang of the cheesecake perfectly complements the sweetness of the red velvet, creating a flavor profile that’s both indulgent and balanced.
For me, these cheesecake bites bring back memories of family holiday parties. My aunt would bake trays of red velvet cupcakes, and my cousin always brought her famous cheesecake. Merging these two desserts into one bite-sized treat feels like a nostalgic nod to those gatherings. And honestly, who doesn’t love a dessert that’s as fun to eat as it is beautiful?
Ingredients for Red Velvet Cheesecake Bites
When it comes to these cheesecake bites, quality ingredients make all the difference. Here’s what you’ll need and some tips for selecting the best:
- Red Velvet Cake Mix: The base of this recipe starts with a boxed red velvet cake mix. It’s quick, convenient, and delivers consistent results. If you prefer homemade, feel free to whip up your favorite red velvet recipe!
- Cream Cheese: The star of the cheesecake layer. Use full-fat cream cheese for the creamiest texture. Let it soften at room temperature to ensure a smooth filling.
- Powdered Sugar: Adds just the right amount of sweetness to the cheesecake mixture without making it too heavy.
- Vanilla Extract: A splash of vanilla enhances the flavor of both the red velvet and cheesecake layers.
- Butter: Melted butter binds the red velvet crumbs together and adds richness. Unsalted is best so you can control the salt level.
- White Chocolate: Optional but highly recommended for dipping the bites. It adds a creamy sweetness and gives the bites a polished finish.
- Sprinkles: Totally optional, but they make these bites extra festive. Choose seasonal colors for a holiday twist!
If you’re feeling adventurous, you can experiment with substitutions. Need a gluten-free version? Use a gluten-free red velvet mix. Dairy-free? Opt for vegan cream cheese and butter. The possibilities are endless.
Equipment Needed
Don’t worry, you won’t need a professional kitchen to make these Red Velvet Cheesecake Bites. Here’s what you’ll need:
- Mixing Bowls: For combining the red velvet crumbs and cheesecake filling.
- Food Processor: To turn the red velvet cake into fine crumbs. A blender works too, in a pinch.
- Hand or Stand Mixer: Helps achieve a smooth and creamy cheesecake filling.
- Baking Sheet: For setting the bites after they’re formed and dipped.
- Melon Baller or Cookie Scoop: Ensures uniform bite sizes.
- Forks or Dipping Tools: Useful for coating the bites in melted white chocolate.
If you don’t have a food processor, you can crumble the cake by hand—it just takes a little more time. A hand mixer works perfectly well if you don’t own a stand mixer. The key is to work with what you have!
How to Make Red Velvet Cheesecake Bites
- Bake the Cake: Prepare the red velvet cake mix according to the package instructions. Let the cake cool completely before moving on to the next step.
- Make the Crumbs: Use a food processor (or crumble by hand) to turn the cake into fine crumbs.
- Prepare the Cheesecake Filling: In a mixing bowl, beat the cream cheese, powdered sugar, and vanilla extract until smooth and creamy.
- Combine: In a large bowl, mix the red velvet crumbs with the melted butter until the texture resembles wet sand. Add the cheesecake mixture and mix until well combined.
- Shape the Bites: Use a melon baller or cookie scoop to form the mixture into bite-sized balls. Place them on a baking sheet lined with parchment paper.
- Chill: Refrigerate the bites for at least 1 hour to firm up.
- Coat in Chocolate: Melt the white chocolate in the microwave or a double boiler. Dip each bite into the chocolate, letting the excess drip off, and place back on the baking sheet.
- Decorate: Add sprinkles or a drizzle of dark chocolate for extra flair. Let the chocolate set before serving.
Pro Tip: If the mixture feels too sticky to work with, pop it in the fridge for 15–20 minutes. It’ll firm up and be much easier to handle.
Cooking Tips & Techniques
Here are a few tips to make your Red Velvet Cheesecake Bites perfect every time:
- Don’t Overmix: When combining the crumbs with the cheesecake filling, mix just until it comes together. Overmixing can make the texture dense.
- Chill Thoroughly: Chilling the bites is crucial for dipping them in chocolate. If they’re too soft, they’ll fall apart in the chocolate.
- Use a Fork for Dipping: This allows the excess chocolate to drip off, giving you a smooth finish.
- Work in Batches: Keep half the bites in the fridge while you dip the others. This prevents them from softening too much.
- Experiment with Toppings: Crushed nuts, shredded coconut, or edible glitter make wonderful decorations.
Variations & Adaptations
Want to switch things up? Here are a few ideas:
- Gluten-Free: Use a gluten-free red velvet cake mix.
- Dark Chocolate Coating: Swap the white chocolate for dark chocolate for a richer flavor.
- Seasonal Colors: Use green and red sprinkles for Christmas, pink for Valentine’s Day, or orange for Halloween.
- Vegan Option: Use vegan cream cheese, butter, and chocolate to make these bites dairy-free.
Once, I added crushed peppermint to the white chocolate coating during the holidays, and it was a huge hit!
Serving & Storage Suggestions
Red Velvet Cheesecake Bites are best served chilled. Arrange them on a platter for a party or stack them in a decorative jar for gifting. Pair them with coffee, tea, or a glass of champagne for an elegant touch.
Store the bites in an airtight container in the refrigerator for up to 5 days. For longer storage, freeze them for up to a month. Just thaw in the fridge before serving. The flavors actually deepen after a day or two, so don’t hesitate to make them ahead of time!
Nutritional Information & Benefits
Each bite is estimated to have about 120 calories, 6 grams of fat, and 14 grams of carbohydrates. While these are a treat, they’re perfect for portion control—just one or two bites satisfy your sweet tooth!
The cream cheese provides a small dose of calcium, and with substitutions like dark chocolate or reduced-sugar options, you can make these a bit lighter. Always check for allergens like gluten or dairy if serving to a crowd.
Conclusion
There you have it—Red Velvet Cheesecake Bites that are as delicious as they are beautiful. Whether you’re making them for a party, a holiday, or just to indulge, they’re guaranteed to impress. The combination of red velvet and cheesecake is truly timeless, and these bites make it so easy to enjoy.
What’s your favorite way to enjoy red velvet? Let me know in the comments, and don’t forget to share this recipe with friends who love a good dessert. I’d love to see your creations, so tag me on social media and let’s celebrate these irresistible bites together. Happy baking!
FAQs
Can I make these ahead of time?
Yes! These bites taste even better the next day. Just store them in the fridge or freezer until ready to serve.
What if I don’t have a food processor?
No problem! You can crumble the cake by hand or use a blender to achieve a similar result.
Can I use homemade red velvet cake?
Absolutely! A homemade cake will work beautifully—just make sure it’s cooled completely before crumbling.
How do I prevent the bites from falling apart?
Chill the mixture thoroughly and work quickly when shaping and dipping. If they’re too soft, pop them back in the fridge for a bit.
What’s the best way to melt chocolate?
Melt it slowly in the microwave in 15-second intervals, stirring often, or use a double boiler for more control.
Print
Red Velvet Cheesecake Bites
These bite-sized treats combine the subtle cocoa flavor of red velvet with the creamy richness of cheesecake, making them perfect for parties or indulgent snacking.
- Total Time: 1 hour 50 minutes
- Yield: 24 bites 1x
Ingredients
- 1 box red velvet cake mix
- 8 oz cream cheese, softened
- 1 cup powdered sugar
- 1 tsp vanilla extract
- 1/4 cup unsalted butter, melted
- 12 oz white chocolate, melted (optional, for dipping)
- Sprinkles (optional, for decoration)
Instructions
- Prepare the red velvet cake mix according to the package instructions and let it cool completely.
- Use a food processor or crumble the cake by hand to create fine crumbs.
- In a mixing bowl, beat the cream cheese, powdered sugar, and vanilla extract until smooth and creamy.
- In a large bowl, mix the red velvet crumbs with the melted butter until the texture resembles wet sand. Add the cheesecake mixture and mix until well combined.
- Use a melon baller or cookie scoop to form the mixture into bite-sized balls. Place them on a baking sheet lined with parchment paper.
- Refrigerate the bites for at least 1 hour to firm up.
- Melt the white chocolate in the microwave or a double boiler. Dip each bite into the chocolate, letting the excess drip off, and place back on the baking sheet.
- Decorate with sprinkles or a drizzle of dark chocolate, if desired. Let the chocolate set before serving.
Notes
Chill the bites thoroughly before dipping in chocolate to prevent them from falling apart. Experiment with toppings like crushed nuts or edible glitter for added flair.
- Prep Time: 20 minutes
- Cook Time: 30 minutes
- Category: Dessert
- Cuisine: American
Nutrition
- Serving Size: 1 bite
- Calories: 120
- Sugar: 10
- Sodium: 85
- Fat: 6
- Saturated Fat: 3.5
- Carbohydrates: 14
- Protein: 1
Keywords: red velvet, cheesecake bites, party dessert, easy dessert, bite-sized treats


