
Introduction
There’s something downright magical about the smell of crushed Oreos and melted chocolate swirling together in your kitchen. The first time I made these Oreo truffles, I remember thinking, “There’s no way something this easy can taste this amazing.” But then I took that first bite—creamy, chocolatey, and just the right amount of crunch—and I knew I was hooked. It was one of those moments where you pause mid-bite, close your eyes, and just sigh because you know you’ve stumbled onto something truly special.
When I was a kid, my mom used to make these for every birthday party and holiday. Back then, I thought she was some kind of dessert wizard, but the real secret was how quick and easy these were to whip up. Years later, when I found myself craving that same nostalgic sweetness, I started experimenting with different versions—classic, mint, and peanut butter. Let’s just say, my family didn’t mind being the taste-testers one bit. They couldn’t even wait for the chocolate to set before sneaking a few off the tray (and honestly, I can’t blame them).
Now, these Perfect Oreo Truffles Three Ways have become a staple in my kitchen. I’ve tested, tweaked, and perfected them—strictly in the name of research, of course. Whether you’re making them for a holiday cookie tray, sweet gift boxes, or just because you need something dangerously easy and delicious, these little bites of heaven never disappoint. They’re the kind of treat that feels like a warm hug and looks stunning enough for any occasion. Trust me, once you try them, you’ll want to bookmark this one.
Why You’ll Love This Recipe
These Oreo truffles aren’t just another no-bake dessert—they’re the kind that make people stop mid-conversation and ask for the recipe. Tested and approved by my family (and a few hungry neighbors), this recipe brings together the best of all dessert worlds: creamy, crunchy, chocolatey, and completely satisfying. Here’s why these are going to be your new go-to treat:
- Quick & Easy: You can whip these up in under 30 minutes, not counting chill time. Perfect for last-minute parties or those “I need dessert now” moments.
- Simple Ingredients: Just a handful of pantry staples—Oreos, cream cheese, and chocolate. No fancy grocery runs, no stress.
- Perfect for Any Occasion: From holiday platters to birthday parties to Valentine’s Day gifts, these truffles fit right in.
- Crowd-Pleaser: Kids, adults, coworkers—everyone loves these. They vanish faster than you can set them down.
- Unbelievably Delicious: The combination of the rich Oreo filling and smooth chocolate coating is pure comfort food bliss.
What makes my Oreo truffles recipe special? It’s the balance of texture and flavor—creamy but not mushy, sweet but not overwhelming. I also love adding small twists: crushed peppermint for a minty coolness, or a swirl of peanut butter for extra richness. These aren’t just truffles—they’re little bites of happiness that taste even better than they look.
This recipe isn’t just about making dessert. It’s about creating moments—those smiles when someone bites into one and immediately goes, “Oh wow.” It’s comfort food with a touch of creativity, and it’s guaranteed to impress without any stress.
What Ingredients You Will Need
This recipe uses simple, wholesome ingredients to deliver big flavor without the fuss. You’ll only need a few items, and chances are, you already have most of them on hand. Here’s what you’ll need for all three variations:
For the Base Oreo Truffle Mixture:

- 36 Oreo cookies (regular, not double-stuffed)
- 8 oz (225 g) cream cheese, softened (full-fat gives the best texture)
For the Chocolate Coating:
- 12 oz (340 g) semisweet or white chocolate melts (use baking chocolate or candy melts)
- 1 tbsp coconut oil (optional, for a smoother coating)
For the Three Flavor Variations:
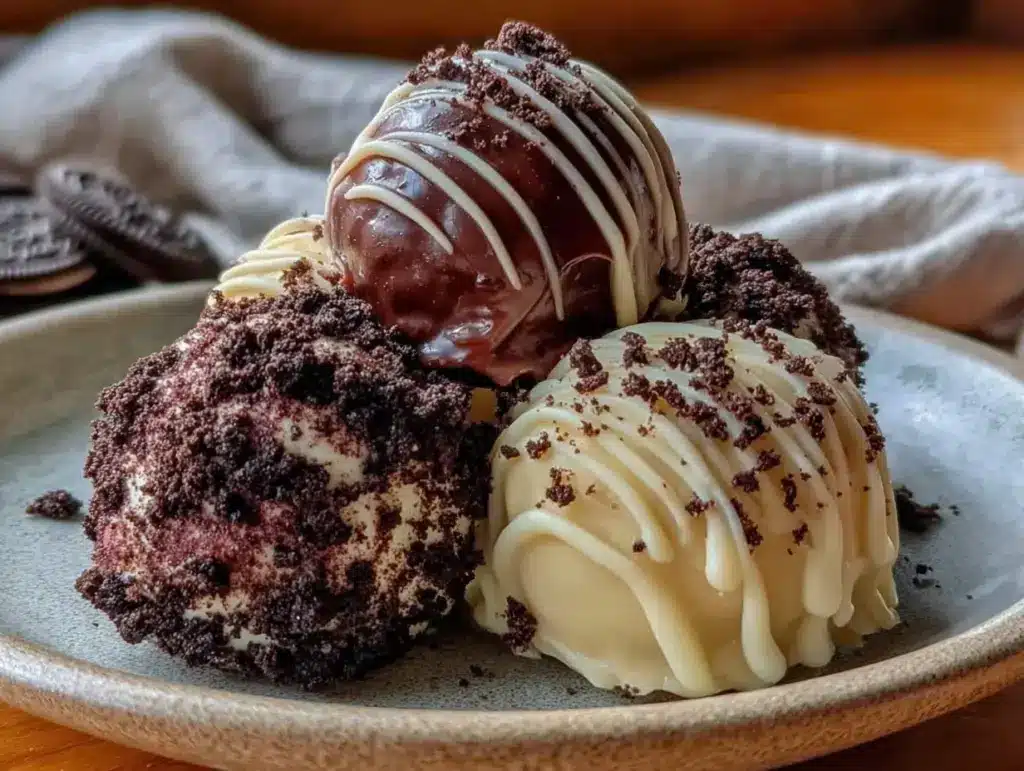
- Classic Oreo Truffles: Use the base mixture and dip in semisweet chocolate. Garnish with crushed Oreos on top.
- Mint Oreo Truffles: Add ½ tsp peppermint extract to the base mixture and use Mint Oreos. Dip in white chocolate and sprinkle with crushed candy canes or green sugar crystals.
- Peanut Butter Oreo Truffles: Add 2 tbsp creamy peanut butter to the base mixture. Dip in milk chocolate and drizzle with melted peanut butter or top with crushed peanuts.
Ingredient Tips: I like using Philadelphia cream cheese because it blends smoothly with the Oreo crumbs. For the chocolate, Ghirardelli melting wafers are my go-to—they melt evenly and coat beautifully. If you’re dairy-free, use vegan cream cheese and dairy-free chocolate chips; they work just as well. And if you’re making these around the holidays, peppermint Oreos add a festive twist that’s hard to resist.
Equipment Needed
You don’t need any fancy kitchen gadgets for these Oreo truffles, which is one of the reasons I love making them. Here’s what you’ll need:
- Food processor or blender (to crush the Oreos evenly)
- Mixing bowl (medium-sized)
- Rubber spatula or wooden spoon
- Baking sheet or tray
- Parchment paper (for easy cleanup)
- Microwave-safe bowl (for melting chocolate)
- Forks or dipping tools (for coating truffles)
If you don’t have a food processor, no problem! Just place the Oreos in a zip-top bag and crush them with a rolling pin—it’s oddly satisfying and works perfectly fine. For the chocolate, a double boiler works great if you prefer not to use the microwave. I always keep a small offset spatula nearby for easy lifting after dipping. Cleanup is a breeze if you use parchment paper—trust me on that one.
Preparation Method
- Crush the Oreos: Place all Oreos in a food processor and pulse until they’re fine crumbs. You can also crush them by hand using a zip-top bag and rolling pin (it’s a great stress reliever!).
- Mix with Cream Cheese: In a medium bowl, combine the crushed Oreos and softened cream cheese. Use a spatula or your hands—yes, it’s a little messy, but it’s worth it—to mix until smooth and uniform. The mixture should hold together easily when pressed.
- Add Flavor Variations: Depending on which version you’re making, fold in peppermint extract or peanut butter at this stage. Keep the classic version as is.
- Shape the Truffles: Scoop out about 1 inch (2.5 cm) of the mixture and roll it into balls. Place them on a parchment-lined baking sheet. You should get about 30 truffles total.
- Chill the Balls: Pop the tray into the freezer for about 20–30 minutes. This step helps them firm up so they’re easier to dip later.
- Melt the Chocolate: In a microwave-safe bowl, melt your chosen chocolate in 30-second intervals, stirring between each until smooth. Add a little coconut oil if the chocolate seems too thick.
- Dip the Truffles: Using a fork, dip each chilled truffle into the melted chocolate, letting the excess drip off before placing it back on the parchment paper. Work quickly so the chocolate doesn’t cool too much.
- Decorate: Before the coating sets, sprinkle with crushed Oreos, candy canes, or peanuts depending on your variation. You can also drizzle with melted chocolate for a pretty finish.
- Set and Chill: Once all truffles are coated, refrigerate for about 15 minutes until firm. The chocolate should have a smooth, glossy finish.
- Store or Serve: Transfer to an airtight container and keep refrigerated until ready to serve. Let them sit at room temperature for about 5 minutes before eating for the best texture.
Pro tip: If your chocolate starts to thicken mid-dipping, just pop it back in the microwave for 10 seconds. And always taste-test one or two (you know, for quality control!).
Cooking Tips & Techniques
After making these Oreo truffles more times than I can count, I’ve picked up a few tricks worth sharing. First, make sure your cream cheese is truly softened—it blends more smoothly and prevents lumps. Cold cream cheese can make the mixture too thick and crumbly.
When melting chocolate, go slow. High heat can seize the chocolate, making it grainy. Short bursts in the microwave with gentle stirring are your best bet. If you’re new to dipping, use a fork to gently roll the truffle and tap it against the bowl’s edge to shake off excess coating—it creates a cleaner finish.
For an extra flavor boost, add a pinch of sea salt on top before the chocolate sets. It adds that perfect sweet-salty contrast. And if you’re making these ahead for a party, freeze the truffle balls before dipping, then coat them the day of serving for the freshest look.
One last thing—don’t skip the chilling stage before dipping! It keeps the truffles from falling apart in the warm chocolate. I learned this the hard way during my first batch—they turned into chocolate soup. Lesson learned!
Variations & Adaptations
One of the best parts about this Oreo truffle recipe is how versatile it is. You can easily customize it to fit the season, your cravings, or dietary needs. Here are a few of my favorite twists:
- Seasonal Variation: For the holidays, add crushed candy canes or drizzle red and green melted chocolate. In summer, try lemon Oreos with white chocolate for a bright twist.
- Dietary Adaptation: Use gluten-free Oreos and dairy-free cream cheese for a delicious gluten- and dairy-free treat. Vegan chocolate chips melt beautifully too.
- Flavor Fun: Swap the cream cheese for mascarpone for a smoother, richer flavor. Or stir in a tablespoon of instant espresso powder for mocha truffles that coffee lovers will adore.
My personal favorite? Peanut butter Oreo truffles with a drizzle of dark chocolate and a sprinkle of flaky salt. They’re dangerously good and make the perfect edible gift. Don’t be afraid to play around—half the fun is in the experimenting!
Serving & Storage Suggestions
These Oreo truffles taste best slightly chilled or at cool room temperature. The chocolate shell should have a gentle snap when you bite in, revealing that soft, creamy center. I love arranging them on a pretty platter or mini cupcake liners for an elegant touch—great for bridal showers or dessert tables.
Store the truffles in an airtight container in the refrigerator for up to 2 weeks. If you’re making them ahead, they freeze beautifully for up to 2 months. Just place them in a single layer on a baking sheet to freeze, then transfer to a freezer-safe bag. Let thaw in the fridge overnight before serving.
To refresh the look before serving, drizzle a bit of fresh melted chocolate or dust lightly with cocoa powder. The flavors actually deepen after a day, so they’re even better the next time you sneak one from the fridge (no judgment here!).
Nutritional Information & Benefits
Each Oreo truffle (based on 30 servings) has approximately 120–140 calories, depending on coating and add-ins. You’ll get around 2g protein, 8g fat, and 12g carbohydrates per truffle. Not exactly a diet food, but definitely a treat worth savoring.
The real benefit here isn’t just nutrition—it’s portion control and satisfaction. One or two of these little bites are all you need to satisfy a sweet craving. They’re also great for sharing, which means you can enjoy dessert without overindulging. If you want to lighten them up, use low-fat cream cheese or dark chocolate instead of milk chocolate for extra antioxidants.
Allergens to watch for: dairy, gluten, and peanuts (for the peanut butter version). But with so many easy substitutions, you can adapt these for almost anyone’s dietary needs.
Conclusion
So there you have it—Perfect Oreo Truffles Three Ways that are easy, versatile, and absolutely irresistible. Whether you’re making the classic, minty, or peanut butter version, each bite delivers that creamy-crunchy bliss you can’t get enough of. They’re simple enough for beginners but impressive enough for any celebration.
I love this recipe because it’s forgiving, fun, and full of possibilities. You can decorate them to match holidays, flavor them to your liking, or just roll them plain and call it a day. However you make them, they’ll always bring smiles (and maybe a few happy groans of delight).
Give these a try and let me know which variation you loved best! Share your creations, tag your friends, and maybe stash a few in the fridge just for yourself—you’ve earned it. Trust me, once you start, you’ll be making these for every occasion from here on out!
FAQs
1. How long do Oreo truffles last?
They’ll keep for up to 2 weeks in the refrigerator or 2 months in the freezer if stored in an airtight container.
2. Can I make Oreo truffles without a food processor?
Yes! Just place the Oreos in a zip-top bag and crush them with a rolling pin until fine.
3. Why is my truffle mixture too sticky?
It might be the cream cheese was too soft. Try chilling the mixture for 15 minutes before rolling.
4. Can I use flavored Oreos?
Definitely! Try Golden, Mint, or Birthday Cake Oreos for fun flavor twists.
5. What’s the best chocolate for coating truffles?
Use high-quality melting chocolate or candy melts—they give a smooth, shiny finish and taste amazing.
Pin This Recipe!


Perfect Oreo Truffles 3 Ways – Easy Homemade Dessert Ideas
These creamy, chocolatey Oreo truffles are a no-bake dessert that comes together quickly and can be customized in three delicious ways: classic, mint, and peanut butter.
- Total Time: 30 minutes (plus chilling time)
- Yield: 30 truffles 1x
Ingredients
- 36 Oreo cookies (regular, not double-stuffed)
- 8 oz (225 g) cream cheese, softened
- 12 oz (340 g) semisweet or white chocolate melts
- 1 tbsp coconut oil (optional)
- ½ tsp peppermint extract (for mint variation)
- 2 tbsp creamy peanut butter (for peanut butter variation)
- Crushed Oreos (for garnish)
- Crushed candy canes or green sugar crystals (for mint variation)
- Crushed peanuts or melted peanut butter drizzle (for peanut butter variation)
Instructions
- Place all Oreos in a food processor and pulse until fine crumbs form.
- In a medium bowl, combine crushed Oreos and softened cream cheese. Mix until smooth and uniform.
- Add peppermint extract or peanut butter for flavor variations, or keep plain for the classic version.
- Roll the mixture into 1-inch balls and place on a parchment-lined baking sheet.
- Freeze for 20–30 minutes until firm.
- Melt chocolate in a microwave-safe bowl in 30-second intervals, stirring until smooth. Add coconut oil if needed.
- Dip each chilled truffle into melted chocolate using a fork, letting excess drip off.
- Decorate with crushed Oreos, candy canes, or peanuts before the coating sets.
- Refrigerate for 15 minutes until chocolate is firm and glossy.
- Store in an airtight container in the refrigerator until ready to serve.
Notes
Ensure cream cheese is softened for smooth mixing. Chill truffles before dipping to prevent them from falling apart. Use high-quality melting chocolate for a glossy finish. For dietary adaptations, use gluten-free Oreos and dairy-free cream cheese.
- Prep Time: 20 minutes
- Cook Time: 10 minutes
- Category: Dessert
- Cuisine: American
Nutrition
- Serving Size: 1 truffle
- Calories: 130
- Sugar: 10
- Sodium: 90
- Fat: 8
- Saturated Fat: 4
- Carbohydrates: 12
- Fiber: 1
- Protein: 2
Keywords: Oreo truffles, no-bake dessert, chocolate truffles, easy dessert, mint truffles, peanut butter truffles


