

Picture this: the air is thick with the sweet aroma of vanilla and anise, and the gentle crackle of pizzelle cookies cooling on a wire rack fills the kitchen. It’s one of those moments where you can’t help but pause, breathe it all in, and grin because, honestly, nothing screams “the holidays are here” quite like a batch of crispy classic Italian pizzelle cookies. The first time I pressed the pizzelle iron closed and watched as the batter transformed into delicate, golden rounds, I was instantly hooked. You know, the kind of moment where you pause, take a deep breath, and just smile because you know you’re onto something truly special.
When I was knee-high to a grasshopper, my Nonna (that’s grandma for us Italian folks) used to make these for every holiday—Easter, Christmas, you name it. She’d stand over the iron, telling stories, letting me sneak a cookie before the rest of the family could get their hands on them (don’t tell!). Years ago, I tried to recreate her pizzelle recipe after stumbling on her old handwritten card tucked inside a flour-dusted cookbook. I wish I’d found it sooner because, let’s face it, these pizzelle are dangerously easy and bring pure, nostalgic comfort.
My family couldn’t stop sneaking them off the cooling rack (and I can’t really blame them). Even the neighbors dropped by, lured by the scent wafting down the hall. I’ve tested these over and over—strictly in the name of research, of course—until they became a staple for family gatherings, gifting, and Pinterest boards everywhere. There’s just something about the crispy snap, the lacy texture, and the delicate flavor that feels like a warm hug. Whether you’re looking to add a sweet treat for your kids, brighten up your holiday cookie platter, or simply indulge in some classic Italian baking, crispy Italian pizzelle cookies are the way to go. Trust me, you’re going to want to bookmark this one.
Why You’ll Love This Recipe
Let me just say, after more batches than I can count (and a few burned knuckles), I can vouch—these crispy classic Italian pizzelle cookies are a holiday game-changer. I’ve tweaked and tested this recipe until it delivered the perfect crunch and flavor, every single time. As a longtime recipe developer and someone who’s failed plenty, I can promise: you’ll want to make these year after year.
- Quick & Easy: Comes together in under 30 minutes—no complicated steps or fancy ingredients.
- Simple Ingredients: You probably have everything you need already (think eggs, flour, sugar, vanilla, and anise).
- Perfect for Holidays: Ideal for Christmas, Easter, or any festive gathering. They look beautiful on a cookie tray and make adorable edible gifts.
- Crowd-Pleaser: Kids love their crisp snap, adults love the classic taste, and there’s always someone asking for the recipe.
- Unbelievably Delicious: The texture is light yet snappy, never greasy or heavy. Each bite is subtly sweet and fragrant.
What sets these apart? It’s the old-school technique—whipping the eggs to airy perfection, using real butter for that signature crispness, and adding just the right touch of anise or vanilla (your choice, honestly). I’ve tried other pizzelle recipes, but they either come out too soft or lose their flavor after a day. This one stays crisp and tasty, even after a week!
And you know what? These pizzelle cookies aren’t just good. They’re the kind that make you close your eyes after the first bite, savoring the taste and remembering holiday mornings at grandma’s table. Comfort food at its best—faster, lighter, and with all the soul you expect from a classic Italian treat. Whether you want to wow your guests or simply sneak a few with your morning coffee, this recipe delivers every time.
What Ingredients You Will Need
This recipe uses simple, wholesome ingredients to deliver bold flavor and a satisfyingly crisp texture—no fuss, no fancy shopping trips required. Most are pantry staples, and there’s plenty of room for little tweaks if you’re in the mood to experiment.
- For the Batter:
- 3 large eggs (room temperature)
- 3/4 cup (150 g) granulated sugar
- 1/2 cup (115 g) unsalted butter, melted and cooled (for rich flavor and crisp texture)
- 1 3/4 cups (210 g) all-purpose flour (King Arthur is my go-to for consistency)
- 1 tsp baking powder (helps create that light crunch)
- 1/2 tsp pure vanilla extract (or swap for lemon extract for a citrusy twist)
- 1/2 tsp anise extract (optional, traditional flavor—adjust to taste)
- Pinch of salt (balances sweetness and rounds out the flavor)
- Optional Add-ins:
- 1 tbsp cocoa powder (for chocolate pizzelle—skip anise for best results)
- 1–2 tsp grated lemon or orange zest (adds bright, zippy flavor)
- Powdered sugar for dusting (looks pretty and adds a touch of sweetness)
- Substitution Tips:
- Use almond or gluten-free flour for a gluten-free version (texture will be slightly softer)
- Swap butter for coconut oil or vegan margarine for dairy-free pizzelle (flavor will be different, but still tasty!)
- If you’re out of anise, just use extra vanilla or try almond extract for a nutty twist
For sourcing, I like to pick up fresh eggs from the local market and real vanilla extract (none of that imitation stuff, please). If you’re using citrus zest, organic fruit is worth the splurge for the best flavor. In summer, you can even add a pinch of fresh herbs (like rosemary) for a fun, savory spin. Honestly, pizzelle cookies are forgiving—trust me, I’ve made them with just about every type of flour and butter, and they always turn out delicious.
Equipment Needed
You don’t need a ton of fancy gear to make crispy Italian pizzelle cookies, but a few key tools make things a whole lot easier. Here’s what you’ll want on hand:
- Pizzelle Iron: The star of the show! I use a nonstick electric iron (brand: CucinaPro or Palmer) for consistent results. If you only have a stovetop model, that works too—it just takes a little more attention.
- Mixing Bowls: One large for the batter, one small for melting butter.
- Whisk or Electric Mixer: A hand mixer makes whipping eggs a breeze, but a good strong whisk works in a pinch.
- Measuring Cups & Spoons: For accuracy—baking is science, after all.
- Cooling Rack: Essential for keeping pizzelle crisp as they cool. No cooling rack? Lay them on parchment-lined baking sheets.
- Rubber Spatula: For scraping every last bit of batter (no waste!)
If you’re on a budget, check thrift stores for pizzelle irons—sometimes the old-school stovetop models are the best. Just be sure to wipe the iron down after each use (a damp cloth works, but never submerge it in water). I’ve tried baking pizzelle on a waffle iron in a pinch—they come out thicker, but still taste great. Maintenance tip: lightly oil the iron before the first batch to prevent sticking, especially if it’s new or not nonstick.
Preparation Method
Ready to make the crispiest classic Italian pizzelle cookies? Here’s the step-by-step guide I swear by. Don’t worry—once you get the hang of it, it’s a breeze!
- Prep the Ingredients: Gather everything and let eggs come to room temperature (about 15 minutes). Melt the butter and allow it to cool slightly—hot butter can scramble the eggs, so don’t rush this step!
- Beat the Eggs & Sugar: In a large mixing bowl, whisk 3 large eggs and 3/4 cup (150 g) sugar together until pale and thick (about 2–3 minutes with a hand mixer, 5 minutes by hand). The mixture should look frothy and almost doubled in volume.
- Add Flavors & Butter: Stir in 1/2 cup (115 g) melted butter, 1/2 tsp vanilla extract, and 1/2 tsp anise extract (if using). Whisk gently until combined. Don’t overmix—just until smooth and glossy.
- Combine Dry Ingredients: In a separate bowl, sift together 1 3/4 cups (210 g) flour, 1 tsp baking powder, and a pinch of salt. (Sifting helps prevent lumps and keeps the pizzelle light.)
- Mix Batter: Add dry ingredients to the wet mixture in two batches, folding gently with a spatula. The batter should be thick but still drop off the spoon—think soft cookie dough. If it’s too stiff, add a splash of milk (1–2 tbsp).
- Preheat the Pizzelle Iron: Plug in and heat the pizzelle iron according to manufacturer’s instructions (usually 5–7 minutes). Lightly brush with oil or nonstick spray if needed. (Tip: The iron is ready when a drop of water sizzles and evaporates quickly.)
- Portion & Cook: Drop about 1 tbsp (15 g) batter onto the center of each pizzelle pattern. Close the iron, cook 30–45 seconds for electric irons (up to 1 minute for stovetop). The pizzelle should be golden with crisp edges. If they stick, let them cool a few seconds before prying off gently with a spatula.
- Cool & Crisp: Transfer each pizzelle to a wire rack immediately—this is key for max crispness! If you stack them while warm, they’ll steam and soften (learned the hard way!).
- Shape (Optional): For fancy presentation, you can quickly mold warm pizzelle over a rolling pin or cup to create cannoli shells or cones. You have about 10 seconds before they set, so work fast.
- Repeat: Keep cooking the rest of the batter, re-oiling the iron as needed. If the batter thickens between batches, stir in a teaspoon of milk.
Troubleshooting: If pizzelle are too soft, cook a little longer—sometimes irons run cool. If they burn, decrease the time or lower the heat. Batter spreading too much? Chill it for 10 minutes. If you get stuck pizzelle, wait for them to cool slightly before lifting (they firm up as they cool).
I like to set up a cookie assembly line—one person drops the batter, another removes and shapes, and everyone fights over who gets the first taste. Efficiency tip: Keep a damp towel handy for sticky fingers and a dry towel for the iron handle (it gets hot!).
Cooking Tips & Techniques
After years of making crispy Italian pizzelle cookies, here’s what I’ve learned (sometimes the hard way):
- Consistency Matters: Batter should be thick, but not dry. If it’s too runny, pizzelle will be thin and soft. Too thick, and they won’t spread—add flour or milk as needed.
- Timing is Everything: Undercooked pizzelle are chewy, overcooked ones are bitter. Watch for the edges to turn golden brown and the steam to slow—usually 30–45 seconds.
- Don’t Overcrowd: Only cook as many pizzelle as your iron allows. Overlapping batter leads to weird shapes and uneven cooking.
- Keep ’Em Crisp: Transfer to a wire rack immediately after baking. Stacking or covering while warm traps steam—soft cookies, no crunch.
- Flavor Balance: Too much anise can overpower; a little goes a long way. Taste the batter if you’re unsure. For vanilla lovers, double the extract!
- Learned the Hard Way: I once forgot to oil the iron and spent ages scraping stuck batter—never again. A quick brush of oil every few batches saves so much headache.
- Multitasking: While one batch cooks, prep the next scoop. If you’re making a double batch, enlist help—otherwise, you’ll be chained to the iron for hours.
- Perfect Results Every Time: Calibrate the heat (medium-high usually works best), and don’t rush—the first batch is always a tester. Make notes for your iron’s quirks!
Honestly, the biggest mistake is not letting the pizzelle cool fully—they crisp up in the last minute on the rack. If you want super-thin pizzelle, press the iron firmly. For thicker ones, use a tiny bit more batter and a gentle hand. These tips will help you get that classic snap!
Variations & Adaptations
The beauty of crispy Italian pizzelle cookies is how versatile they are. I’ve tried all sorts of spins—some out of necessity, some just for fun. Here are my favorite ways to change things up:
- Chocolate Pizzelle: Add 1 tbsp unsweetened cocoa powder to the flour mixture and skip anise. Dust finished cookies with powdered sugar for extra drama.
- Lemon Zest & Almond: Swap anise for 1 tsp grated lemon zest and 1/2 tsp almond extract. Perfect for spring brunches!
- Gluten-Free: Use a 1:1 gluten-free flour blend (Bob’s Red Mill is solid). Batter will be slightly softer, so chill before baking.
- Dairy-Free: Substitute butter with coconut oil or plant-based margarine. The flavor changes, but the crunch stays.
- Seasonal Flavors: In fall, add a dash of cinnamon and nutmeg. For summer, try orange zest and a splash of orange blossom water.
- Shape Adaptations: Mold warm pizzelle over cups for edible bowls, or roll into cannoli shells and fill with ricotta cream.
For allergies, skip nuts and use pure vanilla. If you’re catering to picky eaters (like my nephew who hates anise), just stick to vanilla. Honestly, my personal favorite is the lemon-zest version—bright, fresh, and absolutely addictive. Don’t be afraid to experiment; pizzelle cookies are forgiving, and each batch brings new surprises!
Serving & Storage Suggestions
Crispy Italian pizzelle cookies shine brightest when served fresh and snappy. Here’s how to make them look (and taste) their best:
- Serving: Let pizzelle cool completely before plating—stack them loosely for that pretty, lacy look. Serve at room temperature for max crunch. For parties, dust with powdered sugar or drizzle with melted chocolate.
- Pairings: Perfect with espresso, cappuccino, or even lemonade for a summer twist. They also play well alongside gelato or fresh berries.
- Storage: Keep pizzelle in an airtight container at room temperature for up to 1 week. For longer storage, layer between sheets of parchment and freeze for up to 2 months. Thaw on a wire rack—no microwave, or they’ll soften.
- Reheating: If pizzelle lose their snap, pop them in a 300°F (150°C) oven for 2–3 minutes. Let cool before serving.
- Flavor Development: The anise and vanilla flavors deepen over time, so pizzelle taste even better a day or two after baking. Great for prepping ahead during busy holidays!
For gifting, wrap stacks in cellophane or tuck into festive tins. They travel well and don’t crumble easily, making them a solid choice for holiday cookie swaps. (Just keep them dry—humidity is the enemy of crunch!)
Nutritional Information & Benefits
Here’s the estimated nutritional breakdown per cookie (based on a batch of 30):
- Calories: ~60 kcal
- Carbohydrates: ~8g
- Protein: ~1.5g
- Fat: ~2.5g
- Sugar: ~4g
Pizzelle cookies are naturally low in fat thanks to their thin profile. Eggs provide a little protein, and the recipe can be tweaked for gluten-free or dairy-free diets as needed. Just watch for allergens like eggs, wheat, and dairy—substitutions are easy, but always check labels if gifting. My wellness perspective? Enjoy pizzelle in moderation—they’re a sweet treat, but light enough for a guilt-free snack at holiday gatherings.
Conclusion
So, why try crispy classic Italian pizzelle cookies for your holidays? They’re not just a cookie—they’re an experience. Light, crisp, and packed with nostalgic flavor, these treats will brighten any cookie tray and leave your kitchen smelling heavenly. Customize with your favorite extracts, zest, or shapes, and make them your own. Personally, I love how they bring my family together—the best recipes always do.
I encourage you to give this recipe a whirl, tweak it to suit your taste, and share your results! Did you try a lemon twist, or go for classic anise? Drop a comment below with your best pizzelle stories, share your photos, or pin this recipe for later. From my kitchen to yours—wishing you crunchy, sweet success and happy holidays!
FAQs
What is the best pizzelle iron to use?
I recommend a nonstick electric iron (like CucinaPro or Palmer) for consistent results. Stovetop models work too but need more attention.
Can I make pizzelle cookies without anise?
Absolutely! Use extra vanilla, lemon, or almond extract for different flavor profiles. My nephew hates anise, so we do a vanilla batch just for him.
How do I keep pizzelle crispy?
Let them cool fully on a wire rack and store in an airtight container. Avoid stacking while warm or storing in humid environments.
Can I freeze pizzelle cookies?
Yes—layer between parchment in a sealed container and freeze up to 2 months. Thaw on a wire rack for best texture.
Why are my pizzelle soft?
This usually means they were undercooked or cooled while stacked. Bake a little longer and cool individually for perfect crunch.
Pin This Recipe!


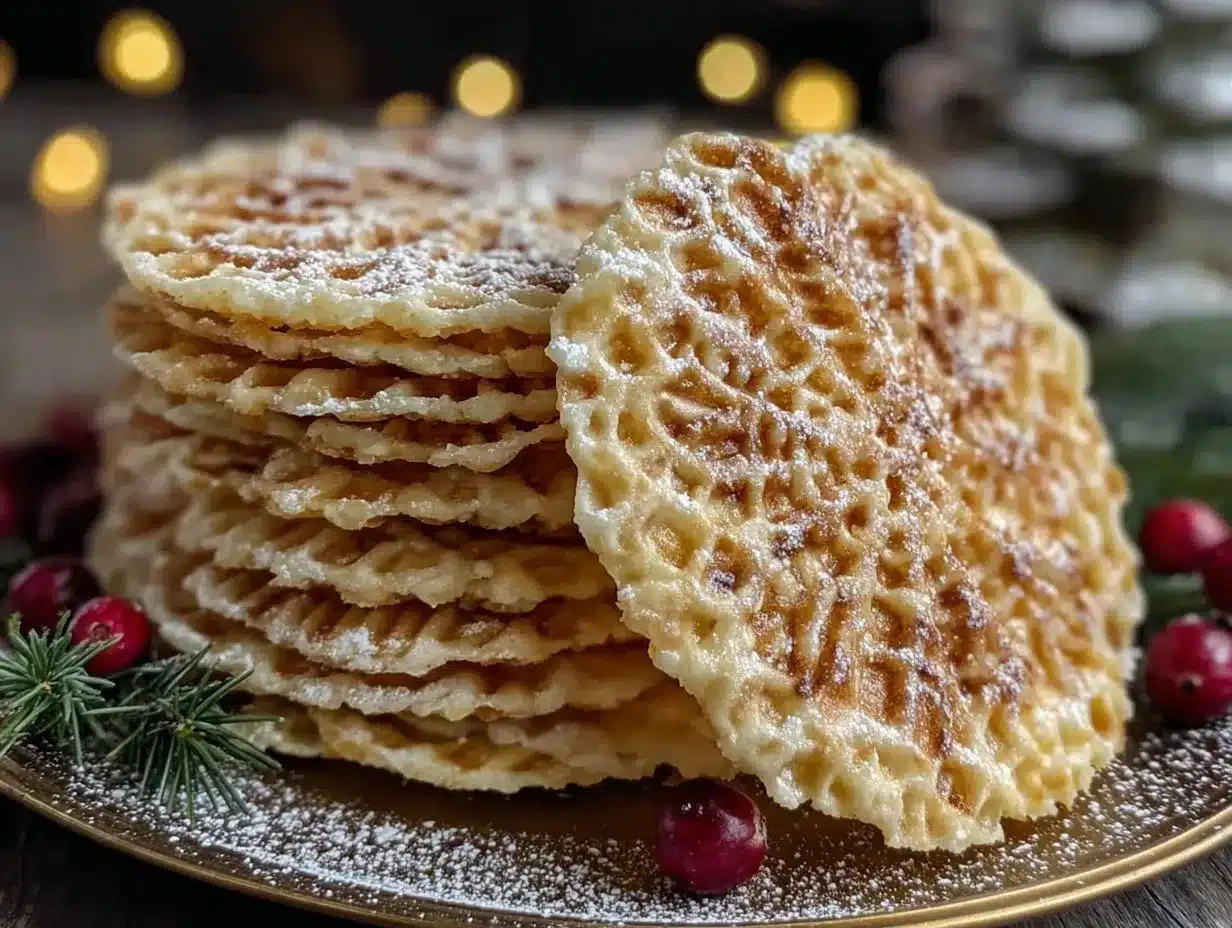
Crispy Italian Pizzelle Cookies
These classic Italian pizzelle cookies are thin, crisp, and delicately flavored with vanilla and anise. Perfect for holiday gatherings, gifting, or enjoying with coffee, they come together quickly and stay crunchy for days.
- Total Time: 30 minutes
- Yield: 30 cookies 1x
Ingredients
- 3 large eggs (room temperature)
- 3/4 cup granulated sugar
- 1/2 cup unsalted butter, melted and cooled
- 1 3/4 cups all-purpose flour
- 1 teaspoon baking powder
- 1/2 teaspoon pure vanilla extract (or lemon extract)
- 1/2 teaspoon anise extract (optional, adjust to taste)
- Pinch of salt
- 1 tablespoon cocoa powder (optional, for chocolate pizzelle)
- 1–2 teaspoons grated lemon or orange zest (optional)
- Powdered sugar for dusting (optional)
Instructions
- Gather all ingredients and let eggs come to room temperature (about 15 minutes). Melt butter and allow to cool slightly.
- In a large mixing bowl, whisk eggs and sugar together until pale and thick (2–3 minutes with a hand mixer, 5 minutes by hand).
- Stir in melted butter, vanilla extract, and anise extract (if using). Whisk gently until combined.
- In a separate bowl, sift together flour, baking powder, and salt.
- Add dry ingredients to wet mixture in two batches, folding gently with a spatula. Batter should be thick but drop off the spoon. If too stiff, add 1–2 tablespoons milk.
- Preheat pizzelle iron according to manufacturer’s instructions (5–7 minutes). Lightly brush with oil or nonstick spray if needed.
- Drop about 1 tablespoon batter onto the center of each pizzelle pattern. Close iron and cook 30–45 seconds (up to 1 minute for stovetop) until golden and crisp.
- Transfer pizzelle to a wire rack immediately to cool and crisp.
- Optional: Quickly mold warm pizzelle over a rolling pin or cup for cannoli shells or cones.
- Repeat with remaining batter, re-oiling iron as needed. If batter thickens, stir in a teaspoon of milk.
- Cool completely before serving or storing. Dust with powdered sugar if desired.
Notes
Let pizzelle cool fully on a wire rack for maximum crispness. For gluten-free or dairy-free versions, substitute flour and butter as needed. Batter consistency is key—adjust with flour or milk if needed. Store in an airtight container at room temperature for up to 1 week, or freeze for up to 2 months.
- Prep Time: 15 minutes
- Cook Time: 15 minutes
- Category: Dessert
- Cuisine: Italian
Nutrition
- Serving Size: 1 cookie
- Calories: 60
- Sugar: 4
- Sodium: 20
- Fat: 2.5
- Saturated Fat: 1.5
- Carbohydrates: 8
- Fiber: 0.2
- Protein: 1.5
Keywords: pizzelle, Italian cookies, holiday cookies, crispy cookies, anise, vanilla, Christmas, Easter, classic Italian dessert


