
Introduction
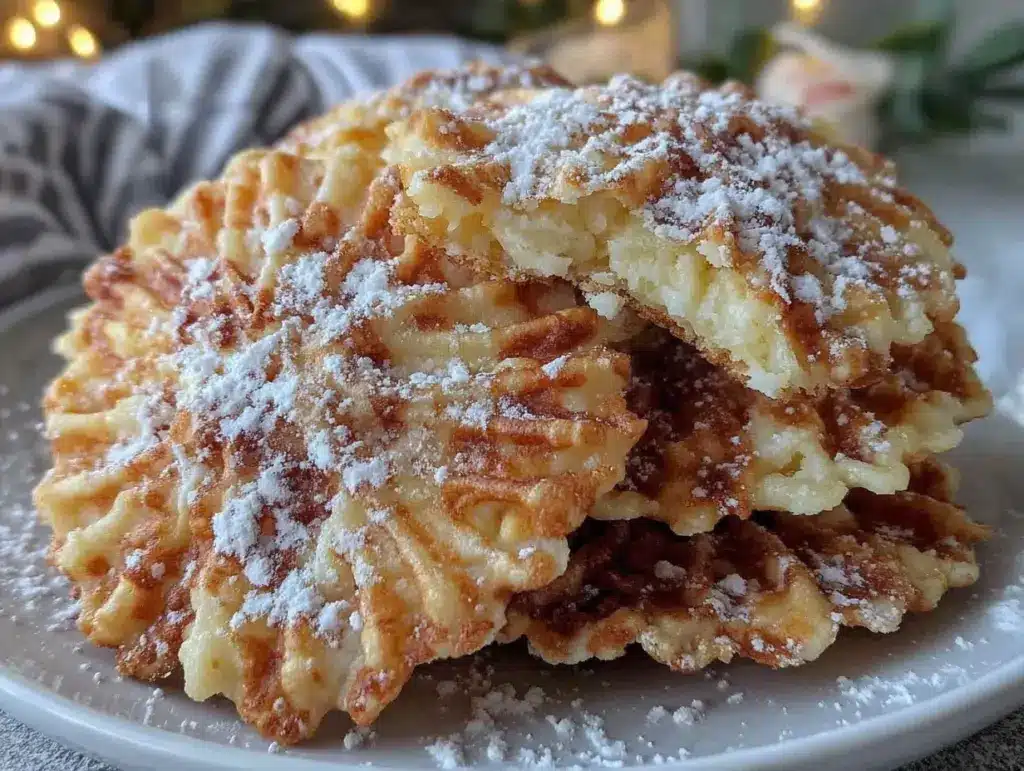
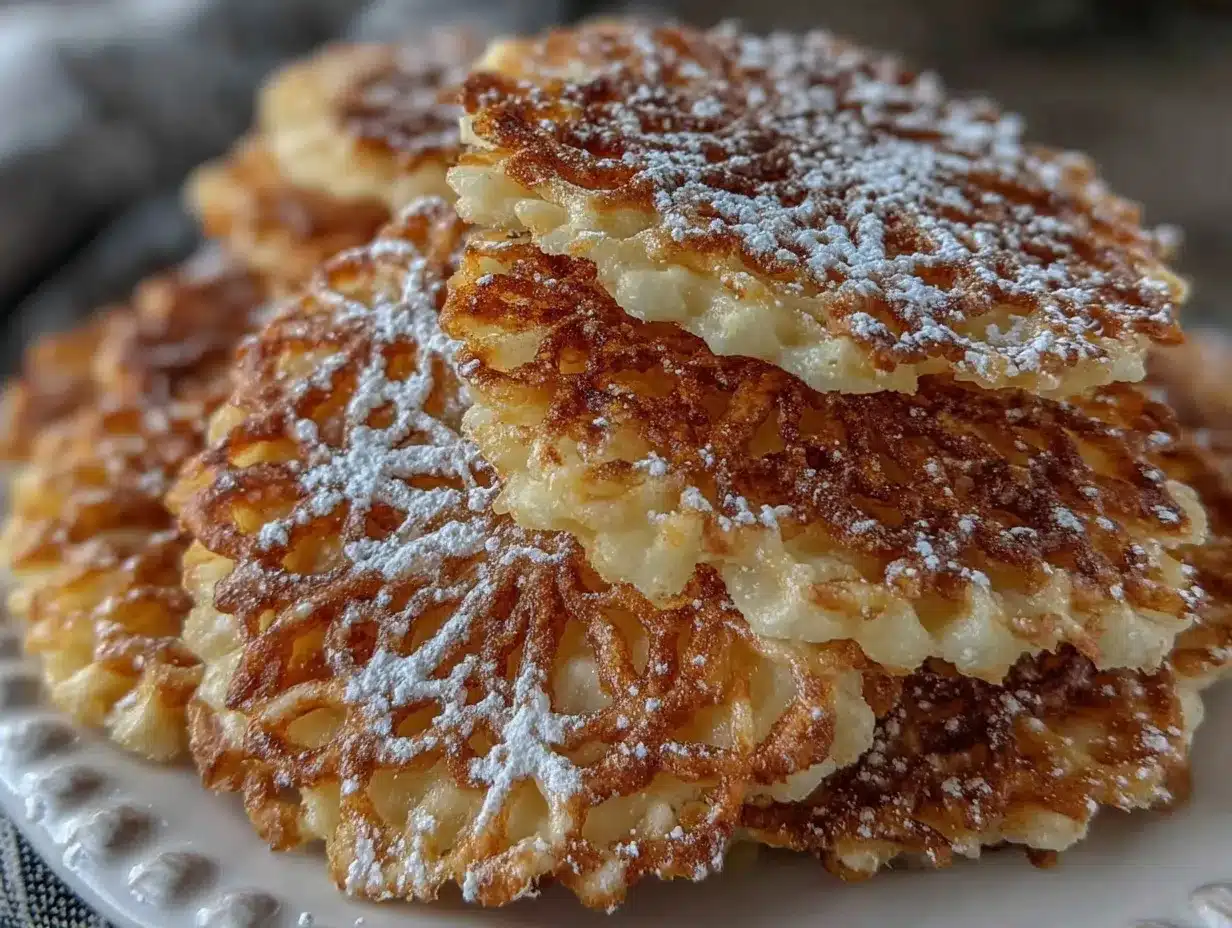
Let me tell you, the aroma of anise wafting from a fresh batch of pizzelles is pure magic—like a little slice of an Italian bakery right in your own kitchen. The first time I pressed the iron closed and heard that gentle sizzle, I knew I was onto something special. You get this delicate, lacy cookie that’s crisp on the outside and so light it nearly floats off the plate. It’s the kind of moment where you pause, take a deep breath, and just smile because, honestly, you know you’ve found a keeper.
Years ago, when I was knee-high to a grasshopper, my grandma would whip up pizzelles for every holiday. She had this old-fashioned stovetop iron and would work with a rhythm only experience brings. I’d watch in awe, stealing warm cookies from the cooling rack when she wasn’t looking (and let’s face it, she always knew). The taste is pure, nostalgic comfort—crisp edges, a whisper of anise, and that signature pattern that’s just so pretty you almost don’t want to eat it (almost!).
I first tried making crispy anise pizzelles on a rainy Sunday, desperate to recreate those childhood flavors. Let’s just say, my family couldn’t stop sneaking them off the rack, and I didn’t really blame them. These cookies are dangerously easy to make and even easier to devour. They’re perfect for potlucks, a sweet treat for your kids, or to brighten up your Pinterest cookie board with their stunning snowflake design. I wish I’d discovered how simple pizzelles were years ago—it’s now a staple for family gatherings and gifting. After testing this recipe more times than I’ll admit (in the name of research, of course), it feels like a warm hug from my heritage, and you’re going to want to bookmark this one!
Why You’ll Love This Recipe
If you’re searching for a cookie recipe that’s big on classic Italian flavor and even bigger on crisp texture, these crispy anise pizzelles are it! Over the years, I’ve tested countless batches—trust me, I’ve had my fair share of flops and triumphs. After all those trials, this pizzelle recipe stands out for so many reasons.
- Quick & Easy: You can whip up a batch in under 30 minutes, making them perfect for busy weeknights or last-minute cravings.
- Simple Ingredients: Everything you need is likely already in your pantry—no fancy shopping trips required.
- Perfect for Any Occasion: These pizzelles shine at brunch, holiday gatherings, afternoon tea, or as a sweet surprise tucked into lunchboxes.
- Crowd-Pleaser: Kids love their crispiness and adults appreciate the classic, aromatic flavor. They always get rave reviews!
- Unbelievably Delicious: The texture is perfectly crisp yet delicate, and the anise flavor is just enough to make them irresistible.
What sets this crispy anise pizzelles recipe apart is the balance of flavor and texture. Instead of being soft and chewy, these cookies have a satisfying snap thanks to the exact butter-to-flour ratio and a little trick I learned from an old Italian friend: letting the batter rest for a few minutes before baking. Plus, the use of pure anise extract—rather than seeds—gives a consistent, bold flavor that doesn’t overpower.
Honestly, these pizzelles are comfort food reimagined—lighter, crispier, and so much easier than you’d expect. They’re perfect for impressing guests without any stress (because, you know, we all need a little less stress at the holidays). If you’ve ever closed your eyes after the first bite of something truly delicious, you’ll know exactly why these cookies deserve a spot in your rotation. Give this recipe a go, and watch it transform a simple afternoon into something memorable!
What Ingredients You Will Need
This crispy anise pizzelles recipe uses simple, wholesome ingredients to deliver bold flavor and that signature snap—no fuss, just pure cookie joy. Most of these are pantry staples, and you can easily swap or adapt based on what you have!
- Large eggs (room temperature; helps with structure and crispiness)
- Granulated sugar (classic sweetness; you can use organic or standard)
- Unsalted butter (melted and cooled; adds richness and helps crisp the cookies)
- All-purpose flour (I recommend King Arthur for best texture; sifted for lighter pizzelles)
- Anise extract (pure, not imitation; for that signature Italian flavor)
- Vanilla extract (optional, but it rounds out the flavor beautifully)
- Baking powder (just a touch to give a little lift)
- Salt (balances the sweetness; just a pinch!)
Ingredient notes and substitutions:
- Butter: You can swap for melted coconut oil if you need dairy-free pizzelles (though the flavor will change slightly).
- Flour: For gluten-free, use a 1:1 baking blend like Bob’s Red Mill. Almond flour works, but results in a softer cookie.
- Anise extract: Don’t have it? Try anise seeds (crushed, about 1 tsp), or use fennel extract for a slightly different twist.
- Vanilla extract: If you prefer, skip it for a more traditional flavor—some folks swear by pure anise only.
- Baking powder: Omit for ultra-thin, super crisp pizzelles, but they may be a touch denser.
I usually stick with classic anise because it’s what my grandma used, but if you want to play with flavors, lemon zest or almond extract are fun additions. In summer, swap in fresh orange zest for a sunny twist! If you’re gifting these, a dusting of powdered sugar makes them extra festive (and honestly, who doesn’t love that touch?).
Equipment Needed
To make authentic crispy anise pizzelles, you’ll need a few kitchen tools—luckily, nothing too fancy!
- Pizzelle maker (electric iron; nonstick is easiest to clean and gives the best pattern)
- Mixing bowls (one large, one medium)
- Whisk (for eggs and sugar)
- Spatula (for folding flour and scraping batter)
- Measuring cups and spoons (accuracy is key for crisp cookies)
- Cooling rack (lets the pizzelles crisp up completely)
- Cookie scoop or tablespoon (for portioning batter)
Alternatives & tips: If you don’t have a pizzelle iron, you can try using a waffle cone maker—though the pattern will be different. I’ve even seen folks use a flat waffle maker in a pinch (not quite the same, but still delicious!). If your pizzelle maker is old-school cast iron, be sure to brush lightly with oil and heat well before using.
Budget-friendly tip: You can usually find pizzelle irons secondhand online or at thrift stores. Maintenance is simple—wipe with a damp cloth, never immerse in water, and store with the plates open so moisture doesn’t get trapped. If you’re just starting out, don’t stress about getting the fanciest iron; my first was a hand-me-down, and it’s still going strong!
Preparation Method
Ready to bake up a batch of crispy anise pizzelles? Follow these step-by-step instructions for perfect results every time.
-
Prep the ingredients: Gather all ingredients and equipment. Melt 1/2 cup (113g) unsalted butter and let it cool. Set out 3 large eggs (150g), 1 cup (200g) granulated sugar, 2 cups (240g) all-purpose flour (sifted), 1 1/2 teaspoons (7ml) anise extract, 1 teaspoon (5ml) vanilla extract, 1 1/2 teaspoons (6g) baking powder, and a pinch of salt.
Time: 5 minutes. -
Mix eggs and sugar: In a large bowl, whisk eggs and sugar until pale and slightly thickened—about 2-3 minutes. The mixture should look creamy and almost doubled in volume. (If it’s too runny, whisk a bit longer.)
Time: 3 minutes. -
Add butter and extracts: Whisk in the cooled, melted butter. Stir in anise and vanilla extracts until well combined. The batter will smell incredible—trust your nose!
Time: 2 minutes. -
Combine dry ingredients: In a separate bowl, sift together flour, baking powder, and salt. (Sifting helps avoid lumps and makes pizzelles extra light.) Gradually add dry ingredients to wet mixture, folding gently with a spatula until just combined. Do not overmix—stop when no dry spots remain.
Time: 3 minutes. -
Rest the batter: Let the batter sit for 5-10 minutes. This helps the flour absorb moisture, leading to crisper pizzelles. (Trust me, skipping this step can lead to softer cookies.)
Time: 10 minutes. -
Preheat pizzelle iron: Plug in your pizzelle maker and let it heat fully—usually takes 5 minutes. If using a stovetop iron, preheat over medium heat and brush lightly with oil.
Time: 5 minutes. - Portion and bake: Place about 1 tablespoon (15g) of batter onto each plate of the iron, slightly off-center. Close the lid and cook for 45-60 seconds (electric) or 30-45 seconds (stovetop), until golden brown and crisp. The pizzelles should smell toasty and release easily when done. (If they stick, add a touch more butter to your batter next time.)
- Remove and cool: Use a fork or offset spatula to lift each pizzelle onto a cooling rack. They’ll be soft at first but will crisp up as they cool. (Don’t stack while warm, or they’ll steam and soften.)
- Repeat: Continue with remaining batter, adjusting baking time as needed. If your iron starts sticking, wipe plates gently with a paper towel and brush with a little oil.
- Optional dusting: Once cooled, dust pizzelles with powdered sugar for an extra festive touch.
Troubleshooting: If pizzelles are too thick, use less batter; if they’re too pale, bake a few seconds longer. Batter too runny? Add 1 tablespoon flour. Too thick? Add 1 teaspoon milk or water. Sensory cues: finished pizzelles should be fragrant, lightly golden, and crisp when tapped.
Personal tip: I always keep a timer handy and work in small batches so none overbake. Once you get the rhythm, you’ll be cranking out pizzelles like a pro!
Cooking Tips & Techniques
Making crispy anise pizzelles is all about nailing the texture and flavor. Here’s what I’ve learned (sometimes the hard way!) over years of baking:
- Preheat is key: A fully heated pizzelle iron is non-negotiable. If it’s not hot enough, the cookies will stick and turn out pale.
- Don’t overmix: Gently fold in flour—overmixing leads to tough cookies. The batter should be smooth, not elastic.
- Batter consistency: Aim for a thick, drop-able batter. Too runny, and your pizzelles will spread thin and break. Too thick, and they’ll be doughy. (I’ve had both happen!)
- Watch the bake time: Every iron is a little different. First few pizzelles are a test run—tweak the time as you go. I set a timer for each batch, so I don’t get distracted.
- Don’t stack hot cookies: Let them cool in a single layer on a rack for maximum crispness. Stacking traps steam and makes them chewy.
- Flavor balance: Anise can be bold—taste your batter! Adjust the extract to suit your preference. Too much can overpower, but too little loses that Italian vibe.
- Multitasking: While one batch bakes, portion the next. Keep a rhythm for efficient baking—otherwise, the iron cools down and throws off the timing.
- Consistency: Use a cookie scoop for even pizzelles. It makes each one uniform and helps with even baking.
Honestly, my biggest failures came from rushing—forgetting to preheat, overfilling the iron, or skipping the batter rest. Take a breath, enjoy the process, and your crispy anise pizzelles will turn out just right. Once you get the hang of it, it’s easy to bake a double batch (because everyone asks for more)!
Variations & Adaptations
The beauty of crispy anise pizzelles is their versatility. Here are some fun ways to switch things up:
- Gluten-Free: Use a 1:1 gluten-free flour blend. The cookies come out just as crisp, but be sure to rest the batter a little longer (about 15 minutes).
- Dairy-Free: Swap butter for melted coconut oil or plant-based margarine. The flavor is a touch different but still delicious.
- Lemon or Orange: Add 1 tablespoon finely grated citrus zest to the batter for a bright, refreshing twist. Perfect for spring gatherings!
- Chocolate Dipped: Once cooled, dip half of each pizzelle in melted dark chocolate and let set. Adds a decadent touch for parties.
- Almond or Hazelnut: Substitute anise extract with almond or hazelnut extract for a nutty spin. I’ve tried almond—so good for holiday cookie trays.
Cooking methods: If you don’t have a pizzelle iron, try making mini waffles in a waffle maker, or use a stovetop iron for a more rustic result. For softer pizzelles, bake for 10–15 seconds less; for ultra-crispy, go a bit longer (watch carefully!).
Allergen swaps: Use egg replacer for vegan pizzelles (texture will be softer). For nut allergies, avoid adding nut extracts—stick to classic anise or citrus.
Personal favorite? Lemon zest and a sprinkle of powdered sugar—tastes like sunshine in cookie form!
Serving & Storage Suggestions
Crispy anise pizzelles are best enjoyed fresh and at room temperature. Their beautiful lace pattern makes them perfect for stacking on a pretty plate or tucking into decorative tins for gifting. Serve with espresso, tea, or a glass of cold milk—it’s hard to beat!
Pair with fresh berries, whipped cream, or as a base for ice cream sandwiches (seriously, try it!). For a classic Italian dessert, layer with mascarpone and drizzle with honey.
To store, let pizzelles cool completely before packing. Keep in an airtight container at room temperature for up to 2 weeks. For longer storage, freeze in a single layer (separated by wax paper) for up to 3 months. They’ll crisp up again after thawing. Reheat in a low oven (250°F / 120°C) for a few minutes if they soften—just don’t overdo it or they’ll dry out.
Over time, the anise flavor deepens—a bonus if you love that aromatic punch. Honestly, leftovers are rare in my house, but when they happen, they’re just as good (sometimes better) the next day!
Nutritional Information & Benefits
Each crispy anise pizzelle (about 20g) contains approximately:
- Calories: 70
- Fat: 3g
- Carbs: 10g
- Protein: 1g
- Sugar: 6g
These cookies are relatively light—thanks to their thin, crisp nature—and contain less sugar and fat than many other holiday treats. Anise is known for digestive benefits and a unique flavor profile that’s naturally aromatic and satisfying.
For gluten-free or dairy-free diets, simple ingredient swaps make these accessible to almost everyone. Note: Contains eggs, wheat, and dairy (if using butter). Always check for potential allergens before serving to guests. I love how pizzelles can be a sweet treat without feeling heavy—perfect for a lighter dessert option!
Conclusion
If you’re looking for a cookie recipe that’s both classic and crowd-pleasing, these crispy anise pizzelles are absolutely worth a try. Their crisp texture, beautiful pattern, and bold Italian flavor make them a staple in my kitchen year-round. Plus, they’re easy to customize—so you can make them just the way you like!
Whether you stick with the traditional anise, swap in citrus or chocolate, or go gluten-free, there’s room for creativity. I personally love how these cookies bring back memories and always spark smiles around the table. It’s that combination of nostalgia and simplicity that keeps me coming back.
I’d love to hear how your batch turns out! Leave a comment, share your own twist, or tag me if you post your pizzelles on Pinterest. Go ahead and give this recipe a try—you might just find a new family favorite. Happy baking!
Frequently Asked Questions
Can I make crispy anise pizzelles without a pizzelle iron?
You can try using a waffle cone maker or a flat waffle iron, but the texture and pattern will be different. For authentic results, a pizzelle iron is best.
How do I keep pizzelles crispy?
Cool them in a single layer on a wire rack and store in an airtight container. Avoid stacking while warm, as steam will soften them.
What if I don’t have anise extract?
You can substitute with crushed anise seeds, fennel extract, or try almond or lemon extract for a different flavor profile.
Can I freeze pizzelles?
Absolutely! Freeze in a single layer with wax paper between each. Thaw at room temperature, and re-crisp in the oven if needed.
Are these cookies gluten-free?
The classic recipe uses all-purpose flour, but you can substitute with a 1:1 gluten-free flour blend for similar results. Always check your blend for taste and texture.
Pin This Recipe!


Crispy Anise Pizzelles
These classic Italian cookies are thin, crisp, and delicately flavored with anise. Perfect for holidays, gifting, or a sweet treat with coffee, they’re easy to make and feature a beautiful snowflake pattern.
- Total Time: 30 minutes
- Yield: 24 cookies 1x
Ingredients
- 3 large eggs (room temperature)
- 1 cup granulated sugar
- 1/2 cup unsalted butter (melted and cooled)
- 2 cups all-purpose flour (sifted)
- 1 1/2 teaspoons anise extract
- 1 teaspoon vanilla extract (optional)
- 1 1/2 teaspoons baking powder
- Pinch of salt
- Powdered sugar (for dusting, optional)
Instructions
- Gather all ingredients and equipment. Melt butter and let it cool. Set out eggs, sugar, flour, anise extract, vanilla extract, baking powder, and salt.
- In a large bowl, whisk eggs and sugar until pale and slightly thickened, about 2-3 minutes.
- Whisk in the cooled, melted butter. Stir in anise and vanilla extracts until well combined.
- In a separate bowl, sift together flour, baking powder, and salt. Gradually add dry ingredients to wet mixture, folding gently with a spatula until just combined. Do not overmix.
- Let the batter sit for 5-10 minutes to allow the flour to absorb moisture.
- Preheat pizzelle iron (electric or stovetop) for about 5 minutes. Brush with oil if using a cast iron model.
- Place about 1 tablespoon of batter onto each plate of the iron, slightly off-center. Close the lid and cook for 45-60 seconds (electric) or 30-45 seconds (stovetop), until golden brown and crisp.
- Use a fork or offset spatula to lift each pizzelle onto a cooling rack. Let cool in a single layer.
- Repeat with remaining batter, adjusting baking time as needed. If iron starts sticking, wipe plates gently and brush with a little oil.
- Once cooled, dust pizzelles with powdered sugar if desired.
Notes
Let the batter rest for 5-10 minutes for crispier cookies. Don’t stack pizzelles while warm to avoid softening. Adjust anise extract to taste. For gluten-free, use a 1:1 baking blend. Store in an airtight container for up to 2 weeks or freeze for up to 3 months.
- Prep Time: 15 minutes
- Cook Time: 15 minutes
- Category: Dessert
- Cuisine: Italian
Nutrition
- Serving Size: 1 cookie (about 20g)
- Calories: 70
- Sugar: 6
- Sodium: 30
- Fat: 3
- Saturated Fat: 2
- Carbohydrates: 10
- Protein: 1
Keywords: pizzelle, Italian cookies, anise, crisp cookies, holiday dessert, classic Italian, easy cookies, homemade pizzelle


