
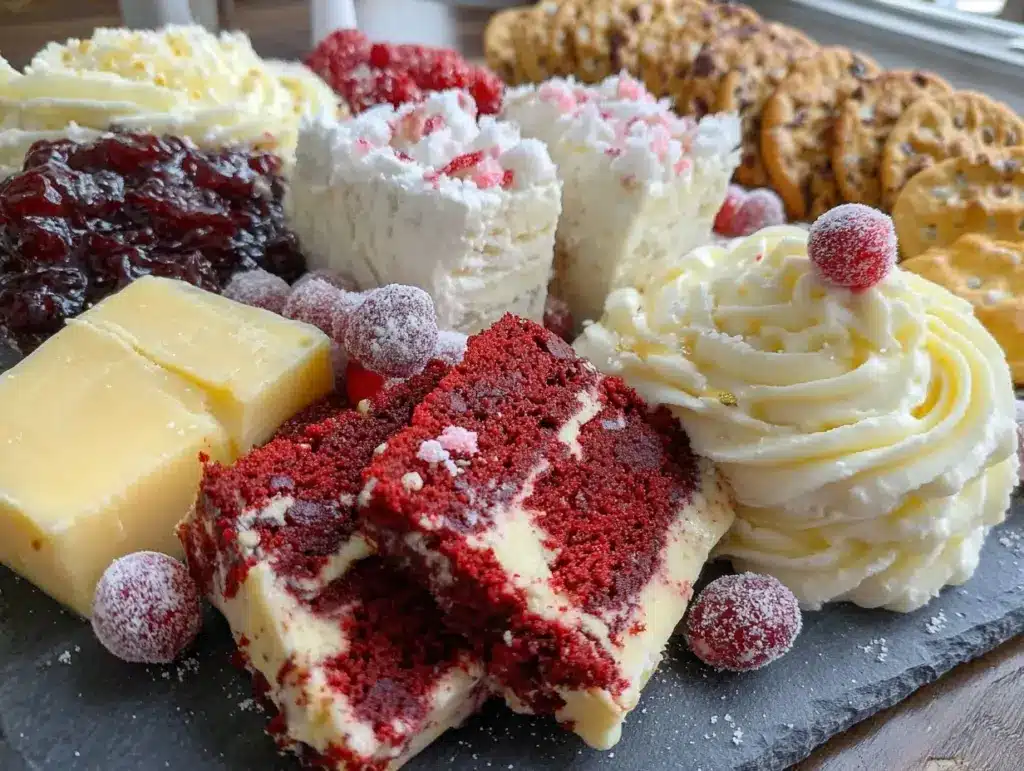
Picture this: a board absolutely bursting with the rich, velvety hues of ruby-red velvet cake bites, swirls of creamy cheese, and pops of pink and white treats—right in the middle of your Galentine’s gathering. The sweet scent of red velvet mingling with tangy cream cheese and the gentle crunch of chocolate-dipped strawberries is enough to make you giddy (I’m not exaggerating—I actually had to stop myself from nibbling as I set this up). The first time I made a red velvet cheese board for my friends, it was a chilly February afternoon, and we were all craving something special but not fussy. It was the kind of moment that made us all pause, take a deep breath, and just soak in the pure joy of friendship (and really good snacks).
Honestly, when I was knee-high to a grasshopper, Galentine’s Day wasn’t a thing, but I sure wish it had been. These days, it’s become a tradition to gather the women in my life for a night of laughter, gossip, and, of course, a show-stopping cheese board that doubles as a centerpiece. I first stumbled on the idea after a bake sale left me with leftover red velvet cupcakes and a spare block of brie. I started piecing together a board, and before I knew it, folks were hovering, snacking, and snapping photos for their Pinterest boards. My family couldn’t stop sneaking tastes (even my “I don’t eat sweets” sister-in-law was hooked). You know what? There’s something magical about watching people’s eyes light up when they see a cheese board that’s both gorgeous and packed with their favorite flavors.
This red velvet cheese board is dangerously easy to assemble, but it delivers pure, nostalgic comfort with a playful, modern twist. It’s perfect for potlucks, girls’ night in, or anytime you want to brighten up your party spread (or your Instagram feed, let’s be real). I tested this setup more times than I’d like to admit (in the name of research, of course), and now it’s a staple for every Galentine’s, gifting moment, or just when I need a little edible pick-me-up. If you’re after a recipe that feels like a warm hug and looks like it belongs on the cover of your favorite food magazine, you’re going to want to bookmark this one. Let’s get into all the gooey, chocolatey details of the ultimate red velvet cheese board for Galentine’s!
Why You’ll Love This Red Velvet Cheese Board
Let’s face it: when it comes to Galentine’s, you want something that’s equal parts stunning and stress-free (nobody has time for complicated recipes when there’s catching up to do!). I’ve built this red velvet cheese board from years of throwing parties and plenty of trial-and-error, so you can trust it’s as crowd-pleasing as it is photogenic. Here’s why you’ll absolutely love it:
- Quick & Easy: Comes together in under 25 minutes—no baking or fussing required. It’s honestly perfect for last-minute gatherings or when you want a jaw-dropping spread without spending all day in the kitchen.
- Simple Ingredients: Everything on this board is easy to find at any regular grocery store (think red velvet cake bites, assorted cheeses, strawberries, and a few sweet add-ons). No specialty store runs necessary.
- Perfect for Galentine’s & Beyond: Whether it’s brunch with your girlfriends, a Valentine’s Day treat, or a cozy night in, this cheese board fits right in. It’s also a fantastic way to impress guests without breaking a sweat.
- Crowd-Pleaser: I haven’t met a single person who didn’t gush over this board—kids, aunts, even my picky friend who “doesn’t like cheese.” It’s one of those rare dishes that truly appeals to everyone.
- Unbelievably Delicious: The combination of red velvet, creamy cheese, tangy fruit, and crunchy add-ins is pure comfort food, but with a playful, festive twist. It’s the kind of snack that disappears before you know it.
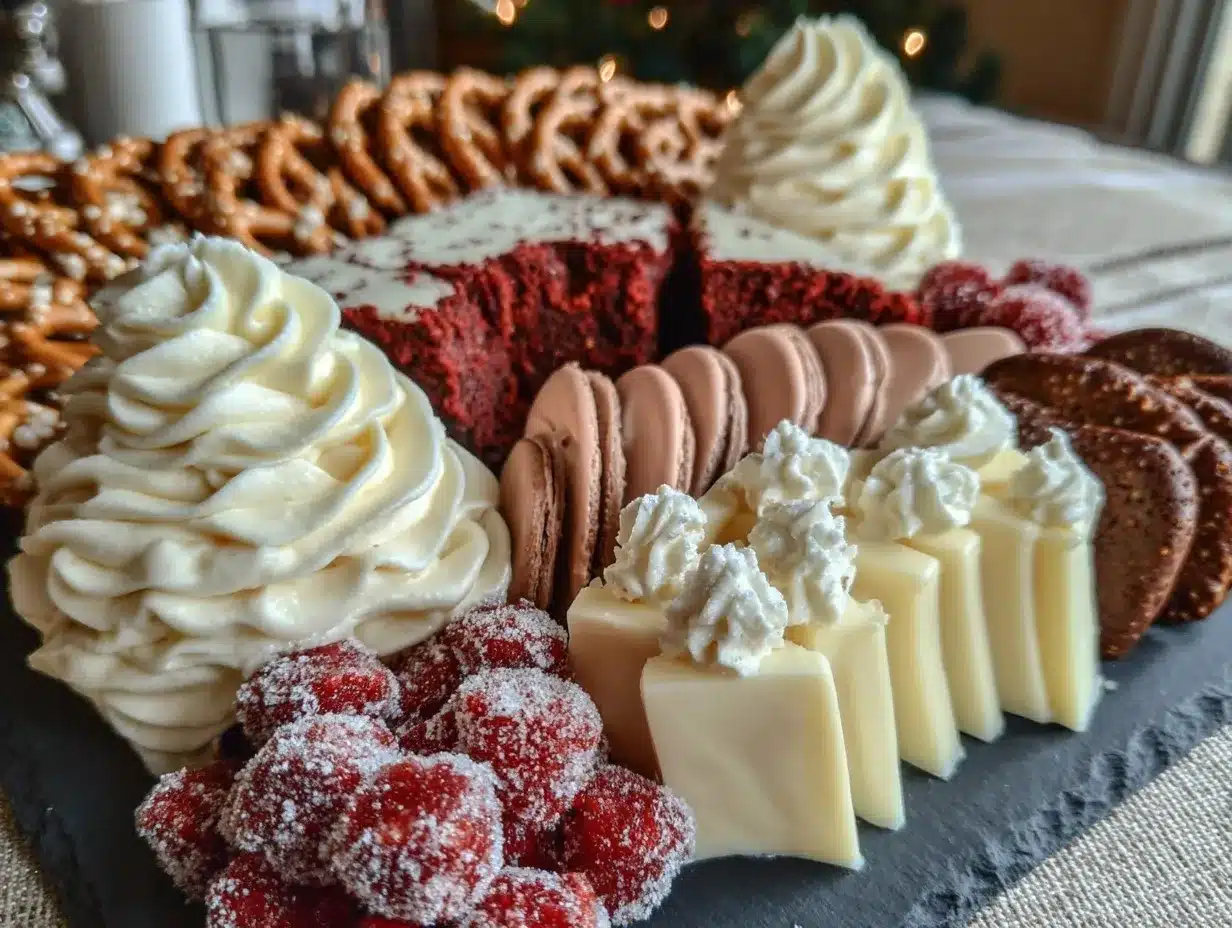
What sets this red velvet cheese board apart is the thoughtful layering of flavors and textures. Instead of just plopping down cheese and crackers, I blend classic red velvet with creamy brie, white cheddar, and a tangy whipped cream cheese dip. I love sneaking in a few chocolate-covered pretzels for crunch, plus fresh fruit for brightness. It’s not just pretty (though it’ll definitely steal the show on your Pinterest feed); it’s balanced, bold, and full of little surprises in every bite.
You know those moments when you take a bite and actually close your eyes because it’s just that good? That’s what this board delivers—happy sighs, giggles, and the kind of comfort that only comes with good food and great company. It’s my answer to “what should I bring?” and the recipe I always reach for when I want to turn a simple get-together into something memorable. Trust me: after one round, your friends will be asking you to make this every year. Let’s get into what you’ll need for the best Galentine’s red velvet cheese board ever.
What Ingredients You Will Need
This red velvet cheese board brings together simple, everyday ingredients in a way that feels special (without any hard-to-find products or tricky prep steps). You probably have a few of these in your pantry or fridge already! Here’s what you’ll need to build your board:
- For the Red Velvet Centerpiece:
- Red velvet cake bites or mini cupcakes (store-bought or homemade; I love using bakery-fresh for extra moisture and color)
- Red velvet cookies (chewy or crunchy—whatever you like best!)
- For the Cheese Selection:
- Brie cheese (soft, creamy, and mild—Trader Joe’s or Président brands are great)
- White cheddar cheese (for a little sharpness—Cabot is a favorite in my kitchen)
- Whipped cream cheese or mascarpone (for easy dipping and spreading; Philadelphia works perfectly)
- Strawberry cream cheese (optional—adds a fun pink twist)
- For the Fruits & Sweets:
- Fresh strawberries (halved, for color and juicy flavor)
- Raspberries (add a tart pop and look gorgeous on the board)
- Red grapes (seedless, for easy snacking)
- Chocolate-covered strawberries (store-bought or homemade, for extra decadence)
- Marshmallows (large or mini, for a soft, sweet bite)
- Chocolate hearts or Valentine’s candy (totally optional but fun for extra flair)
- For the Crunch:
- Chocolate-covered pretzels (white, milk, or dark—your pick!)
- Red velvet crackers (if you can find them, or use simple butter crackers for balance)
- Pistachios or candied pecans (for a little salty crunch and color)
- For the Dips & Spreads:
- Whipped cream cheese dip (see tips below for a quick homemade version)
- Strawberry jam or raspberry preserves (for a sweet-tart accent)
- Nutella or chocolate spread (if you want a rich, chocolatey dip)
Ingredient Tips:
- For homemade red velvet bites, use your favorite recipe and cut into small squares or rounds for easy grabbing.
- Swap in gluten-free cookies or crackers if needed—there are plenty of options these days.
- Dairy-free cheese works too (Daiya and Miyoko’s are solid brands if you’re avoiding dairy).
- Mix up your fruit selection based on the season—fresh cherries or blackberries are lovely in late winter or spring.
- If you have time, making your own chocolate-covered strawberries is both fun and budget-friendly (plus, you can decorate them with pink drizzle or sprinkles for extra pizzazz).
Honestly, the key here is variety and color. Don’t stress if you can’t find every ingredient—just use what you have and go heavy on the reds, pinks, and creamy whites for that signature Galentine’s look!
Equipment Needed
You don’t need a gourmet kitchen to pull off this red velvet cheese board—just a few basics and a little creativity. Here’s what I recommend for assembly:
- Large serving board or platter: A wooden cheese board, marble slab, or even a rimmed baking sheet lined with parchment works great. I’ve even used a large cutting board in a pinch.
- Ceramic ramekins or small bowls: For dips, jams, or loose items (like nuts). Little espresso cups or teacups also work if you’re short on ramekins.
- Cheese knives: Use at least one for each cheese; butter knives work if you don’t have fancy cheese knives.
- Mini tongs or toothpicks: Makes picking up sticky or soft items less messy—plus, they’re fun for guests!
- Small spoons: For the spreads and jams.
- Sharp knife: For slicing cheese or cutting fruit.
Personal Tips: I love using a round board for that “abundant” look, but a rectangle works just as well. If you’re going for a budget-friendly setup, check thrift stores for unique boards or trays (I scored my favorite marble slab for $3!). Hand wash wooden boards—no dishwasher, or they’ll dry out and crack. And don’t stress about matching everything—mismatched bowls and spoons add charm!
Preparation Method
- Prep your ingredients: Wash and dry all fruit thoroughly. Slice strawberries in halves and grapes into small clusters for easy grabbing. If using homemade red velvet cake or cookies, cut them into bite-sized pieces (roughly 1-inch/2.5-cm squares or rounds). Unwrap cheeses and let them come to room temperature for about 20 minutes—this brings out their flavor.
- Arrange your cheeses: Place your brie, white cheddar, and cream cheese on the board first. I like to keep them spaced apart so you’ve got room to tuck in other goodies. (If you’re using a wheel of brie, cut a wedge out for that “inviting” look.)
- Add your dips and spreads: Spoon the whipped cream cheese, strawberry jam, and Nutella into small bowls or ramekins. Nestle these on or around the board—keep them close to items that pair well, like cake bites and fruit.
- Build the red velvet centerpiece: Pile your red velvet cake bites or cookies in the center or just off-center for a dramatic focal point. Feel free to stack or fan them out for texture.
- Layer in the fruit and sweets: Arrange strawberries, raspberries, grapes, and chocolate-covered strawberries in generous clusters around the cheeses and cake. Alternate colors for maximum “wow” factor—think little bursts of red, pink, and white all over.
- Add the crunch: Tuck in chocolate-covered pretzels, crackers, and nuts wherever you see gaps. These add texture and keep the board feeling abundant. If using marshmallows or candy, scatter them in small handfuls for whimsy.
- Finishing touches: Fill any bare spots with extra fruit or candy. For extra flair, sprinkle on a few heart-shaped sprinkles or edible glitter (nobody’s judging!). Add toothpicks or mini tongs near sticky items or dips.
- Serve and enjoy: Set out small plates and napkins for guests, and let everyone help themselves. (Warning: the board will disappear fast!)
Troubleshooting & Tips:
- If your brie seems too soft to slice, pop it in the fridge for 10 minutes before assembling.
- Fruit bleeding onto cheese? Place a little wax paper or a few leaves of lettuce under especially juicy fruit.
- If you’re assembling ahead of time, wait to add delicate items like marshmallows or chocolate until right before serving—they can get sticky in the fridge.
- No board? Use a rimmed cookie sheet lined with parchment—it works perfectly and makes cleanup a breeze.
- Don’t worry about symmetry—boards look best when they’re a little wild and “overflowing.”
Cooking Tips & Techniques
I’ve learned a few things the fun (and sometimes messy) way when it comes to building the perfect Galentine’s red velvet cheese board. Here are my best tips to guarantee a gorgeous, stress-free spread:
- Cut everything bite-sized: Guests love grab-and-go snacks. Pre-slice cheeses and cake bites into 1-inch (2.5 cm) pieces so nobody’s wrestling with a cheese knife.
- Room temperature is your friend: Cheese tastes best when it’s not cold from the fridge. Give it 20-30 minutes to “bloom,” and the flavors will really shine (plus, it spreads more easily).
- Mix up textures: I used to pile all the sweets together—big mistake! Layer creamy, crunchy, chewy, and juicy items throughout the board. It keeps things interesting and looks beautiful.
- Use color as your guide: I once ended up with a sea of beige on an early board—not cute! For that stunning Galentine’s look, alternate red fruits, white cheeses, and pink candies.
- Don’t overcrowd: If you try to fit everything at once, things get squished. Start with your largest items and fill in gaps with smaller snacks.
- Plan for messes: I always keep a few wet wipes or napkins handy, especially for sticky dips. Toothpicks are lifesavers for picking up marshmallows or fruit without sticky fingers.
- Prep ahead, but finish last minute: Most items can be sliced and portioned a few hours ahead, but assemble the final board just before guests arrive so everything stays fresh.
My biggest lesson? Don’t overthink it. The best boards are a little imperfect, overflowing, and made with love. If you’re worried about gaps, just add more fruit or a handful of candy. And if all else fails, chocolate drizzle covers a multitude of “oops” moments! Galentine’s is about fun, not perfection.
Variations & Adaptations
One of the best things about this red velvet cheese board is how flexible it is—you can tweak it for any dietary needs, flavor cravings, or what’s in season. Here are some of my favorite ways to switch things up:
- Gluten-Free: Swap out red velvet cookies and crackers for gluten-free versions (Simple Mills makes a good one, and Schär has great GF crackers). Most cheeses and fruit are naturally gluten-free, so you’re covered.
- Vegan/Dairy-Free: Use plant-based cheeses (Miyoko’s or Treeline are delicious), and make or buy vegan red velvet bites. For the dip, whip together dairy-free cream cheese with a touch of powdered sugar and vanilla extract.
- Low-Sugar: Choose sugar-free jams or dips and stick with fresh fruit and unsweetened nuts. You can make your own red velvet bites with a sugar substitute if needed.
- Seasonal Flavors: In spring or summer, swap in fresh cherries, blueberries, or blackberries. In the winter, dried cranberries or pomegranate seeds are pretty and festive.
- Chocolate-Lovers’ Board: Add dark chocolate chunks, chocolate-covered nuts, or a drizzle of white chocolate over the cake bites. I sometimes add cocoa-dusted almonds for an extra treat.
- Nut Allergies: Omit nuts entirely and focus on seeds (like pumpkin or sunflower) or extra fruit and marshmallows for crunch.
My personal twist? I sometimes sneak in a few slices of salty prosciutto or peppered salami for a sweet-and-savory combo that wows even the “not a dessert person” crowd. Don’t be afraid to experiment—it’s all about what makes you and your friends happy!
Serving & Storage Suggestions
This red velvet cheese board is best served at room temperature, where all the flavors really pop and the cheese spreads like a dream. For parties, I set the board out about 15-20 minutes before guests arrive—just enough time for everything to settle in but not get soft.
Presentation Tips: Arrange everything in generous clusters and let things spill over the edge for that “abundant” look. I love adding a few edible flowers or heart-shaped sprinkles for extra flair. Little name tags or flags (to label cheeses or sweets) are always a hit at Galentine’s parties.
Pairing Suggestions: This board goes beautifully with a glass of bubbly rosé, pink lemonade, or even a strawberry mojito if you’re feeling festive. For a cozy night in, a mug of hot cocoa or coffee works wonders, too.
Storage: Any leftover cheese can be wrapped and refrigerated for 2-3 days (just bring it back to room temp before eating again). Leftover cake bites or cookies keep best in an airtight container at room temperature for 2-3 days. Fruit should be eaten within a day for best texture, but I’ve been known to snack on “day-old” strawberries and not regret it. Marshmallows and candy can be stored in a zip-top bag for a week.
Reheating: No need to reheat anything—this is a “serve as is” board. If you do want warm cake bites, pop them in the microwave for 10 seconds (watch out—they get hot fast!).
Tip: Flavors develop overnight! Sometimes I make the cake bites a day ahead, and they’re even tastier the next day as the flavors meld.
Nutritional Information & Benefits
This board is a treat, no doubt, but there are a few healthful perks tucked in there—especially if you load up on fresh fruit and nuts. Here’s a quick look:
- Estimated per serving (¼ of the board): 450-600 calories, 10-15g protein, 25-30g fat, 40-60g carbohydrates (varies based on your exact selection).
- Key nutrients: Calcium from cheese, antioxidants from berries and dark chocolate, healthy fats from nuts.
- Dietary considerations: Can be made gluten-free, nut-free, or dairy-free with a few simple swaps (see above).
- Potential allergens: Dairy, gluten, nuts, and eggs (check all labels if serving folks with allergies).
I believe in balance—this board is a celebration, not an everyday meal, but the fruit and nuts add some fiber and vitamins, too. Treat yourself and savor every bite with your favorite people!
Conclusion
If you’re searching for a show-stopping way to celebrate Galentine’s (or any gathering, really), this red velvet cheese board is your new secret weapon. It’s festive, fun, and endlessly customizable—plus, it guarantees plenty of “oohs” and “aahs” when you bring it to the table. I love how it brings people together (and looks like a million bucks with very little effort). Whether you stick to the classic version or riff with your own twists, you’ll find yourself making it again and again.
Don’t hesitate to make it your own—swap in your favorite cheeses, add extra chocolate, or keep it super simple. The best part? Sharing it with your friends and making memories together. If you try this red velvet cheese board, I’d love to hear how you put your spin on it! Leave a comment, tag me on social, or share your photos for a chance to inspire someone else’s celebration.
Here’s to friendship, laughter, and the kind of snacks that make every moment sweeter. Happy Galentine’s, friends—may your board be bountiful and your memories even sweeter!
FAQs About Red Velvet Cheese Boards for Galentine’s
What kind of cheese goes best with red velvet cake on a cheese board?
Creamy cheeses like brie, mascarpone, and whipped cream cheese pair beautifully with red velvet cake. For a bit of sharpness, mild white cheddar or even goat cheese are great choices. The key is balancing sweet and tangy flavors!
Can I make a red velvet cheese board ahead of time?
Yes! Prep and slice all your ingredients and cheeses a few hours ahead, but assemble the board just before serving for the freshest look and texture. Add delicate items like marshmallows and chocolate right before guests arrive.
How do I keep fruit from making the cheese board soggy?
Make sure all fruit is dry before adding it to the board, and use a little wax paper or lettuce under especially juicy fruit. Don’t crowd wet items next to crackers or cookies—they can get soft if sitting too long.
What are some fun ways to decorate a Galentine’s cheese board?
Use heart-shaped sprinkles, edible glitter, Valentine’s candies, or even edible flowers. Pink and red napkins or tiny flags with fun messages add a playful touch your guests will love.
Can I make this cheese board gluten-free or vegan?
Absolutely! Just use gluten-free cookies and crackers, and choose dairy-free cheeses and vegan red velvet bites. There are lots of plant-based options in stores now, so everyone can join the fun.
Pin This Recipe!


Red Velvet Cheese Board Ideas for Galentine’s Perfect Party Spread
This festive red velvet cheese board is a show-stopping centerpiece for Galentine’s Day or any gathering, featuring a playful mix of red velvet treats, creamy cheeses, fresh fruit, and sweet and crunchy add-ons. It’s easy to assemble, endlessly customizable, and guaranteed to delight your guests with its vibrant colors and delicious flavors.
- Total Time: 20 minutes
- Yield: 4 servings
Ingredients
- Red velvet cake bites or mini cupcakes (store-bought or homemade)
- Red velvet cookies (chewy or crunchy)
- Brie cheese
- White cheddar cheese
- Whipped cream cheese or mascarpone
- Strawberry cream cheese (optional)
- Fresh strawberries, halved
- Raspberries
- Red grapes, seedless
- Chocolate-covered strawberries
- Marshmallows (large or mini)
- Chocolate hearts or Valentine’s candy (optional)
- Chocolate-covered pretzels (white, milk, or dark)
- Red velvet crackers or butter crackers
- Pistachios or candied pecans
- Whipped cream cheese dip
- Strawberry jam or raspberry preserves
- Nutella or chocolate spread
Instructions
- Wash and dry all fruit thoroughly. Slice strawberries in halves and grapes into small clusters for easy grabbing. If using homemade red velvet cake or cookies, cut them into bite-sized pieces (about 1-inch squares or rounds). Unwrap cheeses and let them come to room temperature for about 20 minutes.
- Arrange brie, white cheddar, and cream cheese on the board first, spacing them apart.
- Spoon whipped cream cheese, strawberry jam, and Nutella into small bowls or ramekins and place them on or around the board.
- Pile red velvet cake bites or cookies in the center or just off-center for a dramatic focal point.
- Arrange strawberries, raspberries, grapes, and chocolate-covered strawberries in clusters around the cheeses and cake, alternating colors.
- Tuck in chocolate-covered pretzels, crackers, and nuts wherever there are gaps. Scatter marshmallows or candy in small handfuls.
- Fill any bare spots with extra fruit or candy. Add finishing touches like heart-shaped sprinkles or edible glitter. Place toothpicks or mini tongs near sticky items or dips.
- Serve at room temperature with small plates and napkins for guests.
Notes
Customize with gluten-free, vegan, or nut-free options as needed. For best results, serve at room temperature and assemble just before guests arrive. Use a variety of colors and textures for visual appeal. Prep ingredients ahead, but add delicate items like marshmallows and chocolate right before serving. Don’t worry about perfection—overflowing, abundant boards are most inviting.
- Prep Time: 20 minutes
- Cook Time: 0 minutes
- Category: Appetizer
- Cuisine: American
Nutrition
- Serving Size: ¼ of the board
- Calories: 450600
- Sugar: 2535
- Sodium: 400600
- Fat: 2530
- Saturated Fat: 1216
- Carbohydrates: 4060
- Fiber: 36
- Protein: 1015
Keywords: red velvet cheese board, Galentine’s Day, party appetizer, dessert board, cheese platter, Valentine’s Day, easy entertaining, fruit and cheese, chocolate, sweet snacks


