
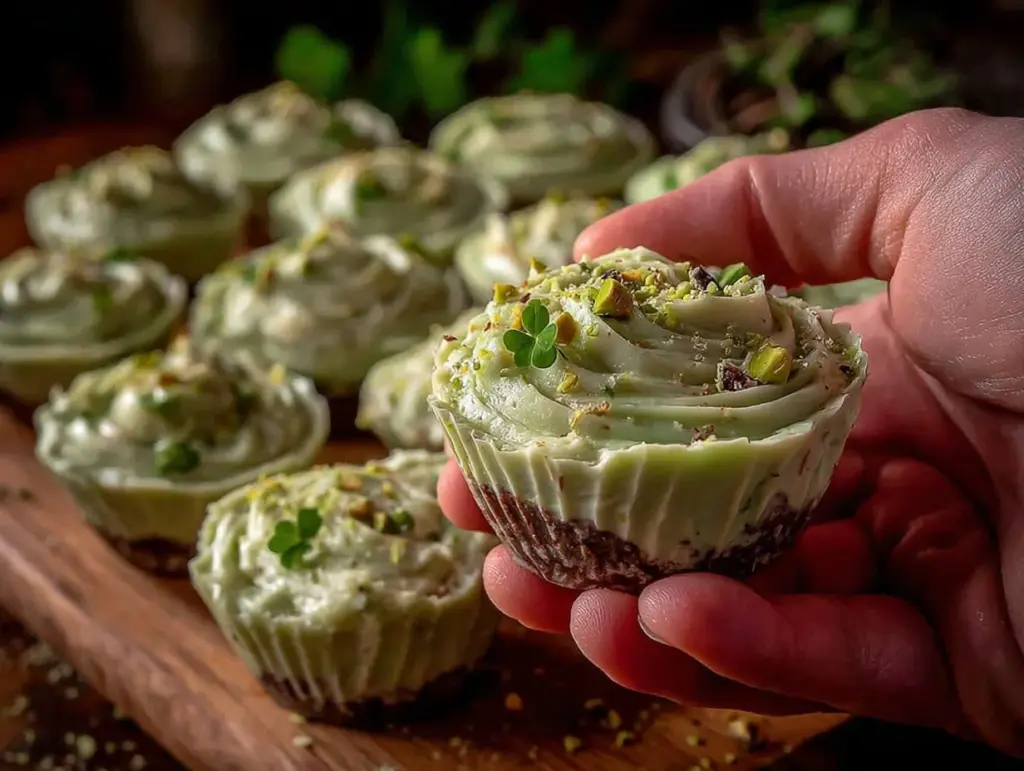
Close your eyes for a second and imagine the scent of sweet vanilla and creamy white chocolate swirling together with a whisper of buttery pistachio, all wrapped up in the most enchanting shade of green. It’s the kind of aroma that sneaks up on you, making your kitchen smell like a confectioner’s dream right before a holiday bash. The first time I made these Creamy St. Patrick’s Lucky Green Fudge Cups, I was honestly just trying to use up some leftover pistachios and fancy sprinkles from last Christmas. But wow—one lick of the spoon and I just stood there, grinning like I’d struck gold at the end of the rainbow (pun totally intended).
Years ago, when I was knee-high to a grasshopper, my grandma used to make these little fudge bites for every special occasion—birthdays, game nights, you name it. She’d always say, “The best treats are the ones that look as good as they taste.” And, let’s face it, when you set these lucky green fudge cups on a platter, people don’t just eat with their eyes—they come running. The first time my kids saw the tiny flecks of gold and green, they squealed and begged to help decorate (and, yes, sneak a few before dinner). My husband? He claims he’s “just taste-testing for quality control,” but I know better.
What I love most about this recipe is how dangerously easy it is to whip up a batch that looks straight out of a designer bakery—no candy thermometer or fancy truffles required. These fudge cups are perfect for St. Patrick’s Day parties, classroom treats, or anytime you want to add a pop of color and fun to your dessert table. You know what? I wish I’d discovered this shortcut recipe years ago. After testing it (multiple times, in the name of research, of course), it’s become a staple for parties, gifting, and those “just because” moments when you need a little magic. Trust me—bookmark this one. It’s pure, nostalgic comfort with a festive twist, and you’ll see why everyone who tries it can’t resist reaching for seconds.
Why You’ll Love This Creamy St. Patrick’s Lucky Green Fudge Cups Recipe
There’s fudge, and then there’s fudge that makes you pause, savor, and maybe even close your eyes because it’s just that good. These Creamy St. Patrick’s Lucky Green Fudge Cups aren’t your run-of-the-mill sweets. They’re a little bit whimsical, a lot delicious, and absolutely guaranteed to get everyone talking at your next St. Patrick’s Day gathering.
- Quick & Easy: You can whip these up in under 30 minutes (plus a bit of chill time)—no baking, no fuss. Perfect for when you remember the class party at 8pm the night before.
- Simple Ingredients: You don’t need anything fancy. Most of this stuff is already hiding in your pantry or fridge.
- Perfect for Parties: Whether you’re hosting a big bash, bringing treats to work, or just want to surprise your neighbors, these fudge cups are a guaranteed hit.
- Crowd-Pleaser: Kids love the color and sparkle, adults go for the creamy texture and that little salty-sweet pistachio crunch. I’ve never had leftovers!
- Unbelievably Delicious: The mix of creamy white chocolate, sweetened condensed milk, and nutty pistachios is pure comfort food, but with an eye-catching, festive twist.
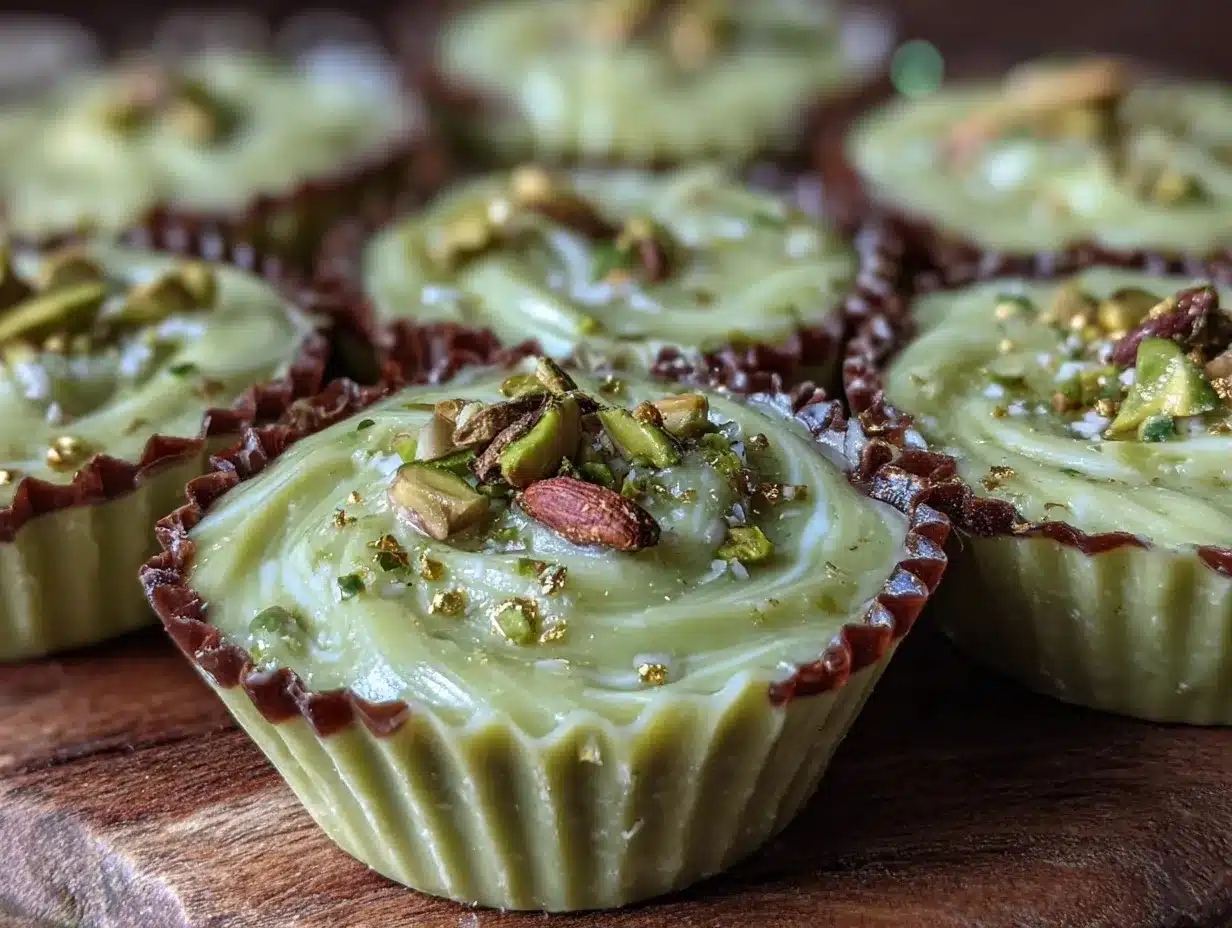
What makes these fudge cups stand out? For one, blending the pistachios into the fudge base (instead of just sprinkling them on top) gives you that smooth, melt-in-your-mouth texture with little bursts of nutty flavor. The addition of a hint of vanilla and a swirl of green food coloring creates that St. Patrick’s Day magic without any artificial taste. And the gold sprinkles? Well, they’re just fun (and who doesn’t need a little sparkle in their day?).
Honestly, I’ve tested a lot of fudge recipes—some too sweet, some too sticky, some that never quite set right. This one nails it every single time. It’s forgiving, flexible, and leaves plenty of room for you to get creative (or let the kids go wild with decorating). It’s the kind of treat you’ll make for the holiday but end up craving all year long. So if you’re after a recipe that’s as impressive as it is easy, this one’s got your back!
What Ingredients You Will Need for Creamy St. Patrick’s Lucky Green Fudge Cups
Let’s talk ingredients. This recipe is all about big flavor with minimal fuss—no hard-to-find stuff, no fancy techniques. Just a handful of pantry staples, a couple of fun extras, and you’re good to go. Here’s what you’ll need to make your own batch of St. Patrick’s Lucky Green Fudge Cups:
- For the Fudge Base:
- White chocolate chips (12 oz / 340 g) – I like Ghirardelli or Nestlé for a smooth, creamy melt.
- Sweetened condensed milk (1 can, 14 oz / 396 g) – This is the magic that makes the fudge set soft and creamy.
- Unsalted butter (2 tablespoons / 28 g), cubed – Adds richness and a silky finish.
- Pistachios, shelled and unsalted (1/2 cup / 65 g), roughly chopped – Gives that nutty bite. You can swap for almonds or leave out for nut-free.
- Vanilla extract (1 teaspoon / 5 ml) – For depth of flavor. Use pure vanilla if you can.
- Salt (1/4 teaspoon / 1 g) – Just a pinch to balance the sweetness.
- Green food coloring gel (about 1/4 teaspoon, or to your liking) – I use AmeriColor Leaf Green for a vibrant, St. Paddy’s look. Liquid coloring works, but gel gives a richer tone with less moisture.
- For the Topping:
- Gold sprinkles or edible glitter (as much as your heart desires) – Look for Wilton or Fancy Sprinkles. Adds the “pot of gold” magic.
- Extra chopped pistachios (2-3 tablespoons / 15-20 g) – For a pretty finish and extra crunch.
- Mini cupcake liners (about 18-20) – I like green, gold, or rainbow foil for the full St. Patrick’s effect.
Ingredient Notes & Substitutions:
- If you’re dairy-free, try using coconut sweetened condensed milk and a dairy-free white chocolate (like Enjoy Life). The texture stays pretty close, though the flavor is a little more tropical.
- For nut allergies, swap pistachios for roasted sunflower seeds or just leave them out. The fudge is still creamy and delicious.
- If you want a slightly less sweet fudge, use half white chocolate and half high-quality milk chocolate chips for a mellow twist.
- Don’t have gold sprinkles? Crushed pretzels or a dusting of cocoa powder can add a fun, salty finish.
This recipe is super flexible, so don’t stress if you need to swap something. The key is that creamy fudge base and a big, bold pop of green!
Equipment Needed to Make Lucky Green Fudge Cups
- Microwave-safe bowl or double boiler: For melting the white chocolate and butter. The microwave is easiest (I do 30-second bursts), but a double boiler works if you want extra control.
- Rubber spatula or wooden spoon: To scrape every last bit of fudge from the bowl (no wasting the good stuff!).
- Measuring cups and spoons: Accurate measurements are key for fudge that sets up just right.
- Mini muffin tin: Holds the liners in place. If you don’t have one, just set the liners on a sturdy tray.
- Mini cupcake liners: For shaping and easy cleanup. Paper or foil both work, but foil holds its shape best.
- Small cookie scoop or spoon: For portioning the fudge into the cups. I like a 1-tablespoon scoop for even sizes.
- Sharp knife and cutting board: For chopping pistachios. (Honestly, I sometimes use a food processor if I’m feeling lazy.)
If you’re missing the mini muffin tin, just use regular cupcake liners in a standard tray—your fudge cups will be a bit bigger, but no one complains! And if you don’t have a microwave, the stovetop does the trick (just keep the heat low so the chocolate doesn’t seize). I’ve used dollar store spatulas and high-end ones, and honestly, for fudge, anything that scrapes clean will do the job. Just rinse tools with hot water right after, so the fudge doesn’t stick.
How to Make Creamy St. Patrick’s Lucky Green Fudge Cups (Step-by-Step)
- Prep Your Gear: Line a mini muffin tin with 18-20 mini cupcake liners. Set aside. Chop your pistachios and gather all your toppings—having everything ready makes assembly a breeze.
- Melt the Chocolate & Butter: In a microwave-safe bowl, combine 12 oz (340 g) white chocolate chips and 2 tablespoons (28 g) unsalted butter. Microwave in 30-second bursts, stirring well after each, until smooth and fully melted (about 1.5–2 minutes total). If using a double boiler, melt over low heat, stirring often. Be careful—white chocolate can scorch quickly.
- Add Sweetened Condensed Milk & Flavorings: Stir in 1 can (14 oz / 396 g) sweetened condensed milk, 1 teaspoon (5 ml) vanilla extract, and 1/4 teaspoon (1 g) salt. Mix until glossy and uniform. The mixture will thicken as you stir—this is normal and means it’s coming together!
- Color & Mix: Add green food coloring gel (start with 1/4 teaspoon, then adjust for your preferred shade). Stir well. Fold in 1/2 cup (65 g) chopped pistachios. The fudge should be thick, creamy, and a brilliant green.
- Portion the Fudge: Using a small cookie scoop or spoon, portion the fudge into the prepared mini liners, filling each about 3/4 full. Tap the tin gently on the counter to flatten the tops.
- Decorate: While the fudge is still soft, sprinkle with extra chopped pistachios and gold sprinkles. Press the toppings in lightly so they stick (kids love helping here!).
- Chill to Set: Transfer the muffin tin to the refrigerator and chill for at least 2 hours, or until the fudge is firm and set. (If you’re in a hurry, 30 minutes in the freezer works, but the texture is creamiest from the fridge.)
- Unmold & Serve: Once set, pop each fudge cup out of the liner and arrange on a platter. They keep their shape at room temperature for a couple of hours—perfect for parties!
Notes & Troubleshooting: If the fudge seems too thick to scoop, microwave for another 10 seconds to loosen. If it looks oily, keep stirring—sometimes the butter separates, but it’ll come together with mixing. If your chocolate seizes (gets grainy), add a splash of warm milk and stir vigorously.
This recipe is forgiving, but a gentle touch goes a long way. And don’t worry if you get a little messy—half the fun is licking the spatula!
Pro Tips & Techniques for Perfect Lucky Green Fudge Cups
After a few (okay, several) batches of these fudge cups, I’ve picked up some handy tricks to guarantee success. Here’s what I’ve learned along the way—sometimes the hard way!
- Use high-quality white chocolate: Not all chocolate chips melt the same. If your chips are stubborn, add a teaspoon of coconut oil to help things along.
- Don’t overheat the chocolate: White chocolate burns fast. Short microwave bursts and lots of stirring work best. If you use a double boiler, go low and slow.
- Mix in the condensed milk quickly: Stir it in while the chocolate is still warm for the smoothest texture. If you wait too long, the mixture can seize up.
- Don’t skimp on the salt: That tiny pinch really balances out all the sweetness. I once forgot it—never again!
- Go easy on the food coloring: A little gel goes a long way. Start small—you can always add more, but you can’t take it out!
- Chill for the best texture: The fudge sets firm in the fridge but stays creamy. Freezing speeds things up, but the fudge might get a little crumbly once thawed.
- Decorate while soft: Sprinkle on toppings right after portioning. If you wait until the fudge sets, nothing sticks (and you’ll be chasing sprinkles around the kitchen).
- Work in batches if doubling: The fudge sets quickly. If you’re making a big batch for a crowd, do it in two rounds so you have time to decorate each cup before it firms up.
Let’s be real—sometimes the fudge gets a little messy, or the color turns a bit “Grinch green.” But honestly, a little imperfection just adds to the homemade charm. And if things go sideways, just pile on extra gold sprinkles. No one complains!
Fun Variations & Adaptations for Every Occasion
One of the best things about these fudge cups? They’re a blank canvas for all sorts of flavors, colors, and dietary tweaks. Here are a few of my favorite spins:
- Mint Chocolate Lucky Cups: Add 1/4 teaspoon peppermint extract and swap half the white chocolate for dark chocolate chips. Top with mini chocolate chips and green sanding sugar for a cool, minty twist.
- Vegan & Dairy-Free: Use coconut sweetened condensed milk and dairy-free white chocolate. I’ve tried it—still creamy, just a bit softer. Top with toasted coconut and pistachios for a plant-based treat.
- Lemon-Pistachio Spring Fudge: Add 1 teaspoon fresh lemon zest and swap gold sprinkles for pastel nonpareils. This version is perfect for Easter or baby showers.
- Nut-Free Option: Leave out the pistachios and add crushed pretzels for crunch. You can also toss in mini marshmallows for a fun, rocky road vibe.
- Sparkle for Every Season: Change the food coloring and sprinkles for any holiday—red and pink for Valentine’s, blue and silver for Hanukkah, orange and black for Halloween. Honestly, this fudge recipe is the gift that keeps on giving!
My personal favorite? Swapping in roasted, salted macadamia nuts and a drop of almond extract. It’s a little tropical, super creamy, and so good with dark chocolate drizzled on top. The options are endless—let your tastebuds (and your pantry) be your guide!
Serving & Storage Suggestions
These creamy fudge cups are best served chilled, straight from the fridge. The texture is dreamy—firm enough to hold, but soft enough to melt in your mouth. If you’re bringing them to a party, arrange them on a green or gold platter for extra St. Patrick’s Day flair. They pair perfectly with a mug of hot chocolate, Irish coffee, or even a cold glass of milk (sometimes, simple is best).
Leftovers (if you have any) can be stored in an airtight container in the fridge for up to a week. For longer storage, freeze the fudge cups in a single layer, then transfer to a zip-top bag. They thaw quickly at room temperature—just 15–20 minutes and they’re good as new. If you like your fudge a little firmer, eat them straight from the freezer (my kids think they taste like ice cream bites this way!).
Honestly, the flavors deepen after a day or two in the fridge. The pistachio gets nuttier, the chocolate a bit richer, and the whole thing just tastes cozier. They’re the perfect make-ahead treat for busy party prep—or for sneaking a sweet bite whenever the mood strikes.
Nutritional Information & Benefits
Each fudge cup is rich and satisfying, with about 120 calories, 6g fat, and 14g carbs per serving (based on a batch of 20 cups). Pistachios add a dose of healthy fats, fiber, and a little protein, while white chocolate and sweetened condensed milk bring the sweet comfort factor. These treats are naturally gluten-free (just check your chocolate and sprinkles), so they’re great for sharing at events where allergies can be tricky. If you need to avoid nuts or dairy, check out the variations above for easy swaps.
As with any sweet, moderation is key. I love that these fudge cups feel indulgent but are small enough to enjoy as a mini dessert. And hey, a little celebration never hurt anyone—especially when there’s green and gold involved!
Conclusion
So there you have it—Creamy St. Patrick’s Lucky Green Fudge Cups with Pistachio & Gold. They’re festive, fun, and honestly a breeze to make, even if you’re not a “baker.” What I love most is how these little cups bring people together—kids, grown-ups, friends, and family all reaching for that one last piece. They’re the kind of treat that fits any occasion, and the variations are endless.
If you’re craving something sweet, colorful, and just a little bit magical, give these fudge cups a try. Tweak the toppings, swap the nuts, or go wild with the sprinkles—this recipe is your playground. I’d love to hear your twists, so drop a comment, share your photos, or tag me in your Pinterest creations. Happy St. Patrick’s Day, and may a little luck (and a lot of fudge) find you this year!
Frequently Asked Questions (FAQs)
Can I make these fudge cups ahead of time?
Absolutely! They keep well in the fridge for up to a week or in the freezer for up to a month. Just thaw before serving for the best creamy texture.
Do I have to use pistachios?
Nope! You can swap in any nut you like, or use pretzels, marshmallows, or even sprinkles for a nut-free version. The fudge is still delicious and festive.
What’s the best way to melt white chocolate without burning it?
Use short, 30-second bursts in the microwave, stirring after each. Or, melt gently over a double boiler. White chocolate scorches fast, so keep the heat low and stir often.
Can I make these fudge cups vegan or dairy-free?
Yes! Use coconut condensed milk and a dairy-free white chocolate. The texture is a little softer, but just as tasty. Top with coconut flakes or seeds if you like.
Why is my fudge grainy or oily?
This can happen if the chocolate overheats or if you add cold condensed milk to hot chocolate. Mix gently, keep the heat low, and stir well—it usually comes together with a bit of patience.
Pin This Recipe!
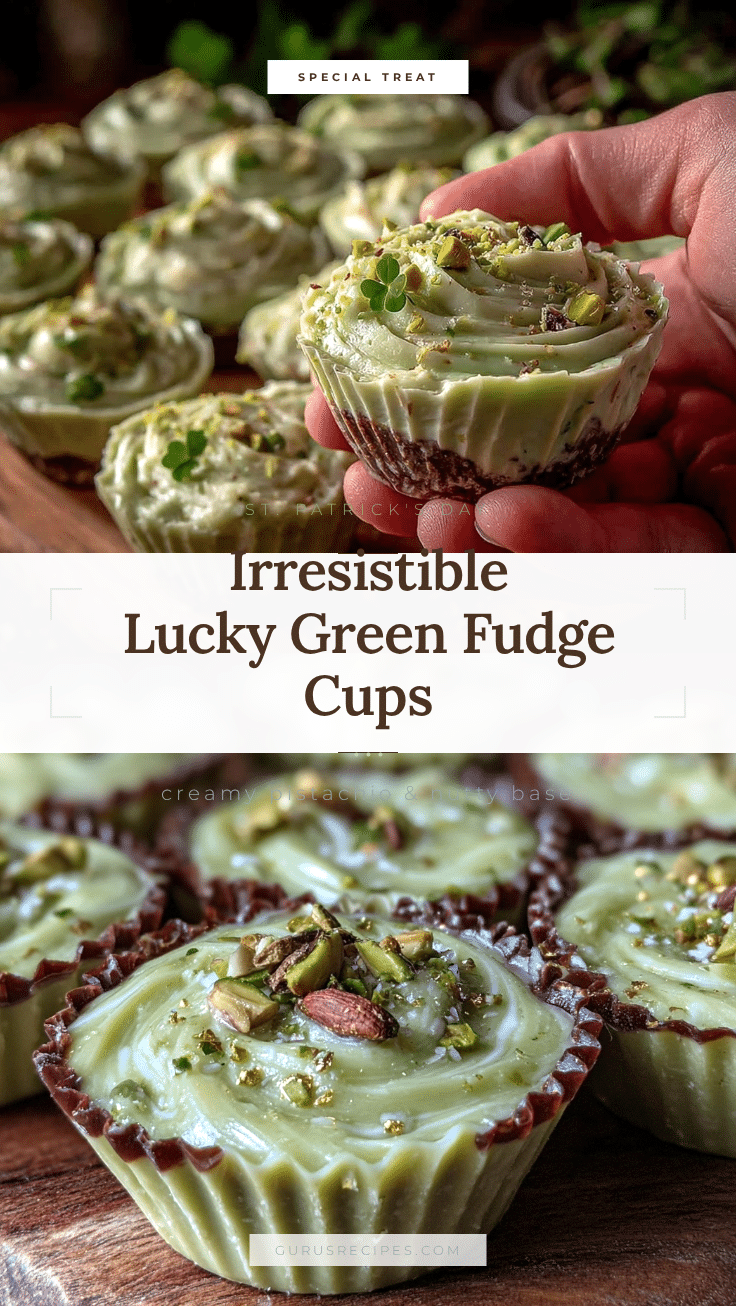

Creamy St. Patrick’s Lucky Green Fudge Cups
These festive fudge cups combine creamy white chocolate, sweetened condensed milk, and nutty pistachios with a pop of green and a sprinkle of gold, making them the perfect easy treat for St. Patrick’s Day parties or any celebration. No baking required—just melt, mix, chill, and enjoy a magical bite-sized dessert everyone will love.
- Total Time: 2 hours 20 minutes
- Yield: 18-20 fudge cups 1x
Ingredients
- 12 oz white chocolate chips (about 2 cups)
- 1 can (14 oz) sweetened condensed milk
- 2 tablespoons unsalted butter, cubed
- 1/2 cup shelled, unsalted pistachios, roughly chopped
- 1 teaspoon vanilla extract
- 1/4 teaspoon salt
- 1/4 teaspoon green food coloring gel (or to desired shade)
- Gold sprinkles or edible glitter (for topping, as desired)
- 2–3 tablespoons extra chopped pistachios (for topping)
- 18–20 mini cupcake liners
Instructions
- Line a mini muffin tin with 18-20 mini cupcake liners. Set aside. Chop pistachios and prepare toppings.
- In a microwave-safe bowl, combine white chocolate chips and unsalted butter. Microwave in 30-second bursts, stirring after each, until smooth and melted (about 1.5–2 minutes total). Alternatively, melt over low heat in a double boiler.
- Stir in sweetened condensed milk, vanilla extract, and salt. Mix until glossy and uniform; mixture will thicken as you stir.
- Add green food coloring gel (start with 1/4 teaspoon, adjust as needed) and stir well. Fold in 1/2 cup chopped pistachios.
- Using a small cookie scoop or spoon, portion fudge into prepared liners, filling each about 3/4 full. Tap tin gently to flatten tops.
- While fudge is still soft, sprinkle with extra chopped pistachios and gold sprinkles. Press toppings in lightly.
- Chill in the refrigerator for at least 2 hours, or until firm and set. (For faster setting, chill in freezer for 30 minutes, but fridge yields creamiest texture.)
- Once set, remove fudge cups from liners and arrange on a platter. Serve chilled or at room temperature for up to 2 hours.
Notes
For best results, use high-quality white chocolate and avoid overheating. Mix in condensed milk while chocolate is still warm for a smooth texture. Decorate fudge cups while soft so toppings stick. Fudge sets best in the fridge. For nut-free, swap pistachios for pretzels or omit. Store in an airtight container in the fridge for up to a week or freeze for up to a month.
- Prep Time: 15 minutes
- Cook Time: 2 minutes
- Category: Dessert
- Cuisine: American
Nutrition
- Serving Size: 1 fudge cup
- Calories: 120
- Sugar: 13
- Sodium: 35
- Fat: 6
- Saturated Fat: 3.5
- Carbohydrates: 14
- Fiber: 0.5
- Protein: 2
Keywords: St. Patrick's Day, fudge, green dessert, pistachio, white chocolate, party treats, no bake, easy dessert, holiday sweets, gluten-free


