
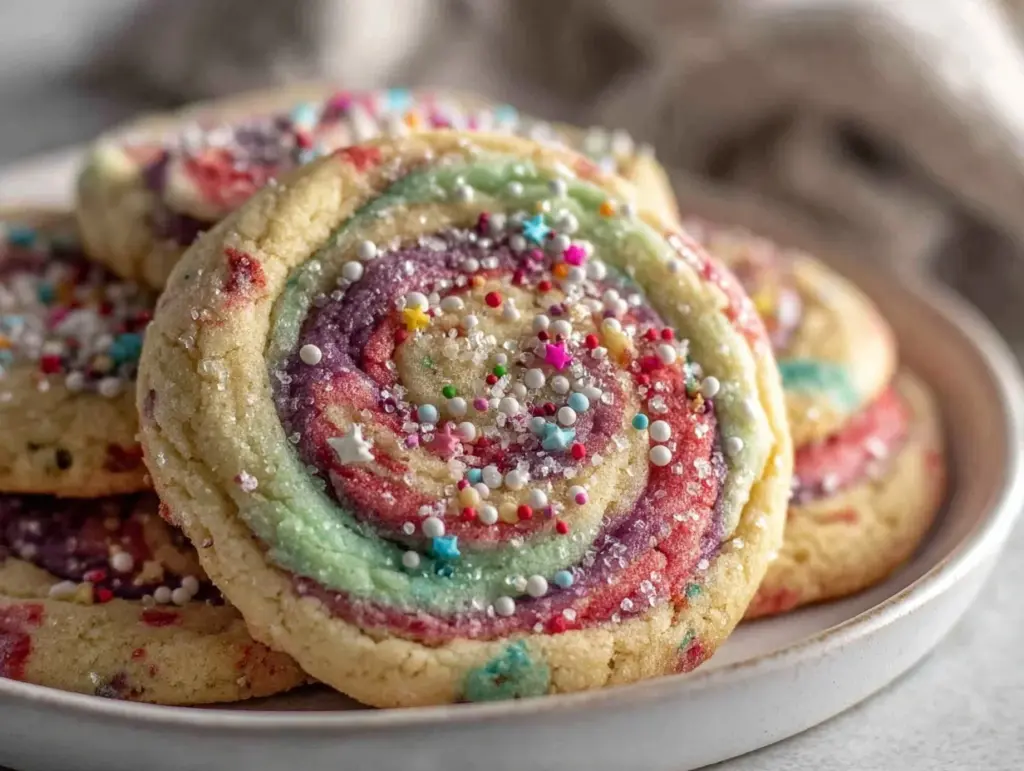
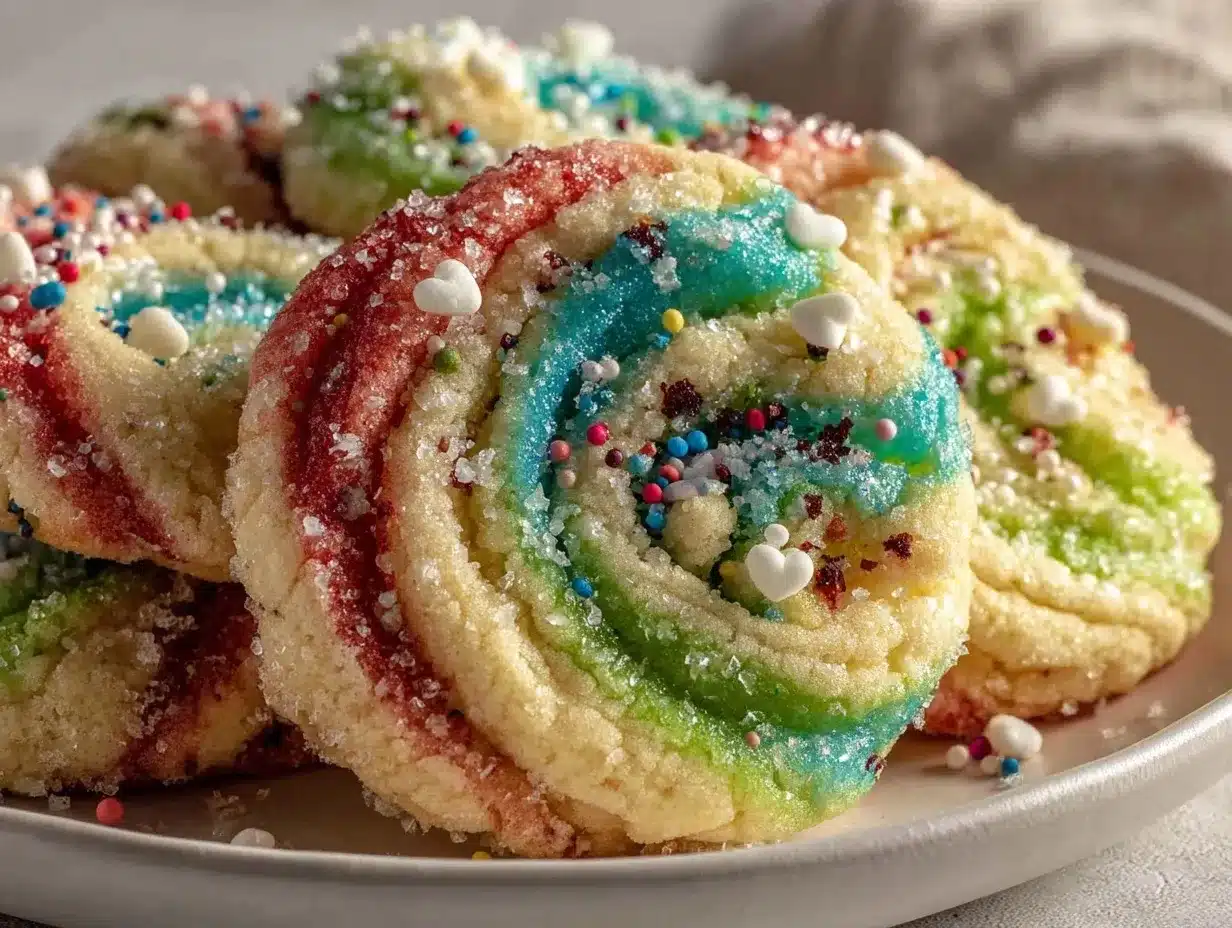
Just imagine—bright, twirling ribbons of color peeking out from a tray, the scent of sweet vanilla and buttery sugar floating through your kitchen, and that moment when you pull a sheet of Whoville Swirl Sugar Cookies from the oven and everyone around you stops, grins, and leans in for a closer look. That’s what this recipe is all about. I’ll never forget the first time I baked these—my kitchen looked like a box of crayons exploded (in the best way), and my kids were practically vibrating with excitement. You know, it’s the kind of moment that makes you pause, take a deep breath, and just smile because you know you’re onto something truly special. There’s pure childhood magic in every bite—like you’ve stepped straight into a Dr. Seuss story.
When I was knee-high to a grasshopper, my grandma used to make old-fashioned sugar cookies for every family gathering. But years ago, in a fit of Seussical inspiration before my daughter’s birthday, I thought, “What if cookies could look as fun as they taste?” That’s how these Whoville Swirl Sugar Cookies spun into our family’s traditions. Honestly, I wish I’d discovered this trick sooner—there’s nothing like watching grown-ups and kids alike light up at the sight of a cookie this whimsical. My family couldn’t stop sneaking them off the cooling rack (and I can’t really blame them). More than once, these have been the showstopper at holiday parties, bake sales, and even as quirky teacher gifts.
These cookies are dangerously easy—pure, nostalgic comfort with a punchy, playful twist. They’re perfect for Dr. Seuss parties, classroom celebrations, or just brightening up your Pinterest cookie board. (And hey, don’t be surprised when folks ask for the recipe.) I’ve tested them more times than I care to admit in the name of research, of course, and now they’re a staple for family gatherings and gifting. They feel like a warm hug, with a side of silly. Trust me—you’re going to want to bookmark this one!
Why You’ll Love This Recipe
Let’s face it—there are a million sugar cookie recipes out there, but these Whoville Swirl Sugar Cookies are the ones you’ll actually want to make over and over. After dozens of batches (and a few flour-dusted mishaps), I’ve dialed in a recipe that’s not just fun to look at, but downright irresistible to eat. Here’s why you’ll be hooked:
- Quick & Easy: Comes together in under an hour (plus chill time), so you’re not stuck in the kitchen all day—great for last-minute party prep.
- Simple Ingredients: No need for fancy stuff. If you have flour, sugar, and butter, you’re halfway there.
- Perfect for Parties: The colors and swirls make these the ultimate Dr. Seuss party treat, or a standout on any dessert table.
- Crowd-Pleaser: Kids go wild for the colors, and adults love the nostalgia. (Honestly, I’ve seen more than one grown-up sneak a second cookie!)
- Unbelievably Delicious: Soft, tender, and buttery with just the right hint of vanilla—no dry, crumbly disappointment here.
What really sets this Whoville Swirl Sugar Cookies recipe apart? It’s all about the method. You roll out layers of colored dough, stack them, and roll them up into a magical swirl. No complicated shaping, no piping bags—just a simple rolling pin and a splash of food coloring. I’ve tweaked the dough for the perfect balance: it’s sturdy enough to hold its shape, but soft enough to melt in your mouth. Plus, you can customize the colors every single time—think birthday themes, holiday palettes, or whatever your Whoville heart desires.
And let’s be honest, these cookies aren’t just good—they’re the kind that make you close your eyes after the first bite. They’re pure comfort in a fun disguise. No matter the occasion, they make people smile, and that’s the real magic. If you’re looking for a recipe that delivers both style and substance, this is your new go-to.
What Ingredients You Will Need
This Whoville Swirl Sugar Cookies recipe sticks to the basics—nothing weird or hard to pronounce here. Everything comes together for a dough that’s easy to work with, holds its shape, and tastes like the best sugar cookie you remember. Here’s what you’ll need:
- For the Cookie Dough:
- 2 3/4 cups (345g) all-purpose flour (I usually reach for King Arthur or Gold Medal for reliability)
- 1/2 teaspoon baking powder (helps keep them tender and light)
- 1/2 teaspoon salt
- 1 cup (226g) unsalted butter, softened to room temperature (don’t skimp on quality—use real butter for flavor!)
- 1 1/4 cups (250g) granulated sugar
- 1 large egg, room temperature
- 2 teaspoons pure vanilla extract (or swap in almond extract for an extra pop)
- Optional: 1/2 teaspoon almond extract (adds a subtle bakery note)
- For the Swirls:
- Assorted gel food coloring (I love AmeriColor or Wilton gels—they give vivid color without making the dough sticky)
- For Rolling (optional but fun):
- Sprinkles, sanding sugar, or nonpareils (pick colors to match your Whoville theme)
Ingredient Tips:
– If you’re out of unsalted butter, use salted—just reduce the added salt to 1/4 teaspoon.
– Gluten-free? Swap in a 1:1 gluten-free flour blend (I’ve had great luck with Bob’s Red Mill).
– Dairy-free? Substitute vegan butter sticks (like Earth Balance) and double-check your sprinkles for hidden dairy.
– Want citrus zing? Add 1/2 teaspoon lemon or orange zest with the sugar.
Most of these are pantry staples, and you can easily customize the colors and sprinkles to suit any occasion. If you can’t find gel food coloring, liquid will work, but the colors may be a little softer. The dough itself is forgiving—just don’t skip chilling, or your swirls might lose their shape.
Equipment Needed
You don’t need a chef’s arsenal to make these Whoville Swirl Sugar Cookies—just a few basics (and maybe a little elbow grease):
- Electric mixer (stand or handheld—either gets the job done)
- Mixing bowls (at least two—one for dough, one for dividing colors)
- Measuring cups and spoons (I swear by metal ones for accuracy)
- Rolling pin (wooden or silicone both work—if you don’t have one, a clean wine bottle does in a pinch!)
- Plastic wrap or parchment paper (for rolling and chilling dough)
- Baking sheets (nonstick or lined with parchment for easy clean-up)
- Sharp knife or bench scraper (for slicing cookies)
- Wire cooling rack
If you have silicone baking mats, they make rolling and transferring dough a breeze. Honestly, I’ve also rolled dough between large sheets of wax paper—works just fine! If your rolling pin sticks, dust it with a little flour or powdered sugar. And here’s a tip: keep a damp towel nearby to wipe up any food coloring mishaps (I’ve learned that one the hard way). No fancy gadgets needed—just a little patience and your favorite kitchen tunes.
How to Make Whoville Swirl Sugar Cookies
Ready to whip up a batch of Whoville magic? Here’s how to make these colorful, swirly sugar cookies, step by step. Grab your apron, and let’s get rolling!
-
Mix the Dry Ingredients:
In a medium bowl, whisk together 2 3/4 cups (345g) all-purpose flour, 1/2 teaspoon baking powder, and 1/2 teaspoon salt. Set aside. -
Cream the Butter and Sugar:
In a large bowl, beat 1 cup (226g) unsalted butter and 1 1/4 cups (250g) granulated sugar together with an electric mixer until light and fluffy (about 2-3 minutes). The mixture should look pale and airy. -
Add Egg and Flavorings:
Beat in 1 large egg and 2 teaspoons vanilla extract (plus almond extract if using) until fully combined. Scrape down the sides as needed. -
Combine Wet and Dry:
Gradually add the flour mixture to the creamed butter, mixing on low just until a soft dough forms. Don’t over-mix—stop when no streaks of flour remain. If dough feels sticky, add up to 2 extra tablespoons flour. -
Divide and Color:
Split dough into as many portions as you want colors (usually 3-4 for a classic Whoville look). Place each portion in a separate bowl. Add a few drops of gel food coloring to each, then knead gently until evenly colored. (Wear gloves if you want to avoid rainbow fingers!) -
Chill:
Wrap each colored dough tightly in plastic wrap. Chill for at least 1 hour, or up to 24 hours. This step keeps your swirls sharp and prevents spreading. -
Roll Out the Layers:
On a lightly floured surface (or between parchment sheets), roll each color into a rectangle about 1/4 inch (6mm) thick and roughly 9×6 inches (23x15cm). Try to keep sizes similar for easy stacking. -
Stack and Roll:
Carefully layer colored dough rectangles on top of each other, pressing gently to stick. Use a rolling pin to flatten slightly if needed. Starting from the long side, roll up the stacked dough tightly into a log (like a jelly roll). Wrap in plastic wrap and chill for another 30 minutes to 2 hours. -
Slice and Decorate:
Preheat oven to 350°F (175°C). Line baking sheets with parchment. Unwrap dough log and use a sharp knife to slice into 1/4 inch (6mm) rounds. Roll edges in sprinkles if desired. Place cookies 2 inches (5cm) apart on baking sheets. -
Bake:
Bake for 9-11 minutes, or until edges are barely golden. Cookies will look soft in the center but set as they cool. Don’t overbake, or they’ll lose that soft, chewy texture. -
Cool and Marvel:
Let cookies cool on the sheet for 2 minutes, then move to a wire rack. Stand back and admire your whimsical swirls!
Troubleshooting: If dough cracks while rolling, let it warm up for 5 minutes. If cookies spread too much, chill the sliced dough for 10 minutes before baking. (Been there, done that!)
Sensory cues: Dough should be cool and pliable, not sticky. When baking, the cookies will puff slightly and edges won’t brown much. If you smell a toasty aroma, check for doneness right away.
Efficiency tips: Roll out dough between sheets of parchment for easy handling and less mess. Slice with a sharp chef’s knife for clean swirls. And don’t stress if your rolls aren’t perfect—wonky swirls taste just as good (sometimes better)!
Cooking Tips & Techniques
There’s a bit of kitchen magic in every batch of Whoville Swirl Sugar Cookies, but a few tricks make all the difference:
- Chill Is Key: Don’t skip chilling the dough between steps—this keeps your swirls sharp and prevents spreading. I learned this the hard way after my first batch turned into psychedelic puddles!
- Use Gel Colors: Gel food coloring is more concentrated and won’t mess with the dough texture. If you only have liquids, use sparingly and add a bit more flour if needed.
- Even Rolling: Try to roll all your colored layers to the same thickness. If you’re a perfectionist (or just a little obsessive, like me), use a ruler or roll between two stacks of chopsticks for guides.
- Sharp Knife for Slicing: A clean, sharp knife gives the best swirls. Wipe the blade between slices for perfect edges.
- Don’t Overbake: The cookies should be pale and just set, not brown. They’ll firm up as they cool. Overbaked cookies are more crunchy, but the soft-and-chewy middle is the goal.
Common mistakes? Not chilling long enough, which leads to spread; or rolling dough too thin, which can make cookies crisp instead of chewy. For multitasking, I color the dough while the oven preheats, then slice and bake in batches while prepping the next tray. Consistency is all about chilling and even rolling. And honestly, if your swirls look “unique,” that just makes them more Seussical! Practice doesn’t hurt—my first rolls were lopsided, but nobody complained. Just have fun with it, and you’ll end up with cookies that taste as good as they look.
Variations & Adaptations
There’s no limit to the fun with Whoville Swirl Sugar Cookies. Here are a few ways to make them your own:
- Dietary Swaps: For gluten-free cookies, use a 1:1 all-purpose gluten-free flour blend (like King Arthur or Bob’s Red Mill). For dairy-free, swap in your favorite vegan butter and double-check your sprinkles.
- Seasonal Colors: Make them red, white, and blue for the Fourth of July; orange and black for Halloween; or pastel for Easter. You can even do rainbow swirls for Pride or birthdays.
- Flavor Twists: Add citrus zest to the dough for a bright twist, or swap in almond or peppermint extract. (My kids love a peppermint swirl version at Christmas!)
- Allergen-Friendly: These work well with egg replacer (like Bob’s Red Mill) if you need egg-free. I’ve made them nut-free for class parties by skipping almond extract.
- Shape Adaptation: Roll the dough into a long rope, then coil into spirals for a pinwheel effect. Or use cookie cutters to make Dr. Seuss-inspired shapes after rolling the dough flat.
Personally, I love adding lemon zest and a touch of lavender extract for a spring tea party version. The possibilities are endless—let your imagination (and your pantry) lead the way. Every batch is a new adventure!
Serving & Storage Suggestions
These Whoville Swirl Sugar Cookies are best served at room temperature—the colors pop and the texture is just right. They look incredible piled high on a bright cake stand, nestled on a platter with matching sprinkles, or tucked into treat bags for party favors. Pair them with milk, hot cocoa, or a fun punch for Dr. Seuss parties.
For storage, keep cookies in an airtight container at room temperature for up to 5 days. To keep them extra soft, toss in a slice of sandwich bread (works like a charm). Need to make ahead? Freeze the dough log, wrapped tightly, for up to a month—just thaw, slice, and bake. Baked cookies also freeze well (single layer, with parchment between), and defrost in minutes on the counter.
If you’re prepping for a party, bake a day or two ahead. The flavors meld as they sit, and the cookies stay tender. To refresh, pop them in a 250°F (120°C) oven for 2-3 minutes. (Just don’t overdo it—soft and chewy is the goal!)
Nutritional Information & Benefits
For the numbers folks: Each Whoville Swirl Sugar Cookie (about 30 per batch) has roughly 110 calories, 5g fat, 15g carbs, and 1g protein. They’re nut-free (unless you add almond extract) and can be made gluten-free or dairy-free with simple swaps.
Butter provides a little vitamin A, and if you add citrus zest, you get a touch of vitamin C. There’s not a lot of fiber here—but these are celebration cookies, after all. Main allergens are wheat, dairy, and egg, but substitutions work well if needed.
My personal perspective? These cookies are all about joy. Sharing something whimsical, colorful, and homemade is a little act of kindness—sometimes that’s the best “nutrition” of all.
Conclusion
Whoville Swirl Sugar Cookies are more than about a pretty plate—they’re a memory in the making, a little party on a tray, and a surefire way to bring smiles to any gathering. They’re simple, fun, and wonderfully adaptable, so you can make them fit any season, color scheme, or dietary need. Honestly, I make these for the joy as much as the taste—they always remind me of family, childhood, and those magical moments only homemade cookies can bring.
Don’t be afraid to add your own twist—play with colors, shapes, or even flavors. That’s where the real fun happens. And if you give them a try, I’d love to hear about your results! Leave a comment, share a picture, or let me know your favorite variation. Whoville would be proud. Happy swirling, friends—and remember, the best recipes are always the ones made with a smile (and maybe a little flour on your nose).
FAQs About Whoville Swirl Sugar Cookies
Can I make the dough ahead of time?
Yes! You can chill the colored dough for up to 24 hours, or freeze the dough log for up to a month. Just thaw slightly before slicing and baking.
What food coloring works best for vibrant swirls?
Gel food coloring is your best bet for bright, vivid colors without making the dough too sticky. I recommend AmeriColor or Wilton brands.
How do I keep the cookies soft?
Don’t overbake! Remove cookies when they’re just set. Store them with a slice of sandwich bread to keep them soft for days.
Can I make these gluten-free or dairy-free?
Absolutely. Use a 1:1 gluten-free flour blend and vegan butter substitutes. They turn out just as magical!
What if my swirls turn out uneven?
No worries! Imperfect swirls are part of the Dr. Seuss fun. Each cookie is a one-of-a-kind masterpiece—embrace the whimsy!
Pin This Recipe!
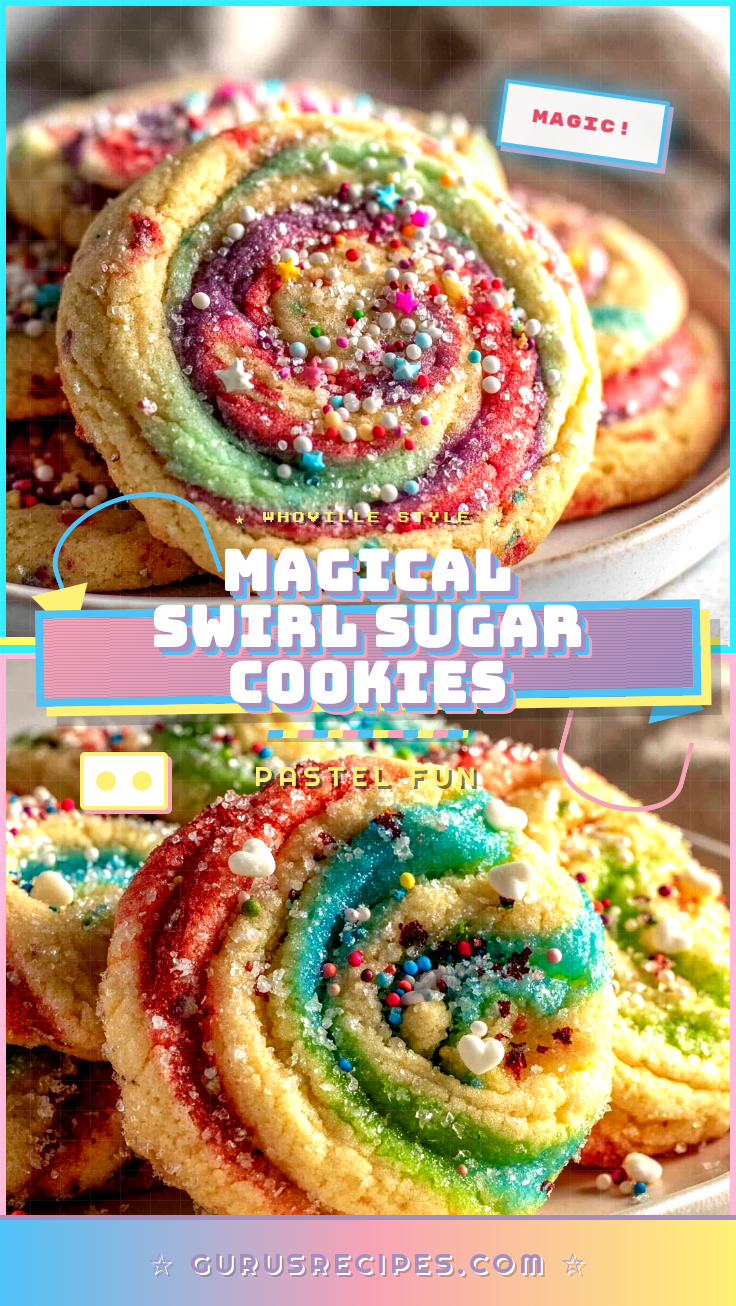

Whoville Swirl Sugar Cookies
These whimsical, colorful sugar cookies feature bright swirls and a soft, buttery texture—perfect for Dr. Seuss parties, holidays, or any occasion that calls for a little magic. Easy to make and endlessly customizable, they’re a guaranteed crowd-pleaser for kids and adults alike.
- Total Time: 1 hour 40 minutes (including chilling time)
- Yield: 30 cookies 1x
Ingredients
- 2 3/4 cups (345g) all-purpose flour
- 1/2 teaspoon baking powder
- 1/2 teaspoon salt
- 1 cup (226g) unsalted butter, softened to room temperature
- 1 1/4 cups (250g) granulated sugar
- 1 large egg, room temperature
- 2 teaspoons pure vanilla extract
- Optional: 1/2 teaspoon almond extract
- Assorted gel food coloring
- Sprinkles, sanding sugar, or nonpareils (optional, for rolling)
Instructions
- In a medium bowl, whisk together flour, baking powder, and salt. Set aside.
- In a large bowl, beat butter and sugar with an electric mixer until light and fluffy, about 2-3 minutes.
- Beat in the egg and vanilla extract (plus almond extract if using) until fully combined.
- Gradually add the flour mixture to the creamed butter, mixing on low just until a soft dough forms. If dough is sticky, add up to 2 extra tablespoons flour.
- Divide dough into as many portions as you want colors (usually 3-4). Place each portion in a separate bowl. Add a few drops of gel food coloring to each and knead gently until evenly colored.
- Wrap each colored dough tightly in plastic wrap. Chill for at least 1 hour, or up to 24 hours.
- On a lightly floured surface or between parchment sheets, roll each color into a rectangle about 1/4 inch thick and roughly 9×6 inches.
- Carefully layer colored dough rectangles on top of each other, pressing gently to stick. Roll up the stacked dough tightly into a log. Wrap in plastic wrap and chill for another 30 minutes to 2 hours.
- Preheat oven to 350°F (175°C). Line baking sheets with parchment paper.
- Unwrap dough log and use a sharp knife to slice into 1/4 inch rounds. Roll edges in sprinkles if desired. Place cookies 2 inches apart on baking sheets.
- Bake for 9-11 minutes, or until edges are barely golden. Cookies will look soft in the center but set as they cool.
- Let cookies cool on the sheet for 2 minutes, then move to a wire rack to cool completely.
Notes
Chilling the dough is essential for sharp swirls and preventing spreading. Use gel food coloring for vibrant colors without altering dough texture. For gluten-free or dairy-free versions, use a 1:1 gluten-free flour blend and vegan butter. Don’t overbake—cookies should be pale and just set. Store with a slice of bread to keep cookies soft.
- Prep Time: 30 minutes
- Cook Time: 10 minutes
- Category: Dessert
- Cuisine: American
Nutrition
- Serving Size: 1 cookie
- Calories: 110
- Sugar: 7
- Sodium: 45
- Fat: 5
- Saturated Fat: 3
- Carbohydrates: 15
- Protein: 1
Keywords: sugar cookies, swirl cookies, Dr. Seuss, party treats, colorful cookies, kid-friendly, holiday cookies, whimsical cookies


