

Picture this: The sweet, slightly tangy aroma of cocoa and vanilla swirling through your kitchen, a pop of vibrant crimson color catching your eye as you peer through the oven door. The first time I pulled a pan of these Red Velvet Cookie Bars with Cream Cheese Swirl from my oven, I’ll admit, I hovered impatiently, practically counting down the minutes ‘til I could slice a square. It’s the kind of moment where you pause, take a deep breath, and just smile because you know you’re onto something truly special. There’s something about red velvet—maybe it’s the nostalgia, or maybe it’s the sheer fun of that bold color—that just brings a little magic to the table.
I remember, years ago, making red velvet cake with my grandma for special occasions. She’d always let me lick the cream cheese frosting spoon (no shame in that!). This cookie bar version is my modern twist—born on a rainy Sunday when I wanted all the flavor with a little less fuss. Let’s face it, sometimes cakes are a whole production, but cookie bars? They’re dangerously easy. And honestly, I wish I’d discovered this shortcut sooner. My family couldn’t stop sneaking pieces off the cooling rack, and one batch disappeared faster than you can say “Valentine’s Day!”
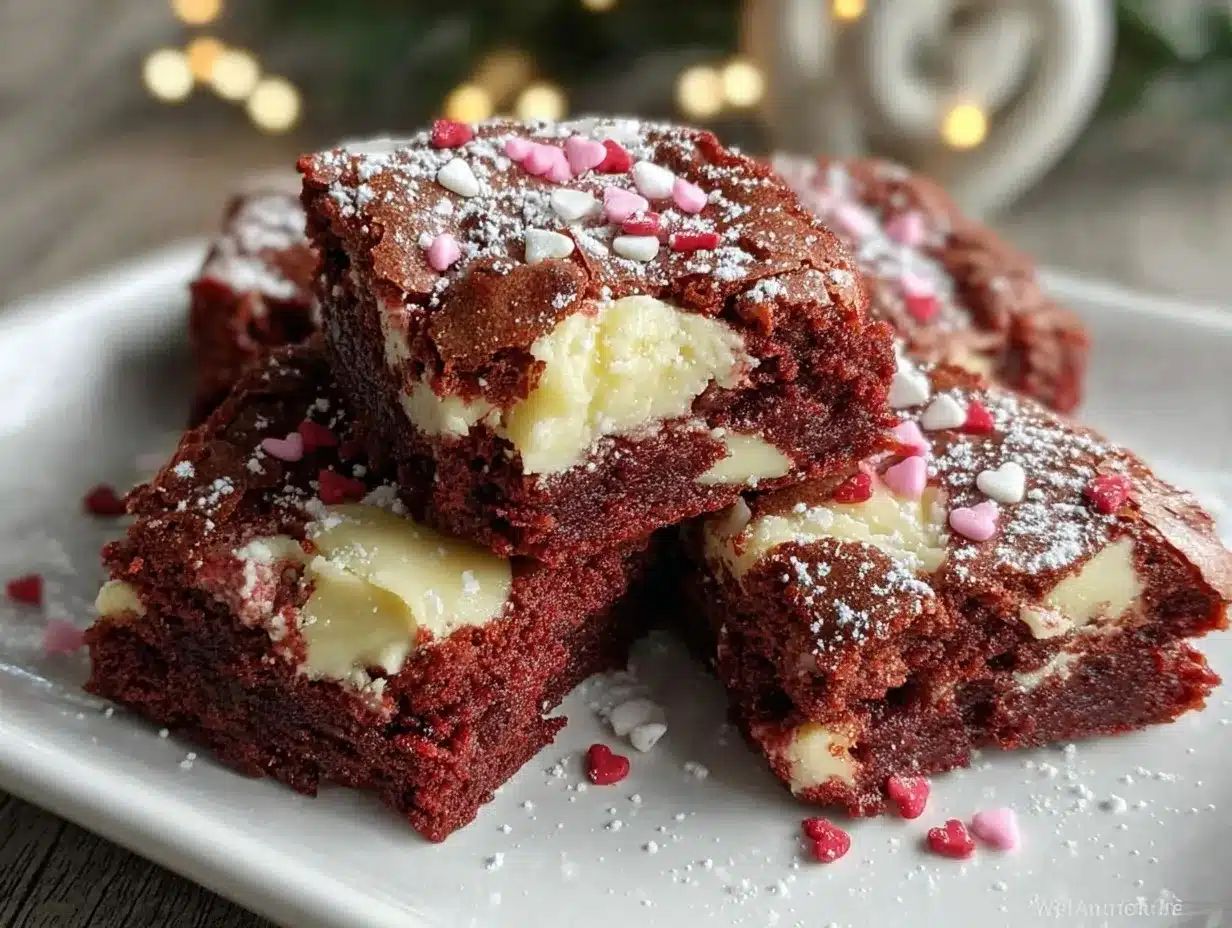
These red velvet cookie bars are perfect for potlucks, gifting to neighbors, or just brightening up your Valentine’s dessert spread. The cream cheese swirl is pure, nostalgic comfort—soft, tangy, and just the right amount of rich. I’ve tested, tweaked, and baked these bars more times than I care to admit (in the name of research, of course), and they’ve become a staple for family gatherings and sweet treat boxes. If you’re looking for a dessert that feels like a warm hug, you’re going to want to bookmark this one. They’re a Pinterest dream come true—eye-catching, simple, and oh-so-shareable!
Why You’ll Love This Red Velvet Cookie Bars Recipe
As someone who’s spent more time than I care to admit tweaking cookie bar recipes, I can promise you—this red velvet cookie bars recipe is a keeper. I’ve pulled from years of baking, family taste tests, and a little professional stubbornness to get this just right. Here’s what you’re in for:
- Quick & Easy: These bars come together in under an hour—no chilling or special steps. Perfect for busy weeknights, last-minute class parties, or when you want dessert without the drama.
- Simple Ingredients: You probably have everything you need in your kitchen already. No need to hunt down fancy chocolate or specialty flours!
- Perfect for Valentine’s Day (and beyond): The gorgeous red color and creamy swirl make them a showstopper for holiday parties, romantic dinners, or just a sweet treat for your kids’ lunchboxes.
- Crowd-Pleaser: I haven’t met a person—kid or adult—who didn’t sneak a second piece. They’re soft, chewy, and perfectly balanced in flavor.
- Unbelievably Delicious: Imagine the flavor of classic red velvet cake, but in chewy, handheld bar form, with tangy cream cheese swirled right in. It’s comfort food, plain and simple.
What sets these red velvet cookie bars apart? For starters, I use just the right amount of cocoa for a true red velvet flavor—not just red food coloring. The cream cheese swirl isn’t just dolloped on top—it’s marbled throughout, ensuring every bite has that dreamy tang. Some recipes use oil, but I stick with real butter for deeper flavor and the perfect soft crumb.
This recipe isn’t just another Pinterest pretty; it’s the kind that makes you close your eyes on the first bite. It’s simple enough for a beginner, but tasty enough to impress even the pickiest dessert lover. If you want a dessert that wows without stress and makes memories, these red velvet cookie bars are about to become your new favorite. (And let’s be honest, they look amazing on a Valentine’s dessert table!)
What Ingredients You Will Need
This red velvet cookie bars recipe keeps things straightforward, with classic ingredients that deliver big flavor and that signature chewy, cake-like texture. I love how most of these are pantry staples, so I don’t have to plan weeks in advance. Here’s what you’ll need:
- For the Red Velvet Cookie Bar Base:
- All-purpose flour (240g) – standard, unbleached flour works best
- Unsweetened cocoa powder (2 tbsp / 12g) – I recommend Hershey’s for classic flavor
- Baking powder (1 tsp / 4g) – for that gentle lift
- Salt (1/2 tsp / 3g) – just enough to balance the sweetness
- Unsalted butter, melted (1/2 cup / 113g) – brings rich flavor and chewy texture
- Granulated sugar (3/4 cup / 150g)
- Brown sugar (1/4 cup / 50g) – adds a touch of caramel depth
- Large eggs (2, room temperature) – helps everything bind and stay tender
- Vanilla extract (2 tsp / 10ml) – pure, if you can swing it!
- Red food coloring (1 tbsp / 15ml) – gel works best for a vibrant color
- White vinegar (1 tsp / 5ml) – the secret for that classic red velvet tang
- For the Cream Cheese Swirl:
- Cream cheese, softened (4 oz / 113g) – I stick with Philadelphia for best texture
- Granulated sugar (1/4 cup / 50g)
- Egg yolk (1, room temperature) – makes the swirl extra creamy
- Vanilla extract (1/2 tsp / 2.5ml)
Ingredient Tips:
- If you only have salted butter, just reduce the added salt by half.
- You can use Neufchâtel cheese for a lower-fat cream cheese swirl, but the classic block style is best for texture.
- No red food coloring? The bars will taste the same, but lose that signature hue—try beet powder for a natural option.
- To make these gluten-free, swap in a measure-for-measure gluten-free flour blend. I’ve had good luck with King Arthur’s mix.
- If you’re dairy-free, use plant-based butter and your favorite dairy-free cream cheese, though the flavor will change a bit.
The best part? You don’t need any fancy ingredients, and the substitutions are forgiving. In summer, I’ve even tossed in a handful of white chocolate chips for extra pizzazz—totally optional, but always a hit!
Equipment Needed
Making these red velvet cookie bars doesn’t require a chef’s arsenal—just a few simple kitchen tools you probably already own:
- 8×8-inch (20x20cm) square baking pan – metal or glass works; metal gives crispier edges
- Parchment paper – for easy lifting (a lifesaver when it comes time to slice!)
- Medium and small mixing bowls – at least two
- Whisk and silicone spatula – or a sturdy spoon
- Measuring cups and spoons – accuracy matters for that perfect texture
- Hand mixer or stand mixer – optional, but makes cream cheese swirl super smooth (a whisk and elbow grease will do in a pinch)
- Toothpick or butter knife – for swirling the cream cheese through the batter
- Cooling rack – helps prevent soggy bottoms
If you don’t have parchment, a well-buttered pan works (but parchment makes cleanup a breeze, trust me). For a more budget-friendly setup, use a sturdy aluminum pan and a classic wooden spoon—I’ve done it plenty of times. Just remember to wash your whisk right after swirling, or that red velvet color will stick around!
How to Make Red Velvet Cookie Bars with Cream Cheese Swirl
- Prep Your Pan and Oven (5 minutes):
Preheat your oven to 350°F (175°C). Line your 8×8-inch (20x20cm) pan with parchment paper, letting some hang over the sides for easy lifting later. If you skip the parchment, make sure to grease the pan well. - Mix the Dry Ingredients (3 minutes):
In a medium bowl, whisk together 1 1/2 cups (240g) all-purpose flour, 2 tbsp (12g) cocoa powder, 1 tsp (4g) baking powder, and 1/2 tsp (3g) salt. Set aside. The cocoa should smell rich and chocolatey—if it’s clumpy, sift it first. - Make the Red Velvet Batter (8 minutes):
In a large mixing bowl, whisk melted butter (1/2 cup / 113g), 3/4 cup (150g) granulated sugar, and 1/4 cup (50g) brown sugar until smooth. Add in 2 eggs (one at a time), whisking well after each. Stir in 2 tsp (10ml) vanilla, 1 tbsp (15ml) red food coloring, and 1 tsp (5ml) vinegar. The batter should look bright red and glossy! - Combine Wet and Dry (2 minutes):
Add the dry ingredients to the wet ingredients and stir gently with a spatula. Don’t overmix—just until you see no more streaks of flour. The batter will be thick and scoopable. - Make the Cream Cheese Swirl (3 minutes):
In a small bowl, beat together the softened cream cheese (4 oz / 113g), 1/4 cup (50g) sugar, 1 egg yolk, and 1/2 tsp (2.5ml) vanilla until smooth and silky. If you have a hand mixer, now’s the time to use it. - Assemble the Bars (3 minutes):
Spread about 3/4 of the red velvet batter evenly into your prepared pan (it’ll be thick, so use a spatula to nudge it into the corners). Dollop spoonfuls of the cream cheese mixture over the top, then drop the remaining red velvet batter in small clumps between the cream cheese. - Swirl It Up (2 minutes):
Use a butter knife or toothpick to gently swirl the batters together, creating a marbled pattern. Don’t overdo it—a few figure-eights is perfect. - Bake (28–32 minutes):
Bake in the preheated oven for 28–32 minutes. The edges should look set, but the center might jiggle just a bit. A toothpick inserted near the edge should come out mostly clean, but a few moist crumbs are good. - Cool Completely (at least 1 hour):
Let the bars cool in the pan on a wire rack for at least an hour. This part is tough, but it makes slicing so much easier, and the flavors develop as they cool. - Slice and Serve:
Lift the bars out using the parchment. Slice into 16 squares. Wipe your knife between cuts for the cleanest lines!
Troubleshooting: If your cream cheese swirl looks runny, make sure your cream cheese isn’t too warm. If the bars seem underbaked in the middle, give them a few more minutes—they’ll firm up as they cool. And if you want thicker bars, use a slightly smaller pan (just add a few minutes to the baking time).
Pro Tips & Techniques for the Best Red Velvet Cookie Bars
- Use room temperature ingredients: This helps everything blend smoothly, especially the cream cheese swirl. Cold eggs or cream cheese can make the batter lumpy.
- Don’t overmix the batter: Overmixing can lead to tough, dry bars. Stir just until combined for the best soft, chewy texture.
- Get that swirl just right: Less is more here. Too much swirling and you’ll lose the pretty marbled look. A few swoops with a butter knife works wonders.
- Watch the baking time: Every oven is a little different (I learned this after burning a batch in my old apartment oven). Start checking at 28 minutes—the edges should be set, but the center can be slightly soft.
- Let them cool completely: I know, the wait is torture, but warm bars are hard to slice and the cream cheese swirl needs time to set. Pop them in the fridge if you’re in a hurry.
- For extra clean slices: Use a sharp knife and wipe it with a damp cloth between cuts. This keeps the red velvet and cream cheese layers distinct and pretty.
- Don’t skip the vinegar: It might seem odd, but it brings out the cocoa flavor and gives the bars that classic red velvet tang.
Honestly, I’ve made every mistake with these bars you can imagine—overbaking, under-swirling, forgetting the vanilla (oops). But each batch taught me something. The more you make them, the easier they get—and the more perfect they’ll turn out every single time. Keep these tips in mind and you’ll have bakery-worthy red velvet cookie bars, no sweat!
Variations & Adaptations
One of my favorite things about this red velvet cookie bars recipe is how flexible it is. You can tweak it for almost any occasion, taste, or dietary need. Here are a few ways to make it your own:
- Gluten-Free: Substitute your favorite 1:1 gluten-free flour blend for the all-purpose flour. I’ve tried King Arthur’s and Bob’s Red Mill with great results—just check for a slightly shorter baking time.
- Dairy-Free: Use plant-based butter and a dairy-free cream cheese (like Kite Hill or Daiya). The texture changes a bit, but the flavor is still fantastic. This is great if you’re baking for mixed dietary needs at a party.
- Chocolate Lover’s Version: Swirl in a handful of mini chocolate chips or white chocolate chips with the cream cheese layer. I did this once for a bake sale and the bars were gone in minutes!
- Seasonal Swaps: For a springy twist, add a sprinkle of freeze-dried raspberries on top before baking. In winter, a dash of cinnamon in the batter adds cozy warmth.
- Nut-Free: The base recipe is naturally nut-free, making it school-friendly. But if you love a little crunch, chopped pecans or walnuts are a tasty addition to the batter.
- Low-Sugar: Substitute a sugar alternative like Swerve or monk fruit sweetener for the granulated sugar. The bars turn out a bit softer but still delicious.
Personally, my favorite twist is swirling in a little raspberry jam with the cream cheese layer—it adds a sweet-tart pop that’s perfect for spring. Don’t be afraid to experiment! This recipe is forgiving, and honestly, some of my best bars have come from happy kitchen accidents.
Serving & Storage Suggestions
Red velvet cookie bars are best served at room temperature—let those flavors shine! For a truly Pinterest-worthy presentation, arrange the squares on a white platter with a few fresh berries or edible flowers. They also look adorable stacked in a cookie tin for gifting (just separate layers with parchment).
Pair these bars with a glass of cold milk, a mug of hot cocoa, or, if you’re feeling fancy, a little sparkling rosé for a grown-up Valentine’s treat. They’re also right at home on a brunch buffet next to fruit salad and coffee.
Storage:
- Counter: Store in an airtight container for up to 2 days.
- Refrigerator: Bars keep well for up to 5 days—just let them come to room temp before serving for best texture.
- Freezer: Layer bars between sheets of parchment in a zip-top bag or freezer-safe box. Freeze up to 2 months. Thaw overnight in the fridge, then bring to room temp.
Reheat gently in the microwave for 10–15 seconds if you like them a touch warm. The flavors deepen as they sit, so don’t be surprised if they taste even better the next day!
Nutritional Information & Benefits
Each red velvet cookie bar (based on 16 squares) contains approximately:
- Calories: 180
- Fat: 8g
- Carbohydrates: 24g
- Protein: 2g
- Sugar: 15g
Key ingredients like cocoa powder bring antioxidants, and cream cheese provides a little protein and calcium. The recipe is nut-free as written and can be adapted for gluten-free or dairy-free diets. (Contains wheat, eggs, and dairy.)
From a wellness perspective, these bars are an occasional treat—but the joy they bring is worth every bite. I believe a little sweetness now and then is good for the soul!
Conclusion
There’s just something special about sharing a pan of homemade red velvet cookie bars—especially with that cheerful cream cheese swirl and the promise of a sweet, soft, chewy bite. Whether you’re baking for Valentine’s Day, a bake sale, or just because, this recipe is easy, reliable, and always a crowd favorite.
Feel free to play with flavors, swap ingredients to fit your needs, and make these bars your own. I love this recipe for its simplicity and the big smiles it brings to every table. If you give these a try, let me know in the comments how they turned out, or share your own twist! Pin this recipe, bake a batch, and watch them disappear—these bars are about to become your new go-to dessert.
Happy baking, and remember: the best recipes are the ones you make your own. Enjoy every bite!
FAQs About Red Velvet Cookie Bars
Can I double this red velvet cookie bars recipe for a bigger crowd?
Absolutely! Just double all ingredients and bake in a 9×13-inch (23x33cm) pan. Add 5–8 minutes to the baking time and check for doneness around the edges.
Can I use natural food coloring instead of red gel?
Yes, beet powder or natural food colorings work, though the color may be less vibrant. The flavor stays the same—delicious!
Why do my bars turn out dry?
This usually means they were overbaked. Start checking at 28 minutes, and remember the bars firm up as they cool. Slightly underbaked in the center is perfect.
Can I freeze these cookie bars?
Definitely. Slice, layer between parchment, and freeze in an airtight container for up to 2 months. Thaw overnight in the fridge for best results.
Is there a substitute for cream cheese in the swirl?
You can use Neufchâtel cheese for a lighter swirl or try a dairy-free cream cheese. Greek yogurt isn’t recommended as it can be too runny for swirling.
Pin This Recipe!


Red Velvet Cookie Bars Recipe – Easy Valentine’s Dessert with Cream Cheese Swirl
These chewy, vibrant red velvet cookie bars feature a marbled cream cheese swirl for a nostalgic, crowd-pleasing treat. Quick to make and perfect for Valentine’s Day, potlucks, or gifting.
- Total Time: 1 hour 45 minutes
- Yield: 16 bars 1x
Ingredients
- 1 1/2 cups all-purpose flour (240g)
- 2 tablespoons unsweetened cocoa powder (12g)
- 1 teaspoon baking powder (4g)
- 1/2 teaspoon salt (3g)
- 1/2 cup unsalted butter, melted (113g)
- 3/4 cup granulated sugar (150g)
- 1/4 cup brown sugar (50g)
- 2 large eggs, room temperature
- 2 teaspoons vanilla extract (10ml)
- 1 tablespoon red food coloring (15ml, gel preferred)
- 1 teaspoon white vinegar (5ml)
- 4 ounces cream cheese, softened (113g)
- 1/4 cup granulated sugar (50g, for swirl)
- 1 egg yolk, room temperature
- 1/2 teaspoon vanilla extract (2.5ml, for swirl)
Instructions
- Preheat oven to 350°F (175°C). Line an 8×8-inch pan with parchment paper, leaving an overhang for easy lifting.
- In a medium bowl, whisk together flour, cocoa powder, baking powder, and salt. Set aside.
- In a large bowl, whisk melted butter, granulated sugar, and brown sugar until smooth. Add eggs one at a time, whisking after each. Stir in vanilla, red food coloring, and vinegar.
- Add dry ingredients to wet ingredients and stir gently with a spatula until just combined. Do not overmix.
- In a small bowl, beat cream cheese, sugar, egg yolk, and vanilla until smooth and creamy.
- Spread about 3/4 of the red velvet batter evenly into the prepared pan. Dollop spoonfuls of the cream cheese mixture over the top, then drop remaining red velvet batter in small clumps between the cream cheese.
- Use a butter knife or toothpick to gently swirl the batters together for a marbled effect.
- Bake for 28–32 minutes, until edges are set and a toothpick near the edge comes out mostly clean.
- Cool completely in the pan on a wire rack for at least 1 hour.
- Lift bars out using parchment, slice into 16 squares, and serve.
Notes
Use room temperature ingredients for best texture. Don’t overmix the batter. For clean slices, wipe your knife between cuts. Bars can be made gluten-free or dairy-free with substitutions. Store in an airtight container at room temperature for 2 days, or refrigerate up to 5 days. Freeze for up to 2 months.
- Prep Time: 15 minutes
- Cook Time: 28–32 minutes
- Category: Dessert
- Cuisine: American
Nutrition
- Serving Size: 1 bar (1/16 of pan)
- Calories: 180
- Sugar: 15
- Sodium: 90
- Fat: 8
- Saturated Fat: 5
- Carbohydrates: 24
- Fiber: 1
- Protein: 2
Keywords: red velvet, cookie bars, cream cheese swirl, Valentine’s dessert, easy dessert, chewy bars, potluck, baking, holiday treat


