
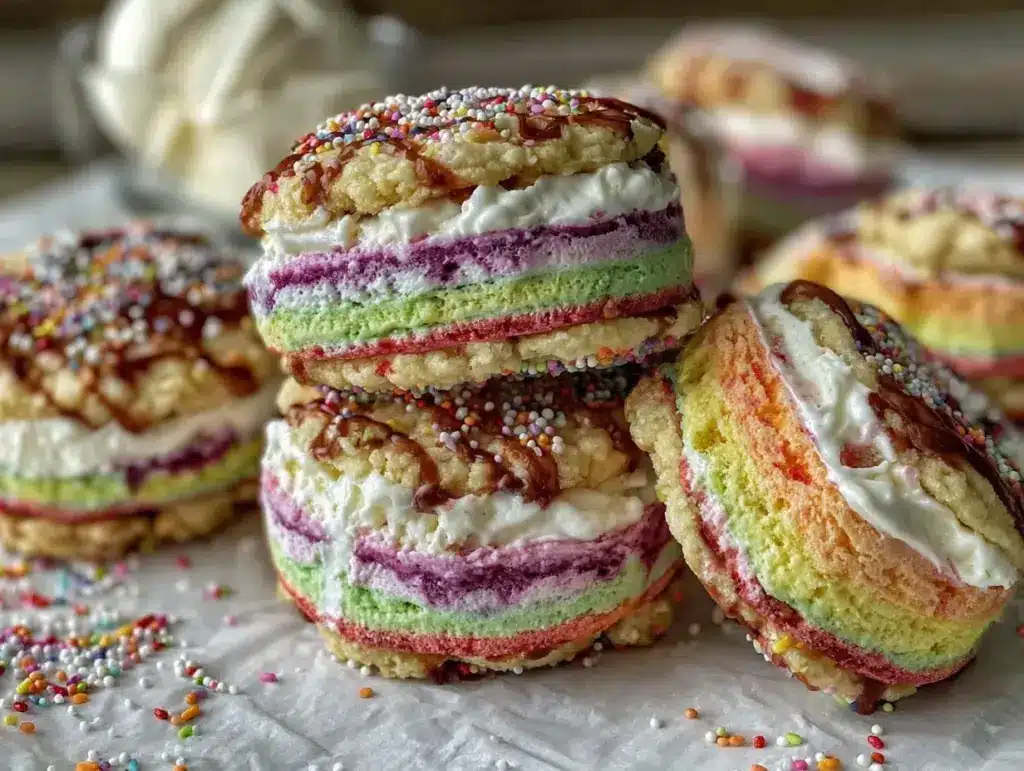
Let me paint you a picture: the kitchen is alive with bursts of color, laughter’s echoing, and the sweet scent of sugar cookies dances in the air. That’s the magic that happens every time I whip up these Dr. Seuss Rainbow Ice Cream Sandwiches. The first time I made these—well, it was one of those rare afternoons when the sun poured through the window and the world felt extra bright. I remember sliding my first tray of rainbow-striped cookies from the oven, and pausing—just to take it all in. (And to resist the urge to eat them all right there!)
This recipe came to life on a whim, inspired by my childhood love for Dr. Seuss’s wild, whimsical worlds—those pages filled with impossible colors and zigzagging lines. When I was knee-high to a grasshopper, I’d get lost in “Oh, the Places You’ll Go!” and dream up fantastical snacks. Years later, I tried recreating that wonder for my own kids’ birthday bash. Let’s face it: nothing brightens up a party table (or a gloomy afternoon) quite like a tray of rainbow ice cream sandwiches. My family couldn’t stop sneaking them off the cooling rack and, honestly, I can’t blame them. These are dangerously easy to love.
They’ve become a staple for every celebration—birthday parties, school bake sales, even rainy-day kitchen adventures. If you want to see kids’ eyes light up or impress your Pinterest followers, these are your ticket. And the best part? You’d never guess how simple they are. I’ve tested this recipe more times than I care to admit, in the name of research, of course. Now it’s my go-to for gifting, family gatherings, or just a sweet treat to share with friends. Each bite is pure, nostalgic comfort with a whimsical twist—like a warm hug from your favorite childhood storybook. You’re going to want to bookmark this one.
Why You’ll Love This Recipe
There’s a reason these Dr. Seuss Rainbow Ice Cream Sandwiches are always the first thing to disappear at parties. I’ve baked (and taste-tested!) more batches than I can count, so trust me—these are the real deal. Here’s why you’ll fall in love with them, too:
- Quick & Easy: You don’t need to spend hours in the kitchen. These come together in about 45 minutes, making them perfect for busy schedules or last-minute party prep.
- Simple Ingredients: No need for specialty stores or hard-to-find items. Everything you need is probably already in your pantry or local grocery store.
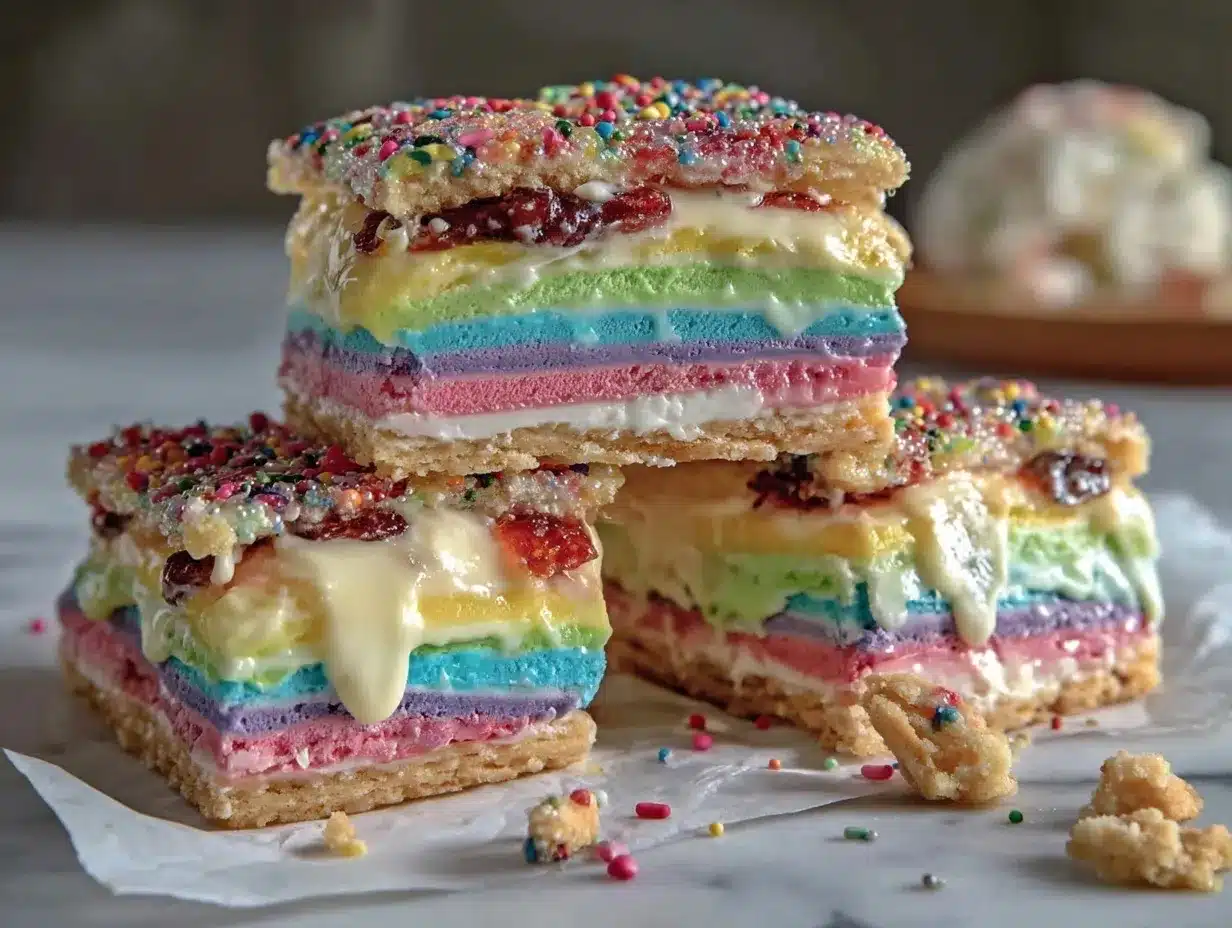
- Perfect for Parties: These ice cream sandwiches steal the show at birthday parties, classroom celebrations, and summer get-togethers. The rainbow stripes make them a showstopper for any occasion.
- Crowd-Pleaser: Kids, teens, and adults all go wild for these. I’ve even had party guests ask for the recipe before the first bite is finished!
- Unbelievably Delicious: The soft, chewy cookies and creamy ice cream are the ultimate comfort combo, with just the right amount of sweetness and a hint of vanilla.
What sets these ice cream sandwiches apart? It’s the way the colors swirl together, and the simple trick of using gel food coloring for those vivid stripes (no weird aftertaste!). I use a no-chill sugar cookie dough—no waiting around for dough to harden in the fridge. The cookies stay soft and chewy, even straight from the freezer. You can swap in your favorite ice cream flavor, too—vanilla, strawberry, or even a dairy-free option for your vegan pals.
This isn’t just another sugar cookie sandwich. It’s comfort food with a playful twist—something that makes you grin as soon as you take a bite. Whether you want to impress guests or just make a Tuesday feel special, these are the kind of treats that make memories. The best part? You don’t need to be a pro baker to pull them off. This recipe brings the fun back to baking, and that’s what it’s all about.
What Ingredients You Will Need
This recipe uses simple, wholesome ingredients to deliver bold flavor and the kind of bright, happy color that just begs to be Instagrammed. Most of these are pantry staples, and you can easily swap a few things if needed. Here’s what you need for your Dr. Seuss Rainbow Ice Cream Sandwiches:
- For the Rainbow Sugar Cookies:
- 2 3/4 cups (345g) all-purpose flour (King Arthur or Gold Medal work well)
- 1/2 teaspoon baking powder
- 1/2 teaspoon baking soda
- 1/2 teaspoon salt
- 1 cup (226g) unsalted butter, room temperature (adds richness and keeps cookies soft)
- 1 1/2 cups (300g) granulated sugar
- 1 large egg, room temperature
- 2 teaspoons pure vanilla extract (Madagascar vanilla gives the best flavor)
- 1/2 teaspoon almond extract (optional, for a hint of extra sweetness)
- Food coloring gels (red, orange, yellow, green, blue, purple—for those bright rainbow stripes; I recommend AmeriColor or Wilton)
- For the Ice Cream Filling:
- 1.5 quarts (about 1.4L) vanilla ice cream (or your favorite flavor, slightly softened)
- Optional: strawberry, chocolate, or birthday cake ice cream for fun flavor twists
- For Decorating (Optional):
- Rainbow sprinkles (for rolling the sandwich edges)
- Mini chocolate chips or crushed freeze-dried fruit (for a little crunch or extra color)
Ingredient Notes & Tips:
- If you’re gluten-free, swap the all-purpose flour for a 1:1 gluten-free blend (Bob’s Red Mill works well).
- Dairy-free? Use plant-based butter and your favorite dairy-free ice cream.
- No almond extract? Just leave it out—the vanilla will shine through.
- Gel food coloring is key for those vivid stripes. Liquid food coloring can water down your dough and mute the colors.
- In a pinch, you can use store-bought sugar cookie dough, but homemade tastes best!
Equipment Needed
You really don’t need much to whip up these whimsical treats, but having the right tools makes things easier (and more fun):
- Electric mixer (stand mixer or hand mixer—either works, but a stand mixer is a little faster for creaming butter and sugar)
- Mixing bowls (at least two: one for dry, one for wet, plus a few small bowls for dividing and coloring the dough)
- Measuring cups and spoons (for accuracy—trust me, it matters with cookies!)
- Rubber spatula (for scraping every last bit of dough and folding in colors)
- Baking sheets (lined with parchment paper or silicone baking mats for easy cleanup)
- Ice cream scoop (for portioning dough evenly)
- Knife or bench scraper (for swirling and shaping those rainbow stripes)
- Cooling rack (so cookies don’t get soggy bottoms—always a party foul!)
- Small offset spatula or butter knife (for spreading ice cream)
- Plastic wrap or parchment paper (for wrapping sandwiches before freezing)
No stand mixer? A sturdy wooden spoon and some elbow grease will do the trick. If you don’t have silicone mats, parchment paper works just fine (and makes cleanup a breeze). I’ve used everything from budget baking sheets to fancy ones, and honestly, they all work—just keep an eye on your cookies so they don’t get too brown on the bottom. Store your food coloring gels in a cool, dark spot and they’ll last for ages.
Preparation Method
- Preheat and Prep:
- Preheat your oven to 350°F (175°C).
- Line two baking sheets with parchment paper or silicone baking mats.
- Mix the Dry Ingredients:
- In a medium bowl, whisk together 2 3/4 cups (345g) flour, 1/2 tsp baking powder, 1/2 tsp baking soda, and 1/2 tsp salt. Set aside.
- Cream Butter and Sugar:
- In a large mixing bowl, beat 1 cup (226g) unsalted butter and 1 1/2 cups (300g) sugar together on medium speed until pale and fluffy—about 2-3 minutes. The mixture should look light and airy.
- Add Egg and Flavorings:
- Beat in 1 large egg, 2 tsp vanilla extract, and 1/2 tsp almond extract (if using) until combined. Scrape down the sides as needed.
- Combine Wet and Dry:
- On low speed, gradually add the dry mixture to the wet. Mix just until a soft dough forms—don’t overmix or cookies get tough.
- Divide and Color the Dough:
- Divide the dough evenly into six small bowls (one for each color of the rainbow). Add a small amount of gel food coloring to each bowl and mix until vibrant. (Use gloves or a spoon to avoid rainbow hands!)
- Form Rainbow Stripes:
- Pinch off small pieces of each color and gently press them together into a ball—don’t overmix, or colors will blend. Roll the ball gently to swirl, then flatten slightly to form a disk (about 2 inches/5cm wide).
- For perfect stripes, stack strips of dough and gently press together before rolling into a ball.
- Bake:
- Place dough balls on your prepared baking sheets, about 2 inches (5cm) apart. Bake for 9-11 minutes, until edges are set but centers are still soft. The cookies should look slightly underdone in the middle (they firm up as they cool).
- Cool:
- Let cookies cool on the baking sheet for 5 minutes, then transfer to a wire rack to cool completely. (Sneaking one warm is always tempting, but wait—they’ll hold up better for sandwiches once cool!)
- Assemble the Sandwiches:
- Once cookies are cool, lay half of them upside down on a baking sheet. Working quickly, place a scoop (about 1/4 cup/60ml) of slightly softened ice cream on each. Top with another cookie, pressing gently to spread the ice cream evenly.
- If you want, roll the sandwich edges in rainbow sprinkles or mini chocolate chips for extra flair.
- Freeze:
- Wrap each sandwich in plastic wrap or parchment and freeze at least 1 hour, until firm. (Overnight is even better for parties.)
- Serve:
- Let sandwiches sit at room temperature for 5 minutes before serving for a softer bite. Watch those colors pop!
Troubleshooting: If your cookies spread too much, the dough might be too warm—chill for 10 minutes before baking. If the ice cream melts too quickly, work in small batches and return sandwiches to the freezer as you go. A little patience goes a long way!
Cooking Tips & Techniques
Honestly, making these Dr. Seuss Rainbow Ice Cream Sandwiches is as fun as eating them, but a few tricks make all the difference:
- Use Gel Food Coloring: Liquid dyes can water down your dough and make colors muddy. A little gel goes a long way for bold stripes without affecting texture.
- Don’t Overwork the Dough: Swirl colors gently—too much mixing and you’ll end up with brown cookies (learned that one the hard way!). Just a couple of folds for those Seuss-like swirls.
- Chill if Needed: If your kitchen is warm or your dough feels sticky, pop it in the fridge for 10-15 minutes. It’ll be easier to handle and cookies won’t spread too much.
- Freeze the Ice Cream Slightly Softened: Scoopable but not runny is the sweet spot. Too hard and it’ll crack your cookies, too soft and it melts everywhere.
- Multitasking: While the cookies bake, let the ice cream sit at room temp. By the time cookies are cool, the ice cream’s ready to scoop—max efficiency!
- Uniform Cookies: Use a cookie scoop or weigh your dough balls for even sandwiches. That way, every bite is perfectly balanced.
- Decorating: Sprinkles are fun, but don’t press too hard or cookies may crack. A gentle roll is all you need.
My first batch was a bit wild—colors blended, cookies spread, and I learned to keep things chilled. If you do get a few “creative” shapes, just call them Seussical originals! Remember, it’s all about the fun and the flavor.
Variations & Adaptations
One of the best things about Dr. Seuss Rainbow Ice Cream Sandwiches? They’re endlessly customizable! Here are a few ways to mix it up:
- Dietary Variations:
- Gluten-free: Substitute your favorite 1:1 gluten-free baking flour for the all-purpose flour. I’ve used Bob’s Red Mill and it works like a charm.
- Dairy-free/Vegan: Use plant-based butter and a dairy-free ice cream (like coconut or oat-based). Try So Delicious or NadaMoo for creamy results.
- Nut-free: Just skip the almond extract—the vanilla is plenty flavorful.
- Seasonal Flavor Twists:
- Try peppermint ice cream for winter parties, or lemon sorbet for a summer bash. You can even add lemon zest to the cookie dough for a citrusy kick.
- Fun Color Combos:
- Go pastel for baby showers, red and green for Christmas, or school colors for a graduation party. The method is the same, just pick your palette.
- Shape Adaptations:
- Cut cookies with star or heart-shaped cutters for extra whimsy. They’ll bake a little faster, so check at 7-8 minutes.
- Personal Favorite:
- I once made these with chocolate chip cookie dough and filled them with mint ice cream. Not traditional, but oh-so-good!
Don’t be afraid to get creative. The best part is seeing what wild combos you (or your kids) dream up!
Serving & Storage Suggestions
For the best party wow factor, serve these Dr. Seuss Rainbow Ice Cream Sandwiches straight from the freezer. The colors stay bright, and the cookies hold their shape perfectly. I like to stack them on a platter lined with parchment, so they don’t stick together. For a real Seussical touch, tuck in a few colorful paper straws or mini flags.
Pair with lemonade, fruit punch, or a fizzy soda for a festive spread. They also look adorable alongside a rainbow fruit salad or a tray of simple cheese and crackers—keeps things balanced!
Storage Tips:
- Wrap each sandwich individually in plastic wrap or parchment and store in an airtight container in the freezer for up to 2 weeks.
- Let them sit at room temperature for 5 minutes before serving so the ice cream softens just enough for the perfect bite.
- If you want to prep ahead, bake the cookies in advance and freeze them (unassembled) for up to a month. Assemble with ice cream the morning of your party for maximum freshness.
- The flavors meld as they sit—day-old sandwiches are somehow even tastier (if you’re lucky enough to have leftovers!).
Nutritional Information & Benefits
Each Dr. Seuss Rainbow Ice Cream Sandwich (with vanilla ice cream and sprinkles) is approximately:
- Calories: 310
- Fat: 14g
- Carbohydrates: 42g
- Protein: 4g
- Sugar: 25g
Of course, exact numbers will vary depending on your ice cream and decorations. The bright side? You get a little calcium from the dairy, and the cookies are free from artificial flavors. For a lighter version, use low-sugar ice cream and skip the sprinkles. Always check ingredient labels if you have allergies—swap out for gluten-free, nut-free, or dairy-free as needed. My personal take: these are a treat for special occasions, meant to bring joy and a splash of color to your day!
Conclusion
So, why not try these Dr. Seuss Rainbow Ice Cream Sandwiches for your next party (or just because you need a little color in your week)? They’re easy, fun, and full of pure, happy flavor. Whether you stick with the classic recipe or add your own twist, these sandwiches are sure to become a family favorite—just like they have in my kitchen.
I hope you’ll get creative with the colors, flavors, and fillings. There’s no wrong way to make them your own! I love this recipe because it brings smiles every time, and the memories made are even sweeter than the cookies. If you make these, let me know—leave a comment, share your photos, or tag your creations online. Your feedback and creativity inspire me to keep baking and sharing!
Here’s to making every day a little more whimsical—one rainbow treat at a time.
Frequently Asked Questions
Can I make the cookies ahead of time?
Absolutely! You can bake the cookies up to a week ahead and store them in an airtight container. Freeze for longer storage and just assemble with ice cream on the day you need them.
How do I keep the ice cream from melting while assembling?
Work in small batches and keep the filled sandwiches in the freezer as you go. If your kitchen is warm, chill your cookie sheet before assembling for extra insurance.
What are the best food coloring brands for bright rainbow stripes?
Gel food colorings like AmeriColor or Wilton work best. They give you vivid colors without thinning the dough.
Can I use store-bought sugar cookie dough?
Yes! If you’re in a hurry, you can use store-bought dough. Just let it soften a bit so you can easily mix in the colors. Homemade has a better flavor, but both work for a party pinch.
Do these work with non-dairy or gluten-free ingredients?
Definitely. Use a gluten-free flour blend and dairy-free ice cream or butter as needed. The cookies still turn out soft and delicious, and everyone can enjoy a bite of whimsy!
Pin This Recipe!
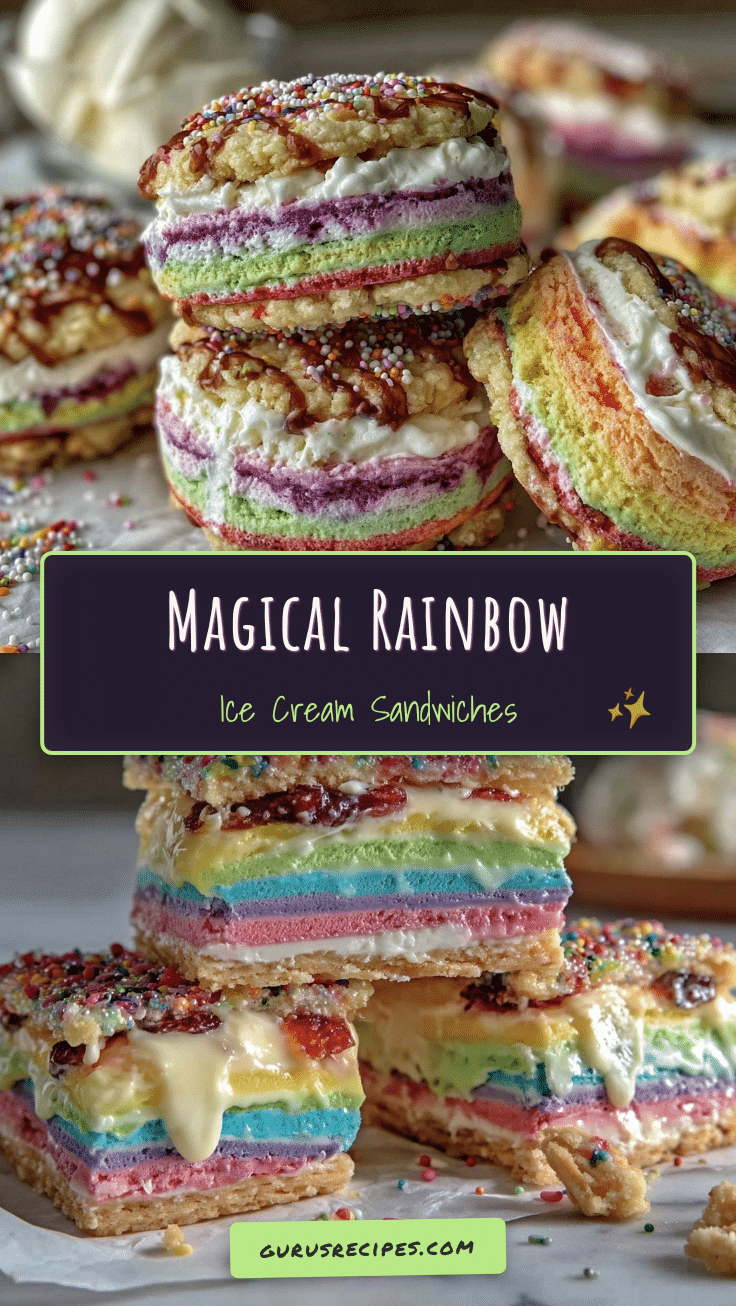

Dr. Seuss Rainbow Ice Cream Sandwiches
These whimsical rainbow ice cream sandwiches feature soft, chewy sugar cookies swirled with vibrant colors and creamy ice cream, making them the perfect party treat for kids and adults alike. Easy to make and endlessly customizable, they’re guaranteed to bring smiles to any celebration.
- Total Time: 45 minutes
- Yield: 12 sandwiches 1x
Ingredients
- 2 3/4 cups all-purpose flour
- 1/2 teaspoon baking powder
- 1/2 teaspoon baking soda
- 1/2 teaspoon salt
- 1 cup unsalted butter, room temperature
- 1 1/2 cups granulated sugar
- 1 large egg, room temperature
- 2 teaspoons pure vanilla extract
- 1/2 teaspoon almond extract (optional)
- Gel food coloring (red, orange, yellow, green, blue, purple)
- 1.5 quarts vanilla ice cream (or your favorite flavor), slightly softened
- Rainbow sprinkles (optional, for decorating)
- Mini chocolate chips or crushed freeze-dried fruit (optional, for decorating)
Instructions
- Preheat your oven to 350°F (175°C). Line two baking sheets with parchment paper or silicone baking mats.
- In a medium bowl, whisk together flour, baking powder, baking soda, and salt. Set aside.
- In a large mixing bowl, beat unsalted butter and granulated sugar together on medium speed until pale and fluffy, about 2-3 minutes.
- Beat in the egg, vanilla extract, and almond extract (if using) until combined. Scrape down the sides as needed.
- On low speed, gradually add the dry mixture to the wet ingredients. Mix just until a soft dough forms; do not overmix.
- Divide the dough evenly into six small bowls. Add a small amount of gel food coloring to each bowl and mix until vibrant.
- Pinch off small pieces of each color and gently press them together into a ball. Roll the ball gently to swirl, then flatten slightly to form a disk about 2 inches wide.
- Place dough balls on prepared baking sheets, about 2 inches apart. Bake for 9-11 minutes, until edges are set but centers are still soft.
- Let cookies cool on the baking sheet for 5 minutes, then transfer to a wire rack to cool completely.
- Once cookies are cool, lay half of them upside down on a baking sheet. Working quickly, place a scoop (about 1/4 cup) of slightly softened ice cream on each. Top with another cookie, pressing gently to spread the ice cream evenly.
- If desired, roll the sandwich edges in rainbow sprinkles or mini chocolate chips.
- Wrap each sandwich in plastic wrap or parchment and freeze at least 1 hour, until firm.
- Let sandwiches sit at room temperature for 5 minutes before serving.
Notes
For best color, use gel food coloring. Do not overmix dough after adding colors to avoid muddying the stripes. If dough is sticky or warm, chill for 10-15 minutes before shaping. Cookies can be made gluten-free or dairy-free with appropriate substitutions. Store assembled sandwiches in the freezer for up to 2 weeks.
- Prep Time: 25 minutes
- Cook Time: 10 minutes
- Category: Dessert
- Cuisine: American
Nutrition
- Serving Size: 1 sandwich
- Calories: 310
- Sugar: 25
- Sodium: 120
- Fat: 14
- Saturated Fat: 8
- Carbohydrates: 42
- Fiber: 1
- Protein: 4
Keywords: rainbow ice cream sandwiches, Dr. Seuss dessert, party treats, sugar cookies, colorful dessert, kid-friendly, birthday party, summer dessert


