

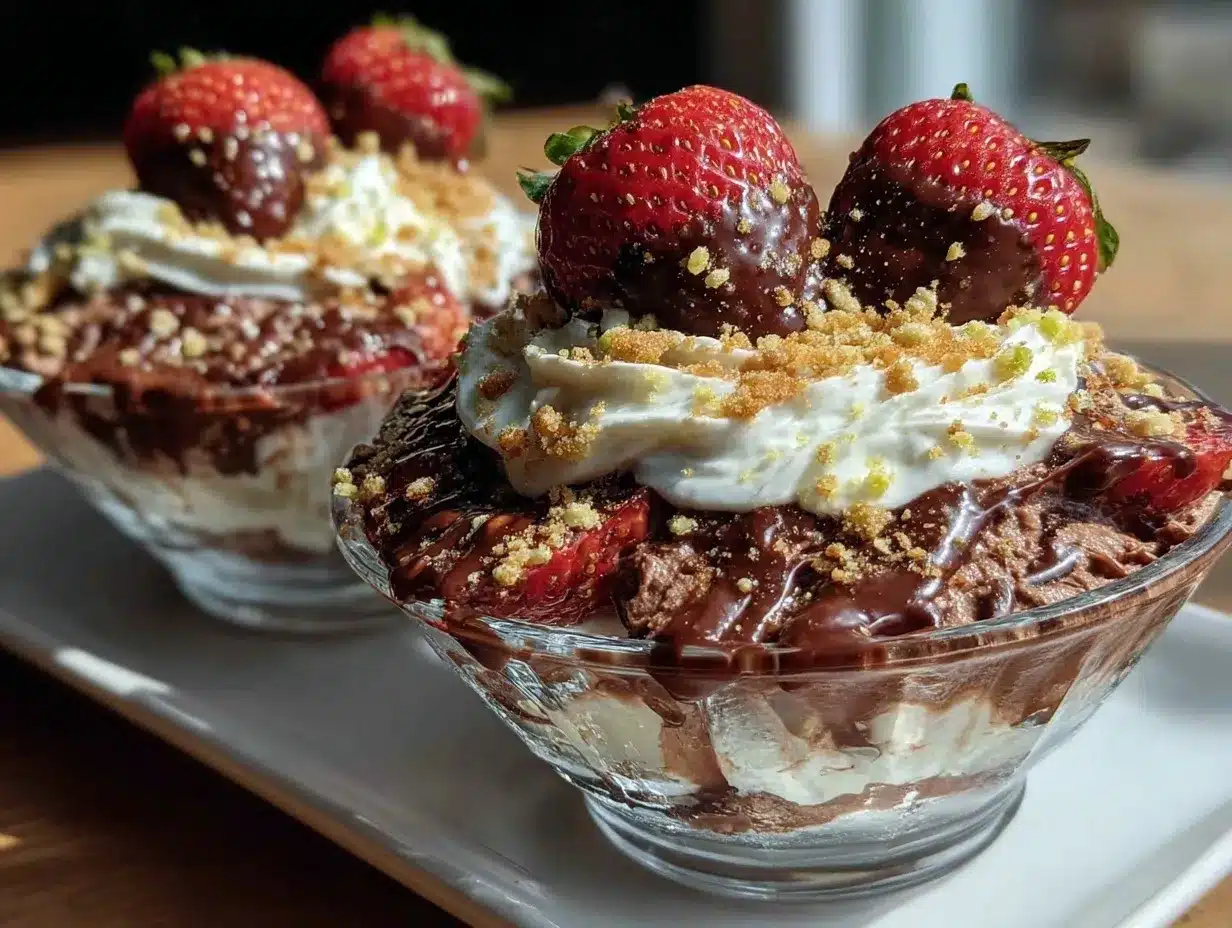
Picture this: You walk into a kitchen, and the air is thick with the sweet scent of melted chocolate, the kind that hugs your senses and makes your knees weak. There’s a gentle tang of ripe strawberries dancing in the background, and you can almost feel the cool creaminess of whipped layers just waiting to be scooped up. The first time I made these Chocolate-Dipped Strawberry Parfait Bowls, I remember the exact moment I took my first bite—the crunch of rich chocolate shell, the burst of juicy berries, the silky smoothness of whipped cream. It was the kind of moment where you pause, take a deep breath, and just grin because you know you’ve found something special.
When I was knee-high to a grasshopper, my grandma used to serve strawberries dipped in chocolate for every birthday, holiday, or excuse she could find. Years later, I stumbled upon the idea of turning that classic treat into a parfait—part nostalgia, part Pinterest inspiration, and entirely delicious. I wish I’d thought of it sooner, honestly! My family can’t resist sneaking spoonfuls straight from the bowl (and I can’t blame them, not one bit). These parfait bowls have quickly become a staple for potlucks, birthdays, and those last-minute “can you bring dessert?” moments that pop up out of nowhere.
These Chocolate-Dipped Strawberry Parfait Bowls are dangerously easy and bring pure, nostalgic comfort with every bite. Whether it’s a bright spot at a backyard BBQ or the star of your Pinterest dessert board, they fit right in. I’ve tested this recipe more times than I’d admit “in the name of research, of course” and it’s always a hit—no leftovers, just happy faces. If you’re searching for a sweet treat that feels like a warm hug and looks like a showstopper, you’re going to want to bookmark this one for sure.
Why You’ll Love This Recipe
I’ve made my fair share of layered desserts, and let me tell you—these Chocolate-Dipped Strawberry Parfait Bowls check all the boxes for taste, texture, and wow-factor. After dozens of tweaks and taste tests (both solo and with a house full of kids), I can confidently say these parfait bowls are a game-changer for any dessert table. Here’s why you’ll love them as much as I do:
- Quick & Easy: Ready to serve in under 30 minutes, perfect for those last-minute party invites or unexpected sweet cravings.
- Simple Ingredients: No wild-goose chases at the grocery store; everything you need is probably already in your kitchen or just a quick trip away.
- Perfect for Parties: These bowls are made for sharing—ideal for birthdays, bridal showers, Mother’s Day brunches, or just a cozy movie night in.
- Crowd-Pleaser: Kids and adults both go crazy for the crunchy chocolate shell and creamy, fruity filling. You’ll be getting recipe requests left and right!
- Unbelievably Delicious: The combination of rich chocolate, fresh strawberries, sweet cream, and crunchy cookie layers is basically comfort food in a bowl—no exaggeration.
What sets this recipe apart? Well, I use a little trick I picked up during a summer pastry internship—tempering chocolate for that perfect snap and gloss on the bowls. Plus, I add a touch of vanilla and almond extract to the whipped cream for just the right depth of flavor. You can swap in different berries or cookie crumbles, making this recipe super flexible for your pantry or dietary needs.
This isn’t just another parfait. It’s the kind of dessert that makes you close your eyes and take a moment after the first spoonful. It’s comfort food—just the way you remember, but somehow better and easier. You can impress your guests without any stress, or simply treat yourself to something special. I promise, these Chocolate-Dipped Strawberry Parfait Bowls are about to become your new go-to.
What Ingredients You Will Need
This recipe uses simple, wholesome ingredients to deliver bold flavor and a satisfying mix of creamy, crunchy, and juicy. Most items are pantry staples, with a few fresh touches that make all the difference. Here’s what you’ll need to whip up these Chocolate-Dipped Strawberry Parfait Bowls:
- For the Chocolate Bowls:
- 8 oz (225 g) semi-sweet chocolate chips or chopped chocolate (I love using Ghirardelli for the best melt and flavor)
- 1 tsp coconut oil (optional, for extra shine and easier dipping)
- 6 medium-sized silicone or paper cupcake liners (for shaping the bowls)
- For the Strawberry Layer:
- 2 cups (300 g) fresh strawberries, hulled and chopped (look for ripe, fragrant berries for max flavor)
- 1-2 tbsp granulated sugar (adjust based on your berries’ sweetness)
- 1 tsp fresh lemon juice (keeps the berries bright and tangy)
- For the Cream Layer:
- 1 cup (240 ml) heavy whipping cream, cold
- 1/4 cup (30 g) powdered sugar
- 1/2 tsp pure vanilla extract (adds warmth)
- 1/4 tsp almond extract (optional, but so good!)
- For the Crunchy Layer:
- 6 chocolate sandwich cookies (like Oreos), crushed (for a gluten-free version, use GF cookies)
- Optional: 1/4 cup (25 g) granola or chopped toasted nuts for extra crunch
- For Garnish:
- Whole strawberries, chocolate shavings, or a sprig of mint (totally optional, but adds a finishing touch)
Substitution Notes: Want to make it dairy-free? Use coconut whipped cream and dairy-free chocolate. Need a lower sugar version? Swap in monk fruit sweetener or skip the cookie layer for more berries. In winter, frozen strawberries work too—just thaw and drain them well. That’s the beauty of this recipe: it’s flexible and forgiving, just like all the best desserts should be!
Equipment Needed
You don’t need a fancy kitchen to create these showstopping parfait bowls. Here’s what you’ll want to have on hand:
- Medium microwave-safe bowl (for melting chocolate; a double boiler works too if you prefer slow and steady melting)
- Silicone or sturdy paper cupcake liners (these make shaping the chocolate bowls super easy and nonstick—if you don’t have them, parchment paper or even small bowls lined with plastic wrap can pinch-hit in a pinch)
- Small pastry brush or spoon (to spread the chocolate evenly inside the liners)
- Hand mixer or stand mixer (for whipping cream; a good old whisk and some elbow grease work if you want a workout!)
- Mixing bowls (one for berries, one for cream, one for cookies)
- Measuring cups and spoons (accuracy is your friend with desserts)
- Small offset spatula or butter knife (for loosening the chocolate bowls, if needed)
- Serving plates or a large tray
Honestly, I’ve made these with mismatched bowls and an old fork before, so don’t stress if your kitchen isn’t decked out. Just keep your tools clean and dry (especially for the chocolate), and always let the kids help crush cookies—it’s messy fun! For maintenance, if you use silicone liners, wash them by hand to keep them from warping. And if you’re on a budget, the dollar store cupcake liners work just fine (I’ve tested them, trust me).
How to Make Chocolate-Dipped Strawberry Parfait Bowls
-
Melt the Chocolate:
- Add 8 oz (225 g) chocolate chips and 1 tsp coconut oil to a microwave-safe bowl.
- Microwave in 20-second bursts, stirring each time, until smooth and glossy (about 1–1.5 minutes total). Alternatively, melt over a double boiler if you like more control.
- Sensory cue: The chocolate should be silky, not grainy, and smell rich and sweet.
- Tip: Make sure your bowl and tools are bone dry—any water will make the chocolate seize.
-
Shape the Chocolate Bowls:
- Spoon 1–2 tablespoons of melted chocolate into each cupcake liner.
- Use a pastry brush or back of a spoon to coat the bottom and sides evenly, about 1/4 inch (0.5 cm) thick.
- Place the liners on a tray and chill in the fridge for 15–20 minutes until set (or freezer for 8–10 minutes if you’re in a rush).
- Warning: Don’t make the shells too thin—they’ll crack when unmolding (I’ve cracked a few, so learn from me!).
-
Prep the Strawberry Layer:
- While chocolate sets, combine 2 cups (300 g) chopped strawberries, 1–2 tbsp sugar, and 1 tsp lemon juice in a bowl.
- Stir and let sit for 5–10 minutes to macerate (the berries will get juicy and glossy).
- Sensory cue: The strawberries should look shiny and smell fragrant.
- Tip: If your berries are super sweet, use less sugar.
-
Whip the Cream:
- In a cold mixing bowl, add 1 cup (240 ml) heavy cream, 1/4 cup (30 g) powdered sugar, 1/2 tsp vanilla extract, and 1/4 tsp almond extract (if using).
- Beat with a hand mixer on medium-high until soft peaks form (about 2–3 minutes).
- Sensory cue: The cream should hold soft, billowy peaks and taste lightly sweet.
- Note: Don’t overbeat—if it looks chunky, you’ve gone too far (been there, done that…).
-
Crush the Cookies:
- Add 6 cookies to a zip-top bag and crush with a rolling pin or jar until you have coarse crumbs.
- Add granola or nuts if you want more crunch.
- Tip: Don’t crush too fine—a little texture is delicious.
-
Unmold the Chocolate Bowls:
- Gently peel the liners away from the set chocolate bowls. If they stick, let them warm up for a minute on the counter first.
- Sensory cue: You should hear a soft snap as the liner releases.
- Warning: Handle with care—they’re sturdy, but not indestructible!
-
Assemble the Parfait Bowls:
- Place a spoonful of cookie crumbs at the base of each chocolate bowl.
- Add a layer of whipped cream, then a generous spoonful of juicy strawberries.
- Repeat layers if your bowls are deep, ending with whipped cream and a few pretty strawberry pieces on top.
- Tip: Work quickly if your kitchen is warm—chocolate can soften!
-
Garnish & Serve:
- Sprinkle with extra cookie crumbs, chocolate shavings, or a sprig of mint for flair.
- Serve immediately for maximum crunch, or chill for up to 2 hours if prepping ahead.
Troubleshooting: If your chocolate shell cracks, patch with a little extra melted chocolate and chill again. If your whipped cream deflates, just re-whip for a few seconds. And if you overfill the bowls and things get messy…that’s half the fun, honestly!
Cooking Tips & Techniques
Making these Chocolate-Dipped Strawberry Parfait Bowls is a breeze, but a few pro tips can make the process smoother (and tastier):
- Tempering Chocolate (the easy way): Melt chocolate slowly and stir often—don’t rush it. If you want extra shiny bowls, reserve a few chocolate chips and stir them into the hot chocolate off the heat. This helps keep the chocolate glossy and snappy.
- Room Temperature Ingredients: Cold berries or cream can cause chocolate to seize when assembling. Let everything sit out for 5–10 minutes before layering.
- Work Assembly-Line Style: Set up all your layers before unmolding the chocolate bowls. That way, you can fill them quickly and avoid melting or fingerprints on the chocolate.
- Don’t Overfill: Less is more when it comes to layering. Leave a little room at the top so you can garnish without overflow (I’ve learned this the messy way!).
- Keep It Cool: If you’re making these on a hot day, chill everything—bowls, cream, even the serving tray. Chocolate melts fast in summer heat.
- Cookie Consistency: Crush cookies to a coarse texture, not powder. This way, you get a satisfying crunch that contrasts with the creamy and juicy layers.
Common mistake? Rushing the chocolate set time. If you remove the liners too soon, the shells will break. Patience pays off, and a quick stint in the freezer works wonders. If your whipped cream gets a bit too stiff, just add a splash of cream and gently fold until smooth again. Multitasking tip: While the chocolate sets, prep your berries and cream—no wasted time, and everything comes together like clockwork. I once tried to shortcut by using store-bought whipped topping… wasn’t the same. Real cream is worth the extra five minutes, trust me!
Variations & Adaptations
The beauty of Chocolate-Dipped Strawberry Parfait Bowls is how easily you can switch things up. Here are a few of my favorite twists (and some I’ve tested myself!):
- Make It Dairy-Free: Use coconut whipped cream and dairy-free chocolate for a plant-based treat. Swap in gluten-free cookies if needed.
- Berry Swap: Try blueberries, raspberries, or blackberries instead of strawberries. In fall, roasted apples or pears with a hint of cinnamon are fantastic.
- Flavor Boost: Add a splash of orange liqueur to the whipped cream for a grown-up twist, or a sprinkle of espresso powder to the cookie layer for mocha vibes.
- Change Up the Crunch: Use vanilla wafers, graham crackers, or even brownie chunks in place of sandwich cookies. For extra nutrition, swap in granola or toasted oats.
- Adjust for Allergies: Nut-free? Skip the granola or nuts. Gluten-sensitive? Gluten-free cookies work perfectly (I’ve made them with almond flour cookies, and they’re divine).
- Personal Favorite: I once made a peanut butter version—just add a swirl of peanut butter between the cream and the berries. It’s rich and oh-so-satisfying!
No matter how you tweak it, the basic formula stays the same: chocolate shell, creamy layer, fresh fruit, and something crunchy. Make it your own, and don’t be afraid to experiment. Sometimes, the best recipes are happy accidents (my peanut butter version happened because I ran out of cream one night—no regrets!).
Serving & Storage Suggestions
These parfait bowls are best served chilled, straight from the fridge. The chocolate shell will have a satisfying snap, and the cream and berries will taste refreshingly cool. For a pretty presentation, arrange them on a platter with a dusting of powdered sugar or a few chocolate curls scattered around. If you’re feeling fancy, add a sprig of mint or an extra whole strawberry on top.
Pair these with a glass of bubbly, sparkling water, or even a cup of hot coffee for contrast. They also make a lovely finish to a light spring brunch or a decadent centerpiece at a dinner party.
To store, keep the assembled bowls in an airtight container in the refrigerator for up to 2 days. The chocolate shell may soften slightly over time, but the flavors will meld beautifully. If you want to get ahead, prepare the chocolate bowls and other layers separately, then assemble just before serving. For longer storage, you can freeze the chocolate shells (empty) for up to a month—just bring them to room temperature before filling.
Reheating? Not needed—these are best enjoyed cold. But if you do have leftovers, a quick chill in the freezer for 5 minutes will perk up the chocolate shell. And you know what? The flavors get even more intense after a few hours, making them a great make-ahead treat.
Nutritional Information & Benefits
Here’s the scoop for those curious about what’s inside each bowl:
- Estimated per bowl: 340 calories, 24g fat, 30g carbohydrates, 4g protein
- Rich in antioxidants from dark chocolate and strawberries
- Source of vitamin C (thanks to all those berries!)
- Can be adapted for gluten-free and dairy-free diets with simple swaps
- Contains dairy and gluten (from cookies and cream), so adjust if you have allergies
From a wellness perspective, these parfait bowls are a sweet treat, but they offer a nice balance—fresh fruit, some healthy fats from chocolate, and the option to reduce sugar or swap in better-for-you cookies. It’s all about enjoying dessert with a smile, no guilt needed!
Conclusion
There’s just something magical about these Chocolate-Dipped Strawberry Parfait Bowls. They’re easy enough for a weekday treat, impressive enough for a special occasion, and endlessly adaptable to whatever you have on hand. I love this recipe because it brings people together—my family always hovers around the kitchen when I make them, and there’s never a crumb left behind.
Don’t be afraid to mix things up (trust your tastebuds!). Whether you stick with classic strawberries and chocolate or try a wild new twist, these parfait bowls will be the hit of any gathering. I hope you’ll give them a try, share your own creative spins in the comments, and maybe even snap a photo for your Pinterest board. There’s no wrong way to enjoy them—just dig in and savor every bite!
So, what do you think? Ready to whip up a batch and wow your friends and family? I can’t wait to hear how yours turn out—drop me a note or tag me with your creations. Happy parfait making!
Frequently Asked Questions
Can I make the chocolate bowls ahead of time?
Yes! The chocolate bowls can be made 1–2 days ahead and stored in an airtight container in the fridge or freezer. Just fill them when you’re ready to serve.
What if I don’t have cupcake liners?
No worries—you can use small bowls lined with parchment paper or plastic wrap, or even mold the chocolate inside silicone muffin pans. Just be gentle when unmolding.
Can I use frozen strawberries?
Absolutely. Just thaw them well and drain off excess liquid before layering. They work great, especially in the off-season!
How do I keep the chocolate bowls from cracking?
Make sure the shells are thick enough and fully set before unmolding. If they do crack, patch with a little melted chocolate and chill again—nobody will notice.
Are these parfait bowls gluten-free?
They can be! Just use gluten-free cookies for the crunchy layer and double-check your chocolate and other ingredients. The rest of the recipe is naturally gluten-free.
Pin This Recipe!
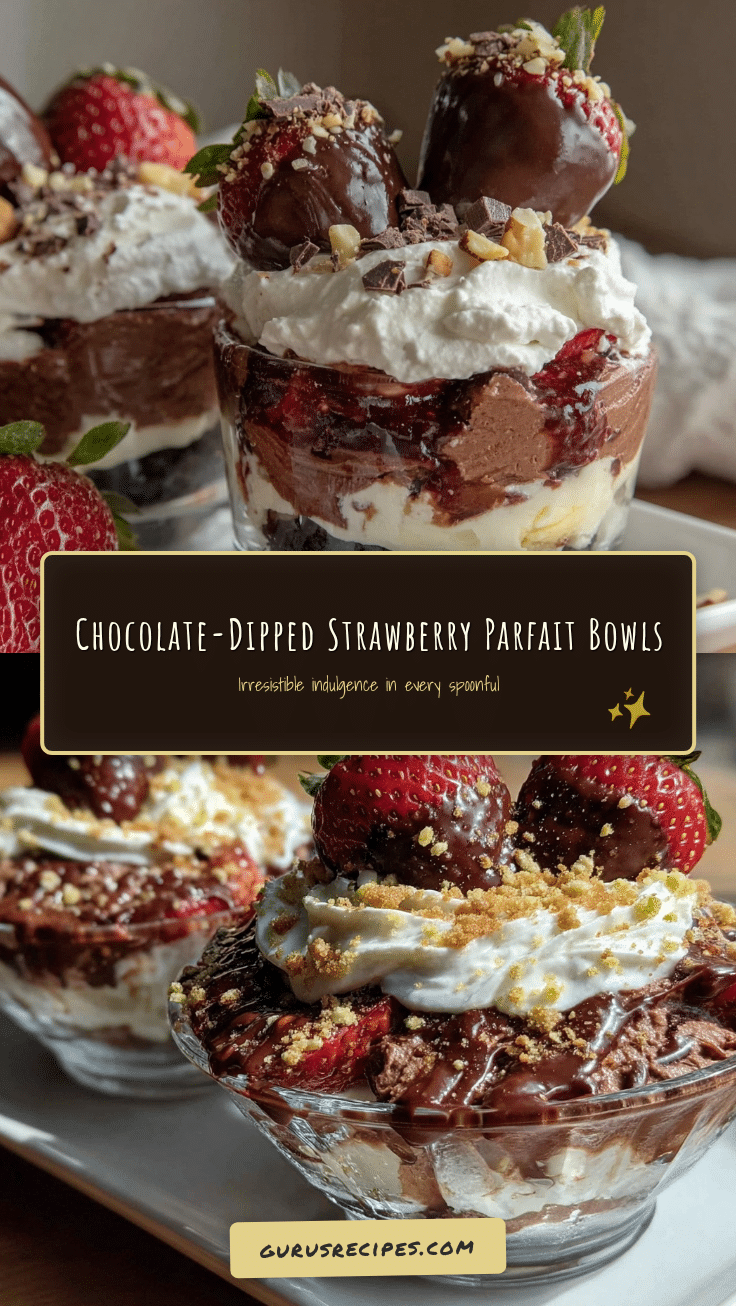

Chocolate-Dipped Strawberry Parfait Bowls
These easy, showstopping parfait bowls feature a crunchy chocolate shell filled with layers of juicy strawberries, sweet whipped cream, and cookie crumbles. Perfect for parties, potlucks, or a special treat, they come together in under 30 minutes and are endlessly adaptable.
- Total Time: 25 minutes
- Yield: 6 servings 1x
Ingredients
- 8 oz semi-sweet chocolate chips or chopped chocolate
- 1 tsp coconut oil (optional)
- 6 medium-sized silicone or paper cupcake liners
- 2 cups fresh strawberries, hulled and chopped
- 1–2 tbsp granulated sugar
- 1 tsp fresh lemon juice
- 1 cup heavy whipping cream, cold
- 1/4 cup powdered sugar
- 1/2 tsp pure vanilla extract
- 1/4 tsp almond extract (optional)
- 6 chocolate sandwich cookies (like Oreos), crushed
- Optional: 1/4 cup granola or chopped toasted nuts
- Whole strawberries, chocolate shavings, or mint for garnish
Instructions
- Add chocolate chips and coconut oil to a microwave-safe bowl. Microwave in 20-second bursts, stirring each time, until smooth and glossy (about 1–1.5 minutes total), or melt over a double boiler.
- Spoon 1–2 tablespoons of melted chocolate into each cupcake liner. Use a pastry brush or spoon to coat the bottom and sides evenly, about 1/4 inch thick. Chill in the fridge for 15–20 minutes until set (or freezer for 8–10 minutes).
- While chocolate sets, combine chopped strawberries, sugar, and lemon juice in a bowl. Stir and let sit for 5–10 minutes to macerate.
- In a cold mixing bowl, add heavy cream, powdered sugar, vanilla extract, and almond extract (if using). Beat with a hand mixer on medium-high until soft peaks form (about 2–3 minutes).
- Add cookies to a zip-top bag and crush with a rolling pin or jar until you have coarse crumbs. Add granola or nuts if desired.
- Gently peel the liners away from the set chocolate bowls. If they stick, let them warm up for a minute on the counter first.
- Place a spoonful of cookie crumbs at the base of each chocolate bowl. Add a layer of whipped cream, then a generous spoonful of juicy strawberries. Repeat layers if your bowls are deep, ending with whipped cream and a few strawberry pieces on top.
- Sprinkle with extra cookie crumbs, chocolate shavings, or mint for garnish. Serve immediately for maximum crunch, or chill for up to 2 hours if prepping ahead.
Notes
For best results, temper chocolate for a glossy, snappy shell. Let ingredients come to room temperature before assembling to prevent chocolate from seizing. Use gluten-free cookies and coconut whipped cream for allergy-friendly versions. Chocolate bowls can be made ahead and stored empty in the fridge or freezer. If shells crack, patch with melted chocolate and chill again.
- Prep Time: 15 minutes
- Cook Time: 10 minutes
- Category: Dessert
- Cuisine: American
Nutrition
- Serving Size: 1 parfait bowl
- Calories: 340
- Sugar: 22
- Sodium: 120
- Fat: 24
- Saturated Fat: 14
- Carbohydrates: 30
- Fiber: 3
- Protein: 4
Keywords: chocolate, strawberry, parfait, dessert, party, easy, no bake, summer, gluten-free option, dairy-free option


