
Let me set the scene: you open your fridge and the sweet aroma of ripe strawberries hits you, mixing with the faint scent of creamy chocolate. You’re instantly transported to summer afternoons, when the sun is warm and the laughter is easy. The first time I made these Chocolate-Covered Strawberry Shortcake Cups, I was standing in my tiny kitchen, hands dusted with flour, and the anticipation was almost too much. The moment I slid the tray from the oven, the rich scent of buttery shortcake mingled with melting chocolate and fresh berries—it was the kind of moment where you pause, take a deep breath, and just smile because you know you’re onto something truly special.
When I was knee-high to a grasshopper, strawberry shortcake was a family favorite, especially at Grandma’s house. She’d pile strawberries high and always sneak me an extra spoonful of whipped cream (don’t tell my siblings). Years later, after a failed attempt to recreate her cake for a bake sale (let’s just say the dog enjoyed it more than the humans), I stumbled onto this cup version—pure, nostalgic comfort but with a decadent chocolate twist. It’s the kind of dessert I wish I’d thought of years ago (imagine all those birthday parties and rainy weekends made sweeter!).
Honestly, these cups are dangerously easy. My family can’t stop sneaking them off the tray, and I’ve caught my partner “taste-testing” more than once (for quality control, of course). Whether you’re looking for a showstopper for your next potluck, a sweet treat for your kids, or something to brighten up your Pinterest dessert board, these Chocolate-Covered Strawberry Shortcake Cups deliver every time. I’ve tested the recipe more times than I’ll admit (in the name of research, obviously), and it’s now a staple for family gatherings and gifting. If you love desserts that feel like a warm hug, you’re going to want to bookmark this one.
Why You’ll Love These Chocolate-Covered Strawberry Shortcake Cups
Trust me, I don’t say this lightly—these Chocolate-Covered Strawberry Shortcake Cups earn their spot in your recipe box. Over the years, I’ve baked my way through dozens of shortcake and chocolate dessert recipes, and this one stands out for all the right reasons. Here’s why you’ll love it (and why it’s become my go-to for everything from last-minute get-togethers to cozy nights in):
- Quick & Easy: Comes together in under 45 minutes, which means you can satisfy those sweet cravings fast (and still have time to put your feet up).
- Simple Ingredients: No need for fancy or hard-to-find items—most of these are pantry staples you probably already have.
- Perfect for Any Occasion: Great for brunches, picnics, bake sales, Valentine’s Day, or just because you need a little indulgence in your life.
- Crowd-Pleaser: Kids and adults both go wild for the combo of juicy strawberries, fluffy shortcake, and that glossy chocolate shell.
- Unbelievably Delicious: Every bite is the perfect mix of soft, creamy, juicy, and chocolatey—no dry, crumbly cake here!
What makes this recipe different? It’s not just another shortcake. I use a muffin tin to create individual cups—no more fighting over the last slice. The shortcake is tender but sturdy enough to hold a mound of strawberries and whipped cream, and the chocolate coating adds a crackly, luxe finish (plus, it keeps those hands a little less messy—well, almost). I’ve played with ratios until I nailed that golden balance between sweet, tart, and rich.
This recipe isn’t just good—it’s the kind of dessert that makes you close your eyes after the first bite. It’s comfort food, but with a bit of a glow-up—easier, cuter, and somehow more satisfying. Whether you want to impress guests without breaking a sweat, or just make a Tuesday feel a little special, these Chocolate-Covered Strawberry Shortcake Cups are your answer. They’re the sort of treat that disappears in a flash, sometimes before they even make it to the table (you know how it goes!).
What Ingredients You Will Need
This recipe uses simple, wholesome ingredients to deliver bold, classic flavor and that perfect, satisfying texture. Most are pantry staples, and you can easily swap things around if you need to (I’ve included some of my favorite substitutions and tips below). Here’s what you’ll need for the best Chocolate-Covered Strawberry Shortcake Cups:
- For the Shortcake Cups:
- All-purpose flour – 1 3/4 cups (210g) (I recommend King Arthur or Bob’s Red Mill for best results)
- Granulated sugar – 1/3 cup (66g) (adds just enough sweetness without overpowering the berries)
- Baking powder – 2 teaspoons (for lift and light crumb)
- Salt – 1/2 teaspoon (balances flavor)
- Unsalted butter, cold and cubed – 6 tablespoons (85g) (the colder, the flakier!)
- Whole milk – 2/3 cup (160ml) (you can swap for almond or oat milk if needed)
- Egg – 1 large (room temperature helps keep the dough smooth)
- Vanilla extract – 1 teaspoon (for warmth and depth)
- For the Strawberry Filling:
- Fresh strawberries – 2 cups (about 300g), hulled and diced (look for bright red, fragrant berries)
- Granulated sugar – 2 tablespoons (24g) (to macerate and sweeten the berries)
- Lemon juice – 1 teaspoon (brings out the berry flavor)
- For the Chocolate Coating:
- Semi-sweet or dark chocolate chips – 1 cup (170g) (I love Ghirardelli or Enjoy Life for a glossy finish)
- Coconut oil – 2 teaspoons (helps the chocolate set and gives a lovely sheen)
- For the Whipped Cream:
- Heavy cream – 1 cup (240ml) (or try coconut cream for a dairy-free option)
- Powdered sugar – 2 tablespoons (16g) (for stability and sweetness)
- Vanilla extract – 1/2 teaspoon
Ingredient Notes & Swaps:
- Flour: For gluten-free, use an all-purpose gluten-free blend (like Cup4Cup).
- Dairy-Free: Sub in plant-based butter and coconut cream for a totally dairy-free cup.
- Chocolate: Milk chocolate chips are fine if you prefer a sweeter shell, or use white chocolate for a fun twist.
- Strawberries: In the winter, frozen strawberries work—just thaw and drain well first.
Honestly, you can riff on this recipe with what you have on hand. The magic is in the combo of juicy fruit, fluffy cake, and snappy chocolate!
Equipment Needed
You don’t need a fancy kitchen to make these Chocolate-Covered Strawberry Shortcake Cups—just a few basics and a little bit of patience. Here’s what I reach for every time:
- Muffin tin (12-cup standard size): This is the secret to those perfectly shaped shortcake cups. If you only have a mini muffin pan, just reduce the baking time by about 5 minutes.
- Mixing bowls: At least two—one for the dough, one for the berries. Glass or stainless steel works best for easy cleanup.
- Pastry cutter or two forks: For cutting the butter into the flour. If you don’t have a pastry cutter, I’ve used my hands in a pinch (just work quickly to keep the butter cold!).
- Hand mixer or stand mixer: For whipping cream. A sturdy whisk will do if you’re feeling ambitious!
- Microwave-safe bowl or double boiler: For melting the chocolate smoothly.
- Measuring cups and spoons: Accuracy makes all the difference, especially for baking.
- Rubber spatula: For scraping every last bit of dough (and whipped cream) from the bowl.
- Small spoon or cookie scoop: For portioning dough and filling cups neatly.
- Baking rack: For cooling the shortcake cups evenly—prevents sogginess underneath.
If you’re on a budget, most of these tools can be found at thrift stores or discount shops. I started with a hand-me-down muffin pan from my aunt, and it’s still going strong years later (a little warped, but it does the trick!). For the chocolate, I like to use a glass bowl over a simmering pot of water—no need to buy a double boiler. Just be mindful of water splashes, or your chocolate might seize up.
Preparation Method

- Prep the Strawberries:
- Hull and dice 2 cups (about 300g) of fresh strawberries.
- Place in a medium bowl, add 2 tablespoons (24g) granulated sugar and 1 teaspoon lemon juice. Stir well.
- Let sit for at least 20 minutes to macerate—this draws out the juices and makes the berries syrupy and sweet.
- Personal tip: If you’re in a rush, pop them in the fridge while you prep everything else!
- Make the Shortcake Dough:
- In a large bowl, whisk together 1 3/4 cups (210g) all-purpose flour, 1/3 cup (66g) sugar, 2 teaspoons baking powder, and 1/2 teaspoon salt.
- Add 6 tablespoons (85g) cold, cubed unsalted butter. Use a pastry cutter, two forks, or your fingers to cut in the butter until the mixture looks like coarse crumbs—small pea-sized bits are perfect.
- In a small bowl, whisk together 2/3 cup (160ml) milk, 1 large egg, and 1 teaspoon vanilla extract.
- Pour wet ingredients into the dry. Stir gently with a spatula until just combined—don’t overmix or your shortcakes will be tough.
- If the dough feels sticky, sprinkle on a bit more flour. If it’s dry, add a splash more milk. The dough should hold together but not stick to your hands.
- Shape and Bake the Cups:
- Preheat your oven to 400°F (200°C). Grease a standard 12-cup muffin tin, or line with paper liners for easier removal.
- Divide the dough evenly among the muffin cups—about 2 tablespoons per cup. Press the dough gently into the bottom and up the sides to form a well in the center (like a little tart shell).
- Bake for 12-15 minutes, or until lightly golden and puffed. The edges should feel firm, but the center will still be soft.
- Let cool in the pan for 5 minutes, then carefully remove to a cooling rack. If they stick, run a thin knife around the edge.
- Troubleshooting tip: If the centers puff up, use the back of a spoon to gently press down and reshape the wells while warm.
- Prepare the Chocolate Coating:
- While the cups cool, melt 1 cup (170g) chocolate chips with 2 teaspoons coconut oil. Microwave in 30-second intervals, stirring after each, until smooth. Or use a double boiler over gently simmering water.
- Spoon about 1 teaspoon of melted chocolate into each cooled shortcake cup. Tilt or use the back of the spoon to coat the inside. Set cups aside to let chocolate set (you can chill them in the fridge for 5-10 minutes for faster results).
- If there’s extra chocolate, save it to drizzle on top!
- Whip the Cream:
- In a cold mixing bowl, pour in 1 cup (240ml) heavy cream, 2 tablespoons (16g) powdered sugar, and 1/2 teaspoon vanilla extract.
- Beat with a mixer on medium-high until soft peaks form—don’t overwhip or you’ll end up with butter.
- Tip: For extra stability, chill your bowl and beaters before starting.
- Assemble the Cups:
- Spoon a generous tablespoon of macerated strawberries (with juice!) into each chocolate-lined shortcake cup.
- Top with a dollop of whipped cream.
- If you saved extra melted chocolate, drizzle it artistically over the whipped cream (or use a fork for Jackson Pollock vibes).
- Serve immediately, or chill for up to 2 hours before serving.
- Note: Assembled cups are best enjoyed the day they’re made for ultimate freshness and crunch.
Cooking Tips & Techniques
Over the years, I’ve picked up a few tricks (and survived plenty of kitchen mishaps) to make these Chocolate-Covered Strawberry Shortcake Cups as foolproof as possible. Here’s what I’ve learned—so you don’t have to make the same mistakes I did:
- Keep Your Butter Cold: This is key for flaky, tender shortcake cups. Cut the butter in quickly, and don’t overwork the dough. If your kitchen is warm, chill the formed dough cups in the freezer for 5 minutes before baking.
- Don’t Overmix: Once you add the wet ingredients, stir just until the dough comes together. Overmixing makes the shortcake tough, and nobody wants that!
- Macerate the Berries: Letting the strawberries sit in sugar and lemon juice is worth the extra few minutes. It draws out the juices, making every bite juicy and flavorful (and prevents dry filling).
- Chocolate Coating: Make sure the shortcake cups are completely cool before adding melted chocolate, or the chocolate won’t set right. If your kitchen is hot, set the cups in the fridge while assembling.
- Whipping Cream: For the fluffiest whipped cream, use cold cream and tools. If things start to separate, stop immediately and use as-is—overwhipped cream gets grainy fast!
- Timing & Multitasking: While the shortcakes bake, prep your berries and melt your chocolate. This way, everything comes together seamlessly (and you’re not rushing at the end).
- Batching for Parties: If you’re making a big batch, bake the shortcake cups a day ahead. Assemble with strawberries and cream right before serving, so they stay crisp.
- Personal Flops: I once forgot to grease the muffin tin—big mistake! Make sure to grease well or use liners, or you’ll be prying out stuck shortcakes with a fork (learned that one the hard way).
Consistency comes from practice, but these tips should set you up for shortcake cup success every time. Don’t stress about perfection—these are meant to be fun, a little rustic, and above all, delicious!
Variations & Adaptations
One of my favorite things about Chocolate-Covered Strawberry Shortcake Cups is how easy they are to customize. Whether you’re working around allergies, seasons, or just want to mix things up, here are some fun ideas:
- Gluten-Free: Swap the all-purpose flour for a 1-to-1 gluten-free blend. I’ve done this for friends with celiac, and the texture is still tender and delicious.
- Dairy-Free/Vegan: Use plant-based butter, coconut cream for the whipped topping, and dairy-free chocolate chips. Almond or oat milk works well in the dough.
- Fruit Swaps: Try raspberries, blueberries, or even thinly sliced peaches instead of strawberries. In fall, diced apples tossed with cinnamon are amazing!
- Chocolate Variations: White chocolate makes for a pretty, sweeter shell; dark chocolate adds a more intense richness. Mix and match for a marbled effect.
- Different Shortcake Bases: Use a classic biscuit base, or try chocolate shortcake for double chocolate indulgence.
- Mini or Jumbo Cups: Make bite-sized cups in a mini muffin tin for parties, or super-sized ones in a jumbo tin for sharing (just adjust the bake time accordingly).
One personal favorite? Swapping the strawberries for a quick cherry compote and using almond extract in the dough—tastes just like a Black Forest cake, but in a cute, hand-held cup. The possibilities are endless, so don’t be afraid to get creative!
Serving & Storage Suggestions
These Chocolate-Covered Strawberry Shortcake Cups are meant to be a little luxurious—so serve them up with flair! Here’s how I like to do it:
- Serving: Best enjoyed slightly chilled or at room temperature. Arrange on a pretty cake stand or platter, and add a few extra fresh strawberries for color.
- For Parties: Garnish with extra chocolate drizzle, chocolate shavings, or mint leaves for a Pinterest-worthy presentation.
- Pairings: These cups go great with coffee, cold milk, or a glass of bubbly for celebrations. For a brunch spread, serve alongside fresh fruit or a simple green salad.
- Storage: Unfilled shortcake cups can be stored in an airtight container at room temperature for up to 2 days. Assembled cups should be covered and kept in the fridge for up to 24 hours—though the shortcake will soften slightly.
- Freezing: The baked, unfilled cups freeze well (up to 1 month). Thaw at room temp, then fill and serve as usual.
- Reheating: If you want a warm shortcake cup (minus the cream), pop them in a 300°F (150°C) oven for 5 minutes before filling.
- Flavor Note: The flavors deepen as they sit, but for maximum crunch, don’t assemble too far ahead of serving.
Honestly, leftovers are rare in my house—but if you do have some, they make a sweet breakfast treat the next day!
Nutritional Information & Benefits
Here’s a quick estimate for one Chocolate-Covered Strawberry Shortcake Cup (assembled):
- Calories: ~210
- Carbohydrates: 28g
- Protein: 3g
- Fat: 10g
- Fiber: 2g
- Sugar: 15g
Key ingredients like strawberries are rich in vitamin C and antioxidants, while dark chocolate adds a little iron and magnesium. If you go the gluten-free or dairy-free route, these cups can fit a variety of dietary needs. Just be mindful—there’s wheat, dairy, and eggs in the classic version, so check those swaps if you have allergies.
From a wellness perspective, I love that these feel like an indulgence but aren’t overly heavy. Paired with fresh fruit and real cream, they satisfy your sweet tooth without going overboard. Moderation is key, and a homemade treat always beats store-bought in my book!
Conclusion
There’s a reason these Chocolate-Covered Strawberry Shortcake Cups have become a staple in my kitchen—they’re simple, stunning, and downright delicious. Whether you’re baking for a crowd or just for yourself (no judgment), they hit that sweet spot between comfort food and showstopper dessert.
I hope you’ll make these your own—try a different fruit, play with the chocolate, or add your own flair. The best recipes are the ones that evolve with each baker’s touch. Personally, I love sharing them with family and friends, but I’ll be honest: sneaking one with a cup of tea on a quiet afternoon is pure bliss.
If you give these a try, let me know in the comments or tag me on social media—I’d love to see your creations! Don’t forget to pin this recipe for later, and share it with anyone who deserves a little chocolate-strawberry happiness. Happy baking, friend—you’ve got this!
Frequently Asked Questions
Can I make the shortcake cups ahead of time?
Yes, you can bake the shortcake cups a day or two in advance. Store them in an airtight container at room temperature, then assemble with berries and cream when you’re ready to serve.
What’s the best way to melt the chocolate for coating?
I like to use a microwave in short bursts, stirring after each, or a glass bowl over simmering water. Just make sure no water gets into the chocolate, or it might seize up.
Can I use frozen strawberries instead of fresh?
You can! Thaw and drain them well first, then proceed with the recipe as usual. The flavor will still be lovely, though the texture will be a bit softer.
How do I make these gluten-free?
Use a 1-to-1 gluten-free flour blend in place of all-purpose flour. I’ve had great results with Cup4Cup and Bob’s Red Mill blends—no other changes needed.
Can I freeze assembled shortcake cups?
I wouldn’t recommend freezing them once assembled, as the cream and berries can make the shortcake soggy. But the unfilled cups freeze beautifully—just thaw, fill, and enjoy!
Pin This Recipe!
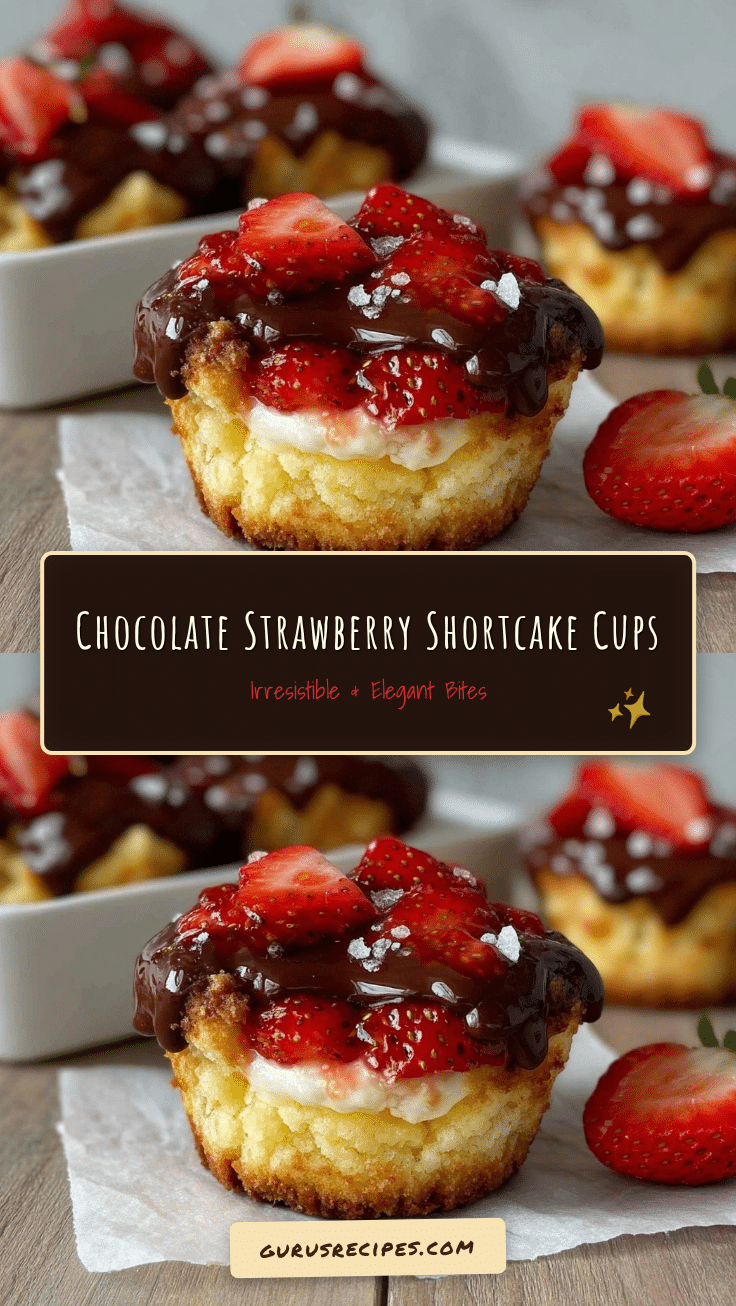

Chocolate-Covered Strawberry Shortcake Cups
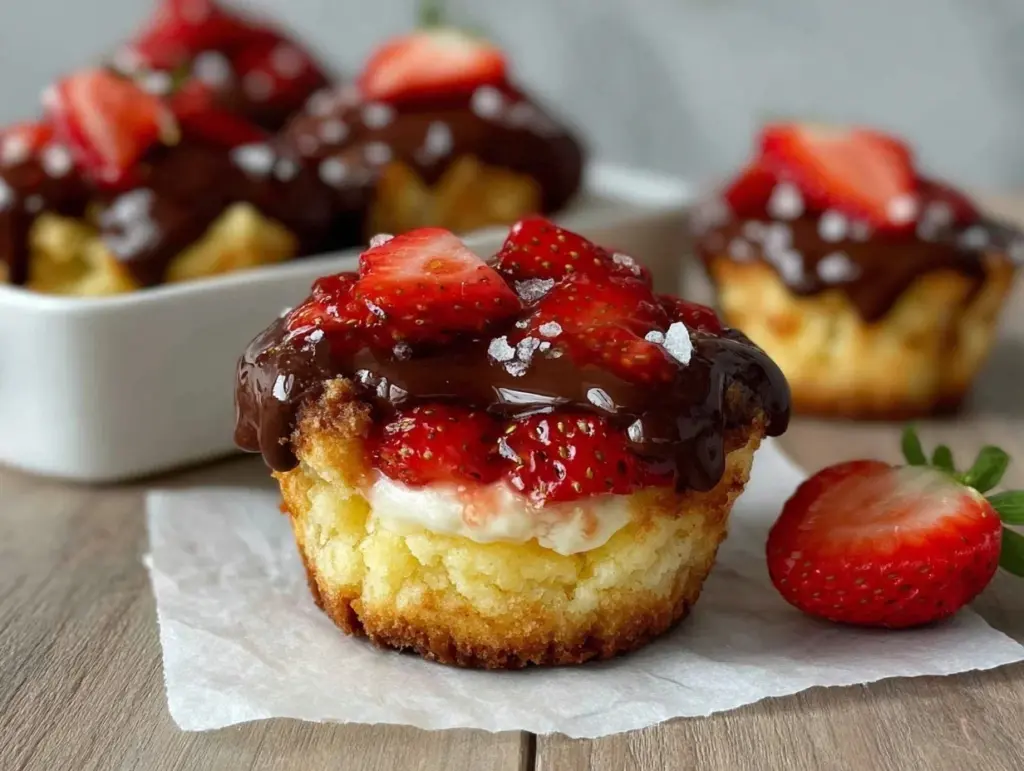
These individual shortcake cups feature tender, buttery shortcake shells filled with juicy macerated strawberries, topped with fluffy whipped cream, and finished with a glossy chocolate coating. They’re quick, easy, and perfect for any occasion.
- Total Time: 35 minutes
- Yield: 12 cups 1x
Ingredients
- 1 3/4 cups all-purpose flour
- 1/3 cup granulated sugar
- 2 teaspoons baking powder
- 1/2 teaspoon salt
- 6 tablespoons unsalted butter, cold and cubed
- 2/3 cup whole milk
- 1 large egg
- 1 teaspoon vanilla extract
- 2 cups fresh strawberries, hulled and diced
- 2 tablespoons granulated sugar (for strawberries)
- 1 teaspoon lemon juice
- 1 cup semi-sweet or dark chocolate chips
- 2 teaspoons coconut oil
- 1 cup heavy cream
- 2 tablespoons powdered sugar
- 1/2 teaspoon vanilla extract (for whipped cream)
Instructions
- Hull and dice strawberries. Place in a bowl with 2 tablespoons sugar and 1 teaspoon lemon juice. Stir and let sit for at least 20 minutes to macerate.
- In a large bowl, whisk together flour, sugar, baking powder, and salt.
- Cut in cold butter using a pastry cutter, forks, or fingers until mixture resembles coarse crumbs.
- In a separate bowl, whisk milk, egg, and vanilla extract. Pour into dry ingredients and stir gently until just combined.
- Preheat oven to 400°F (200°C). Grease a 12-cup muffin tin or line with paper liners.
- Divide dough evenly among muffin cups (about 2 tablespoons per cup). Press into bottom and up sides to form wells.
- Bake for 12-15 minutes until lightly golden and puffed. Cool in pan 5 minutes, then transfer to rack.
- Melt chocolate chips with coconut oil in microwave (30-second intervals) or double boiler until smooth.
- Spoon about 1 teaspoon melted chocolate into each cooled shortcake cup, coating the inside. Chill to set.
- In a cold bowl, whip heavy cream, powdered sugar, and vanilla extract until soft peaks form.
- Spoon macerated strawberries into each chocolate-lined cup. Top with whipped cream.
- Drizzle extra melted chocolate over whipped cream if desired.
- Serve immediately or chill up to 2 hours before serving.
Notes
Keep butter cold for flaky shortcake. Don’t overmix dough. Macerate berries for juicier filling. Cool cups before adding chocolate. Whip cream with cold tools for best texture. Unfilled cups can be made ahead and frozen. Gluten-free and dairy-free swaps work well. Assembled cups are best enjoyed fresh.
- Prep Time: 20 minutes
- Cook Time: 15 minutes
- Category: Dessert
- Cuisine: American
Nutrition
- Serving Size: 1 cup
- Calories: 210
- Sugar: 15
- Sodium: 120
- Fat: 10
- Saturated Fat: 6
- Carbohydrates: 28
- Fiber: 2
- Protein: 3
Keywords: strawberry shortcake, chocolate dessert, easy dessert, summer dessert, individual desserts, muffin tin dessert, potluck dessert, kid-friendly, whipped cream, berry dessert


