
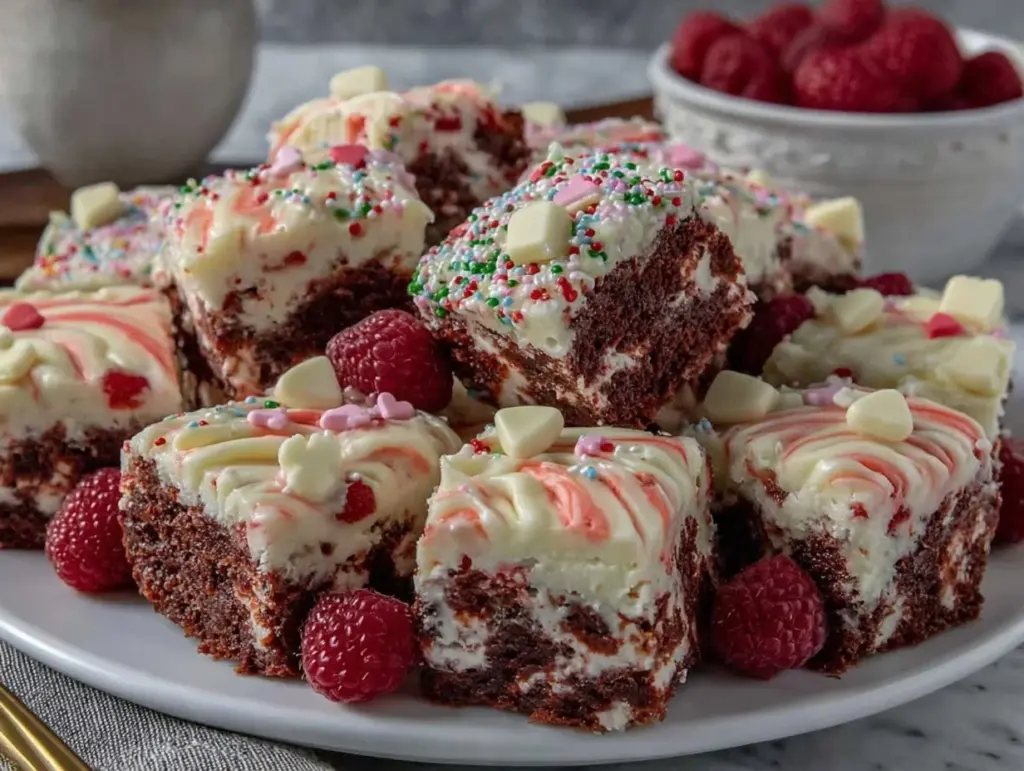
Imagine this: the rich, chocolatey scent of red velvet brownie bites drifting through your kitchen, mingling with hints of vanilla and just a whisper of cocoa. The first time I whipped up my red velvet brownie bite board, it was a snowy February afternoon—one of those days when you just want to hunker down with your best friends, laugh till your cheeks hurt, and eat way too many sweet treats. I remember sliding the first batch out of the oven, the tops crackly and deep ruby-red, and I just had to sneak one before they cooled. That first bite—warm, fudgy, a little tangy from the cream cheese swirl—was the kind of moment where you pause, take a deep breath, and just smile because you know you’re onto something truly special.
Honestly, red velvet anything always reminds me of my grandma’s kitchen (she made a killer cake), but these brownie bites are my own twist—easier, cuter, and dangerously easy to pop in your mouth. Years ago, I would have never thought to turn brownies into bite-sized pieces or arrange them on a board. Let’s face it, the idea hit me while scrolling Pinterest (like every good Galentine’s idea), and now it’s a staple for our annual get-togethers. My friends can’t resist sneaking bites as soon as the board hits the table, and I can’t blame them. It’s the sort of thing that looks fancy but is pure, nostalgic comfort food—and honestly, it’s perfect for gifting, parties, or just cheering up a dreary February day.
You know what? If you’re looking for a sweet centerpiece for Galentine’s, something to brighten up your Pinterest board, or just a treat to make your friends feel extra-loved, this red velvet brownie bite board is where it’s at. I’ve tested and tweaked it (in the name of research, of course), and each batch is better than the last. It feels like a warm hug on a plate. Bookmark this one—you’ll want it for every celebration.
Why You’ll Love This Red Velvet Brownie Bite Board
There’s something magical about this red velvet brownie bite board—so much more than just a dessert tray. After making it for three Galentine’s in a row, I can say with confidence (and a bit of chocolate on my fingers) that it’s a game-changer for celebrations. Here’s why you’re going to fall in love with this recipe, just as I have:
- Quick & Easy: You can whip up the brownie bites in under 45 minutes. No need for special equipment or hours in the kitchen—just mix, bake, and arrange.
- Simple Ingredients: Everything you need is probably already in your pantry. No fancy chocolate or obscure red food coloring brands—just the basics, done right.
- Perfect for Parties: This board isn’t just for Galentine’s Day (though it does look adorable with all the reds and pinks). Serve it at bridal showers, birthdays, or any day that needs a little extra joy.
- Crowd-Pleaser: These brownie bites get rave reviews from everyone—kids, adults, even the friends who “don’t like sweets” (they’ll cave, trust me).
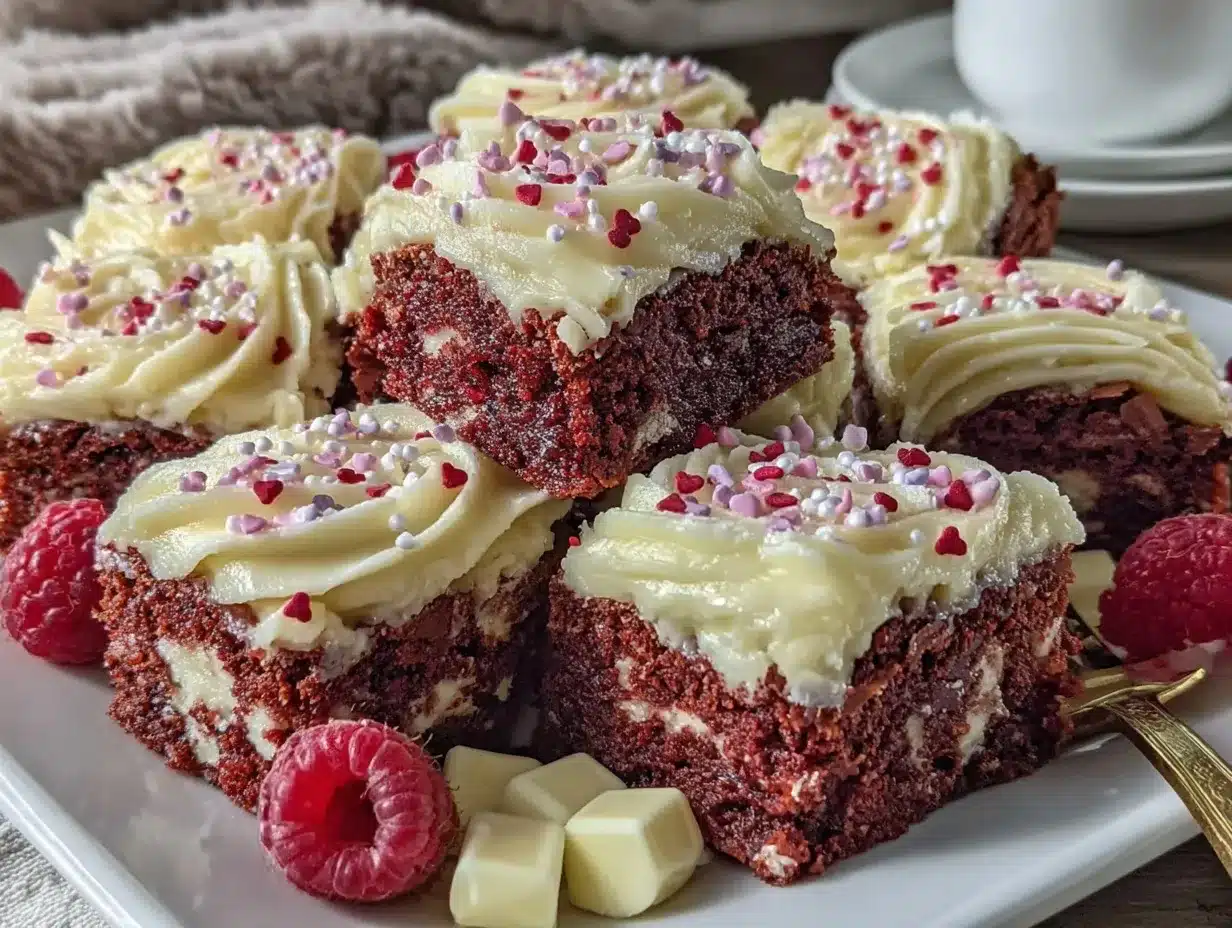
- Unbelievably Delicious: The mix of fudgy brownie, tangy cream cheese swirl, and a hint of vanilla makes every bite irresistible. It’s the kind of dessert you close your eyes for, just to savor it.
What makes my red velvet brownie bite board stand out? It’s not just about the brownies (though they are the star). I use a blend of cocoa powder and a little espresso powder for depth, and the cream cheese swirl is whipped until cloud-soft for maximum tang. Instead of a full pan, I bake these as bites—no crumbly squares or tricky cutting. You get the perfect ratio of chewy edge to soft center, every time. The board presentation means you can mix and match with fresh berries, chocolates, or even little heart-shaped candies, making it as over-the-top or as simple as you want.
It’s comfort food with a playful twist—nostalgic, but dressed up for a party. If you want a treat that’ll make your friends ooh and ahh (and snap plenty of pics for Instagram), this is the one. I love how it transforms a casual hangout into a mini celebration—no stress, no fuss, just pure joy on a plate. You’ll be making this board long after Galentine’s Day is over, trust me.
What Ingredients You Will Need
This red velvet brownie bite board looks impressive, but it’s built on simple, reliable ingredients. You don’t need anything fancy—just good basics, a little love, and maybe a sprinkle of heart-shaped candies for flair. Here’s what you’ll need:
For the Red Velvet Brownie Bites
- 1 cup (120g) all-purpose flour (sifted for best texture)
- 1/4 cup (24g) unsweetened cocoa powder (Dutch-process or natural works—I use Hershey’s Special Dark for color)
- 1/2 teaspoon espresso powder (optional, but adds depth)
- 1/2 teaspoon baking powder
- 1/4 teaspoon salt
- 1 cup (200g) granulated sugar
- 1/2 cup (113g) unsalted butter, melted and slightly cooled
- 2 large eggs, room temperature
- 1 tablespoon (15ml) vanilla extract (I love Nielsen-Massey for a strong vanilla hit)
- 1 tablespoon (15ml) red food coloring (liquid or gel; use more for a brighter red)
- 1/2 cup (120ml) buttermilk (or 1/2 cup milk + 1/2 teaspoon vinegar as a substitute)
For the Cream Cheese Swirl
- 4 oz (113g) cream cheese, softened
- 2 tablespoons (30g) granulated sugar
- 1 egg yolk
- 1/2 teaspoon vanilla extract
For the Board & Garnishes
- Fresh strawberries, halved (for color and freshness)
- Raspberries or cherries (anything vibrant and red)
- White chocolate chunks or chips
- Mini marshmallows
- Heart-shaped candies or sprinkles (totally optional, but they make it super cute!)
- Assorted chocolates (truffles, chocolate-covered pretzels, etc.)
Ingredient Notes: If you want gluten-free, swap the all-purpose flour for a 1:1 gluten-free blend (I’ve tried King Arthur’s and it works well). Dairy-free? Use vegan cream cheese and butter—Miyoko’s is a solid pick. If you can’t find buttermilk, the milk-and-vinegar hack works in a pinch. For a deeper cocoa flavor, add an extra tablespoon of cocoa powder, but the color will be less vibrant.
Red food coloring tip: Gel gives a richer color than liquid, but either will work. Go for what you have on hand. And if you want to skip the food dye altogether, just call them “chocolate brownie bites”—they’re still delicious, just not as festive for Galentine’s Day!
Equipment Needed
You don’t need a fancy kitchen to pull off this red velvet brownie bite board. Most of what you need is probably already in your cabinets (and if not, I’ve got some workarounds):
- Mini muffin tin (24-cup): Perfect for bite-sized brownies. If you only have a regular muffin tin, just bake longer and cut in half for minis.
- Mixing bowls: One large for brownie batter, one small for the cream cheese swirl.
- Whisk and spatula: I like silicone spatulas for easy scraping.
- Hand mixer or stand mixer: For the cream cheese swirl. You can also use elbow grease and a fork—just make sure the cream cheese is very soft.
- Measuring cups and spoons: Accuracy makes for perfect bites.
- Ice cream scoop or tablespoon: For portioning batter into the muffin cups (keeps things tidy).
- Serving board or platter: Wooden boards look great for rustic vibes. Large plates, baking sheets, or even a big cutting board work just as well.
- Cooling rack: For cooling the brownie bites quickly (though sometimes they barely make it there).
Personal tip: I’ve used silicone mini muffin pans before—cleanup is a breeze, but they can be wobbly. Place them on a baking sheet for stability. And if you don’t have a board, a piece of parchment on a cookie sheet does the trick. No need to spend big—just use what you have and make it fun!
How to Make the Perfect Red Velvet Brownie Bite Board
- Preheat and Prep: Set your oven to 350°F (175°C). Lightly grease your mini muffin tin or line with mini muffin papers. This makes removing the bites easy and keeps the edges soft.
- Mix the Dry Ingredients: In a medium bowl, whisk together 1 cup (120g) all-purpose flour, 1/4 cup (24g) cocoa powder, 1/2 tsp espresso powder, 1/2 tsp baking powder, and 1/4 tsp salt. Make sure it’s lump-free—nobody likes a pocket of baking powder!
- Blend the Wet Ingredients: In a large bowl, whisk 1 cup (200g) sugar with 1/2 cup (113g) melted butter until shiny and smooth (about 1 minute). Add 2 eggs, one at a time, whisking after each. Stir in 1 tablespoon (15ml) vanilla extract and the red food coloring.
- Combine and Color: Add half the dry mix to the wet ingredients, stir gently, then add 1/2 cup (120ml) buttermilk. Finish with the rest of the dry mix. Stir just until combined—overmixing makes tough brownies!
- Make the Cream Cheese Swirl: In a small bowl, beat 4oz (113g) softened cream cheese with 2 tbsp (30g) sugar, 1 egg yolk, and 1/2 tsp vanilla until smooth and fluffy (about 1-2 minutes with a hand mixer).
- Fill the Muffin Tin: Scoop about 1 tablespoon of batter into each cup (should fill 20-24). Drop a small spoonful of cream cheese swirl in the center of each and swirl gently with a toothpick or skewer. Don’t over-swirl—you want pretty ribbons!
- Bake: Place in the oven and bake for 12-15 minutes. The edges should look set and a toothpick poked in the center comes out with a few moist crumbs (not wet batter). If using a regular muffin tin, bake for 16-18 minutes.
- Cool: Let the brownie bites cool in the tin for 5 minutes, then gently pop out onto a rack to finish cooling. Warm bites are fragile—use a butter knife to loosen edges if needed.
- Arrange the Board: Once cooled, pile the brownie bites in the center of your board. Arrange fresh strawberries, raspberries, white chocolate, marshmallows, and candies around the edges. Mix up the colors and shapes for a playful, inviting look.
- Serve & Enjoy: Bring out your masterpiece and watch everyone’s eyes light up. These are best enjoyed the day they’re made, but they stay fudgy for 2-3 days stored airtight.
Troubleshooting: If your brownie bites sink, they might be underbaked—add another minute or two. If they stick to the tin, let them cool longer before removing. And if the cream cheese swirl disappears, try swirling less or adding a bit more to each cup.
Personal tip: I always make a few extra for “taste-testing”—quality control, you know?
Cooking Tips & Techniques
Making these red velvet brownie bites is simple, but I’ve picked up some tricks over the years for next-level results:
- Room-Temperature Ingredients: Butter, eggs, and cream cheese blend more smoothly when not straight from the fridge. This means fewer lumps and a silkier batter.
- Don’t Overmix: Once you add the flour, stir just until you don’t see dry spots. Overmixing makes brownies tough instead of fudgy.
- Watch the Bake Time: Mini muffin pans bake fast. Start checking at 12 minutes—brownies should look set at the edges but still soft in the middle. Carryover heat will finish the job.
- Swirling the Cream Cheese: Less is more! A gentle swirl with a toothpick gives a pretty marbled look. Overdoing it just blends everything together (I’ve learned this the hard way).
- Testing for Doneness: A toothpick should come out with a few moist crumbs—if it’s clean, you’ve gone too far. Fudgy is the goal!
- Chill for Clean Cuts (if needed): If you want to cut larger brownies into bite-sized pieces, chill them first. They’ll slice clean and hold their shape better for the board.
- Multitasking: While the brownies bake, prep your fruits and candies. This way, the board comes together fast and you’re not scrambling at the end.
Confession: I’ve overbaked these before (distracted by chatty friends), and they were still tasty—just a bit more cakey than fudgy. Stick close to the oven, and you’ll nail it every time!
Variations & Adaptations
This red velvet brownie bite board is easy to customize for any crowd, season, or dietary need. Here are some of my favorite twists:
- Gluten-Free: Swap the flour for a 1:1 gluten-free baking blend. I’ve tested King Arthur’s and Bob’s Red Mill—both work great and keep the bites fudgy.
- Dairy-Free: Use vegan butter and cream cheese substitutes (Miyoko’s works well), and swap buttermilk for a plant-based milk with a splash of vinegar or lemon juice.
- Flavor Swaps: Add orange zest to the batter for a chocolate-orange twist, or mix mini chocolate chips into the batter for extra richness. You can also replace the cream cheese with a peanut butter swirl if your friends are PB lovers.
- Different Cooking Methods: Bake as a slab brownie in an 8×8-inch (20x20cm) pan, then cut into bites when cool. It saves time if you don’t have a mini muffin tin.
- Seasonal Boards: For Valentine’s, add pink candies and heart sprinkles; for Christmas, swap in crushed peppermint and green sprinkles; for summer, load up on fresh berries.
- Nut-Free or Allergen-Friendly: Skip nuts and double-check chocolates for cross-contamination if you’re serving friends with allergies.
Personal note: Last year, I made a “chocolate overload” board with brownie bites, chocolate-dipped strawberries, and triple chocolate chips. It was a hit! Don’t be afraid to mix and match to fit your theme or cravings.
Serving & Storage Suggestions
The beauty of a red velvet brownie bite board is how it shines on the table—colorful, playful, and so inviting. Here’s how to get the most out of your creation:
- Serving: Serve the brownie bites at room temperature for the best texture. Arrange them in the center of your board and fill the gaps with fresh fruit, chocolates, and candies for a lush, overflowing look.
- Pairings: These pair perfectly with coffee, hot chocolate, or a glass of sparkling rosé (perfect for Galentine’s!). For after-dinner, serve with a scoop of vanilla ice cream.
- Storage: Store leftover brownie bites in an airtight container at room temperature for up to 2 days or in the fridge for up to 5 days. Board extras like fruit and candies should be stored separately to keep everything fresh.
- Freezing: Brownie bites freeze well—layer with parchment in a freezer-safe box, and thaw at room temperature before serving. The cream cheese swirl will stay creamy if tightly wrapped.
- Reheating: If you love warm brownies, zap a few bites in the microwave for 10-15 seconds. Just enough to bring back that fresh-baked magic.
Personal tip: The flavors deepen on day two, so don’t stress if you’re prepping ahead. Just keep the board components separate until you’re ready to serve for the best look and taste.
Nutritional Information & Benefits
Let’s be honest—these red velvet brownie bites are a treat, but there are a few perks beyond their taste. Here’s what you should know:
- Estimated Nutrition (per brownie bite): 90-110 calories, 4g fat, 13g carbs, 1g protein (varies with toppings and exact ingredients).
- Key Ingredients: Cocoa powder adds antioxidants, and using fresh berries on the board brings in vitamin C and fiber.
- Dietary Swaps: Easily gluten-free or dairy-free with simple substitutions. Nut-free as written, just double-check your add-ons.
- Allergens: Contains wheat, dairy, eggs. Check all ingredient labels if food allergies are a concern.
From my own wellness journey: I believe in balance—celebrating with friends and sweet bites is part of what makes life special. If you need to adapt for your needs, don’t hesitate. There’s room for everyone at the table!
Conclusion
This red velvet brownie bite board isn’t just a recipe—it’s a celebration in every sense. It pulls together rich, fudgy bites and a playful, Pinterest-worthy arrangement that’s sure to be the star of any Galentine’s gathering (or any celebration, really). Let yourself have fun with the board—swap in your favorite candies, go wild with sprinkles, or make it as colorful as you like.
Personally, I love this recipe because it brings people together. There’s nothing better than watching friends light up as they reach for another bite. If you try it, I’d love to hear about your variations—did you add your own twist, or stick with the classic? Leave a comment, share a photo, and spread the Galentine’s spirit!
Whatever you do, don’t forget to savor the moment—the giggles, the chocolatey fingers, and the joy of good company. Happy baking, and happy celebrating!
FAQs for Red Velvet Brownie Bite Board
Can I make the brownie bites ahead of time?
Yes! You can bake the brownie bites up to two days ahead. Just store them in an airtight container at room temperature, and assemble your board right before serving.
What can I use if I don’t have a mini muffin tin?
No worries—bake the batter in an 8×8-inch (20x20cm) pan, then cut into small squares once cooled. They’ll still look adorable on your board.
How do I get a bright red color without using lots of food dye?
Gel food coloring gives a richer color with less product than liquid. You can also use a bit more cocoa powder for flavor, but the color will be deeper and less vibrant.
Are these brownie bites freezer-friendly?
Absolutely. Let them cool completely, then freeze in a single layer before transferring to a freezer-safe container. Thaw at room temperature before serving—still fudgy and delicious!
Can I add nuts or chocolate chips to the batter?
Definitely! Chopped pecans, walnuts, or mini chocolate chips are all tasty additions. Just fold in up to 1/2 cup (60g) before baking for extra crunch or meltiness.
Pin This Recipe!
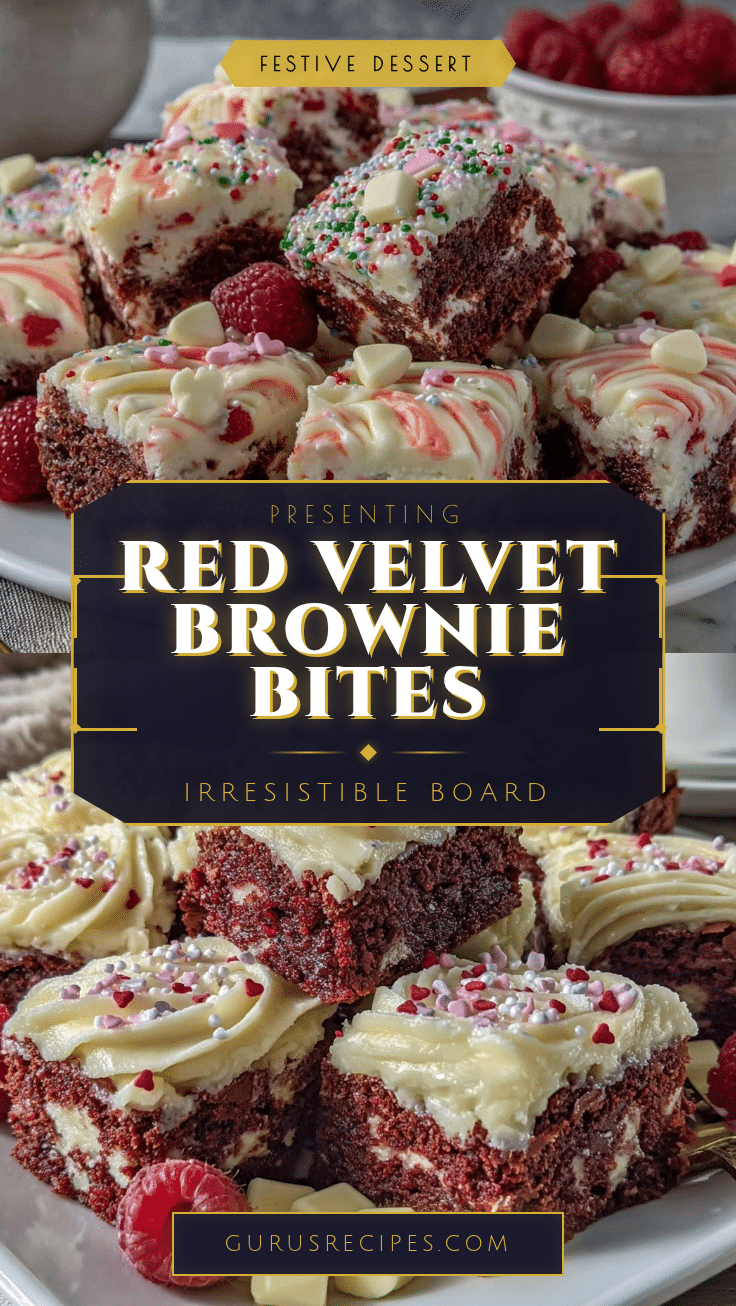

Red Velvet Brownie Bite Board
Rich, fudgy red velvet brownie bites with a tangy cream cheese swirl, arranged on a festive board with fresh fruit, chocolates, and candies—perfect for Galentine’s Day or any celebration.
- Total Time: 35 minutes
- Yield: 20-24 brownie bites 1x
Ingredients
- 1 cup (120g) all-purpose flour, sifted
- 1/4 cup (24g) unsweetened cocoa powder (Dutch-process or natural)
- 1/2 teaspoon espresso powder (optional)
- 1/2 teaspoon baking powder
- 1/4 teaspoon salt
- 1 cup (200g) granulated sugar
- 1/2 cup (113g) unsalted butter, melted and slightly cooled
- 2 large eggs, room temperature
- 1 tablespoon (15ml) vanilla extract
- 1 tablespoon (15ml) red food coloring (liquid or gel)
- 1/2 cup (120ml) buttermilk (or 1/2 cup milk + 1/2 teaspoon vinegar)
- 4 oz (113g) cream cheese, softened
- 2 tablespoons (30g) granulated sugar
- 1 egg yolk
- 1/2 teaspoon vanilla extract
- Fresh strawberries, halved
- Raspberries or cherries
- White chocolate chunks or chips
- Mini marshmallows
- Heart-shaped candies or sprinkles (optional)
- Assorted chocolates (truffles, chocolate-covered pretzels, etc.)
Instructions
- Preheat oven to 350°F (175°C). Lightly grease a mini muffin tin or line with mini muffin papers.
- In a medium bowl, whisk together flour, cocoa powder, espresso powder, baking powder, and salt until lump-free.
- In a large bowl, whisk sugar and melted butter until shiny and smooth. Add eggs one at a time, whisking after each. Stir in vanilla extract and red food coloring.
- Add half the dry mix to the wet ingredients, stir gently, then add buttermilk. Finish with the rest of the dry mix. Stir just until combined.
- In a small bowl, beat cream cheese, sugar, egg yolk, and vanilla until smooth and fluffy (1-2 minutes with a hand mixer).
- Scoop about 1 tablespoon of batter into each mini muffin cup (fills 20-24 cups). Drop a small spoonful of cream cheese swirl in the center of each and swirl gently with a toothpick.
- Bake for 12-15 minutes (16-18 minutes for regular muffin tin). Edges should look set and a toothpick should come out with a few moist crumbs.
- Cool brownie bites in the tin for 5 minutes, then gently pop out onto a rack to finish cooling.
- Arrange cooled brownie bites in the center of a serving board. Surround with strawberries, raspberries, white chocolate, marshmallows, candies, and assorted chocolates.
- Serve and enjoy! Best enjoyed the day they’re made, but they stay fudgy for 2-3 days stored airtight.
Notes
For gluten-free, use a 1:1 gluten-free flour blend. Dairy-free options include vegan butter and cream cheese. Gel food coloring gives a richer red color. Don’t overmix the batter for fudgy bites. Brownie bites freeze well and can be made ahead. Add nuts or chocolate chips for extra flavor. Arrange the board with colorful fruits and candies for a festive look.
- Prep Time: 20 minutes
- Cook Time: 15 minutes
- Category: Dessert
- Cuisine: American
Nutrition
- Serving Size: 1 brownie bite
- Calories: 100
- Sugar: 9
- Sodium: 60
- Fat: 4
- Saturated Fat: 2
- Carbohydrates: 13
- Fiber: 1
- Protein: 1
Keywords: red velvet, brownie bites, Galentine's Day, dessert board, cream cheese swirl, party dessert, easy brownies, chocolate, Valentine's Day, mini brownies


