
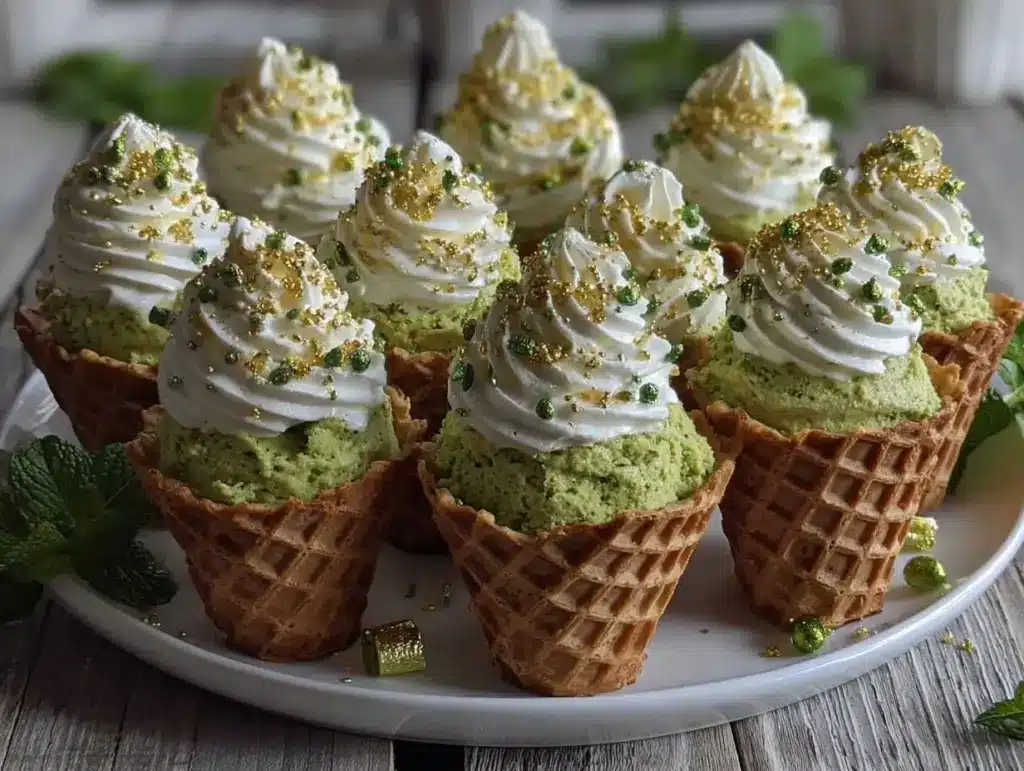
Let me paint you a picture—imagine the sweet, slightly earthy scent of cocoa and vanilla swirling through your kitchen, and that vibrant emerald color peeking out from the oven. There’s something almost magical about pulling out a tray of Green Velvet Cupcake Cones—the way the cake rises just enough to hug the rim of each crisp wafer cone, the way little fingers (and, honestly, grown-ups too) reach out, barely able to wait for the frosting to set. The first time I whipped up these cupcake cones for St. Patrick’s Day, I was instantly hooked. I remember the look on my kids’ faces—the kind of moment where you pause, take a deep breath, and just smile because you know you’re onto something truly special.
Years ago, when I was knee-high to a grasshopper, my grandma made red velvet everything. But on a rainy March weekend, I decided to give her classic recipe a lucky twist. I swapped in green food coloring, grabbed a box of wafer cones, and hoped for the best. Turns out, these Green Velvet Cupcake Cones are dangerously easy and provide pure, nostalgic comfort with a whimsical, party-ready twist. My family couldn’t stop sneaking them off the cooling rack (and I can’t really blame them). Even my neighbor—who claims to “not do sweets”—asked for the recipe after just one bite.
Honestly, you know what makes these so special? They’re perfect for potlucks, school parties, or just brightening up your Pinterest board with that pop of green. Plus, these cupcakes are a breeze to make, but they look like you spent hours crafting them. I tested this recipe more times than I care to admit (in the name of research, of course), and it’s become a staple for family gatherings and gifting. If you’re looking for a treat that feels like a warm hug and stands out from the crowd, you’re going to want to bookmark this one.
Why You’ll Love This Green Velvet Cupcake Cones Recipe
I’ve made my fair share of St. Patrick’s Day desserts, but these Green Velvet Cupcake Cones always steal the show. After years of tweaking and plenty of “just one more taste” moments, I can confidently say this recipe is a crowd-pleaser. Here’s why you’ll fall in love with it too:
- Quick & Easy: These come together in under an hour, so you can whip them up even if you’re tight on time. Perfect for last-minute classroom treats or spontaneous celebrations.
- Simple Ingredients: No hunting for specialty flours or obscure extracts. Everything you need is likely in your pantry or a quick grocery run away.
- Perfect for Celebrations: Whether it’s a school bake sale, family brunch, or a St. Paddy’s Day office potluck, these cupcakes fit right in and add instant festive flair.
- Crowd-Pleaser: Kids are enchanted by the color and shape, but adults fall for the soft, moist crumb and that classic touch of cocoa. I’ve never had leftovers—ever!
- Unbelievably Delicious: The combo of a hint of cocoa, tangy buttermilk, and luscious cream cheese frosting is next-level comfort food, with a playful twist from the cones.
But here’s what really sets this Green Velvet Cupcake Cones recipe apart: I use a little trick I picked up from my pastry chef friend—whipping the butter and sugar longer than usual for extra fluffiness, and adding just enough vinegar to preserve that tender crumb. The green hue is vibrant but not artificial-tasting, thanks to the balance with cocoa. And baking in cones means there’s no dirty cupcake liners or messy peeling—just grab and go (and maybe sneak a second!).
This recipe isn’t just good—it’s the kind that makes you close your eyes for a second and think, “Wow, this is what celebration tastes like.” It’s comfort food reimagined for any gathering. Plus, it’s reliable. I’ve made it for allergy-sensitive friends (with tweaks), picky eaters, and even my skeptical auntie who usually brings her own dessert. Every time, it gets rave reviews, and I feel like a baking rock star with zero stress. Try it once, and I bet you’ll be adding it to your regular rotation, not just for St. Patrick’s Day but any time you want smiles all around.
What Ingredients You Will Need
This Green Velvet Cupcake Cones recipe relies on everyday ingredients to create bold color, rich flavor, and a fun, handheld treat. Most of the items are pantry staples, and you can swap a few things if you need to. Here’s what you’ll need:
- For the Cupcakes:
- 1 1/4 cups (150g) all-purpose flour (sifted for best texture)
- 1 cup (200g) granulated sugar
- 2 tablespoons (12g) unsweetened cocoa powder (Dutch-process or natural—Hershey’s works well)
- 1/2 teaspoon baking soda
- 1/2 teaspoon salt
- 1/2 cup (113g) unsalted butter, softened (I like to use Kerrygold for extra richness)
- 2 large eggs, room temperature
- 3/4 cup (180ml) buttermilk, room temperature (can sub with 3/4 cup milk plus 2 tsp lemon juice or vinegar if needed)
- 1 tablespoon (15ml) white vinegar (keeps the crumb tender and bright)
- 1 teaspoon vanilla extract
- 1–2 teaspoons green gel food coloring (I use AmeriColor for the most vibrant hue; start with 1 and add more as needed)
- 18–20 flat-bottomed ice cream cones (the classic kind, not sugar cones)
- For the Cream Cheese Frosting:
- 1/2 cup (113g) unsalted butter, softened
- 8 oz (226g) cream cheese, softened (full-fat makes for the smoothest frosting)
- 3 cups (360g) powdered sugar, sifted
- 1 teaspoon vanilla extract (or almond for a twist)
- Pinch of salt
- Green sprinkles, gold sugar, or mini shamrock candies for topping (optional but so festive!)
Ingredient Tips: If you need gluten-free, swap the all-purpose flour for a 1:1 gluten-free blend (I like King Arthur’s Measure for Measure). For dairy-free, use vegan butter, your favorite non-dairy milk with lemon juice, and vegan cream cheese. The cones themselves are usually dairy-free, but check labels to be sure.
For the green color, gel food coloring gives the most vibrant shade without thinning your batter. You can experiment with natural food coloring too, but the color won’t be as bold. If you want a deeper cocoa flavor, add up to 1 tablespoon (7g) cocoa powder—just note the green will be slightly muted.
You can also swap the cream cheese frosting for a classic vanilla buttercream or a dairy-free frosting if you’re avoiding cream cheese. In summer, I sometimes add a handful of finely chopped fresh mint to the frosting for a cool twist—highly recommend if you’re a mint fan!
Equipment Needed
- Electric mixer: Stand mixer or hand mixer will work for creaming butter, sugar, and whipping up that dreamy frosting. If you don’t have one, a sturdy whisk and a little muscle do the trick (just takes longer).
- Mixing bowls: At least two—one for batter, one for frosting. Glass or stainless steel are easiest to clean.
- Measuring cups and spoons: For accuracy, especially with baking. I’m a fan of the stainless steel kind—they last forever and don’t warp in the dishwasher.
- Ice cream scoop or large spoon: Makes filling the cones super easy and helps keep the cupcakes even.
- Baking sheet: For holding the cones upright. I sometimes crumple a bit of foil to nestle the cones so they don’t tip over, but a muffin tin works too.
- Piping bag and large star tip (optional): For fancy frosting swirls. If you don’t have a piping bag, a zip-top bag with one corner snipped works in a pinch.
- Cooling rack: To let the cones cool completely without getting soggy bottoms.
If you’re worried about cones tipping in the oven, I’ve used a muffin tin lined with foil “nests”—just scrunch up pieces of foil and set the cones in so they stand steady. For quick clean-up, line your baking sheet with parchment paper. Budget option: Dollar store mixing bowls and a hand whisk work just fine if you’re baking with kids or in a pinch!
How to Make Green Velvet Cupcake Cones
-
Prep Your Cones:
- Preheat your oven to 350°F (175°C). Place 18–20 flat-bottomed ice cream cones upright in a muffin tin or nestled in foil on a baking sheet. This keeps them from tipping over. (Tried and learned: cones tip easily, so take the extra minute to secure them!)
-
Mix the Dry Ingredients:
- In a medium bowl, whisk together 1 1/4 cups (150g) all-purpose flour, 2 tablespoons (12g) cocoa powder, 1/2 teaspoon baking soda, and 1/2 teaspoon salt. Set aside.
-
Cream Butter and Sugar:
- In a large bowl, use your electric mixer to beat 1/2 cup (113g) softened butter with 1 cup (200g) sugar for 3–4 minutes, until it’s pale and fluffy. Don’t skimp on this step—it’s the secret to that soft, tender crumb.
-
Add Eggs and Flavor:
- Beat in 2 large eggs, one at a time, scraping down the bowl after each. Mix in 1 teaspoon vanilla extract.
-
Tint and Combine:
- Stir 1–2 teaspoons green gel food coloring into 3/4 cup (180ml) buttermilk. The color should be a bright, shamrock green—add more or less as desired.
-
Mix Wet and Dry Ingredients:
- With the mixer on low, alternate adding the dry ingredients and green buttermilk to the butter mixture, starting and ending with dry. Mix until just combined—don’t overmix or your cupcakes might get tough.
-
Vinegar Magic:
- In a small bowl, combine 1 tablespoon (15ml) white vinegar with 1 teaspoon baking soda. It’ll fizz—quickly fold this into your batter for that classic velvet texture and rise.
-
Fill the Cones:
- Using an ice cream scoop or large spoon, fill each cone about 2/3 full. Don’t overfill—batter rises! (If you fill too high, they’ll spill over and create a cupcake “muffin top”—tasty, but a mess.)
-
Bake:
- Bake in the preheated oven for 18–22 minutes, or until a toothpick inserted into the center comes out clean. The tops should spring back when lightly pressed. Rotate the pan halfway for even baking.
-
Cool Completely:
- Let the cones cool in the pan for 5 minutes, then transfer to a cooling rack. (If you frost too soon, the frosting will melt—been there, done that.)
-
Make the Cream Cheese Frosting:
- Beat 1/2 cup (113g) butter and 8 oz (226g) cream cheese until smooth, about 2 minutes. Gradually add 3 cups (360g) powdered sugar, beating until fluffy. Mix in 1 teaspoon vanilla and a pinch of salt. If the frosting is too soft, chill for 10–15 minutes.
-
Frost and Decorate:
- Pipe or spread frosting on cooled cupcake cones. Top with green sprinkles, gold sugar, or mini shamrock candies for extra fun.
Personal tip: Bake a test cone—every oven is different, and this helps you get the perfect bake time. If your cones brown too quickly, tent with foil. If you notice any cones getting soggy, cool them completely on a rack before storing. And don’t worry if a few topple in the oven—just dust with sprinkles and call them “leprechaun-style!”
Cooking Tips & Techniques
- Don’t Overfill the Cones: Seriously, the batter rises more than you think! Stick to 2/3 full—overflow leads to messy tops and uneven baking. I learned this the hard way, with a few “volcano” cones in my first batch.
- Securing the Cones: Nestle cones in a muffin tin or foil “nests” on a baking sheet to avoid tip-overs. If you’re making a big batch, the muffin tin trick saves so much heartache (and clean-up time).
- Room Temperature Ingredients: Make sure your eggs, butter, and buttermilk are at room temperature for the fluffiest texture. Cold ingredients can cause the batter to split, and that’s no fun to fix.
- Mixing Technique: Cream the butter and sugar longer than you think—3–4 minutes until pale and light. This step makes all the difference in the cupcake’s crumb. Don’t overmix after adding flour; just combine until you don’t see streaks.
- Check for Doneness: Every oven is a little quirky. Start checking at 18 minutes—look for springy tops and a toothpick that comes out clean. If the tops are browning too fast, loosely tent with foil.
- Chill the Frosting: If your kitchen is warm (looking at you, summer bakers), pop the frosting in the fridge for 10–15 minutes before piping. It holds its shape better and looks more festive.
- Decorate Just Before Serving: If you’re adding sprinkles or candy toppings, do it right after frosting so they stick. For parties, I sometimes set up a “decorate your own” station—kids love it, and so do adults!
Multitasking tip: Make the frosting while the cones are baking, then chill it while the cupcakes cool. And if you’re like me and get distracted, set a timer—burnt cones are no one’s idea of lucky! Lastly, if you find the cones getting soft after storage, a quick 2-minute toast in a 300°F (150°C) oven crisps them up again.
Variations & Adaptations
- Gluten-Free Version: Swap the all-purpose flour for a 1:1 gluten-free baking blend. I’ve tried King Arthur’s Measure for Measure with great results. Just keep an eye on the bake time—it might need 2–3 extra minutes.
- Dairy-Free: Use vegan butter and cream cheese, and your favorite non-dairy milk plus vinegar instead of buttermilk. The color stays just as vibrant, and the flavor is still spot-on.
- Flavor Twists:
- Add 1/2 teaspoon mint extract to the batter or frosting for a “lucky mint” vibe.
- Stir in mini chocolate chips or chopped pistachios for texture and extra flavor.
- Top with orange sprinkles or candied ginger for a rainbow-inspired effect.
- Cooking Methods: If you don’t have an oven, you can make the batter into regular cupcakes and microwave in cups (just 1–2 minutes on high, but watch carefully!). The cone will soften more in the microwave, but it works in a pinch.
- Personal Touch: Sometimes I swirl a bit of gold luster dust into the frosting for a “pot of gold” effect. My kids love adding edible glitter—so fun for parties!
For nut allergies, skip pistachios and double-check your cones for cross-contamination warnings. You can also swap the cream cheese frosting for a simple glaze if you’re egg- or dairy-free. Honestly, once you master the base, you’ll find endless ways to make these Green Velvet Cupcake Cones fit any celebration or dietary need.
Serving & Storage Suggestions
- Serving: These cupcake cones are best served at room temperature. Arrange them upright on a platter or in a tall vase for a party-ready look. For extra flair, wrap the cones’ bases with a bit of green ribbon or set them in a decorative “grass” box for that Pinterest-perfect touch.
- Pairings: Serve with cold milk, hot cocoa, or a festive green punch for kids. For adults, a cup of Irish coffee or a creamy stout pairs surprisingly well!
- Storage: Store frosted cones upright in an airtight container at room temperature for up to 2 days. If it’s humid, keep them in the fridge, but bring to room temp before serving so the cones don’t get chewy.
- Freezing: The baked (unfrosted) cupcakes freeze beautifully—just thaw at room temp and frost before serving. I don’t recommend freezing assembled cones as the cones can get soggy.
- Flavor Development: The flavor actually improves after a day, as the cocoa, buttermilk, and vanilla meld. If you’re making ahead, frost just before serving for the freshest taste and texture.
Reheating isn’t necessary, but if you want to crisp up the cones, a quick 2-minute stint in a low oven (300°F/150°C) works wonders. Don’t microwave assembled cones—the frosting will melt and the cones might soften.
Nutritional Information & Benefits
Here’s an estimate per cupcake cone (frosted):
- Calories: ~230
- Total fat: 9g
- Saturated fat: 5g
- Carbohydrates: 34g
- Protein: 3g
- Sugar: 22g
Key ingredient benefits: Buttermilk adds calcium and a nice probiotic boost (if you use cultured), while the cocoa powder brings antioxidants—even in a treat, that’s a little win! You can make these gluten-free or dairy-free for different dietary needs. Just note: cones may contain wheat and sometimes soy, so check your labels if you’re baking for allergies. From a wellness perspective, I love that these Green Velvet Cupcake Cones are portion-controlled and make celebrations feel special without being overindulgent. Plus, they’re nut-free as written and easy to adapt for most diets.
Conclusion
If you’re searching for a treat that’s festive, fun, and guaranteed to spark joy at any celebration, these Green Velvet Cupcake Cones are it. They’re simple enough for a weekday, but special enough for St. Patrick’s Day, birthday parties, or just because. I love how easy they are to customize with your favorite colors, toppings, and flavors—honestly, it’s the kind of recipe that never gets boring. Every time I make them, I’m reminded of kitchen memories with my family, and I hope they become a tradition for you too.
Don’t be afraid to make these your own—swap in new flavors, experiment with different cones, or let the kids decorate their own. I’d love to hear how yours turn out! Leave a comment below, share your photos, or tag me if you post your Green Velvet Cupcake Cones on social media. Happy baking, and may your celebrations be as sweet and lucky as these cupcakes!
Frequently Asked Questions
Can I make Green Velvet Cupcake Cones ahead of time?
Yes! You can bake the cupcake cones a day in advance and frost them just before serving. If you need to make them further ahead, freeze the baked cupcakes (without cones), then defrost and assemble on the day you need them.
What’s the best way to transport these to a party?
Stand the cones upright in a deep baking dish or a tall box lined with a kitchen towel to prevent tipping. If you’re traveling far, bring the frosting separately and decorate on site for best results.
Can I use natural food coloring instead of gel?
You can! Try spirulina powder, matcha, or spinach juice for a natural green color. The shade will be more muted, but the cupcakes will still taste great.
What should I do if the cones get soft?
If your cones absorb moisture and soften, pop them in a 300°F (150°C) oven for 2–3 minutes to crisp up before serving. Let them cool before adding frosting.
Can I make these allergy-friendly?
Absolutely. Use gluten-free flour and dairy-free substitutes for butter, buttermilk, and cream cheese. Check the ice cream cones for allergens, as some may contain wheat or be processed in facilities with nuts or soy.
Pin This Recipe!

Green Velvet Cupcake Cones
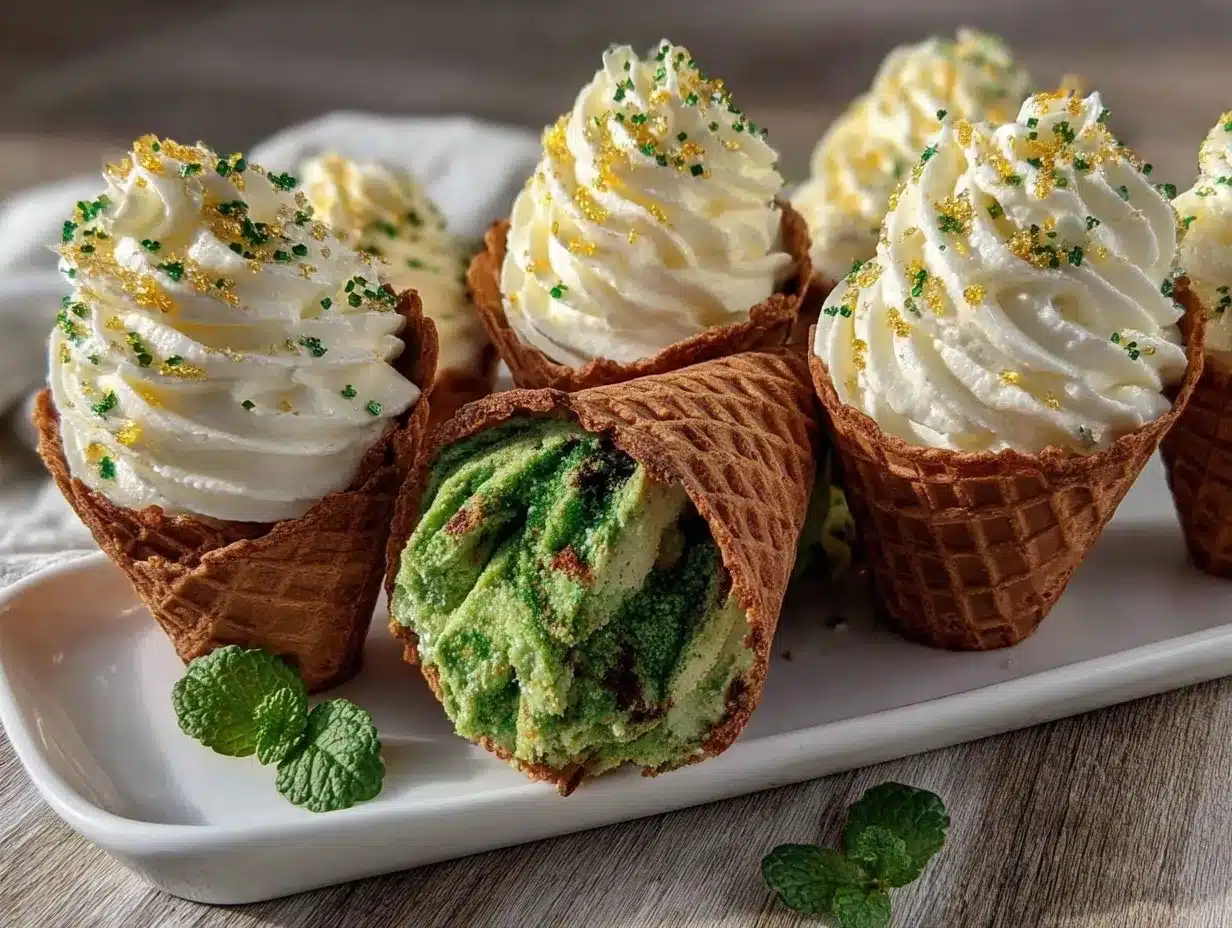
These Green Velvet Cupcake Cones are a festive, handheld treat perfect for St. Patrick’s Day or any celebration. Moist green velvet cake is baked right into crisp ice cream cones and topped with luscious cream cheese frosting for a whimsical, crowd-pleasing dessert.
- Total Time: 42 minutes
- Yield: 18–20 cupcake cones 1x
Ingredients
- 1 1/4 cups all-purpose flour, sifted
- 1 cup granulated sugar
- 2 tablespoons unsweetened cocoa powder
- 1/2 teaspoon baking soda
- 1/2 teaspoon salt
- 1/2 cup unsalted butter, softened
- 2 large eggs, room temperature
- 3/4 cup buttermilk, room temperature (or 3/4 cup milk plus 2 tsp lemon juice or vinegar)
- 1 tablespoon white vinegar
- 1 teaspoon vanilla extract
- 1–2 teaspoons green gel food coloring
- 18–20 flat-bottomed ice cream cones
- For the Cream Cheese Frosting:
- 1/2 cup unsalted butter, softened
- 8 oz cream cheese, softened
- 3 cups powdered sugar, sifted
- 1 teaspoon vanilla extract (or almond extract)
- Pinch of salt
- Green sprinkles, gold sugar, or mini shamrock candies for topping (optional)
Instructions
- Preheat oven to 350°F (175°C). Place 18–20 flat-bottomed ice cream cones upright in a muffin tin or nestled in foil on a baking sheet to keep them from tipping.
- In a medium bowl, whisk together flour, cocoa powder, baking soda, and salt. Set aside.
- In a large bowl, beat softened butter and sugar with an electric mixer for 3–4 minutes until pale and fluffy.
- Beat in eggs one at a time, scraping down the bowl after each. Mix in vanilla extract.
- Stir green gel food coloring into buttermilk until desired shade is reached.
- With mixer on low, alternate adding dry ingredients and green buttermilk to the butter mixture, starting and ending with dry. Mix until just combined.
- In a small bowl, combine white vinegar with baking soda. Quickly fold this fizzy mixture into the batter.
- Fill each cone about 2/3 full with batter using an ice cream scoop or large spoon.
- Bake for 18–22 minutes, or until a toothpick inserted into the center comes out clean and tops spring back when pressed. Rotate pan halfway for even baking.
- Let cones cool in the pan for 5 minutes, then transfer to a cooling rack to cool completely.
- For frosting: Beat butter and cream cheese until smooth, about 2 minutes. Gradually add powdered sugar, beating until fluffy. Mix in vanilla and a pinch of salt. Chill if too soft.
- Pipe or spread frosting on cooled cupcake cones. Decorate with sprinkles, gold sugar, or candies as desired.
Notes
Don’t overfill cones—stick to 2/3 full to avoid overflow. Secure cones in muffin tin or foil nests to prevent tipping. Use room temperature ingredients for best texture. Cream butter and sugar thoroughly for a tender crumb. If cones get soft after storage, crisp in a 300°F oven for 2 minutes. For gluten-free or dairy-free, substitute flour and dairy ingredients as needed. Decorate just before serving for best results.
- Prep Time: 20 minutes
- Cook Time: 22 minutes
- Category: Dessert
- Cuisine: American
Nutrition
- Serving Size: 1 cupcake cone
- Calories: 230
- Sugar: 22
- Sodium: 150
- Fat: 9
- Saturated Fat: 5
- Carbohydrates: 34
- Protein: 3
Keywords: green velvet, cupcake cones, St. Patrick's Day, cream cheese frosting, party dessert, kid-friendly, handheld treat, festive cupcakes


