
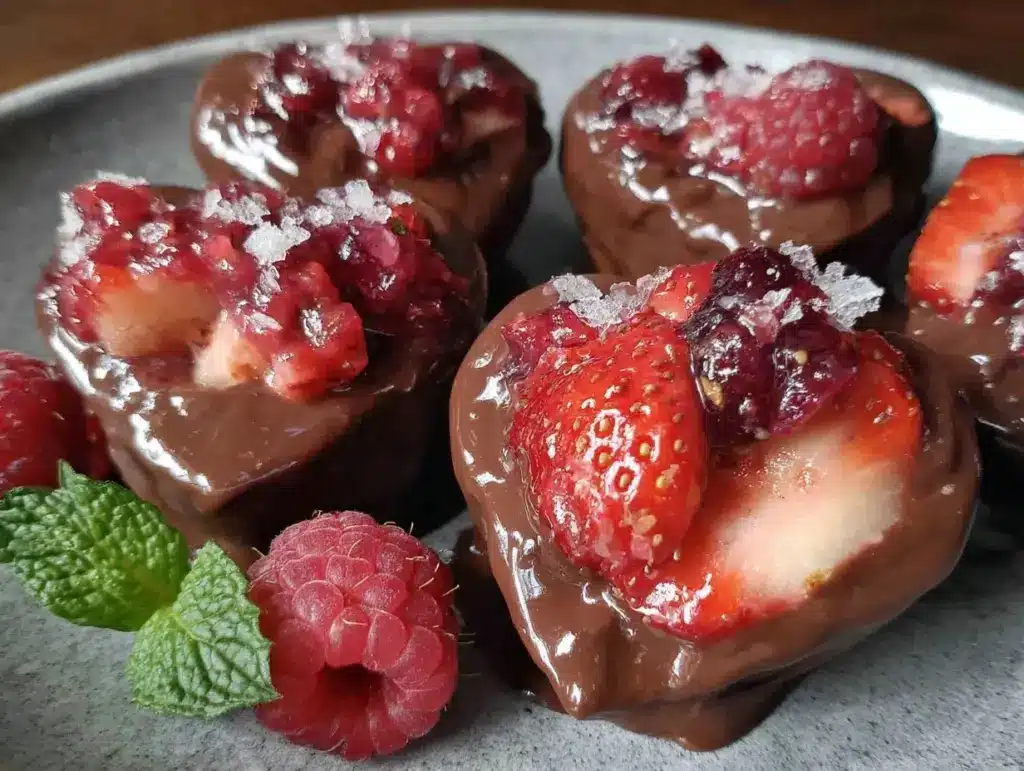
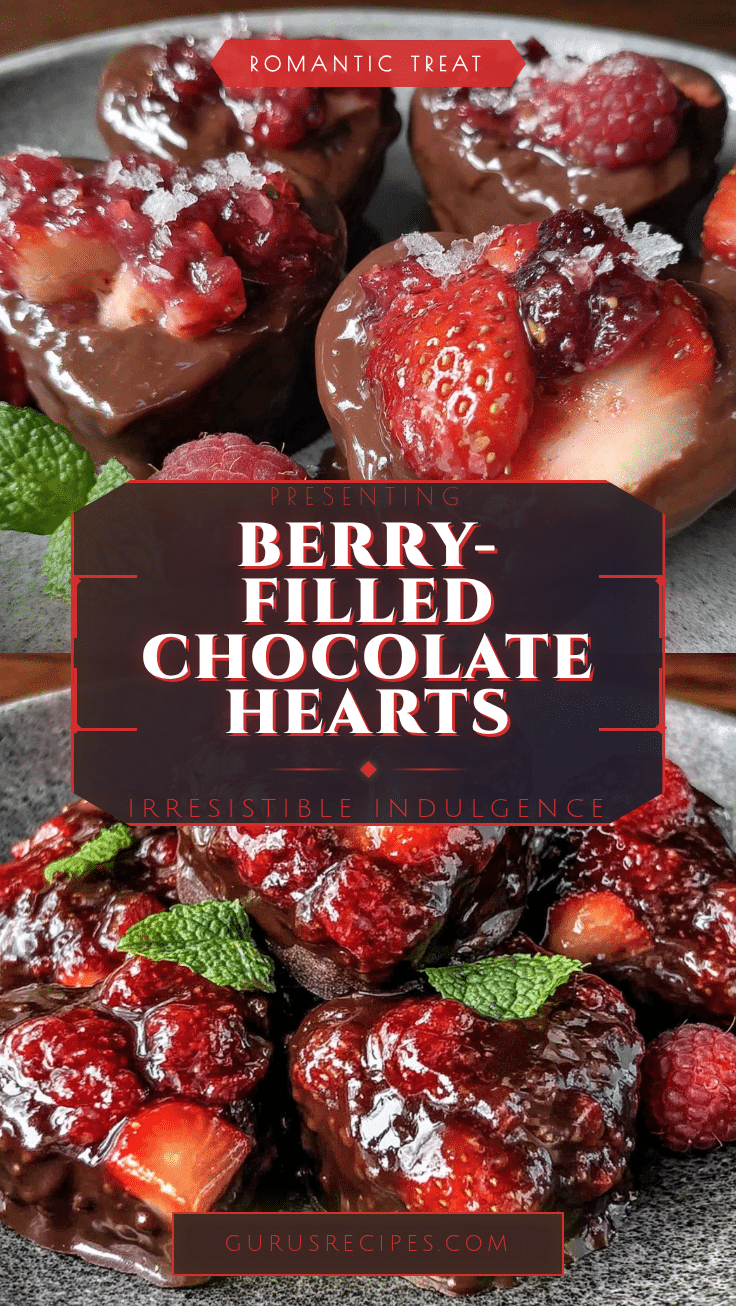
Picture this: the sweet, almost intoxicating scent of melted chocolate swirling through your kitchen, a hint of tangy berries lingering in the air, and the gentle snap as you bite into a glossy heart-shaped treat. That’s the magic of these Valentine’s Berry-Stuffed Chocolate Hearts—rich chocolate shells with a surprise burst of fresh berry filling. The first time I made these, it was one of those chilly February afternoons where you just want to cozy up and make something special (preferably something that involves chocolate, let’s be real). I remember standing over the counter, nervously filling each mold, hoping for that perfect glossy finish and wondering if the berries would burst with flavor. When I finally tasted one, it was a moment of pure, sweet discovery—the kind of moment where you pause, take a deep breath, and just smile because you know you’re onto something truly special.
I’ve always had a soft spot for heart-shaped treats. Growing up, my grandma used to make little chocolate candies for every holiday—Valentine’s Day was her favorite. She’d let me help with the dipping, even when I was knee-high to a grasshopper, and those afternoons were filled with giggles and sticky fingers. These berry-stuffed hearts are my grown-up twist on her tradition, blending nostalgia with a modern, fruity surprise in every bite. Honestly, I wish I’d stumbled onto this idea years ago—it’s become my go-to for gifting, especially since my family can’t stop sneaking them off the tray (I can’t blame them, these are dangerously easy to love).
Whether you’re making these for a romantic gesture, a sweet treat for your kids, or just to brighten up your Pinterest cookie board, these Valentine’s Berry-Stuffed Chocolate Hearts truly hit the spot. They’re the kind of homemade candy that feels like a warm hug—perfect for sharing, gifting, or, let’s face it, hiding away for yourself. After several rounds of “testing” (in the name of research, of course), I can say with confidence: these are a staple at our house for every Valentine’s Day and beyond. Get ready—you’re going to want to bookmark this one!
Why You’ll Love This Recipe
There are chocolate hearts, and then there are these Valentine’s Berry-Stuffed Chocolate Hearts. I’ve tested dozens of variations (some less successful than others—ask me about the time my filling completely vanished!), and this version is the one I keep coming back to. Here’s why you’ll fall head over heels for this recipe:
- Quick & Easy: These come together in under an hour, making them perfect for last-minute gifting or satisfying a late-night chocolate craving.
- Simple Ingredients: No need for a fancy shopping list—most of these are pantry staples, plus some fresh berries you can grab from any grocery store.
- Perfect for Valentine’s Day (or any celebration): Heart-shaped and filled with sweet-tart berries, these treats are tailor-made for February 14th, but honestly, they’re a hit year-round.
- Crowd-Pleaser: My kids and husband practically fight over who gets the last one. They’re great for parties, gift boxes, or just because.
- Unbelievably Delicious: The contrast between the snap of chocolate and the juicy berry filling is next-level comfort food. You get a little tang, a lot of sweet, and just enough richness to make you swoon.
So, what makes these Valentine’s Berry-Stuffed Chocolate Hearts different from all the other chocolate candies out there? For starters, it’s the real berry filling—no jams or preserves, just fresh or frozen berries that burst with natural flavor. I use a special technique of chilling the filling before tucking it inside, which keeps the chocolate crisp and the berries bright. You can even swap in your favorite chocolate—dark, milk, or white—for a personal touch. It’s not just a cute shape; it’s a flavor experience that makes you close your eyes and sigh after the first bite.
For me, these hearts aren’t just about the taste—they’re about creating memories. Whether you’re impressing a sweetheart, treating your kids, or just spoiling yourself, these chocolates bring all the joy of a bakery treat without the stress or mess. It’s homemade candy, redefined—easy, approachable, and guaranteed to put a smile on your face.
What Ingredients You Will Need
This Valentine’s Berry-Stuffed Chocolate Hearts Recipe uses simple, wholesome ingredients to deliver bold flavor and that irresistible, juicy center. Most of these ingredients are easy to find, and there’s lots of flexibility for swaps if you want to mix things up.
- For the Chocolate Shells:
- High-quality chocolate chips or bars (dark, milk, or white; about 10 oz / 285 g). I love Ghirardelli or Guittard for glossy, smooth shells.
- Coconut oil (2 teaspoons / 10 mL, optional; helps with melting and shine)
- For the Berry Filling:
- Fresh or frozen berries (1 cup / 150 g)—strawberries, raspberries, or a mix. If using frozen, thaw and drain excess juice.
- Powdered sugar (2-3 tablespoons / 16-24 g, to taste)
- Lemon juice (1 teaspoon / 5 mL, adds brightness)
- Cornstarch (1/2 teaspoon / 2 g, thickens the filling)
- Pinch of salt
- Optional Garnishes:
- Edible gold leaf, sprinkles, or freeze-dried berry powder (for extra Valentine’s pizzazz)
Ingredient Tips: For the chocolate, make sure you choose real chocolate (not candy melts) for best flavor and texture. If you want to keep it dairy-free, use a vegan chocolate. For the berries, I usually reach for raspberries or strawberries, but blackberries and blueberries work too—just chop them up if they’re large. Powdered sugar dissolves easily for a smoother filling, but you could use honey or maple syrup in a pinch (the filling will be a little stickier). Cornstarch is my trick for keeping the berries from leaking out—don’t skip it if you want clean, neat centers!
Substitutions? You bet:
- Swap coconut oil with a neutral oil or leave it out if your chocolate is already glossy.
- Try monkfruit or stevia for a lower sugar filling.
- Use dairy-free chocolate for vegan hearts.
- Nut allergies? Skip garnishes with nuts and double-check your chocolate label.
These ingredients are flexible, so don’t stress if you need to make a swap—these hearts are forgiving and always delicious.
Equipment Needed
You don’t need a professional candy kitchen to make these Valentine’s Berry-Stuffed Chocolate Hearts. Here’s what I use (plus some budget-friendly alternatives):
- Heart-shaped silicone molds: These make unmolding a breeze and give you that perfect, Pinterest-worthy shape. If you don’t have heart molds, mini muffin tins with paper liners work in a pinch—just call them “chocolate cups.”
- Microwave-safe bowl or double boiler: For melting chocolate evenly. I prefer a glass mixing bowl for easy pouring.
- Spoon or small brush: To coat the mold evenly with melted chocolate. A pastry brush is great, but a regular teaspoon works too.
- Small saucepan: For cooking the berry filling.
- Mixing spoon and fork: For stirring and mashing berries.
- Refrigerator or freezer: For quick setting.
- Optional: Small piping bag or zip-top bag (for neater filling), offset spatula (for smoothing tops).
I’ve found that silicone molds are a game changer—no sticking, easy to wash, and they last forever if you hand wash them. If you’re just starting out, you can usually find these for a few dollars at discount stores or online. And honestly, don’t stress about perfection—a little rustic charm makes these feel even more homemade and heartfelt.
How to Make Valentine’s Berry-Stuffed Chocolate Hearts
-
Prep Your Tools & Ingredients (5 minutes)
Wash and dry your heart molds (or mini muffin liners). Measure out all ingredients before you start—trust me, it makes things less hectic if you’re working with melted chocolate. -
Make the Berry Filling (10 minutes)
In a small saucepan, combine 1 cup (150 g) berries, 2-3 tablespoons (16-24 g) powdered sugar, 1 teaspoon (5 mL) lemon juice, 1/2 teaspoon (2 g) cornstarch, and a pinch of salt. Mash the berries slightly with a fork. Cook over medium heat, stirring often, until the mixture thickens and becomes jammy—about 5-7 minutes. You want the filling to hold together but stay a little juicy. Taste and add more sugar if you like it sweeter. Transfer to a bowl and chill in the fridge for at least 10 minutes. (This step keeps the filling from melting the chocolate later.) -
Melt the Chocolate (5 minutes)
Place 10 oz (285 g) chocolate and 2 teaspoons (10 mL) coconut oil in a microwave-safe bowl. Microwave in 20-second bursts, stirring after each, until just melted and smooth. Or use a double boiler over simmering water. Don’t overheat—chocolate should be glossy and pourable, not grainy. If it starts to seize, add a bit more oil and stir gently. -
Coat the Molds (10 minutes)
Spoon about 1 teaspoon (5 g) melted chocolate into each heart mold cavity. Use the back of your spoon (or a pastry brush) to spread the chocolate evenly up the sides. Tap the mold gently on the counter to remove air bubbles. Chill in the fridge or freezer for 5-10 minutes, until set. If you want thicker shells, repeat with a second layer of chocolate and chill again. -
Add the Berry Filling (5 minutes)
Spoon about 1/2 teaspoon (2-3 g) of the chilled berry filling into each chocolate shell. Leave a little space at the top so you can seal them with more chocolate. If your filling is too runny, chill it a few more minutes. -
Seal with More Chocolate (5 minutes)
Cover the filling with a final teaspoon (5 g) of melted chocolate, smoothing the tops with a spoon or spatula. Tap the mold again to level the chocolate and get rid of bubbles. -
Chill Until Set (15-20 minutes)
Place the filled molds in the fridge or freezer until completely firm (about 15-20 minutes). Don’t rush this step—the chocolate should release cleanly and have a nice snap. -
Unmold & Decorate (5 minutes)
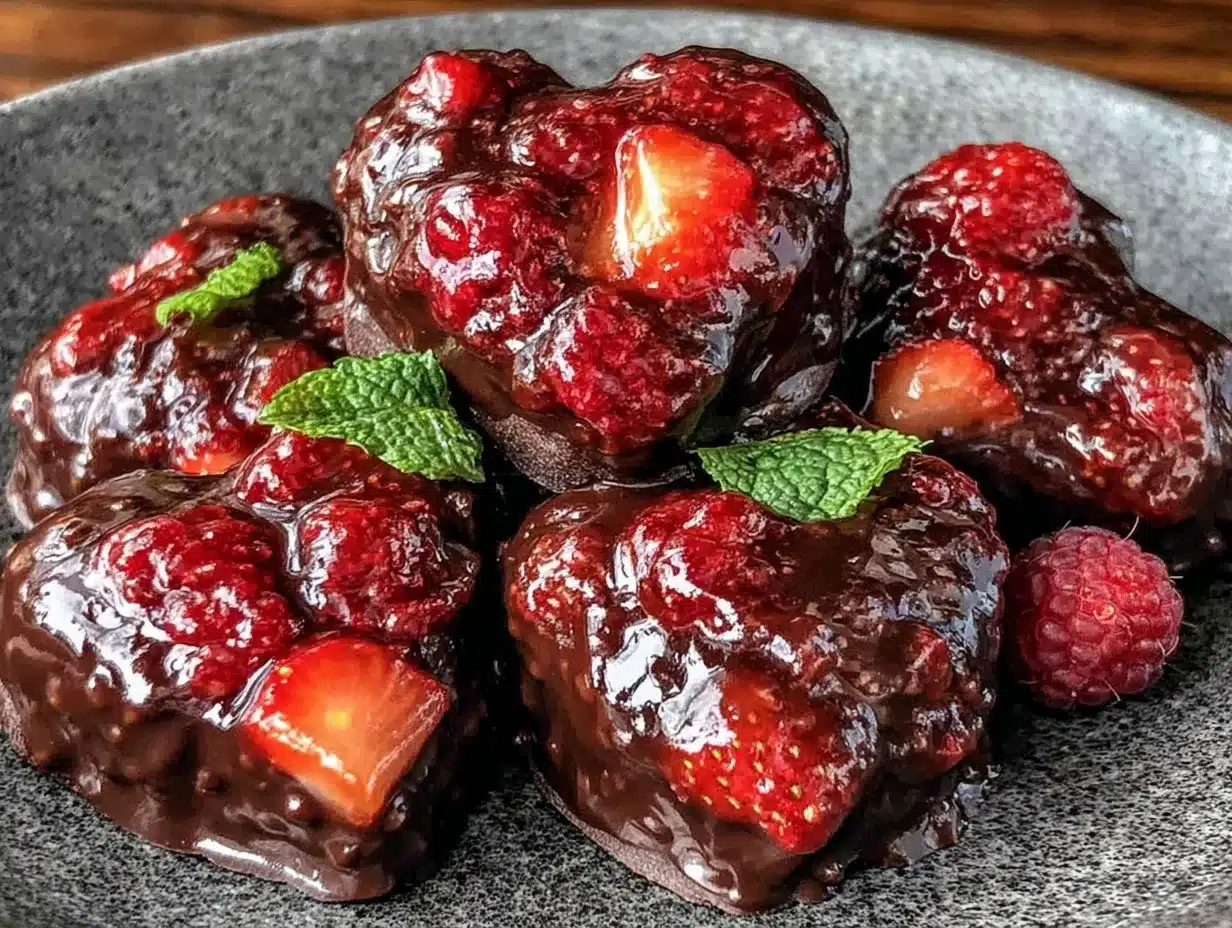
Carefully pop each heart out of the silicone mold. If you want, decorate with a drizzle of melted white chocolate, edible gold leaf, or a sprinkle of freeze-dried berry powder. Let any decorations set before handling.
Troubleshooting: If your chocolate cracks, your shells might be too thin—add a second coat next time. If the filling leaks, make sure it’s cooled and thickened before using. And don’t worry if they’re not picture-perfect—homemade charm always wins hearts!
Chocolate Candy-Making Tips & Techniques
Making Valentine’s Berry-Stuffed Chocolate Hearts is part science, part art. Here’s what I’ve learned after a few chocolate mishaps and some sweet victories:
- Don’t rush the melting: Chocolate burns fast! Always use short bursts in the microwave or a gentle double boiler. If it gets grainy, a little extra coconut oil can sometimes save the batch.
- Chill between layers: Let each chocolate layer set completely before adding filling or more chocolate. This keeps the shells from cracking and the filling from leaking.
- Use dry tools: Any water will make chocolate seize—make sure bowls and spoons are bone dry before you melt.
- Get ahead with multitasking: While the filling cools, prep the molds and melt the chocolate. This way, you’re never waiting around.
- Test one first: If you’re new to candy-making, fill just one heart and see how it turns out. Adjust the chocolate or filling as needed before filling the rest.
- Don’t skip the cornstarch: It keeps the berry filling thick enough to stay put inside the chocolate shell.
- If your kitchen is warm: Pop the finished hearts in the freezer for a few minutes before unmolding—no sticky hands, no messy chocolate.
And one more thing I learned the hard way: Always taste the filling before you use it! Sometimes berries are more tart than you expect, so adjust the sugar to your liking. That’s the secret to getting hearts that taste as good as they look.
Variations & Adaptations
- For Different Diets:
- Vegan: Use dairy-free chocolate and swap honey with maple syrup if using. Check your molds for nonstick coatings if you’re strictly vegan.
- Gluten-Free: Most chocolate is naturally gluten-free, but always check the labels—some add stabilizers or flavors that may contain gluten.
- Low-Sugar: Choose a sugar-free chocolate and use monkfruit or stevia in the filling.
- Seasonal Twists:
- Try chopped cherries or blackberries in summer.
- In the fall, add a pinch of cinnamon or orange zest for a cozy flavor twist.
- Flavor Fun:
- Add a drop of vanilla or almond extract to the berry filling.
- Mix in a handful of mini chocolate chips for extra texture.
- Drizzle the tops with a contrasting chocolate (white or ruby) for a bakery-style look.
- Cooking Methods:
- No mold? Use mini cupcake liners and make “chocolate berry cups.”
- Feeling fancy? Use a piping bag to add a swirl of whipped cream or nut butter inside with the berries.
- Allergen Swaps:
- Nut allergies? Just skip the nuts and check your chocolate for cross-contamination.
My favorite personal twist? I once added a tiny spoonful of homemade raspberry jam alongside the berries. The result was a double-berry punch—so good, it barely lasted a day in our house!
Serving & Storage Suggestions
For the best wow factor, serve these Valentine’s Berry-Stuffed Chocolate Hearts chilled but not ice-cold—the filling is juiciest at room temperature but the chocolate stays snappy from the fridge. Arrange them on a pretty platter or tuck a few into mini candy boxes for gifting (with a little tissue paper for charm).
Pair with a hot mug of coffee, a glass of champagne, or a scoop of vanilla ice cream for an extra treat. These hearts also shine as a sweet ending to a romantic dinner or a festive brunch spread.
Storage:
- Refrigerator: Store in an airtight container for up to 1 week. Layer with parchment paper if stacking.
- Freezer: Freeze in a single layer, then transfer to a zip-top bag for up to 2 months. Thaw at room temp for 10-15 minutes before serving.
If you’re making these ahead, know that the berry flavor gets even better after a day or two. Just keep them away from strong-smelling foods (chocolate absorbs odors easily!).
Leftovers? I rarely have any, but these make a delightful midnight snack or a quick sweet bite with your morning coffee.
Nutritional Information & Benefits
Each Valentine’s Berry-Stuffed Chocolate Heart is approximately 90-120 calories (depending on chocolate type and filling amount), with about 6-8g of sugar, 2g of fiber, and a small dose of vitamin C from the berries. Using dark chocolate bumps up the antioxidants and lowers the sugar a bit. The berries add a fresh, fruity twist and a little fiber, making these hearts a better-for-you treat compared to store-bought candies.
Dietary considerations: These are naturally gluten-free if you check your chocolate brand, and they can be easily adapted to be dairy-free or vegan. Be aware of potential allergens—always read chocolate labels for possible traces of nuts, milk, or soy. If you’re watching your sugar, opt for a lower-sugar chocolate and sweetener for the filling. From my own wellness journey, I love being able to control exactly what goes into these—less sugar, more real fruit, and all the joy of a homemade treat.
Conclusion
There’s just something magical about making your own Valentine’s Berry-Stuffed Chocolate Hearts. Maybe it’s the hands-on fun, the glossy chocolate, or the sweet surprise inside, but I guarantee this recipe will bring a little extra joy to your kitchen. Whether you stick to the classic version or put your own spin on it, this is one recipe you’ll come back to year after year.
I love these hearts for their nostalgia, their bold berry flavor, and how they turn a simple moment into something memorable. Don’t be afraid to get creative—mix up the berries, try different chocolates, or add your favorite garnishes. The best part is making them your own (and maybe sneaking a few before you share!).
If you give these a try, I’d love to hear how they turn out—drop a comment below, share your photos, or tell me your favorite variation. Happy Valentine’s Day, sweet friends—wishing you all the chocolate, all the berries, and all the love!
FAQs About Valentine’s Berry-Stuffed Chocolate Hearts
How do I keep the chocolate shells from cracking?
Make sure you chill each chocolate layer fully before adding the next, and don’t make the shells too thin. If you see cracks, just patch with a little extra melted chocolate and chill again.
Can I use frozen berries for the filling?
Absolutely! Just thaw and drain them first so you don’t add too much moisture. If the filling seems runny, cook it a bit longer to thicken.
What’s the best way to melt chocolate without burning it?
Microwave in short bursts (20 seconds at a time) and stir well in between. Or use a double boiler on low heat. Don’t rush—slow and steady wins the chocolate race!
Can I make these ahead of time?
Yes! These store well in the fridge for up to a week or the freezer for two months. Just bring to room temp before serving for the juiciest berry filling.
What if I don’t have a heart-shaped mold?
No problem. Use mini muffin tins with liners or shape small “cups” in a regular ice cube tray. They’ll taste just as delicious, even if they’re not heart-shaped!
Pin This Recipe!

Valentine’s Berry-Stuffed Chocolate Hearts
These homemade chocolate hearts feature a glossy chocolate shell filled with a juicy, tangy berry center—perfect for Valentine’s Day or any sweet celebration. Quick to make and endlessly customizable, they’re a crowd-pleasing treat with a nostalgic twist.
- Total Time: 35 minutes
- Yield: 18-24 chocolate hearts 1x
Ingredients
- 10 oz high-quality chocolate chips or bars (dark, milk, or white)
- 2 teaspoons coconut oil (optional, for melting and shine)
- 1 cup fresh or frozen berries (strawberries, raspberries, or a mix; thaw and drain if frozen)
- 2–3 tablespoons powdered sugar, to taste
- 1 teaspoon lemon juice
- 1/2 teaspoon cornstarch
- Pinch of salt
- Optional: edible gold leaf, sprinkles, or freeze-dried berry powder for garnish
Instructions
- Wash and dry heart-shaped silicone molds (or mini muffin liners). Measure out all ingredients.
- In a small saucepan, combine berries, powdered sugar, lemon juice, cornstarch, and salt. Mash berries slightly with a fork. Cook over medium heat, stirring often, until thickened and jammy (about 5-7 minutes). Taste and adjust sugar if needed. Chill filling in the fridge for at least 10 minutes.
- Place chocolate and coconut oil in a microwave-safe bowl. Microwave in 20-second bursts, stirring after each, until melted and smooth. Alternatively, melt using a double boiler over simmering water.
- Spoon about 1 teaspoon melted chocolate into each mold cavity. Spread evenly up the sides with a spoon or brush. Tap mold to remove air bubbles. Chill in fridge or freezer for 5-10 minutes until set. Repeat for a thicker shell if desired.
- Spoon about 1/2 teaspoon chilled berry filling into each chocolate shell, leaving space at the top.
- Cover filling with a final teaspoon of melted chocolate, smoothing tops. Tap mold to level chocolate and remove bubbles.
- Chill filled molds in fridge or freezer until completely firm (15-20 minutes).
- Carefully unmold chocolate hearts. Decorate with melted white chocolate, edible gold leaf, or freeze-dried berry powder if desired. Let decorations set before serving.
Notes
For best results, use real chocolate (not candy melts) and chill each layer fully before adding the next. Adjust sugar in the berry filling to taste, and use cornstarch to prevent leaking. These can be made ahead and stored in the fridge for up to a week or frozen for up to two months. For vegan hearts, use dairy-free chocolate and maple syrup. Always check chocolate labels for allergens.
- Prep Time: 15 minutes
- Cook Time: 20 minutes
- Category: Dessert
- Cuisine: American
Nutrition
- Serving Size: 1 chocolate heart
- Calories: 105
- Sugar: 7
- Sodium: 15
- Fat: 6
- Saturated Fat: 4
- Carbohydrates: 13
- Fiber: 2
- Protein: 1
Keywords: Valentine's Day, chocolate hearts, berry filling, homemade candy, easy dessert, gluten-free, vegan option, gifting, holiday treats


