
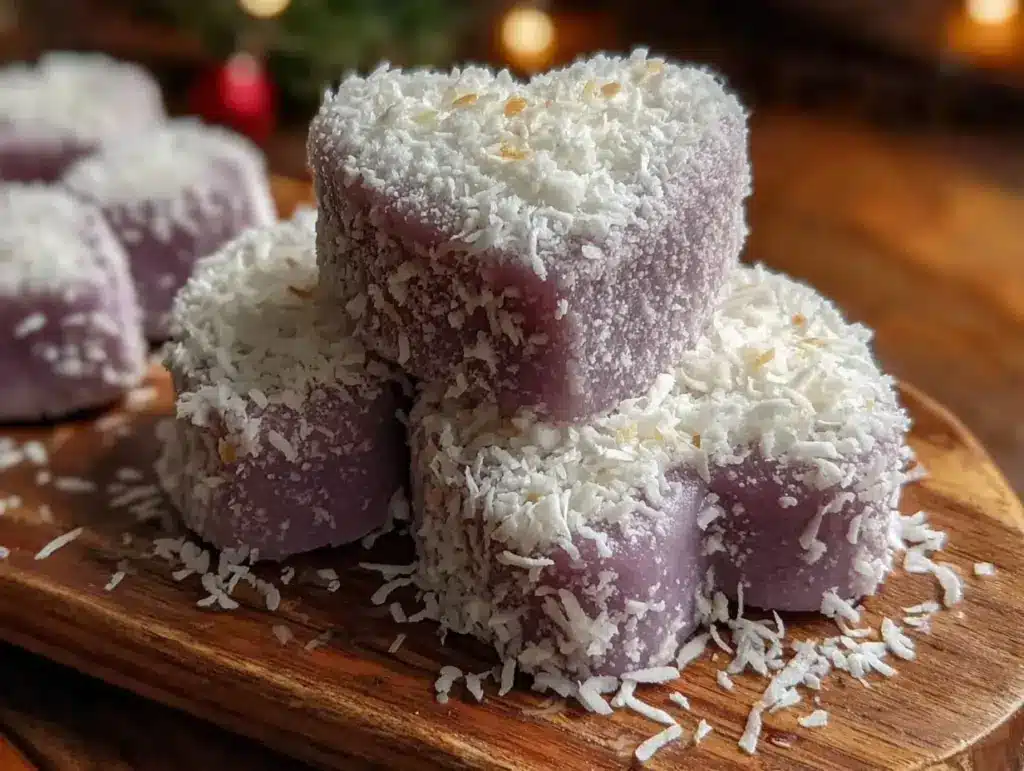
Let me tell you, the moment those tender heart-shaped ube coconut mochi cakes come out of the oven, the sweet, earthy aroma of ube mingling with creamy coconut fills the kitchen in a way that’s downright irresistible. The soft, chewy texture paired with the subtle nuttiness makes it one of those treats that sneaks up on you with every bite. The first time I baked these—years ago, when I was knee-high to a grasshopper—I was instantly hooked. It was one of those rare moments where you pause, take a deep breath, and just smile, knowing you’ve stumbled onto something truly special.
This recipe holds a special place in my heart because it’s tied to fond memories of family gatherings, where these little mochi cakes disappeared faster than I could plate them. Honestly, my family couldn’t stop sneaking them off the cooling rack (and I can’t really blame them). You know what’s the best part? They’re dangerously easy to make but feel like a warm hug in dessert form. Let’s face it, homemade treats like these are perfect for everything from Valentine’s Day surprises to sweet snacks that brighten up your Pinterest cookie board.
After testing this recipe multiple times—in the name of research, of course—it became a staple for my family gatherings and gifting. It’s the kind of cake that makes you close your eyes after the first bite, savoring the uniquely chewy yet tender texture that only mochi can deliver. If you haven’t tried making ube coconut mochi cakes at home yet, you’re going to want to bookmark this one.
Why You’ll Love This Tender Heart-Shaped Ube Coconut Mochi Cakes Recipe
Having fiddled with mochi recipes for years, I can honestly say this version hits the sweet spot between traditional flavor and modern ease. Here’s why this recipe stands out:
- Quick & Easy: Comes together in about 40 minutes, perfect for busy days or last-minute dessert cravings.
- Simple Ingredients: No exotic trips to specialty stores—just pantry staples and a little ube magic.
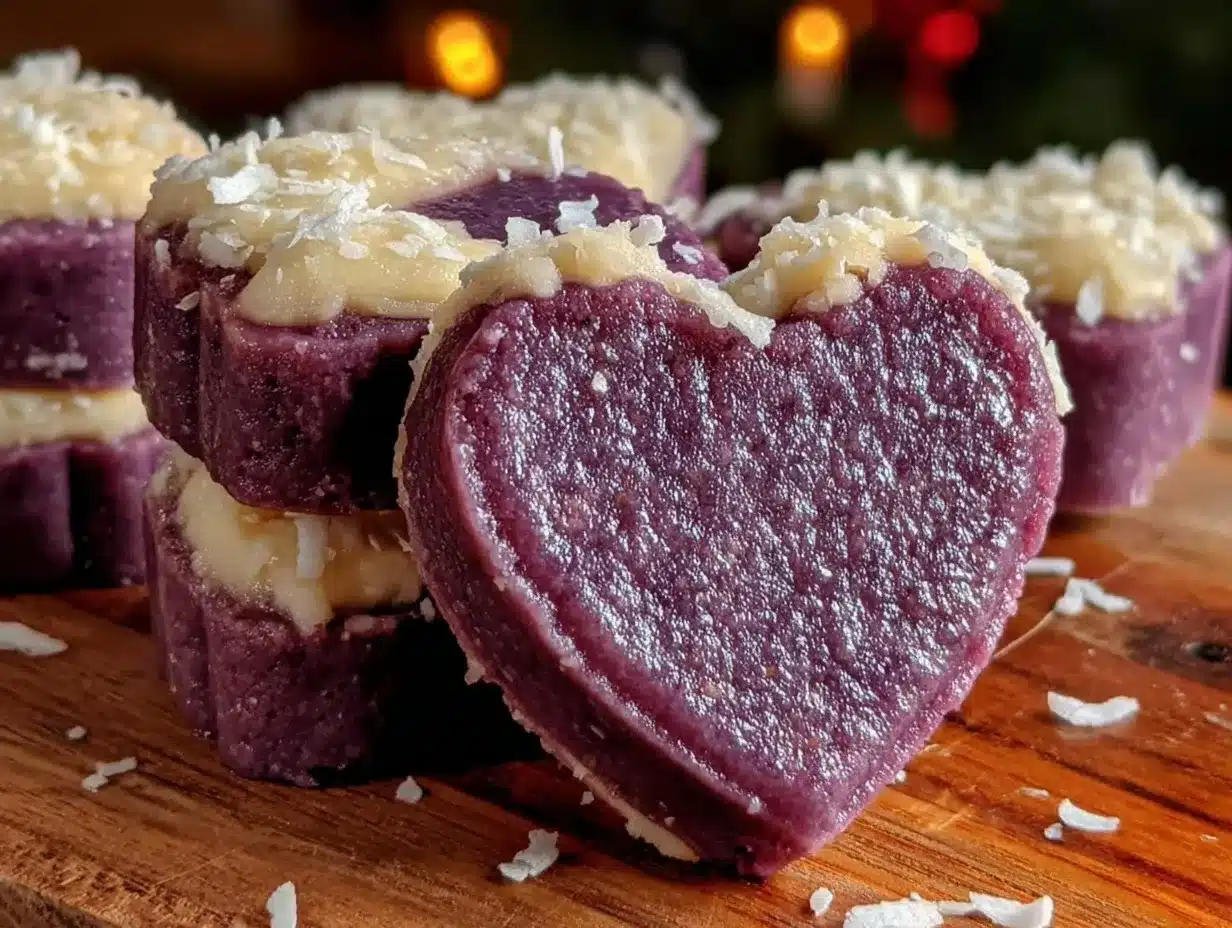
- Perfect for Special Occasions: Heart-shaped and vibrant purple, these cakes make any celebration feel extra special.
- Crowd-Pleaser: Kids and adults alike will rave about the chewy texture and sweet coconut flavor.
- Unbelievably Delicious: The blend of ube’s unique earthiness with creamy coconut milk creates a flavor combo that’s both nostalgic and fresh.
This isn’t your average mochi cake. The secret? I blend the ube powder with coconut milk to get that silky, vibrant batter, and the use of glutinous rice flour gives it that signature chewiness without being gummy. Plus, shaping them into hearts adds a whimsical touch that’s perfect for gifting or impressing guests with minimal fuss. Honestly, this recipe feels like comfort food reimagined—simple, soulful, and utterly satisfying.
What Ingredients You Will Need
This recipe uses simple, wholesome ingredients to deliver bold flavor and that perfect chewy texture without any fuss. Most of these you probably have in your pantry already!
- Glutinous Rice Flour (Mochiko): 1 cup (120 g) – the base for that classic mochi chewiness.
- Ube Powder: 2 tablespoons – choose a trusted brand like Oriental Ube for vibrant color and flavor.
- Coconut Milk: 1 cup (240 ml), full-fat preferred (adds richness and moisture).
- Sugar: 1/2 cup (100 g) – balances the earthiness of ube with sweetness.
- Baking Powder: 1 teaspoon – gives a slight lift to the cakes.
- Salt: 1/4 teaspoon – enhances all the flavors.
- Butter: 2 tablespoons (28 g), melted – adds a subtle richness and tender crumb.
- Shredded Coconut: 1/4 cup (20 g), unsweetened – for mixing into the batter and garnish.
- Vanilla Extract: 1 teaspoon – a small touch for warmth and depth.
- Optional: Food coloring (purple) if you want a more intense hue, but high-quality ube powder usually does the trick.
Substitution tips: For a dairy-free version, swap butter for coconut oil and use coconut cream instead of coconut milk for an even richer texture. Gluten-free? Mochiko is naturally gluten-free, so you’re covered. If you can’t find ube powder, you can try fresh grated ube or ube halaya (purple yam jam), but note that the texture and moisture might change slightly. In summer, you might want to top these with fresh coconut flakes or even a drizzle of sweetened condensed coconut milk.
Equipment Needed
- Mixing Bowls: A medium-sized bowl for wet ingredients and a separate one for dry.
- Heart-Shaped Silicone Mold or Baking Pan: I prefer silicone molds for easy popping out, but a regular greased baking pan works fine—just cut into hearts afterward.
- Whisk and Spatula: For smooth batter mixing.
- Measuring Cups and Spoons: Precision matters here for the perfect texture.
- Steamer or Oven: You can steam mochi cakes traditionally or bake them; I’ll explain both methods below.
- Cooling Rack: To cool cakes evenly and prevent sogginess.
If you don’t have a heart-shaped mold, no worries! A square pan works just fine, and you can cut hearts with a cookie cutter after baking. For budget-friendly options, silicone molds can often be found at dollar stores or online. Just be sure to keep your tools well-maintained—moisture in measuring cups can throw off the flour measurement, and an ungreased pan leads to sticking, which is the last thing you want with these delicate cakes.
Preparation Method
- Preheat and Prepare: If baking, preheat your oven to 350°F (175°C). Grease your heart-shaped mold or baking pan lightly with butter or coconut oil. If steaming, prepare your steamer and bring water to a rolling boil.
- Mix Dry Ingredients: In a medium bowl, whisk together 1 cup (120 g) glutinous rice flour, 2 tablespoons ube powder, 1/2 cup (100 g) sugar, 1 teaspoon baking powder, and 1/4 teaspoon salt until evenly combined. This ensures no clumps of flour or powder.
- Combine Wet Ingredients: In another bowl, whisk 1 cup (240 ml) full-fat coconut milk, 2 tablespoons (28 g) melted butter, and 1 teaspoon vanilla extract until smooth. The coconut milk should be at room temp to avoid lumps.
- Mix Batter: Slowly pour the wet ingredients into the dry, stirring gently with a spatula. Add 1/4 cup (20 g) shredded coconut and fold in evenly. The batter will be thick but smooth, with a lovely purple hue. Avoid overmixing to keep the cakes tender.
- Fill the Mold: Spoon the batter into your prepared mold, smoothing the tops with a spatula. If using a baking pan, spread evenly to about 1-inch (2.5 cm) thickness.
- Cook: For baking, place the mold on the middle rack and bake for 25-30 minutes. The cakes should spring back lightly when touched and develop a slight crust on top. For steaming, cover the mold with a clean cloth and steam for about 30 minutes until set and chewy.
- Cool Down: Let the mochi cakes cool completely on a wire rack. They firm up as they cool, developing that classic chewy texture.
- Remove and Serve: Gently pop the cakes out of the mold or cut into heart shapes if baked in a pan. Optionally, sprinkle with toasted shredded coconut for a little extra crunch and coconut punch.
Pro tip: If the cakes stick when removing, run a thin knife along the edges first. Also, moisture in the air can make mochi sticky, so store them in a cool, dry place to keep their texture just right. If you want to speed things up, chilling the batter briefly before cooking can help with even setting.
Cooking Tips & Techniques
Cooking mochi cakes can be a little tricky if you’re new to it, but here are some tips that have saved me more than once:
- Measure Carefully: Glutinous rice flour is different from regular rice flour—too much or too little affects the chewiness significantly.
- Don’t Overmix: Mix just until combined. Overworking the batter can make the cakes tough.
- Choose Your Cooking Method: Baking gives a light crust and a slightly drier texture, while steaming keeps it soft and moist. I prefer steaming for that classic mochi feel, but baking works great if you like a bit more structure.
- Watch the Cooking Time: Underbaking leads to a gummy center, overbaking can dry out the cakes. Test by lightly pressing the surface—it should spring back.
- Prevent Sticking: Use silicone molds or grease pans well. If you’re using a metal pan, line it with parchment paper for easier removal.
- Keep It Cool: Mochi texture improves after cooling. Resist the urge to dig in hot—it can feel sticky and gooey.
My first batch was a little too sticky (lesson learned: don’t skip the baking powder!). Also, I once forgot to grease the pan, and well, let’s just say it was a mochi cake massacre. But after a few tries, I nailed the balance, and now it’s reliably perfect every time.
Variations & Adaptations
If you want to mix things up or cater to different tastes, here are some fun ways to customize your tender heart-shaped ube coconut mochi cakes:
- Dairy-Free Version: Swap butter for coconut oil and use full-fat coconut cream instead of milk for even richer flavor.
- Chocolate Ube Mochi: Add 2 tablespoons cocoa powder to the dry ingredients for a subtle chocolate twist that pairs beautifully with ube’s earthiness.
- Matcha Coconut Mochi: Replace ube powder with 1 tablespoon matcha green tea powder for a vibrant, slightly bitter note.
- Filled Mochi Cakes: Before cooking, place a small spoonful of sweetened coconut jam or ube halaya in the center of each mold for a gooey surprise.
- Gluten-Free Friendly: Stick with mochiko (glutinous rice flour) as it’s naturally gluten-free, but check labels for cross-contamination if sensitive.
One time, I tried swirling in some cream cheese for a tangy contrast and honestly, it was a keeper. Experimenting with flavors is part of the fun, so don’t hesitate to get creative!
Serving & Storage Suggestions
These tender heart-shaped ube coconut mochi cakes are best served at room temperature or slightly chilled. The chewy texture shines brightest when they’re not too cold or hot. You can dress them up with a sprinkle of toasted shredded coconut, a drizzle of sweetened condensed coconut milk, or even a dusting of powdered sugar for a simple, elegant touch.
Pair them with a cup of hot tea—jasmine or green tea works wonderfully—or a cold coconut latte for a tropical vibe. They make a perfect addition to dessert tables, afternoon snacks, or thoughtful homemade gifts.
To store, keep the cakes in an airtight container at room temperature for up to two days. For longer storage, wrap them tightly and freeze for up to a month. When ready to eat, thaw at room temp and warm slightly in a microwave for 10–15 seconds if you like them softer. Just be careful not to overheat or they can turn too sticky.
Flavors tend to deepen after a day, so if you can wait, that’s when they taste even better. Trust me, patience is a virtue with these little delights!
Nutritional Information & Benefits
Each tender heart-shaped ube coconut mochi cake is roughly 120 calories, depending on size. They’re a moderate source of carbs from glutinous rice flour, with healthy fats from coconut milk and butter. Ube brings antioxidants and vitamins A and C, making this treat a little more wholesome than your average dessert.
Because these mochi cakes rely on glutinous rice flour, they’re naturally gluten-free, which is great for those with sensitivities. Just note the presence of dairy if you don’t swap butter for a dairy-free fat. The shredded coconut adds fiber and healthy fats, which can help keep you satisfied longer.
From a wellness perspective, I love that these cakes provide a nostalgic comfort with some nutritional perks—just the right balance between indulgence and mindful eating.
Conclusion
There you have it—tender heart-shaped ube coconut mochi cakes that are easy to make, irresistibly chewy, and bursting with flavor. Whether you’re new to mochi or a seasoned fan, this recipe offers a fun, approachable way to enjoy a classic treat with a tropical twist. Feel free to customize the flavors or shapes to make it uniquely yours.
Honestly, this recipe holds a special place in my kitchen and heart. It’s the kind of dessert that brings smiles, sparks conversations, and somehow manages to make ordinary days feel a little sweeter. So grab your ingredients, heat up that oven or steamer, and treat yourself—you deserve it!
If you try this recipe, please drop a comment below or share how you made it your own! I love hearing about your baking adventures.
Happy baking and happy indulging!
FAQs About Tender Heart-Shaped Ube Coconut Mochi Cakes
Can I use fresh ube instead of ube powder?
Yes, but fresh ube or ube halaya will add more moisture, so you may need to adjust the coconut milk amount slightly to keep the batter from becoming too wet.
What’s the difference between glutinous rice flour and regular rice flour?
Glutinous rice flour, also called mochiko, has a sticky, chewy texture when cooked, perfect for mochi. Regular rice flour won’t give you that chewiness and will result in a crumbly texture.
Can I make these mochi cakes vegan?
Absolutely! Replace butter with coconut oil and ensure you use coconut milk or another plant-based milk. Skip any dairy-based toppings as well.
How long do these mochi cakes stay fresh?
They’re best eaten within two days at room temperature. You can freeze leftovers for up to a month and thaw before eating.
Is it possible to bake instead of steam the mochi cakes?
Yes! Baking at 350°F (175°C) for 25-30 minutes works well. Baking creates a light crust, while steaming keeps the cakes softer and moister.
Pin This Recipe!
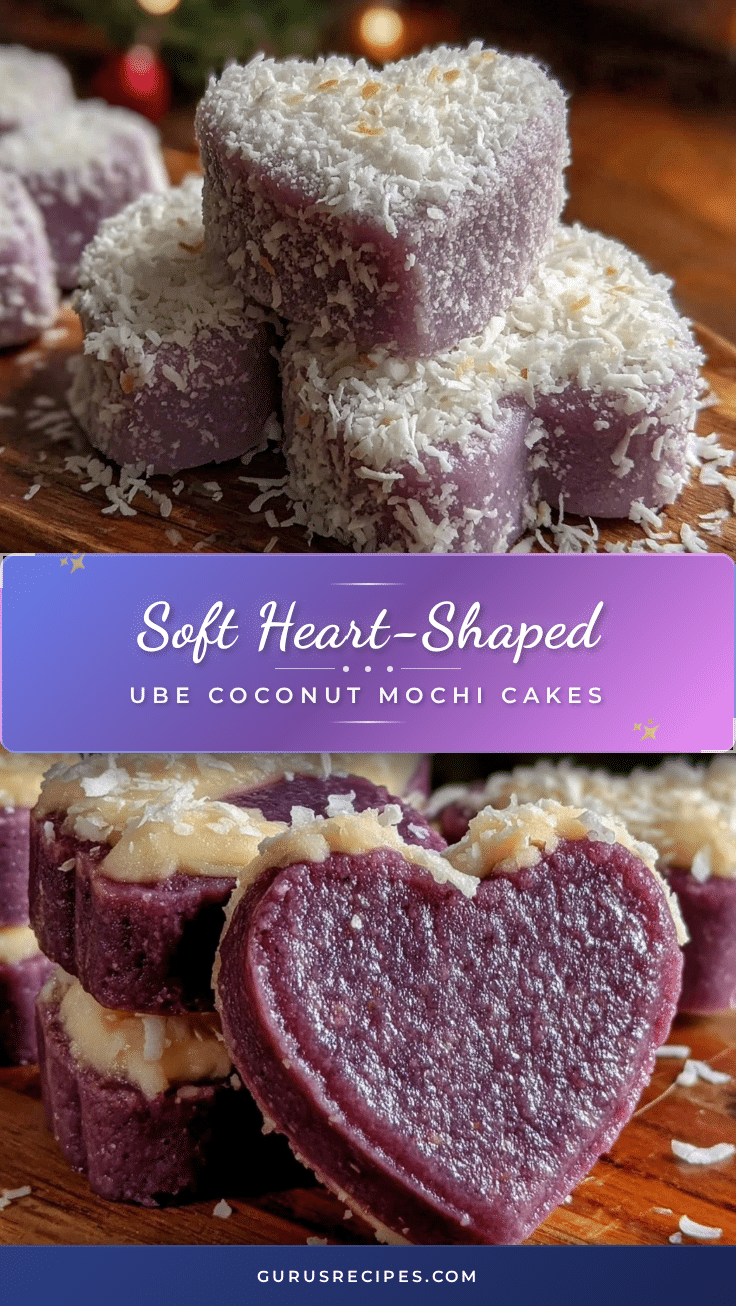

Tender Heart-Shaped Ube Coconut Mochi Cakes
These tender heart-shaped ube coconut mochi cakes are chewy, flavorful treats combining the earthy sweetness of ube with creamy coconut. Perfect for special occasions or everyday indulgence, they are easy to make and naturally gluten-free.
- Total Time: 40 minutes
- Yield: 12 servings 1x
Ingredients
- 1 cup (120 g) glutinous rice flour (mochiko)
- 2 tablespoons ube powder
- 1 cup (240 ml) full-fat coconut milk
- 1/2 cup (100 g) sugar
- 1 teaspoon baking powder
- 1/4 teaspoon salt
- 2 tablespoons (28 g) melted butter
- 1/4 cup (20 g) shredded unsweetened coconut
- 1 teaspoon vanilla extract
- Optional: purple food coloring
Instructions
- Preheat oven to 350°F (175°C) and grease heart-shaped mold or baking pan with butter or coconut oil. If steaming, prepare steamer and bring water to a boil.
- In a medium bowl, whisk together glutinous rice flour, ube powder, sugar, baking powder, and salt until combined.
- In another bowl, whisk coconut milk, melted butter, and vanilla extract until smooth.
- Slowly pour wet ingredients into dry ingredients, stirring gently with a spatula. Fold in shredded coconut evenly. Avoid overmixing.
- Spoon batter into prepared mold, smoothing tops. If using a baking pan, spread evenly to about 1-inch thickness.
- Bake for 25-30 minutes until cakes spring back lightly and develop a slight crust. If steaming, cover mold with cloth and steam for about 30 minutes until set and chewy.
- Cool completely on a wire rack to firm up and develop chewy texture.
- Gently remove cakes from mold or cut into hearts if baked in a pan. Optionally sprinkle with toasted shredded coconut before serving.
Notes
For dairy-free, substitute butter with coconut oil and use coconut cream instead of coconut milk. Avoid overmixing batter to keep cakes tender. Use silicone molds or grease pans well to prevent sticking. Cakes are best served at room temperature or slightly chilled. Store in airtight container at room temperature for up to 2 days or freeze for up to 1 month.
- Prep Time: 10 minutes
- Cook Time: 30 minutes
- Category: Dessert
- Cuisine: Filipino
Nutrition
- Serving Size: 1 mochi cake (approx
- Calories: 120
- Sugar: 8
- Sodium: 90
- Fat: 6
- Saturated Fat: 5
- Carbohydrates: 18
- Fiber: 1
- Protein: 1
Keywords: ube mochi cake, coconut mochi, heart-shaped mochi, Filipino dessert, glutinous rice flour dessert, easy mochi recipe, steamed mochi, baked mochi


