
Let me tell you, the scent of toasted marshmallows mingling with rich chocolate and velvety cream cheese is enough to make anyone’s mouth water. The first time I made these creamy s’mores cheesecake cups, I was instantly hooked—the kind of moment where you pause, take a deep breath, and just smile because you know you’re onto something truly special. It was a chilly weekend, and I was craving a sweet treat that felt like a warm hug. Years ago, when I was knee-high to a grasshopper, my family used to gather around a campfire roasting marshmallows, and this recipe brings all those nostalgic flavors straight to your spoon without the fuss of a fire.
Honestly, these little cups have become a staple for family gatherings and gifting during the holidays. My crew couldn’t stop sneaking them off the cooling rack (and I can’t really blame them). You know what’s great? They’re dangerously easy to whip up and deliver pure, nostalgic comfort in every bite. Perfect for a cozy night in, a potluck dessert, or to brighten up your Pinterest cookie board with a twist on a classic favorite.
I tested this recipe more times than I can count (in the name of research, of course), and it never fails to impress. If you’re looking for creamy s’mores cheesecake cups that hit all the right notes—gooey, creamy, chocolatey, and delightfully crunchy—you’re going to want to bookmark this one.
Why You’ll Love This Recipe
Having played around with countless cheesecake and s’mores recipes, I can confidently say this one ticks all the boxes. It’s a blend of comfort and convenience that’s hard to beat.
- Quick & Easy: Comes together in under 30 minutes with no complicated baking skills needed—perfect for busy weeknights or last-minute cravings.
- Simple Ingredients: No fancy grocery trips needed; you likely already have everything in your kitchen pantry or fridge.
- Perfect for Cozy Occasions: Great for chilly evenings, family movie nights, potlucks, or even a casual brunch with friends.
- Crowd-Pleaser: Always gets rave reviews from kids and adults alike—because honestly, who doesn’t love s’mores?
- Unbelievably Delicious: The creamy cheesecake filling combined with a crunchy graham cracker crust and melty marshmallow topping is next-level comfort food.
What makes these creamy s’mores cheesecake cups different? Well, the secret lies in blending the cream cheese until silky smooth and folding in just the right amount of melted chocolate and marshmallow fluff to create that perfect creamy texture. Plus, the crust isn’t just your typical graham cracker base—it’s got a little extra butter and a sprinkle of sugar for a buttery crunch that balances the softness. This recipe isn’t just good—it’s the kind that makes you close your eyes after the first bite and savor that warm, gooey goodness. It’s comfort food reimagined—faster to make, but still packed with soul-soothing satisfaction.
What Ingredients You Will Need
This recipe uses simple, wholesome ingredients to deliver bold flavor and satisfying texture without the fuss. Most of these are pantry staples, making it easy to throw together on a whim.
- For the Crust:
- Graham cracker crumbs (about 1 1/2 cups or 150g) – I recommend using Honey Maid for that classic flavor
- Unsalted butter, melted (6 tablespoons or 85g) – adds richness and helps bind the crust
- Granulated sugar (2 tablespoons) – balances the tartness of the filling
- For the Cheesecake Filling:
- Cream cheese, softened (16 oz or 450g) – for that creamy, dreamy texture, use full fat
- Granulated sugar (3/4 cup or 150g) – for sweetness
- Large eggs (2, room temperature) – helps with structure
- Vanilla extract (1 teaspoon) – adds depth of flavor
- Heavy cream (1/4 cup or 60ml) – makes the filling extra smooth
- Melted semi-sweet chocolate (1/2 cup or 90g) – fold gently for a chocolatey swirl
- For the Topping:
- Mini marshmallows (1 cup or 50g) – the star of the show, for that authentic toasted marshmallow taste
- Chocolate chunks or chips (1/4 cup or 45g) – optional, adds extra chocolate bursts
- Graham cracker crumbs (optional, for garnish)
If you want to swap out the graham crackers, crushed digestive biscuits work well too. For a dairy-free option, substitute the cream cheese with a plant-based version and use coconut cream instead of heavy cream. When picking cream cheese, I find that the Philadelphia brand gives a reliably smooth, rich finish. In summer, try adding fresh berries on top for a fresh twist!
Equipment Needed
- Muffin tin or small dessert cups (12-cup capacity) – I usually use a silicone muffin pan for easy release
- Mixing bowls – one large for the filling, one for the crust
- Electric hand mixer or stand mixer – makes whipping the cream cheese a breeze
- Measuring cups and spoons – for accuracy
- Spatula – to fold in ingredients gently
- Oven – set to 325°F (160°C) for baking
- Broiler or kitchen torch (optional) – for toasting marshmallows on top
If you don’t have a stand mixer, the hand mixer works just fine. For budget-friendly baking, a simple glass or metal muffin pan works too—just line with cupcake liners to avoid sticking. When using a kitchen torch to toast marshmallows, always keep a safe distance to avoid burning. If you’re going the broiler route, keep a close watch—it happens fast!
Preparation Method
- Preheat your oven to 325°F (160°C). Line your muffin tin with paper liners or grease lightly to prevent sticking. This step ensures smooth removal later.
- Prepare the graham cracker crust. In a medium bowl, combine 1 1/2 cups (150g) of graham cracker crumbs, 6 tablespoons (85g) melted unsalted butter, and 2 tablespoons sugar. Stir until the mixture looks like wet sand.
- Press the crust mixture firmly into the bottom of each muffin cup. Use the back of a spoon or your fingers to compact it evenly. This creates a sturdy base for your cheesecake cups.
- Bake the crust for 8 minutes. This helps it set and crisp slightly—no soggy bottoms here! Remove and let cool while you prepare the filling.
- Make the cheesecake filling. In a large bowl, beat 16 oz (450g) softened cream cheese with 3/4 cup (150g) sugar until smooth and creamy. This usually takes about 2-3 minutes with a mixer.
- Add 2 room-temperature eggs one at a time, mixing well after each addition. Then stir in 1 teaspoon vanilla extract and 1/4 cup (60ml) heavy cream. The mixture should be silky and pourable, not lumpy.
- Gently fold in 1/2 cup (90g) melted semi-sweet chocolate. Swirl for a marbled effect or mix thoroughly if you prefer the whole filling chocolatey.
- Pour the filling evenly over the pre-baked crusts. Fill each cup about 3/4 full to leave room for toppings.
- Bake for 18-22 minutes. The centers will still jiggle slightly—that’s exactly what you want to keep them creamy. Avoid overbaking or they’ll dry out.
- Remove from oven and immediately sprinkle mini marshmallows (about 1 tablespoon per cup) and optional chocolate chunks on top.
- Place under the broiler for 1-2 minutes until marshmallows are golden and toasted. Keep a close eye—they brown quickly! Alternatively, use a kitchen torch for controlled toasting.
- Allow the cheesecake cups to cool at room temperature for 30 minutes, then refrigerate for at least 2 hours to set fully. Trust me, the wait is worth it.
- Serve chilled and enjoy your creamy s’mores cheesecake cups! They’re perfect bite-sized treats to share (or sneak all to yourself).
If you notice your marshmallows aren’t browning evenly, try rotating the pan halfway under the broiler. If the filling cracks slightly during baking, don’t fret—it’s still delicious and cracks add a rustic charm. For a smoother finish, make sure your cream cheese is fully softened before mixing.
Cooking Tips & Techniques
Let’s face it, cheesecake can be intimidating, but these creamy s’mores cheesecake cups are surprisingly forgiving. Here are some tips I picked up after a few too many cheesecake “oops” moments:
- Room temperature ingredients: Always bring your cream cheese and eggs to room temperature. Cold ingredients can lead to lumps and uneven baking.
- Don’t overmix: Overbeating can incorporate too much air, causing cracks. Mix just until smooth and combined.
- Gently fold in the chocolate: If you want a marbled look, swirl it in with a spatula rather than mixing fully.
- Watch the broiler: Toasting marshmallows under the broiler happens fast. Stay close and ready to pull out your cups the moment they turn golden.
- Use a water bath if you want an ultra-smooth texture: I skip it for this recipe since it’s baked in small cups, but wrapping the muffin tin in foil with a pan of hot water underneath can reduce cracks.
- Chill thoroughly: The cheesecake cups firm up beautifully after a good chill, so don’t rush this step.
One time, I accidentally cranked the oven temperature too high and ended up with over-toasted marshmallows and cracked filling. Lesson learned: steady heat and patience pay off big time. Multitasking by prepping the crust while the oven heats can save you time and keep the process smooth.
Variations & Adaptations
Want to shake things up a bit? These creamy s’mores cheesecake cups are super versatile and open to your creative touch.
- Peanut Butter S’mores: Add a swirl of creamy peanut butter into the cheesecake filling or sprinkle chopped peanuts on top for a salty-sweet combo.
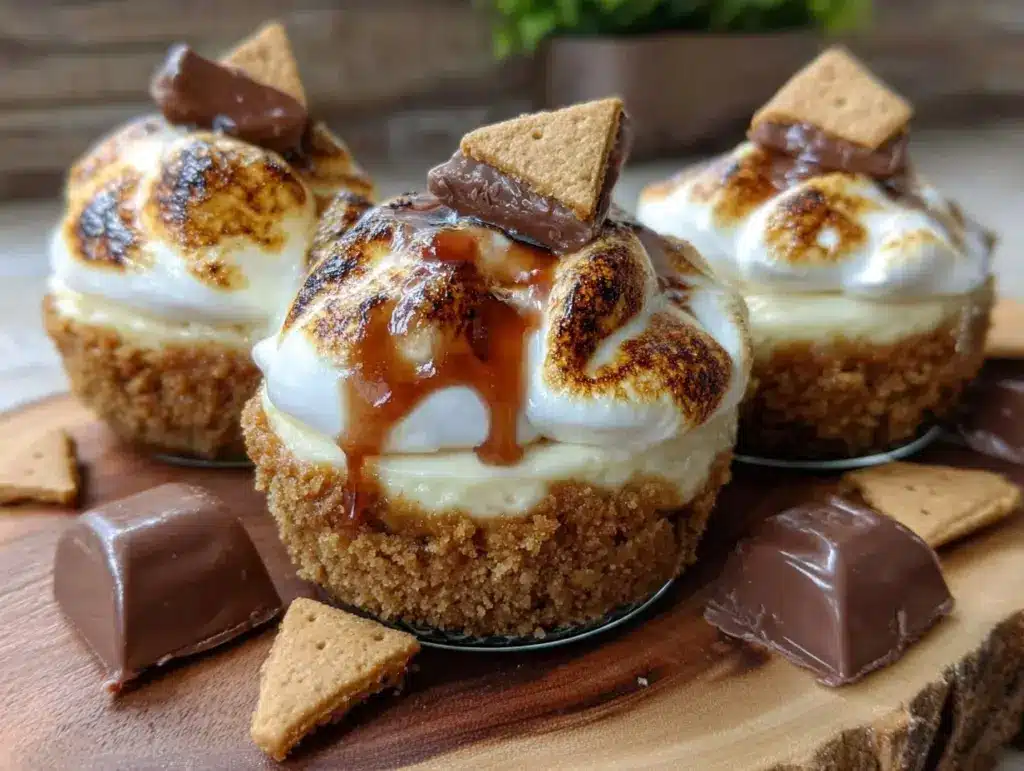
- Salted Caramel Twist: Drizzle salted caramel sauce over the toasted marshmallows just before serving for an indulgent upgrade.
- Vegan-Friendly Version: Use dairy-free cream cheese and coconut cream, swap butter for coconut oil, and replace eggs with flax eggs (1 tablespoon ground flaxseed + 3 tablespoons water per egg).
- Seasonal Berry Addition: In summer, add a spoonful of fresh raspberries or strawberries on top for a tart contrast that brightens the dessert.
- Microwave Option: If you’re short on time, you can microwave the crust mixture in small ramekins and chill the filling instead of baking—just note the texture will be different but still delicious.
Once, I added crushed peppermint candies during the holidays—it was a refreshing twist that my family couldn’t get enough of. Feel free to customize based on your mood or pantry staples; this recipe loves a little experimentation.
Serving & Storage Suggestions
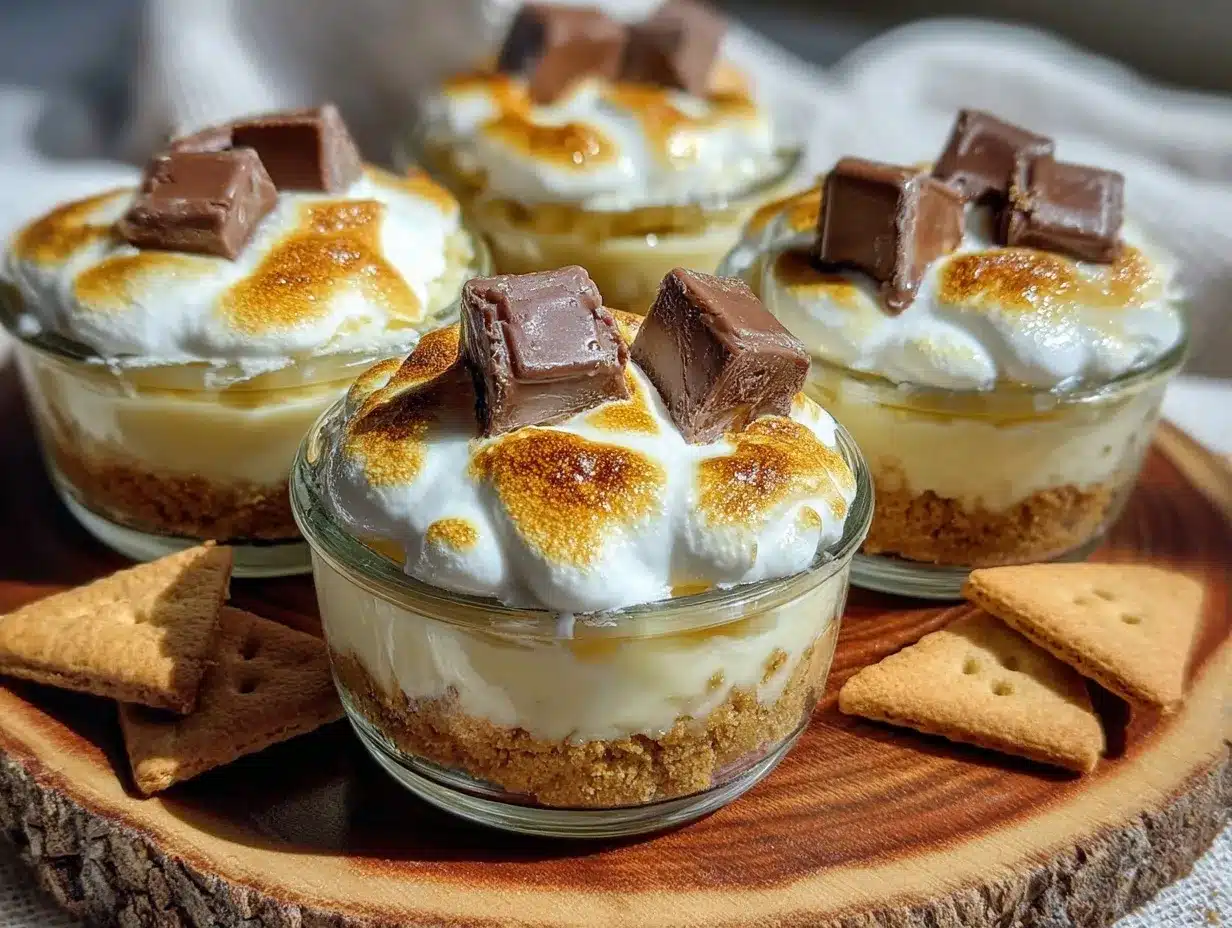
These creamy s’mores cheesecake cups are best served chilled, straight from the fridge. Let them sit at room temperature for about 10 minutes if you want a softer bite. They look adorable garnished with a sprinkle of extra graham cracker crumbs or a few chocolate shavings on top.
Pair them with a hot cup of coffee, rich hot chocolate, or even a glass of cold milk—the classic combo never fails. For a party, arrange them on a platter with toasted marshmallow skewers and fresh fruit for a beautiful spread.
To store, cover tightly with plastic wrap or place in an airtight container. They keep well in the fridge for up to 4 days. If you want to prepare ahead, you can freeze the cups (without the toasted marshmallow topping) for up to 2 months. Just thaw overnight in the fridge and add fresh toasted marshmallows before serving.
Reheating isn’t really recommended since it changes the texture, but if you must, a quick zap in the microwave for 10 seconds can soften them just enough. Flavors tend to develop and deepen after chilling overnight, making these cheesecake cups even more irresistible the next day.
Nutritional Information & Benefits
Each creamy s’mores cheesecake cup is a delightful indulgence, clocking in around 300-350 calories depending on portion size and toppings. They offer a good dose of calcium and protein from the cream cheese and eggs, which makes them a more satisfying treat than your average sugary dessert.
Using high-quality ingredients like real cream cheese and natural graham crackers adds to the wholesome feel. For those watching carbs, swapping in almond flour for the crust can lower the sugar load while keeping the crunch.
Keep in mind these cheesecake cups do contain dairy, eggs, and gluten (from graham crackers), so they’re not suitable for all allergies. But for those without restrictions, they strike a nice balance between indulgence and nourishment—you know, a little treat that doesn’t leave you feeling weighed down.
Conclusion
In a nutshell, these creamy s’mores cheesecake cups are a cozy treat that’s both simple to make and impossible to resist. Whether you’re craving something sweet after dinner or need a dessert that wows without the hassle, this recipe is your new best friend. Feel free to customize it with your favorite flavors or keep it classic—the results are always fantastic.
I love this recipe because it brings back warm memories and fills the kitchen with that toasty, chocolatey aroma that just feels like home. If you give it a try, I’d love to hear how you made it your own. Drop a comment below or share your variations—I’m always excited to see what you come up with!
Happy baking and even happier eating!
FAQs About Creamy S’mores Cheesecake Cups
Can I make these cheesecake cups ahead of time?
Absolutely! They keep well in the fridge for up to 4 days and can be frozen (without the marshmallow topping) for up to 2 months. Just add fresh toasted marshmallows before serving.
What if I don’t have a broiler to toast the marshmallows?
No worries! You can use a kitchen torch if you have one, or simply serve the marshmallows as-is—they’ll still be gooey and delicious.
Can I use a different crust instead of graham crackers?
Yes! Crushed digestive biscuits or even chocolate cookie crumbs work great as a substitute, just adjust the sugar and butter to taste.
Is it possible to make these dairy-free?
Definitely. Use plant-based cream cheese and coconut cream, swap butter for coconut oil, and replace eggs with flax eggs for a vegan-friendly version.
How do I prevent cracks in the cheesecake filling?
To avoid cracks, don’t overbeat your filling, bake at a moderate temperature, and avoid overbaking. Using a water bath can help, but with these small cups, careful timing usually does the trick.
Pin This Recipe!
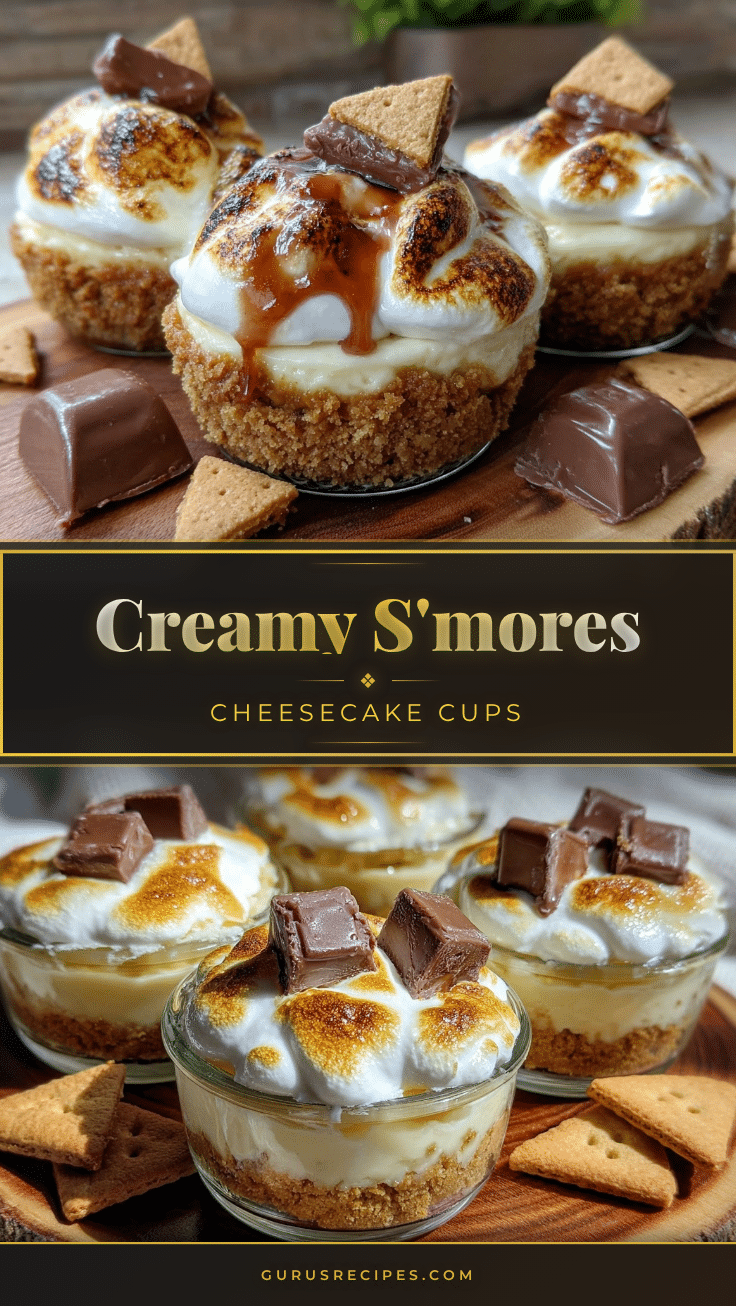

Creamy S’mores Cheesecake Cups
These creamy s’mores cheesecake cups combine a crunchy graham cracker crust, silky cream cheese filling with chocolate swirls, and toasted marshmallow topping for a cozy, nostalgic treat perfect for any occasion.
- Total Time: 2 hours 45 minutes
- Yield: 12 servings 1x
Ingredients
- 1 1/2 cups (150g) graham cracker crumbs
- 6 tablespoons (85g) unsalted butter, melted
- 2 tablespoons granulated sugar
- 16 oz (450g) cream cheese, softened (full fat)
- 3/4 cup (150g) granulated sugar
- 2 large eggs, room temperature
- 1 teaspoon vanilla extract
- 1/4 cup (60ml) heavy cream
- 1/2 cup (90g) melted semi-sweet chocolate
- 1 cup (50g) mini marshmallows
- 1/4 cup (45g) chocolate chunks or chips (optional)
- Graham cracker crumbs for garnish (optional)
Instructions
- Preheat your oven to 325°F (160°C). Line a 12-cup muffin tin with paper liners or grease lightly.
- In a medium bowl, combine graham cracker crumbs, melted butter, and 2 tablespoons sugar. Stir until mixture resembles wet sand.
- Press the crust mixture firmly into the bottom of each muffin cup to create a sturdy base.
- Bake the crust for 8 minutes. Remove and let cool while preparing the filling.
- In a large bowl, beat softened cream cheese with 3/4 cup sugar until smooth and creamy (2-3 minutes).
- Add eggs one at a time, mixing well after each addition. Stir in vanilla extract and heavy cream until silky and pourable.
- Gently fold in melted semi-sweet chocolate for a marbled or fully chocolatey filling.
- Pour the filling evenly over the pre-baked crusts, filling each cup about 3/4 full.
- Bake for 18-22 minutes until centers jiggle slightly. Avoid overbaking to keep creamy texture.
- Remove from oven and immediately sprinkle mini marshmallows and optional chocolate chunks on top.
- Place under the broiler for 1-2 minutes until marshmallows are golden and toasted, watching closely. Alternatively, use a kitchen torch.
- Allow cheesecake cups to cool at room temperature for 30 minutes, then refrigerate for at least 2 hours to set fully.
- Serve chilled and enjoy.
Notes
[‘Bring cream cheese and eggs to room temperature to avoid lumps.’, ‘Do not overmix the filling to prevent cracks.’, ‘Gently fold in melted chocolate for marbled effect.’, ‘Watch marshmallows closely under broiler to avoid burning.’, ‘Use a water bath wrapped in foil for ultra-smooth texture if desired.’, ‘Chill thoroughly for best texture and flavor.’, ‘Can substitute graham crackers with crushed digestive biscuits or chocolate cookie crumbs.’, ‘For dairy-free version, use plant-based cream cheese, coconut cream, coconut oil, and flax eggs.’, ‘Freeze without marshmallow topping for up to 2 months; add fresh toasted marshmallows before serving.’]
- Prep Time: 15 minutes
- Cook Time: 30 minutes
- Category: Dessert
- Cuisine: American
Nutrition
- Serving Size: 1 cheesecake cup
- Calories: 325
- Sugar: 20
- Sodium: 210
- Fat: 22
- Saturated Fat: 12
- Carbohydrates: 28
- Fiber: 1
- Protein: 6
Keywords: s'mores, cheesecake cups, creamy cheesecake, toasted marshmallows, easy dessert, no-bake cheesecake cups, chocolate dessert, cozy treat


