
There was this one evening when I had zero intention of baking bread. Honestly, I was just rummaging through the kitchen, looking for something to soak up the last bit of soup from that day. The clock was ticking late, and the grocery store was already closed. I glanced at a bag of flour sitting untouched for weeks and thought, “Why not try making some bread?” I wasn’t expecting much, especially since I’m not usually the one who bakes artisan loaves at home. But, you know, sometimes the best things come from those low-effort moments.
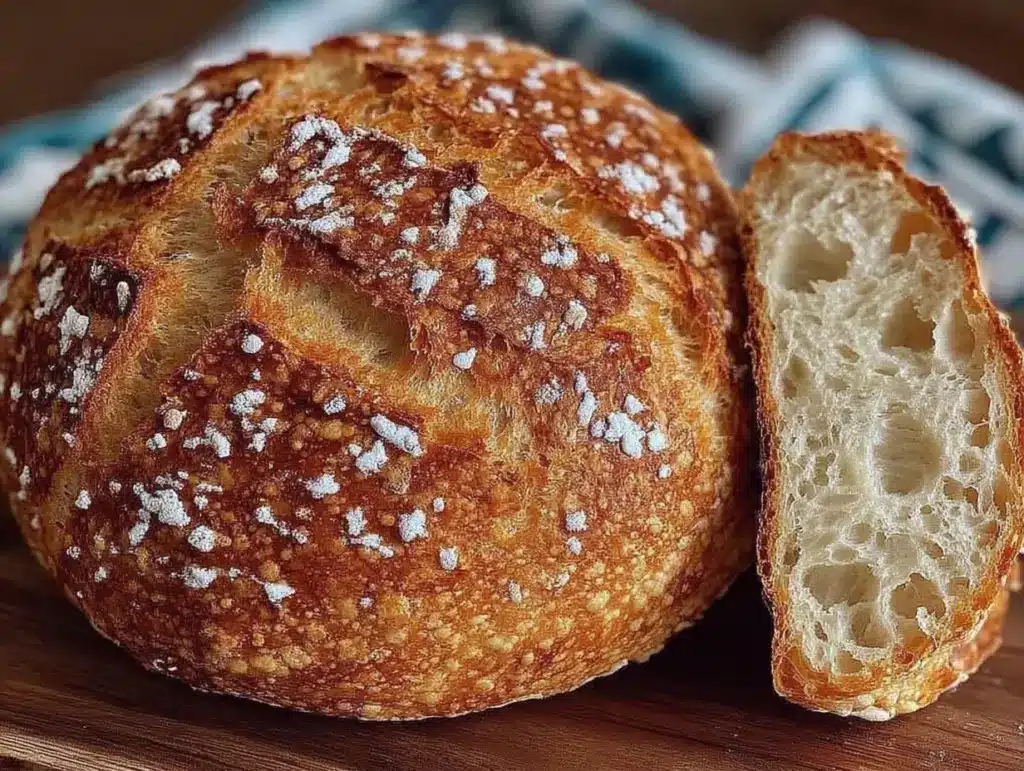
After a couple of hours, what emerged from the oven was this beautiful, golden-brown, crusty artisan bread with a perfectly crispy crust that cracked delightfully with every slice. My skepticism quickly melted away with that first bite — the crust had this satisfying crunch, and the inside was soft and airy, just like the fancy bakery bread I usually admire but never try making myself. It became clear pretty fast that this easy crusty artisan bread recipe was a keeper.
I kept coming back to the recipe, tweaking it slightly here and there—sometimes adding a pinch more salt, other times letting it rise a little longer. Each time, it rewarded me with that same comforting, rustic loaf that felt like a little piece of home on my kitchen counter. This bread isn’t just about flour and water; it’s about those quiet moments of satisfaction when simple ingredients turn into something unexpectedly wonderful.
Why You’ll Love This Recipe
- Quick & Easy: Comes together with minimal hands-on time, making it perfect for busy evenings or spontaneous baking urges.
- Simple Ingredients: Uses pantry staples—flour, water, yeast, salt—no fancy additions required.
- Perfect for Any Occasion: Whether it’s a cozy dinner, picnic, or just a snack with butter, it fits right in.
- Crowd-Pleaser: Friends and family always ask for the recipe after tasting that crispy crust and soft crumb.
- Unbelievably Delicious: The crackling crust paired with the airy, chewy inside makes it feel like a bakery loaf fresh from your own oven.
This recipe stands out because it skips complicated kneading and long waits without sacrificing flavor or texture. The secret lies in a simple no-knead method combined with a hot oven and a covered baking vessel that traps steam—giving you that iconic crackly crust. Honestly, it’s the kind of bread that makes you pause mid-bite and appreciate the art of simplicity. You don’t need to be a bread expert to pull this off; just a little patience and a warm oven.
What Ingredients You Will Need
This recipe uses simple, wholesome ingredients to deliver bold flavor and satisfying texture without the fuss. Most are pantry staples that you might already have on hand, and substitutions are easy if needed.
- All-purpose flour: 3 cups (360g) – I prefer unbleached flour like King Arthur for the best texture.
- Warm water: 1 ½ cups (360ml) – about 105°F to 110°F (40°C to 43°C) to activate the yeast gently.
- Active dry yeast: 2 teaspoons (7g) – ensures a good rise; instant yeast works too, but adjust water slightly.
- Salt: 1 ½ teaspoons (9g) – kosher or sea salt adds flavor and strengthens the dough.
Optional:
- Olive oil: 1 tablespoon (15ml) – adds subtle richness if you want a slightly softer crust.
- Whole wheat flour: You can swap up to 1 cup (120g) for a nuttier flavor and denser crumb.
Substitution tips: For gluten-free options, try a mix of gluten-free bread flour blends, but expect a different texture. If you want to avoid yeast, this recipe isn’t the best fit, but a sourdough starter could be a fun experiment!
Equipment Needed
- Large mixing bowl: For combining the dough. Glass or stainless steel works well.
- Dutch oven or heavy oven-safe pot with lid: This is key to creating steam inside the oven for that crispy crust. If you don’t have one, a cast-iron skillet covered with a large metal bowl can work.
- Kitchen scale (optional): Helpful for precise measurements but not mandatory.
- Measuring cups and spoons: For convenience and accuracy.
- Dough scraper or spatula: Makes handling sticky dough easier.
- Cooling rack: To let the bread rest and cool evenly after baking.
From my experience, investing in a good Dutch oven changed my bread game entirely. It retains heat beautifully and traps steam, which is exactly what you want. If you’re on a budget, any heavy pot with a tight-fitting lid will do. Just make sure it’s oven-safe up to 450°F (232°C).
Preparation Method
- Mix the dough (10 minutes): In a large bowl, combine 3 cups (360g) all-purpose flour, 2 teaspoons (7g) active dry yeast, and 1 ½ teaspoons (9g) salt. Stir them together to distribute evenly. Add 1 ½ cups (360ml) warm water and 1 tablespoon (15ml) olive oil if using. Use a wooden spoon or your hand to mix until a sticky, shaggy dough forms. It will look rough but that’s perfect.
- First rise (12-18 hours): Cover the bowl loosely with plastic wrap or a clean kitchen towel. Leave it on your countertop to rise overnight or for about 12 to 18 hours. The dough should double in size, look bubbly, and feel soft and airy to the touch. Don’t rush this step; it’s what builds flavor and texture.
- Preheat your oven and pot (45 minutes): About 45 minutes before baking, place your Dutch oven (or heavy pot) with its lid in the oven and preheat to 450°F (232°C). This ensures the pot is scorching hot to create steam for the crust.
- Shape the dough (5 minutes): Lightly flour a clean surface and gently scrape the dough out onto it. With floured hands, fold the dough over itself a couple of times to shape it into a rough ball. Let it rest for 15 minutes.
- Bake the bread (45 minutes): Carefully remove the hot pot from your oven. Gently place the dough ball inside (you can use parchment paper to help lift it). Cover with the lid and bake for 30 minutes. Then remove the lid and bake for an additional 15 minutes, or until the crust is deeply golden and crisp.
- Cool (at least 1 hour): Transfer the bread to a cooling rack and let it rest for at least an hour before slicing. This step is crucial because the crumb continues to set as it cools.
Pro tip: If your dough feels too sticky, resist adding too much flour; a wetter dough often means a lighter crumb. And don’t skip preheating your pot—that’s the magic behind the crust’s crunch.
Cooking Tips & Techniques
Getting that perfect crispy crust and soft interior can feel tricky, but a few tricks make it much easier. First, patience is your best friend. The long rise time develops flavor and texture in the dough without complicated kneading. I used to rush this step and ended up with dense bread that lacked character.
Second, steam is critical. The covered pot traps moisture released during baking, keeping the crust soft initially so it can expand. Once you remove the lid, the dry heat crisps it up beautifully. Without this step, the crust won’t get that signature crackle.
Third, watch your oven temperature. An oven that’s not hot enough won’t give you the right crust, and too hot can burn the outside before the inside cooks. Using a reliable oven thermometer helped me a lot with consistency.
Also, don’t slice the bread too soon. I’ve been guilty of cutting into it right out of the oven—big mistake! The crumb needs time to set; otherwise, it gets gummy.
Finally, multitasking is key. While the dough rises and the oven heats, you can clean up or prepare toppings to enjoy with your bread. It’s a satisfying rhythm that keeps you engaged without stress.
Variations & Adaptations
- Herb-infused bread: Add 1-2 tablespoons of chopped fresh rosemary, thyme, or oregano to the dough for a fragrant twist perfect for pairing with olive oil or cheese.
- Whole wheat blend: Swap up to 1 cup (120g) of all-purpose flour with whole wheat flour to add a nutty flavor and boost fiber. The bread will be a bit denser but still delicious.
- Gluten-free option: Use a gluten-free bread flour blend designed for yeast breads. Keep in mind the texture and rise will differ, so consider adding xanthan gum if your blend doesn’t have it.
- Seeded crust: Before baking, brush the dough lightly with water and sprinkle sesame seeds, poppy seeds, or flaxseeds for crunch and visual appeal.
- Different baking vessels: Tried baking on a pizza stone covered with a metal bowl as a makeshift Dutch oven. It worked surprisingly well but requires more attention to oven temperature.
Personally, I love the herb variation during cooler months—it adds warmth and makes the bread feel special without extra effort.
Serving & Storage Suggestions
This artisan bread shines best served warm or at room temperature. Slice it thick with a serrated knife to preserve that crust. It pairs wonderfully with butter, olive oil, or your favorite jam for breakfast, or alongside soups and stews for dinner.
To keep it fresh, store the bread in a paper bag or bread box at room temperature for up to 2 days. Avoid plastic bags as they trap moisture and soften the crust. For longer storage, slice the loaf and freeze in airtight bags. Toast slices straight from the freezer for a crispy, fresh-baked feel.
Reheating works best in a 350°F (175°C) oven for 5-10 minutes, uncovered, to revive the crust’s crunch. Over time, the flavors mellow and deepen, making day-old bread perfect for croutons or bread pudding.
Nutritional Information & Benefits
Per slice (approximately 60g):
| Calories | 160 kcal |
|---|---|
| Carbohydrates | 32g |
| Protein | 5g |
| Fat | 1g |
| Fiber | 1g (higher if using whole wheat) |
Using simple ingredients, this bread is free from preservatives and artificial additives, making it a wholesome choice. Flour provides carbohydrates for energy, and the fermentation process from yeast can aid digestion. For those watching gluten intake, opting for whole wheat or gluten-free flour blends can adjust the recipe accordingly. Just be aware, this recipe contains gluten and yeast, which may not suit all dietary needs.
Conclusion
This easy crusty artisan bread recipe with perfectly crispy crust has become my go-to for satisfying that craving for homemade bakery-quality bread without complicated steps. It’s proof that with a little patience and simple ingredients, you can create something truly special in your own kitchen. Feel free to tweak it to match your taste or dietary needs—the recipe is forgiving and adaptable.
I love it because it turns any meal into a comforting occasion, whether it’s a quick snack or part of a bigger spread. Baking this bread is like a little ritual that brings calm to even the busiest days. Give it a try and see how it quietly becomes a staple you can’t imagine living without.
FAQs
- Can I use instant yeast instead of active dry yeast?
Yes, you can substitute instant yeast with the same amount. Just mix it directly with the flour without proofing in water first. - Do I need a Dutch oven to bake this bread?
A Dutch oven is ideal for steam retention, but a heavy oven-safe pot with a lid or a cast-iron skillet covered with a metal bowl can work as alternatives. - How long can I store this bread?
Store at room temperature in a paper bag for up to 2 days. For longer storage, freeze sliced bread in airtight bags for up to 3 months. - Why is my bread dense and not airy?
Dense bread often comes from under-proofing or using too much flour. Make sure to let the dough rise until bubbly and avoid adding extra flour while shaping. - Can I add seeds or herbs to the dough?
Absolutely! Adding herbs or seeds enhances flavor and texture. Mix them into the dough during the initial mix or sprinkle on top before baking.
Pin This Recipe!


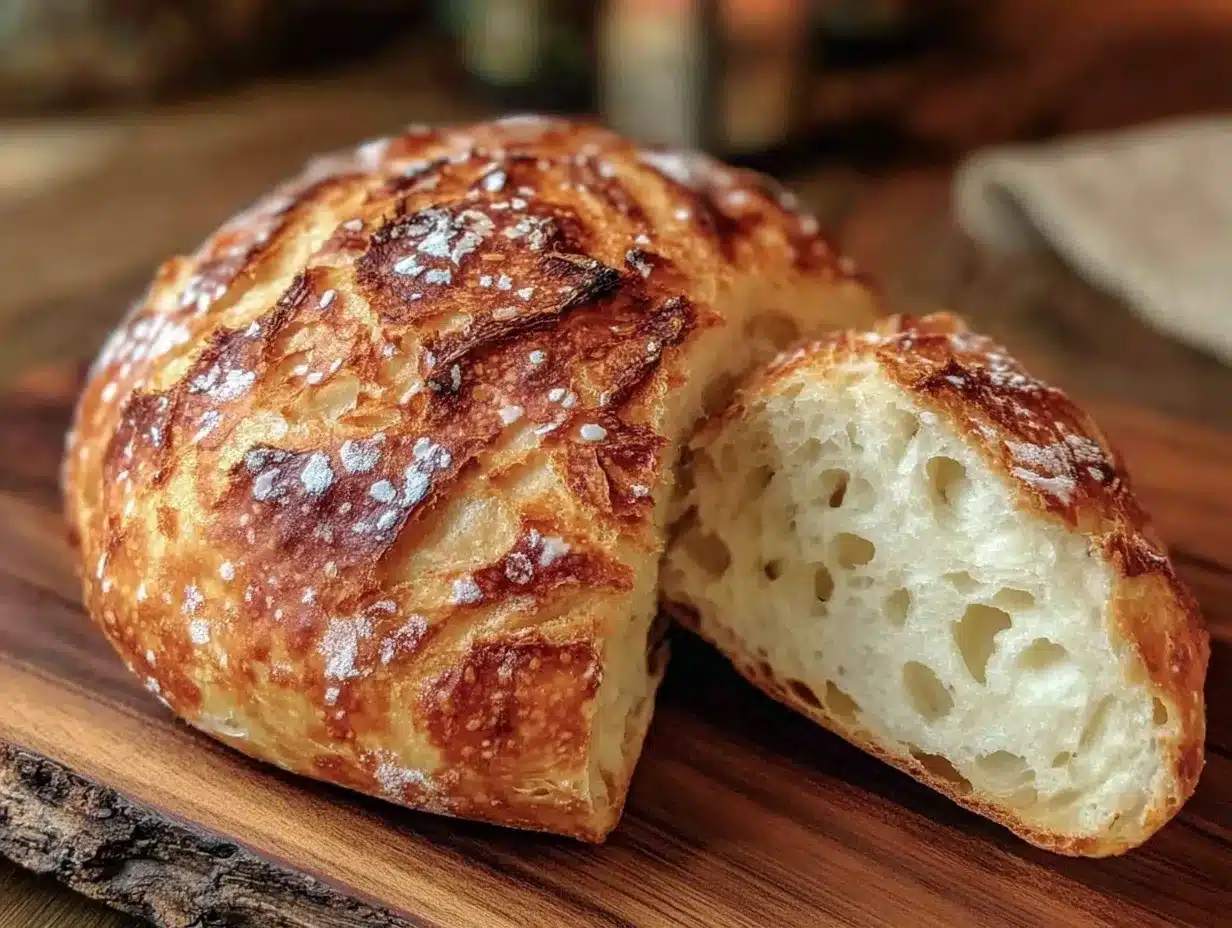
Easy Crusty Artisan Bread Recipe with Perfectly Crispy Crust at Home
A simple no-knead artisan bread recipe that yields a golden-brown crust with a soft, airy interior. Perfect for busy evenings and uses pantry staples.
- Total Time: 13 hours
- Yield: 1 loaf (about 8-10 slices) 1x
Ingredients
- 3 cups (360g) all-purpose flour (unbleached preferred)
- 1 ½ cups (360ml) warm water (105°F to 110°F / 40°C to 43°C)
- 2 teaspoons (7g) active dry yeast
- 1 ½ teaspoons (9g) salt (kosher or sea salt)
- 1 tablespoon (15ml) olive oil (optional)
- Up to 1 cup (120g) whole wheat flour (optional substitution)
Instructions
- Mix the dough (10 minutes): In a large bowl, combine flour, yeast, and salt. Add warm water and olive oil if using. Mix until a sticky, shaggy dough forms.
- First rise (12-18 hours): Cover the bowl loosely and leave on countertop to rise overnight until doubled in size and bubbly.
- Preheat oven and pot (45 minutes): Place Dutch oven or heavy pot with lid in oven and preheat to 450°F (232°C).
- Shape the dough (5 minutes): Lightly flour surface, scrape dough out, fold over itself to form a rough ball, and let rest for 15 minutes.
- Bake the bread (45 minutes): Remove hot pot from oven, place dough inside (using parchment paper if desired), cover with lid and bake 30 minutes. Remove lid and bake additional 15 minutes until crust is golden and crisp.
- Cool (at least 1 hour): Transfer bread to cooling rack and let rest before slicing.
Notes
Do not rush the long rise time; it develops flavor and texture. Preheat the pot thoroughly to create steam for a crispy crust. Avoid slicing bread immediately after baking to allow crumb to set. A wetter dough yields a lighter crumb. Alternatives to Dutch oven include cast-iron skillet covered with metal bowl.
- Prep Time: 15 minutes
- Cook Time: 45 minutes
- Category: Bread
- Cuisine: American
Nutrition
- Serving Size: 1 slice (approximate
- Calories: 160
- Fat: 1
- Carbohydrates: 32
- Fiber: 1
- Protein: 5
Keywords: artisan bread, crusty bread, no-knead bread, homemade bread, easy bread recipe, crispy crust bread


