
One chilly weekend, when the power flickered out unexpectedly, I found myself staring into the fridge with a kitchen that suddenly felt like a ghost town. No oven, no mixer, no fancy tools—just a desire for something warm and comforting. That’s when I remembered a little experiment I’d been meaning to try: an easy no-knead roasted garlic rosemary bread with crispy crust. Honestly, I was skeptical at first. Bread baking always seemed like a high-maintenance art, reserved for weekends with hours of hands-on dough folding and patience.
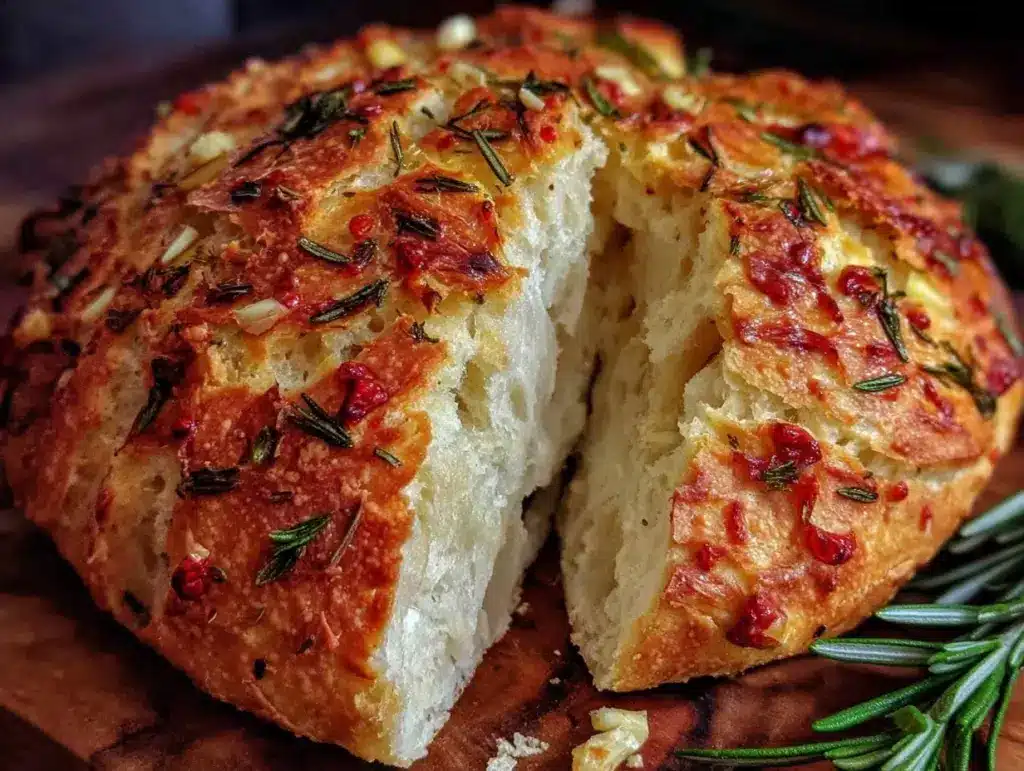
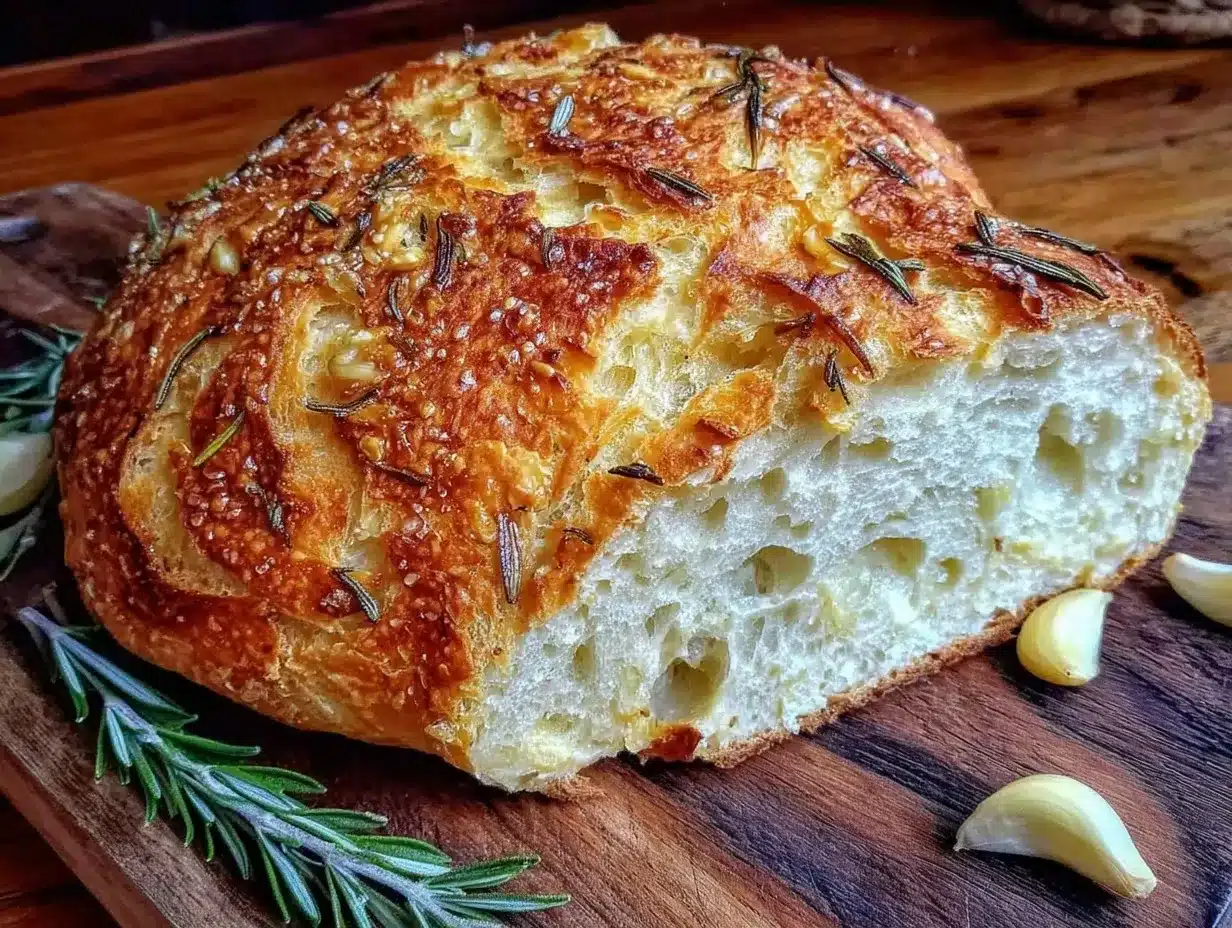
But this recipe? It was different. I grabbed a few simple ingredients, threw them together in a bowl, and let the magic happen overnight. The next morning, with the oven back on, the smell of roasted garlic mingling with fresh rosemary filled the whole kitchen. The crust crackled just right, and the inside was soft with tiny air pockets—a texture that felt like a hug in bread form. It quickly became clear this wasn’t just a lucky accident, but a recipe that would stick around in my regular rotation.
What I love most is how this bread manages to feel rustic and fancy all at once, without the usual fuss. If you’ve ever thought, “I wish I could bake artisan bread without turning my kitchen into a flour bomb zone,” you might find this recipe speaking your language. It’s approachable, forgiving, and perfect for those moments when you want comfort food that looks like you put in way more effort than you actually did. The easy no-knead roasted garlic rosemary bread with crispy crust has quietly become my go-to for everything from casual dinners to last-minute guests.
Why You’ll Love This Recipe
- Quick & Easy: This bread comes together with just a few minutes of active prep and then does its own thing overnight, making it ideal for busy folks or last-minute bakers.
- Simple Ingredients: You probably already have most of what you need in your pantry—flour, yeast, salt, garlic, and rosemary—no specialty shopping required.
- Perfect for Any Occasion: Whether it’s a cozy dinner side, a brunch centerpiece, or a snack alongside soup, this bread fits effortlessly into any meal.
- Crowd-Pleaser: The crispy crust combined with the fragrant roasted garlic and earthy rosemary keeps everyone asking for seconds.
- Unbelievably Delicious: The slow fermentation brings out a subtle tang, while the roasted garlic gives it a mellow, sweet depth you don’t get with raw garlic additions.
- Hands-Off Technique: No kneading means less mess and less stress, but you still get that artisan loaf vibe that usually takes hours and elbow grease.
This isn’t just another no-knead bread recipe floating around—it’s one I’ve tweaked to balance flavor and texture perfectly. Roasting the garlic in advance softens its sharpness, and the rosemary adds just enough herbal brightness. Plus, the crust? It’s that golden, crackly kind that makes you want to tear off chunks with your fingers. You know, the kind of bread that makes you close your eyes as you savor that first bite.
What Ingredients You Will Need
This recipe uses simple, wholesome ingredients to deliver bold flavor and a satisfying texture without fuss. Most are pantry staples and easy to swap out if needed.
- All-purpose flour – 3 cups (360 g), the backbone of your bread; King Arthur brand works great for consistent results.
- Instant yeast – 1/4 teaspoon, no need to proof, it wakes up as the dough rests.
- Salt – 1 1/2 teaspoons, balances the flavors and controls yeast activity.
- Roasted garlic cloves – about 6 cloves, mashed (roasting mellows the garlic into a sweet, buttery softness).
- Fresh rosemary – 2 tablespoons, finely chopped (adds a piney, savory note that dances with the garlic).
- Warm water – 1 1/2 cups (355 ml), around 105°F (40°C), just warm enough to activate the yeast without killing it.
- Olive oil – 1 tablespoon (optional, for brushing crust before baking to deepen color and add shine).
If you want to tweak the recipe, feel free to swap all-purpose flour for bread flour for a chewier texture or use gluten-free flour blends if you’re avoiding gluten. For the garlic, you can use pre-roasted or jarred if you’re short on time, but fresh-roasted gives the best flavor. And if rosemary isn’t your thing, thyme or sage are great herbal alternatives.
Equipment Needed
- Large mixing bowl: For combining ingredients—glass or ceramic works well and doesn’t react with yeast.
- Dutch oven or heavy oven-safe pot with lid: This is key for creating a steamy environment that produces the crispy crust. I use a 5-quart Le Creuset, but a cast-iron pot or even a deep oven-safe casserole dish with a lid will do.
- Kitchen scale (optional): For precise flour measurement, though cups work fine if you level carefully.
- Bench scraper or spatula: Helpful for handling sticky dough without adding too much flour.
- Oven mitts: For safely handling the hot Dutch oven.
Don’t have a Dutch oven? No worries. You can bake the bread on a preheated baking stone or heavy baking sheet and spritz with water to mimic steam. Just know the crust might be slightly less crackly. Also, keeping your pot well-seasoned and clean helps with non-stick release and longevity.
Preparation Method
- Roast the garlic: Preheat your oven to 400°F (205°C). Slice the top off a garlic bulb to expose the cloves, drizzle with a little olive oil, wrap in foil, and roast for 30-35 minutes until soft and golden. Once cool, squeeze out about 6 cloves and mash them into a paste. (If short on time, you can use jarred roasted garlic, but fresh is unbeatable.)
- Mix the dry ingredients: In your large mixing bowl, combine 3 cups (360 g) of all-purpose flour, 1/4 teaspoon instant yeast, and 1 1/2 teaspoons salt. Stir to blend evenly.
- Add wet ingredients: Pour in 1 1/2 cups (355 ml) warm water and add the roasted garlic paste and 2 tablespoons chopped rosemary. Use a wooden spoon or spatula to mix until a sticky dough forms. The dough will be shaggy and wet—that’s perfect. No kneading necessary.
- First rise: Cover the bowl loosely with plastic wrap or a damp towel. Let it rest at room temperature for 12 to 18 hours. The dough will bubble and double in size, developing flavor and a slightly tangy aroma.
- Pre-shape the dough: After the long rise, lightly flour a clean surface. Scrape the dough out gently onto it. With floured hands, fold the dough over itself a couple of times to shape into a rough ball. Let it rest uncovered for 20 minutes.
- Final shape and proof: Shape the dough into a tighter ball by folding edges underneath. Place it seam-side down on a piece of parchment paper. Cover with a towel and let proof for 1 to 2 hours until puffy (but not doubled again).
- Preheat the oven: Place your Dutch oven with the lid inside the oven and preheat to 450°F (230°C) for at least 30 minutes.
- Bake the bread: Carefully remove the hot pot from the oven. Lift the parchment paper with the dough and place it into the pot. Cover with the lid and bake for 30 minutes.
- Finish baking uncovered: Remove the lid and bake for an additional 15-20 minutes until the crust is deep golden brown and crackly. For extra shine, brush with olive oil right after baking.
- Cool completely: Transfer bread to a wire rack and let cool for at least an hour before slicing. This resting lets the crumb set and prevents gummy texture.
Cooking Tips & Techniques
Getting that perfect crispy crust and tender crumb is all about timing and environment. Here’s what I’ve learned from many batches:
- Don’t rush the rise: The long fermentation develops flavor and texture. Even if you’re eager, skipping this step leads to bland, dense bread.
- Use warm water, not hot: About 105°F (40°C) wakes up yeast gently. Too hot and you risk killing it, which means no rise.
- Resist the urge to add too much flour: The dough is sticky, but that’s normal. Adding extra flour makes bread dense and tough.
- Preheat your Dutch oven well: This creates steam inside, which is crucial for that signature crust. I’ve tried baking without it and the crust just isn’t the same.
- Use parchment paper: It helps transfer the dough safely and prevents sticking, especially with wet dough.
- Cool the bread fully before slicing: It’s tempting to dig in hot bread, but cutting too soon can squish the crumb and make it gummy.
- Experiment with herbs: Rosemary is classic here, but thyme or oregano can work well too, just adjust quantities to taste.
Variations & Adaptations
- Garlic-free version: Omit the roasted garlic and add a tablespoon of caramelized onions for a milder, sweet flavor.
- Gluten-free adaptation: Use a gluten-free all-purpose blend with xanthan gum. Note the dough will be less elastic but still delicious.
- Cheesy twist: Fold in 1/2 cup grated Parmesan or sharp cheddar with the rosemary for a savory upgrade.
- Different herbs: Swap rosemary for fresh thyme or sage for seasonal flair.
- Whole wheat version: Replace half the all-purpose flour with whole wheat flour for nuttier flavor and added fiber.
Personally, I once tried adding sun-dried tomatoes with the rosemary, which brought a lovely tangy surprise that worked beautifully for sandwiches. Feel free to get creative; this dough is forgiving and easy to customize.
Serving & Storage Suggestions
This bread is best served slightly warm or at room temperature to showcase its crispy crust and soft crumb. It pairs wonderfully with olive oil and balsamic vinegar for dipping, or alongside soups, stews, and fresh salads.
For storing, wrap the cooled loaf in a clean kitchen towel and keep it at room temperature for up to 2 days. To keep it longer, slice and freeze in airtight bags for up to 3 months. When ready to eat, reheat slices in a toaster or oven at 350°F (175°C) for 5-7 minutes to revive the crust.
Flavors actually mellow and deepen if you wait a day before slicing, so if you can hold off, the bread tastes even better the next day.
Nutritional Information & Benefits
One serving (about 2 slices) of this roasted garlic rosemary bread contains approximately:
| Calories | 180 kcal |
|---|---|
| Carbohydrates | 36 g |
| Protein | 5 g |
| Fat | 2 g |
| Fiber | 1.5 g |
Roasted garlic offers antioxidants and anti-inflammatory compounds, while rosemary contains compounds that may support digestion and brain health. This bread is naturally low in fat and free from artificial additives.
For those watching gluten intake, adapting with gluten-free flour blends can make this recipe suitable, but beware of cross-contamination if highly sensitive.
Conclusion
This easy no-knead roasted garlic rosemary bread with crispy crust has proven itself as a simple yet satisfying staple in my kitchen. Its hands-off approach means you get fresh, artisan-style bread without the usual fuss, and the flavors bring that cozy, homemade vibe we all crave now and then.
Feel free to make it your own—whether swapping herbs, adding cheese, or experimenting with flours. Baking bread can feel daunting, but this recipe is a gentle, friendly introduction that rewards patience with every crusty, fragrant slice.
I love how it fits into busy days and quiet moments alike, reminding me that good food doesn’t have to be complicated. If you try it, I’d love to hear how you make it your own or any tweaks you find magic—comments and stories are always welcome.
Happy baking, and may your kitchen always smell like fresh bread and herbs!
FAQs
Can I make this bread without roasting garlic first?
You can, but roasting garlic mellows its sharpness and adds sweetness. Raw garlic will be more pungent and may overpower the bread’s flavor.
How long can I store this bread at room temperature?
Wrapped in a towel or bread bag, it stays fresh for about 2 days. After that, it’s best to freeze slices to keep it from going stale.
What if I don’t have a Dutch oven?
You can bake the bread on a preheated baking stone or heavy baking sheet and spritz the oven with water to create steam. The crust will still be good but slightly less crispy.
Can I use active dry yeast instead of instant yeast?
Yes, but activate it first by dissolving in warm water with a pinch of sugar and letting it sit for 5-10 minutes until bubbly before mixing with flour.
Is this recipe suitable for beginners?
Absolutely! The no-knead method is perfect for those new to bread baking—minimal hands-on time and forgiving dough make it a great starting point.
Pin This Recipe!

Easy No-Knead Roasted Garlic Rosemary Bread Recipe with Crispy Crust Perfect for Beginners
A simple, hands-off no-knead bread recipe featuring roasted garlic and fresh rosemary, delivering a crispy crust and soft crumb perfect for beginners and busy bakers.
- Total Time: 13 hours
- Yield: 1 loaf (about 8 servings) 1x
Ingredients
- 3 cups (360 g) all-purpose flour
- 1/4 teaspoon instant yeast
- 1 1/2 teaspoons salt
- About 6 roasted garlic cloves, mashed
- 2 tablespoons fresh rosemary, finely chopped
- 1 1/2 cups (355 ml) warm water (around 105°F / 40°C)
- 1 tablespoon olive oil (optional, for brushing crust before baking)
Instructions
- Preheat oven to 400°F (205°C). Slice the top off a garlic bulb, drizzle with olive oil, wrap in foil, and roast for 30-35 minutes until soft and golden. Cool and mash about 6 cloves into a paste.
- In a large mixing bowl, combine flour, instant yeast, and salt. Stir to blend evenly.
- Add warm water, roasted garlic paste, and chopped rosemary. Mix with a wooden spoon or spatula until a sticky dough forms. No kneading needed.
- Cover the bowl loosely with plastic wrap or a damp towel. Let rest at room temperature for 12 to 18 hours until dough bubbles and doubles in size.
- Lightly flour a clean surface. Scrape dough onto it and fold over itself a couple of times to form a rough ball. Let rest uncovered for 20 minutes.
- Shape dough into a tighter ball by folding edges underneath. Place seam-side down on parchment paper. Cover with a towel and proof for 1 to 2 hours until puffy.
- Place Dutch oven with lid inside oven and preheat to 450°F (230°C) for at least 30 minutes.
- Carefully remove hot Dutch oven. Lift parchment paper with dough and place into pot. Cover with lid and bake for 30 minutes.
- Remove lid and bake an additional 15-20 minutes until crust is deep golden brown and crackly. Brush with olive oil if desired.
- Transfer bread to wire rack and cool completely for at least 1 hour before slicing.
Notes
Use warm water around 105°F to activate yeast without killing it. Do not rush the long rise for best flavor and texture. Preheat Dutch oven well to create steam for crispy crust. Cool bread completely before slicing to avoid gummy texture. Parchment paper helps transfer sticky dough safely.
- Prep Time: 15 minutes
- Cook Time: 45 minutes
- Category: Bread
- Cuisine: American
Nutrition
- Serving Size: About 2 slices
- Calories: 180
- Fat: 2
- Carbohydrates: 36
- Fiber: 1.5
- Protein: 5
Keywords: no-knead bread, roasted garlic bread, rosemary bread, easy bread recipe, artisan bread, crispy crust bread, beginner bread recipe


