
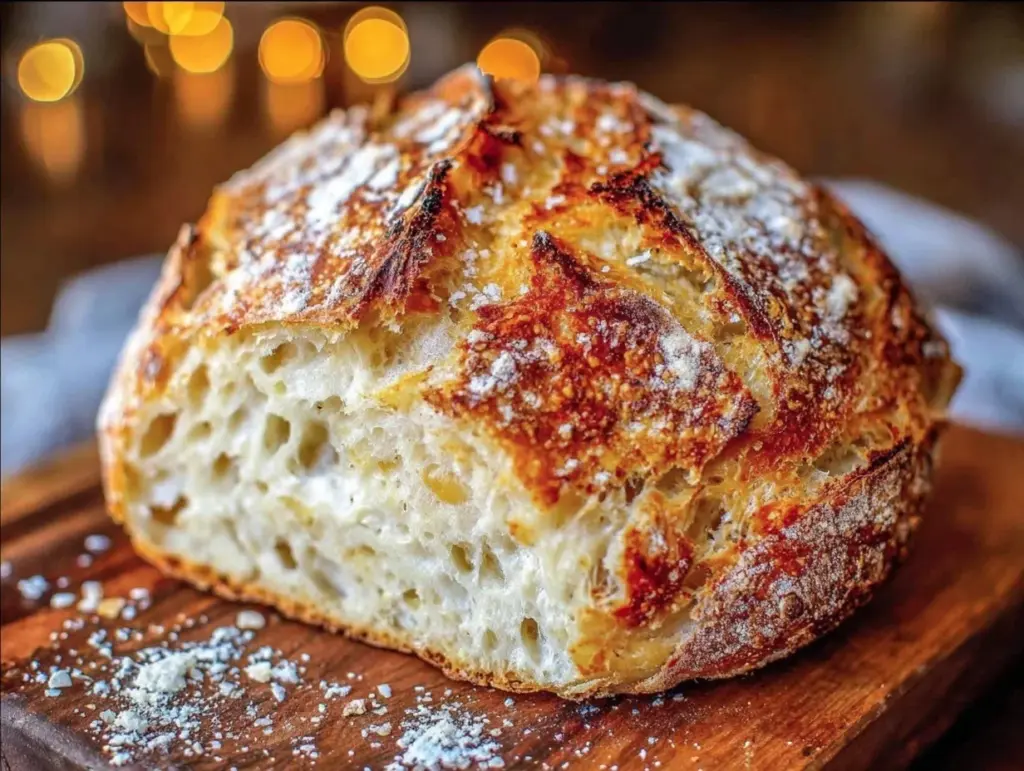
There was this one evening when I realized I was out of bread—again. It was already late, and honestly, I wasn’t in the mood to run to the store. I glanced at my sourdough starter bubbling quietly in the corner, half-forgotten. I thought, “What if I could whip up some fresh sourdough bread today without the usual days-long wait?” Skeptical but curious, I gave it a shot. To my surprise, the Easy Same Day Sourdough Bread with Rustic Crust came together beautifully, crust crackling just right, crumb soft but with those signature holes you expect from sourdough.
The smell that filled my kitchen was comforting—earthy, warm, and inviting. I sat down with a slice, butter melting slowly on the warm crumb, and knew this recipe wasn’t just a fluke. It quickly became a go-to whenever I needed fresh bread, fast. What’s great is that it’s foolproof enough for a busy weekday evening, yet satisfying enough that friends ask for the recipe the next day. No fancy equipment, no long waits, just that perfect rustic crust and tangy flavor that makes sourdough, well, sourdough.
Honestly, this recipe stuck with me because it proved that good bread doesn’t always mean a big time commitment. It’s about making the magic happen when you need it most—right now. And that’s why I’m sharing it with you.
Why You’ll Love This Recipe
- Quick & Easy: Ready in under 6 hours, this recipe fits perfectly into a busy day without the usual sourdough wait.
- Simple Ingredients: Uses just basic pantry staples—flour, water, salt, and your trusty sourdough starter.
- Perfect for Last-Minute Plans: Whether it’s a spontaneous dinner or a craving for fresh bread, you can pull this off without stress.
- Crowd-Pleaser: The rustic crust and chewy crumb win over both sourdough newbies and seasoned bread lovers.
- Unbelievably Delicious: The tangy flavor balanced with a golden, crackly crust is pure comfort food.
What sets this recipe apart is the technique that skips the long fermentation but still builds flavor and texture. Instead of the traditional multi-day routine, this method uses a shorter bulk fermentation combined with a smart folding process to develop gluten and taste. I’ve tweaked it many times—sometimes baking two loaves in a day just because I can’t get enough. If you want sourdough that’s as rustic as it is quick, this recipe’s where I’d start.
It’s not just bread—it’s the kind that turns an ordinary meal into a moment you want to savor, no matter how rushed the day was.
What Ingredients You Will Need
This recipe calls for straightforward, wholesome ingredients that work together to create that perfect rustic sourdough loaf. No need for fancy additions—just the essentials that you might already have on hand.
- Active sourdough starter, bubbly and fed (about 100g / 3.5 oz) – I prefer a mature, lively starter for the best rise and tang.
- Unbleached all-purpose flour (450g / 3 3/4 cups) – You can use bread flour for more chewiness, but AP flour works well.
- Filtered water, lukewarm (350g / 1 1/2 cups) – Room temperature or slightly warm helps activate the starter.
- Sea salt (10g / 2 tsp) – Enhances flavor and strengthens the dough.
Tips: When I’m feeling fancy, I sometimes swap 50g of flour for whole wheat, which adds a nice depth without making the dough too dense. For gluten-free options, this recipe isn’t suitable as-is, but you can experiment with gluten-free sourdough starters and flours.
Make sure your starter is active before starting—bubbly and doubled in size after feeding. I use a glass jar with a loose lid to keep track of its activity. It helps to stir the starter a few times before measuring to redistribute the yeast evenly.
Equipment Needed
- Large mixing bowl – For combining and fermenting the dough. Glass or stainless steel works best.
- Dutch oven or heavy oven-safe pot with lid – This traps steam to create a crisp crust. If you don’t have one, a baking stone with a pan of water works as a good alternative.
- Bread lame or sharp knife – For scoring the dough before baking to control how it expands.
- Kitchen scale – Precision matters in bread-making; measuring by weight keeps results consistent.
- Dough scraper or spatula – Handy for folding and handling sticky dough.
Personally, I started baking sourdough with just a cast iron skillet and an oven-safe bowl as a makeshift lid. It’s surprising how budget-friendly you can keep this. Also, a digital thermometer can be helpful for checking water temperature and dough temperature, but it’s not mandatory.
Preparation Method

- Mix the dough (10 minutes): In your large bowl, combine 100g (3.5 oz) active sourdough starter with 350g (1 1/2 cups) lukewarm water. Stir until the starter dissolves. Add 450g (3 3/4 cups) all-purpose flour and 10g (2 tsp) sea salt. Mix with a wooden spoon or your hand until a shaggy dough forms. It’ll seem sticky—that’s perfect.
- Autolyse (30 minutes): Cover the bowl with a damp towel and let the dough rest. This step hydrates the flour and kick-starts gluten development. You’ll notice the dough becomes smoother and easier to handle.
- Fold the dough (5 minutes): After resting, perform a series of stretches and folds right in the bowl: wet your hand, grab one edge of the dough, stretch it upward gently and fold it over the center. Rotate the bowl and repeat 4-6 times. This builds strength in the dough without kneading.
- Bulk fermentation (3 to 4 hours): Cover again and leave the dough at room temperature (around 70°F / 21°C). Every 30 minutes during the first 2 hours, repeat the folding process once or twice. The dough will rise and become airy. You’ll know it’s ready when it’s nearly doubled and poking it leaves a slight indentation.
- Shape the loaf (10 minutes): Lightly flour a work surface. Turn the dough out carefully, trying not to deflate it too much. Shape it into a round boule by folding edges inward and tucking underneath to create surface tension. Place it seam-side up on a piece of parchment paper.
- Final proof (1 hour): Cover the dough loosely with a towel and let it rest. It will puff up slightly. The dough should feel soft but spring back slowly when poked.
- Preheat the oven (30 minutes): About 20 minutes before baking, place your Dutch oven (lid on) in the oven and heat to 475°F (245°C). This ensures a hot baking environment for a crisp crust.
- Score and bake (45 minutes): Carefully remove the hot Dutch oven. Use your bread lame or sharp knife to make a few slashes on the dough’s surface (this controls expansion). Transfer the dough on parchment into the pot, cover with the lid, and bake for 25 minutes.
- Finish baking (15-20 minutes): Remove the lid to let the crust brown fully. Bake uncovered for another 15-20 minutes until the crust is deep golden and crackly. The internal temperature should reach about 205°F (96°C) for fully baked bread.
- Cool completely: Let the bread cool on a wire rack for at least an hour before slicing. This step is key to perfect crumb texture.
Pro tip: If your dough feels too sticky when shaping, dust your hands lightly with flour but avoid adding too much to the dough itself. That can dry it out.
Cooking Tips & Techniques
- Starter activity is everything: If your starter isn’t bubbly and active, your bread won’t rise properly. Feed it 4-6 hours before baking or overnight in a warm spot.
- Water temperature matters: Too hot and you’ll kill the yeast; too cold and fermentation slows. Aim for about 75°F (24°C) water.
- Don’t rush folding: The folding technique replaces kneading and builds gluten gradually. Skip it, and your bread might be dense.
- Keep the Dutch oven hot: Preheating it well traps steam, giving you that coveted crust. Avoid opening the oven during the first 25 minutes.
- Scoring controls expansion: If you’re nervous about cutting the dough, watch a quick video on scoring— it’s like giving your bread a little breathing room.
- Patience with cooling: I know it’s tempting to slice right away, but cooling lets the crumb set. Otherwise, the bread can be gummy inside.
Variations & Adaptations
- Whole wheat twist: Replace 100g of all-purpose flour with whole wheat flour for a nuttier flavor and denser crumb.
- Herbed crust: Sprinkle rosemary or thyme with coarse salt on top before baking for an aromatic crust.
- Overnight cold proof: After shaping, cover and refrigerate the dough overnight. Bake the next day for a deeper flavor, though this means the “same day” aspect shifts.
- Gluten-free option: This recipe relies on gluten, so for gluten-free bread, try a dedicated gluten-free sourdough starter and flour blend—though expect different texture.
- Seeded loaf: Mix in sunflower seeds, flax, or pumpkin seeds during mixing for added crunch and nutrition.
I once added caramelized onions and gruyere cheese to the dough just before shaping. The result was a rustic, savory treat perfect for a cozy weekend brunch.
Serving & Storage Suggestions
The bread tastes best fresh and slightly warm, with a crunchy crust and soft interior. Slice it thick for sandwiches or thinly for crostini. It pairs beautifully with olive oil, butter, or your favorite jam.
For storage, keep the loaf in a paper bag or bread box at room temperature for up to 3 days to maintain crust crispness. Avoid plastic bags as they trap moisture and soften the crust.
If you want to keep it longer, slice and freeze the bread in airtight bags. Toast slices straight from the freezer for nearly fresh texture.
Reheating in a 350°F (175°C) oven for 10 minutes helps restore crunch if the crust softens.
Over time, the flavors deepen—so if you save some slices for the next day, you might find the tang more pronounced, which is a nice bonus.
Nutritional Information & Benefits
One slice (about 60g) of this sourdough bread contains roughly:
| Calories | 150-170 kcal |
|---|---|
| Carbohydrates | 30g |
| Protein | 5g |
| Fat | 0.5g |
| Fiber | 1-2g |
Sourdough fermentation helps break down gluten and phytic acid, making the bread easier to digest for many people. It’s a more natural option compared to commercial yeast breads.
Using minimal ingredients means no preservatives or additives, keeping it wholesome. However, it contains gluten and is not suitable for those with celiac disease.
From my experience, having this bread around makes meals feel more balanced and satisfying without excess calories or processing.
Conclusion
This Easy Same Day Sourdough Bread with Rustic Crust recipe has become one of my favorite kitchen hacks. It’s proof that you can enjoy fresh, delicious sourdough without the usual wait or fuss. You can tweak it to your taste, add your favorite flavors, and trust that it’ll come out with a perfect crust every time.
Whether you’re new to sourdough or a seasoned baker, this recipe offers a reliable, comforting loaf for whenever you need bread on the fly. I love how it fills my home with warmth and makes even simple meals feel special.
If you try it, I’d love to hear how you customize it or what moments you bake it for. Bread baking is such a personal journey—let’s keep sharing those stories.
Here’s to many crusty, tender loaves ahead!
FAQs
How active should my sourdough starter be before using it in this recipe?
Your starter should be bubbly and have roughly doubled in size within 4-6 hours after feeding. A sluggish or dormant starter won’t give your bread a good rise.
Can I use whole wheat flour instead of all-purpose flour?
Yes, but replace no more than 20-25% of the flour with whole wheat to avoid a dense loaf. Whole wheat absorbs more water, so you might need to adjust hydration slightly.
What if I don’t have a Dutch oven—can I still make this bread?
Absolutely! Use a heavy baking sheet or stone, and place a shallow pan with hot water in the oven to create steam. Covering the dough loosely with foil for the first 20 minutes can help, too.
How do I know when the bread is fully baked?
The crust should be deep golden and crackly. You can also check the internal temperature with a thermometer; it should read about 205°F (96°C).
Can I freeze this sourdough bread?
Yes! Slice first, then freeze in an airtight bag. Toast or warm slices directly from the freezer for best results.
Pin This Recipe!
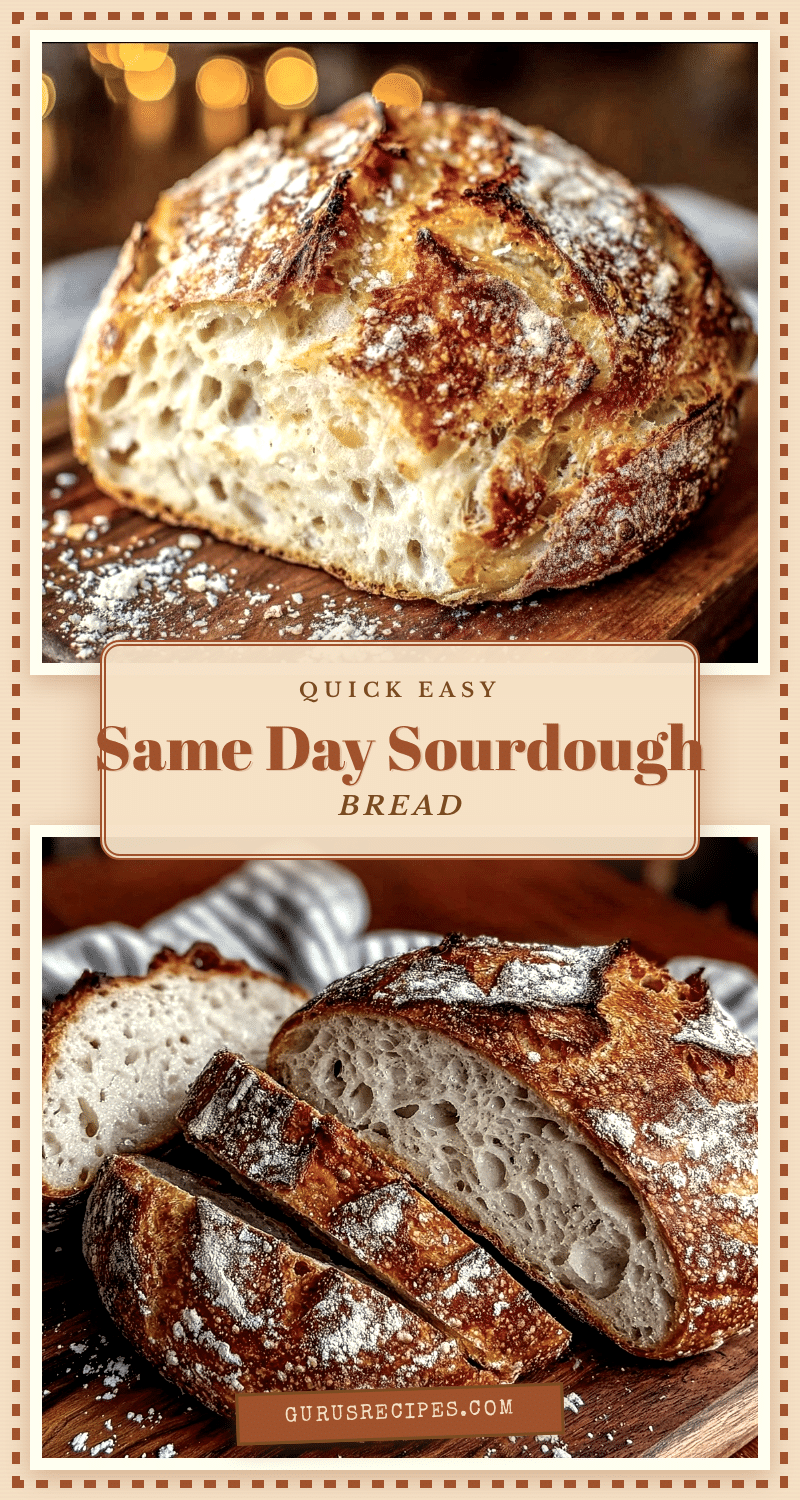

Easy Same Day Sourdough Bread Recipe with Perfect Rustic Crust
A quick and easy sourdough bread recipe that produces a rustic crust and soft crumb with signature holes, ready in under 6 hours without the usual long fermentation.
- Total Time: 5 hours 45 minutes
- Yield: 1 loaf (about 8-10 servings) 1x
Ingredients
- 100g (3.5 oz) active sourdough starter
- 450g (3 3/4 cups) unbleached all-purpose flour
- 350g (1 1/2 cups) filtered lukewarm water
- 10g (2 tsp) sea salt
Instructions
- Mix the dough (10 minutes): In a large bowl, combine 100g (3.5 oz) active sourdough starter with 350g (1 1/2 cups) lukewarm water. Stir until the starter dissolves. Add 450g (3 3/4 cups) all-purpose flour and 10g (2 tsp) sea salt. Mix until a shaggy dough forms.
- Autolyse (30 minutes): Cover the bowl with a damp towel and let the dough rest to hydrate the flour and start gluten development.
- Fold the dough (5 minutes): Perform 4-6 stretches and folds in the bowl to build dough strength without kneading.
- Bulk fermentation (3 to 4 hours): Cover and leave dough at room temperature (~70°F/21°C). Fold once or twice every 30 minutes during the first 2 hours. Dough should nearly double and leave a slight indentation when poked.
- Shape the loaf (10 minutes): Lightly flour a surface, turn dough out carefully, shape into a round boule, and place seam-side up on parchment paper.
- Final proof (1 hour): Cover loosely with a towel and let dough rest until slightly puffed and springs back slowly when poked.
- Preheat oven (30 minutes): Place Dutch oven with lid in oven and heat to 475°F (245°C).
- Score and bake (45 minutes): Remove hot Dutch oven, score dough surface with a bread lame or sharp knife, transfer dough on parchment into pot, cover, and bake for 25 minutes.
- Finish baking (15-20 minutes): Remove lid and bake uncovered until crust is deep golden and crackly, internal temperature about 205°F (96°C).
- Cool completely: Let bread cool on wire rack for at least 1 hour before slicing.
Notes
Ensure your sourdough starter is active and bubbly before starting. Use lukewarm water (~75°F) to activate the starter. Folding replaces kneading and builds gluten gradually. Preheat the Dutch oven well to trap steam for a crisp crust. Let bread cool completely before slicing to set the crumb. For gluten-free options, experiment with gluten-free sourdough starters and flours. You can substitute up to 50g of flour with whole wheat for added flavor.
- Prep Time: 45 minutes
- Cook Time: 1 hour
- Category: Bread
- Cuisine: American
Nutrition
- Serving Size: 1 slice (about 60g)
- Calories: 150170
- Sodium: 0.4
- Fat: 0.5
- Carbohydrates: 30
- Fiber: 12
- Protein: 5
Keywords: sourdough bread, easy sourdough, same day sourdough, rustic crust bread, quick sourdough, homemade bread, bread recipe


