

“Are you seriously turning pretzels into witch fingers?” my friend asked with a mix of amusement and skepticism over the phone. Honestly, I was half-joking the first time I tossed together these Tasty Witch Finger Pretzel Rods with green chocolate, but the idea stuck. It was late October, and I was scrambling for a last-minute Halloween snack to bring to a neighborhood party. The usual candy bowl felt too predictable, and store-bought treats just didn’t feel right that year.
I grabbed a bag of pretzel rods, some green candy melts hiding in my pantry, and a handful of sliced almonds I’d meant to use for something else. As I dipped those pretzels into the melty chocolate and stuck on the almond “nails,” the whole kitchen smelled like sweet nostalgia — that mix of chocolate and a little holiday mischief. People at the party were weirded out at first, but then they kept reaching for more. The best part? Kids and adults alike loved them, and no one could stop laughing when the “fingers” disappeared faster than I expected.
Since then, I’ve made these pretzel rods more times than I can count every October. They’re simple, a little spooky, and honestly, so much fun to make. Plus, they don’t require hours of baking or a dozen special ingredients. I think it’s that perfect balance between creepy and delicious that keeps me coming back to this recipe year after year. If you ask me, these witch fingers are the kind of treat that turns any Halloween gathering into a little celebration—without the stress.
There’s something quietly satisfying about biting into that salty crunch coated in sweet green chocolate, knowing you whipped it up yourself. It’s a reminder that sometimes the simplest ideas make the best memories.
Why You’ll Love This Tasty Witch Finger Pretzel Rods Recipe
Having tested this recipe multiple times, I can confidently say it’s a winner for anyone wanting easy, festive, and crowd-pleasing treats. Here’s why it’s worth making:
- Quick & Easy: These witch finger pretzel rods come together in about 20 minutes, perfect for last-minute Halloween prep or an unexpected party invite.
- Simple Ingredients: No need for fancy or hard-to-find items — just pretzel rods, green candy melts, and sliced almonds. You probably have most of these on hand already.
- Perfect for Halloween Parties: They add creepy charm and fun to any spooky-themed gathering, trick-or-treat event, or classroom party.
- Crowd-Pleaser: Kids love the novelty, and adults appreciate the balance of salty and sweet with a hint of crunch.
- Unbelievably Delicious: The buttery crunch of the pretzel combined with smooth green chocolate and that almond “nail” detail hits all the right flavor and texture notes.
What sets this recipe apart is the clever use of simple components to create an effect that looks intricate but isn’t. The sliced almonds pressed into the chocolate look way more impressive than they really are. Plus, using green candy melts instead of traditional chocolate adds a fun, festive color without extra effort. You won’t find a fussier witch finger recipe that’s this fast and fuss-free — I promise.
Honestly, it’s the kind of snack that makes you pause and smile after the first bite (and maybe sneak a few more). It’s Halloween, but it’s also just good, homemade fun that’s easy to share and enjoy.
What Ingredients You Will Need for Witch Finger Pretzel Rods
This recipe uses simple, wholesome ingredients to deliver bold, festive flavor and satisfying texture without any fuss. Most are pantry staples, and substitutions are easy if needed.
- Pretzel rods: The base for your witch fingers; look for sturdy, straight rods for best results.
- Green candy melts: These give the witch fingers their spooky color and smooth coating. I recommend Wilton brand for a reliable melt and texture.
- Sliced almonds: Used for fingernails—choose thin, even slices to press into the chocolate (they add the perfect creepy detail).
- Optional: Red decorating gel or edible marker for “blood” details (adds a fun, dramatic touch but not necessary).
- Vegetable shortening or coconut oil: Just a teaspoon or two mixed into the candy melts helps thin the chocolate for smoother dipping and coating.
Substitution tips: If you can’t find green candy melts, white chocolate with green food coloring works fine but may be less smooth. For a nut allergy alternative, try sunflower seeds instead of almonds for the nails, or skip them altogether and draw the nails with edible markers.
These ingredients come together quickly and don’t require pre-baking or complicated prep, which is why this recipe fits perfectly for busy cooks or last-minute celebrations.
Equipment Needed
- Microwave-safe bowl or double boiler: For melting candy melts. I find a microwave works best for quick melting, but a double boiler helps prevent overheating.
- Baking sheet or tray: To lay out the dipped pretzels while the chocolate sets.
- Parchment paper or silicone mat: Prevents sticking and makes cleanup easier.
- Tongs or fork: Useful for dipping pretzels and lifting them out without making a mess.
- Optional: Toothpicks for adding “blood” details with decorating gel.
For budget-friendly alternatives, parchment paper and a simple microwave-safe bowl suffice. If you don’t have candy melts, a sturdy double boiler setup with a metal bowl over simmering water works just as well to melt chocolate gently.
Preparation Method for Tasty Witch Finger Pretzel Rods

- Prepare your workspace: Line a baking sheet with parchment paper or a silicone mat. Have your pretzel rods, sliced almonds, and candy melts ready to go. This step takes about 5 minutes.
- Melt the green candy melts: Place 8 ounces (226 g) of candy melts in a microwave-safe bowl. Microwave in 30-second increments, stirring in between, until fully melted and smooth. Add 1-2 teaspoons of vegetable shortening or coconut oil to thin the chocolate if needed. This should take about 3-4 minutes total.
- Dip the pretzel rods: Holding a pretzel rod by one end, dip it into the melted green chocolate about 3/4 of the way down, swirling gently to coat evenly. Let excess chocolate drip off. This step is fun but can be messy, so take your time (about 10 seconds per rod).
- Create the “knuckle” indentations: Before the chocolate sets, gently press your finger or the back of a spoon into the chocolate at intervals to mimic knuckles. This adds a realistic witch finger texture.
- Add almond “fingernails”: Press a sliced almond onto the tip of each dipped pretzel rod to resemble a nail. Make sure the almond is partially embedded in the chocolate for secure adhesion.
- Set the pretzels: Lay the dipped rods flat on the prepared baking sheet. Let them sit at room temperature until the chocolate hardens, about 15-20 minutes. You can speed this up by placing the sheet in the fridge for 10 minutes.
- Optional blood details: Use red decorating gel or an edible marker to add creepy “blood” streaks around the nails or knuckles once the chocolate sets. This step adds drama but is totally optional.
- Serve or store: Once fully set, your witch finger pretzel rods are ready to enjoy or package for gifting.
Tip: If the chocolate starts to thicken while dipping, gently rewarm it in the microwave for 10 seconds to keep it smooth. The key is to work quickly and have all ingredients ready before melting the chocolate.
Cooking Tips & Techniques for Perfect Witch Finger Pretzel Rods
Making these witch finger pretzel rods is pretty straightforward, but a few tricks help nail the look and texture every time.
- Use room temperature candy melts: Cold candy melts tend to seize or clump. Let them sit out for a bit before melting if they’ve been stored in a chilly pantry.
- Thin the chocolate slightly: Adding a bit of vegetable shortening or coconut oil makes the coating smoother and easier to work with. This also helps the chocolate harden with a nice sheen.
- Press knuckle indentations quickly: The chocolate thickens fast, so use a spoon or your finger to create knuckles immediately after dipping. If you wait too long, the chocolate will be too firm to shape.
- Secure almond nails firmly: Press the sliced almonds into the chocolate before it fully sets. If they fall off later, a tiny dab of melted chocolate can be used to glue them back on.
- Work in small batches: Don’t melt all candy melts at once if you’re making a large batch. Re-melting multiple times can cause graininess.
- Store in a cool, dry place: Avoid humidity to prevent the chocolate from sweating or melting prematurely.
I once tried skipping the knuckle step and it just looked like a green pretzel rod—boring! That little detail transforms these from cute to creepy every time.
Variations & Adaptations for Witch Finger Pretzel Rods
These witch finger pretzel rods are versatile and easy to customize depending on your taste, dietary needs, or the spooky vibe you want to create.
- Flavor twist: Swap green candy melts for orange or purple to match other Halloween colors. White chocolate tinted with food coloring works well, too.
- Allergen alternative: Use pumpkin seeds or sunflower seeds instead of almonds for the nails if you’re avoiding nuts.
- Spicy variation: Add a pinch of cayenne pepper or chili powder to the melted chocolate for a surprising spicy-sweet combo.
- Gluten-free option: Use gluten-free pretzel rods to make this recipe safe for gluten-sensitive guests.
- Extra creepy: Draw on veins or cracks with edible markers, or add a drop of red gel near the nails for “bloody” effect.
One of my favorite tweaks is using crushed candy cane bits pressed into the chocolate for a minty crunch—perfect if you want to keep the recipe around for fall but add a winter holiday hint.
Serving & Storage Suggestions for Witch Finger Pretzel Rods
These pretzel rods are easy to serve and store, making them perfect for parties or gifting.
- Serving temperature: Best served at room temperature so the chocolate is firm but not too hard to bite.
- Presentation: Arrange them standing upright in a tall glass or laid flat on a black or orange platter for a spooky effect.
- Complementary treats: Pair with a warm pumpkin spice latte or a bowl of creamy no-churn strawberry ice cream for a crowd-pleasing combo.
- Storage: Keep in an airtight container at room temperature for up to 3 days. Refrigerate if your home is warm, but note this can cause slight condensation on the chocolate.
- Freezing: Freeze for up to 2 weeks in a sealed container; thaw at room temperature before serving to avoid condensation.
- Flavor development: The salty-sweet balance stays consistent, but the almond nails may soften slightly over time—best enjoyed fresh for maximum crunch.
Nutritional Information & Benefits
These witch finger pretzel rods are an indulgent treat, but they come with a few perks thanks to their simple ingredients.
- Estimated nutrition per pretzel rod: Approximately 110 calories, 3g fat, 17g carbs, and 1g protein (varies based on brand and size).
- Health benefits: Pretzels provide a low-fat source of carbs, and almonds offer a bit of protein and healthy fats.
- Dietary notes: Can be made gluten-free with special pretzels; dairy-free if using vegan candy melts.
- Potential allergens: Contains nuts (almonds) and gluten (unless substituted).
From a wellness perspective, these are treats best enjoyed in moderation — but they add a fun, homemade touch to holiday celebrations without artificial preservatives or complicated ingredients.
Conclusion
If you want a Halloween treat that’s fun to make, delightfully spooky, and loved by all ages, these Tasty Witch Finger Pretzel Rods with green chocolate are a must-try. They’re quick, simple, and bring a playful twist to your holiday table.
Feel free to customize the colors, nails, or even add a little “blood” for extra creep factor. I personally keep coming back to this recipe because it’s easy to whip up even when my schedule is packed—and it never fails to get laughs and compliments.
Give it a shot and share how your witch fingers turn out! I’d love to hear your twists or spooky stories around this recipe. Happy haunting and happy snacking!
FAQs about Tasty Witch Finger Pretzel Rods
Can I use regular chocolate instead of green candy melts?
Yes, you can melt white or milk chocolate and add green food coloring to get the same effect. Just be sure to use oil-based colors designed for chocolate.
How do I keep the sliced almonds attached to the pretzel rods?
Press the almond slices into the melted chocolate immediately after dipping and hold them for a few seconds until they stick. If they fall off later, a dab of melted chocolate can reattach them.
Can these be made ahead of time?
Absolutely! You can prepare the witch finger pretzel rods a day or two in advance. Store them in an airtight container at room temperature for best freshness.
What if I don’t have pretzel rods?
Long pretzel sticks work as a substitute, though the shape might be less uniform. You could also try breadsticks for a similar effect.
Any tips for making the “knuckle” indentations look realistic?
Use your fingertip or the back of a spoon to gently press the melted chocolate at intervals along the pretzel. Do this right after dipping before the chocolate firms up for the best results.
Pin This Recipe!
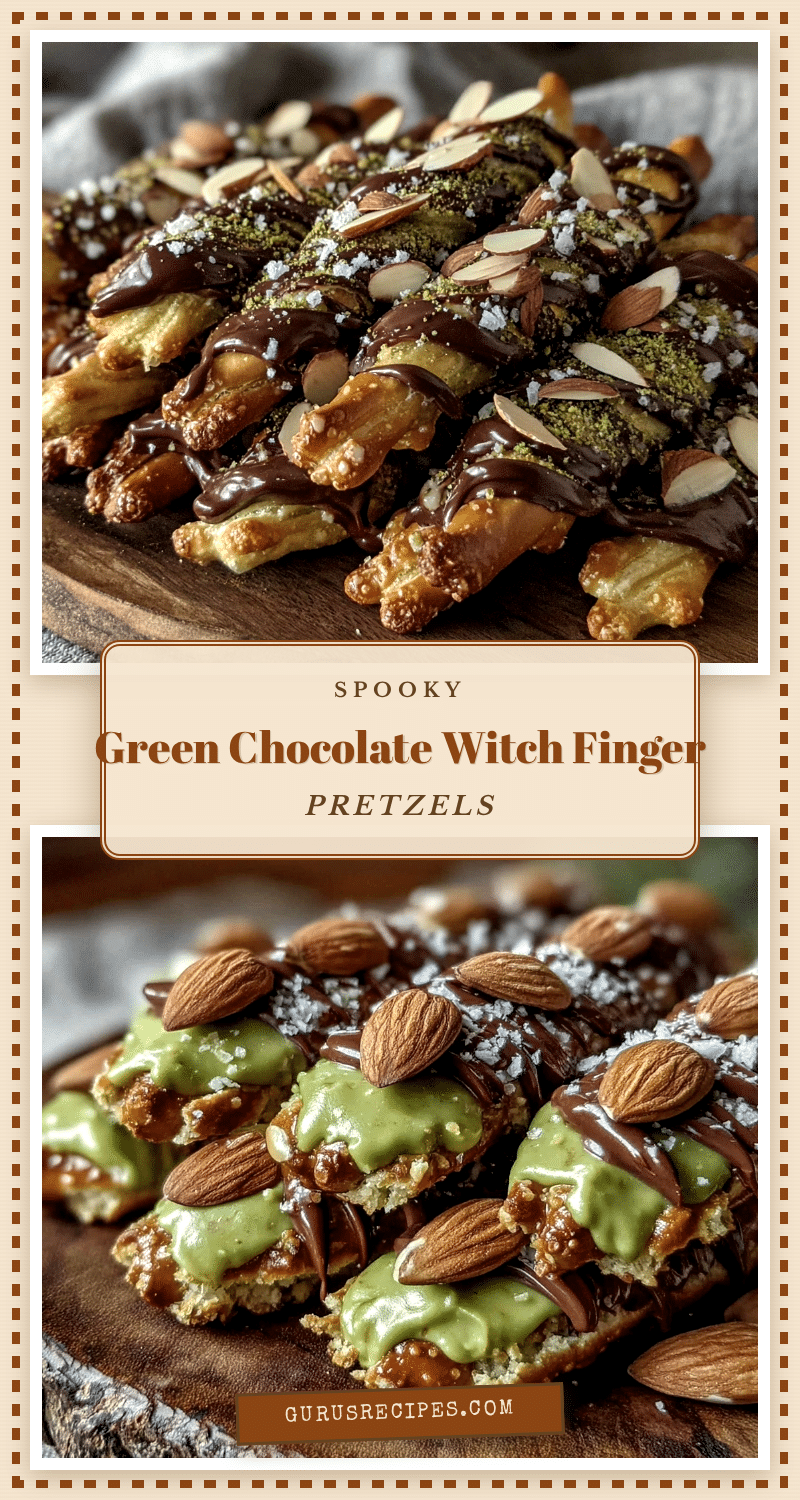

Tasty Witch Finger Pretzel Rods Recipe Easy Homemade Halloween Treats
These witch finger pretzel rods are a quick, easy, and festive Halloween treat featuring pretzel rods dipped in green candy melts with almond ‘nails’ for a spooky effect. Perfect for parties and last-minute celebrations.
- Total Time: 20-25 minutes
- Yield: 12 pretzel rods 1x
Ingredients
- Pretzel rods (sturdy, straight rods recommended)
- 8 ounces green candy melts (Wilton brand recommended)
- Sliced almonds (thin, even slices for fingernails)
- 1–2 teaspoons vegetable shortening or coconut oil (to thin chocolate)
- Optional: Red decorating gel or edible marker for ‘blood’ details
Instructions
- Prepare your workspace by lining a baking sheet with parchment paper or a silicone mat. Have pretzel rods, sliced almonds, and candy melts ready (about 5 minutes).
- Melt 8 ounces of green candy melts in a microwave-safe bowl in 30-second increments, stirring between, until smooth. Add 1-2 teaspoons of vegetable shortening or coconut oil to thin the chocolate if needed (3-4 minutes).
- Dip each pretzel rod about 3/4 of the way into the melted green chocolate, swirling gently to coat evenly. Let excess chocolate drip off (about 10 seconds per rod).
- Before the chocolate sets, press your finger or the back of a spoon into the chocolate at intervals to create knuckle indentations.
- Press a sliced almond onto the tip of each dipped pretzel rod to resemble a fingernail, embedding it partially in the chocolate.
- Lay the dipped rods flat on the prepared baking sheet and let them set at room temperature until the chocolate hardens, about 15-20 minutes. Alternatively, refrigerate for 10 minutes to speed up setting.
- Optional: Use red decorating gel or edible marker to add ‘blood’ streaks around the nails or knuckles once the chocolate sets.
- Serve immediately or store in an airtight container.
Notes
Use room temperature candy melts to avoid clumping. Thin the chocolate with vegetable shortening or coconut oil for smoother coating. Press knuckle indentations quickly before chocolate firms. Secure almond nails firmly; use melted chocolate to reattach if needed. Work in small batches to avoid graininess. Store in a cool, dry place to prevent melting or sweating. Optional blood details add dramatic effect.
- Prep Time: 5 minutes
- Cook Time: 15-20 minutes
- Category: Dessert
- Cuisine: American
Nutrition
- Serving Size: 1 pretzel rod
- Calories: 110
- Fat: 3
- Carbohydrates: 17
- Protein: 1
Keywords: Halloween treats, witch finger pretzels, easy Halloween snacks, candy melts recipe, spooky snacks, almond nails, party treats


