
“I never thought a cake could look like a watercolor painting until that rainy Saturday when my paint-stained apron somehow landed in the kitchen instead of the studio.” That’s how the story of my Perfect Pastel Ombre Vanilla Spring Cake with Watercolor Frosting began. Honestly, I was supposed to be cleaning up after a messy art project, but the leftover pastel food colors on my fingers sparked an idea that wouldn’t let me rest.
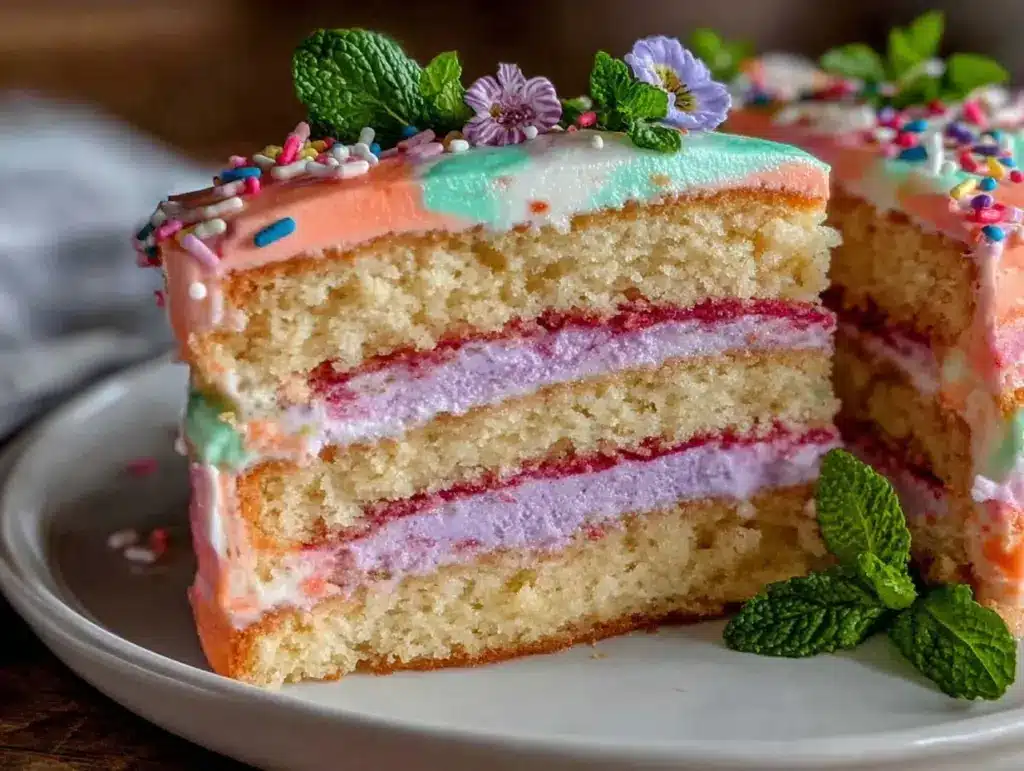
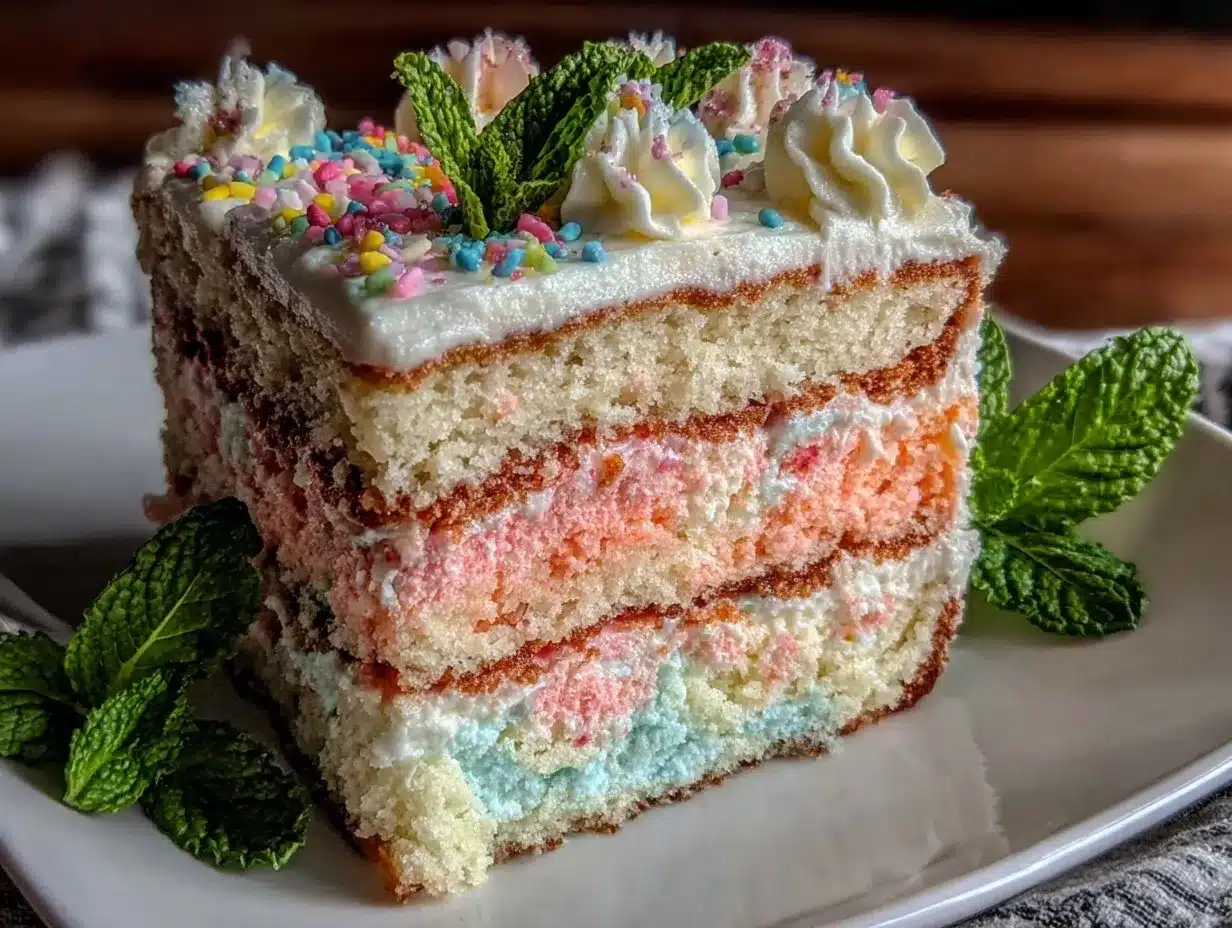
Maybe you’ve been there — that moment when inspiration strikes in the least expected way. The kitchen smelled like freshly baked vanilla, and the soft pastel hues reminded me of spring blossoms after a gentle rain. I grabbed my usual vanilla cake recipe, added a gentle twist with ombre layers, and played around with watercolor-style frosting that looked like it belonged on a gallery wall rather than a dessert table.
Let me tell you, the process was a delightful mess. I dropped a streak of pale pink on the counter, forgot to set the timer once, and even had to scrape frosting off my cat’s curious nose (don’t ask). But once that cake came together, I knew this wasn’t just another vanilla cake — it was a celebration of spring’s soft colors and sweet flavors in one slice. It’s the kind of cake that makes you pause, savor, and maybe even snap a few photos before digging in.
This recipe has stuck with me because it’s as much about the joy of creating something beautiful as it is about the taste. Whether you’re baking for a special occasion or just because you want to brighten a regular day, this Perfect Pastel Ombre Vanilla Spring Cake with Watercolor Frosting will charm your eyes and your palate alike.
Why You’ll Love This Recipe
After countless experiments and frosting smudges, this recipe has truly become a favorite in my baking repertoire. Here’s why I swear by it:
- Quick & Easy: The cake layers come together in about 30 minutes, perfect for last-minute celebrations or those weekend baking moods.
- Simple Ingredients: No need for specialty stores here — just pantry staples and a few food coloring gels.
- Perfect for Spring Gatherings: Whether it’s a brunch, baby shower, or just a sunny afternoon tea, the pastel ombre effect fits right in.
- Crowd-Pleaser: I’ve seen even the pickiest eaters swoon over the tender crumb and delicate vanilla flavor.
- Unbelievably Delicious: The vanilla base is rich but light, balanced beautifully by the silky watercolor frosting that’s not too sweet.
What makes this cake stand apart is the frosting technique — it’s not just tinted buttercream, it’s a soft watercolor blend that looks hand-painted but is surprisingly easy to achieve. I recommend using gel food colors like AmeriColor for the best vibrancy without watering down your frosting. Also, the ombre layering means that each slice is a pastel gradient surprise, making every piece a little work of art.
For me, this recipe isn’t just dessert; it’s a little moment of spring captured in cake form. You might find yourself closing your eyes after that first bite, savoring both flavor and color.
What Ingredients You Will Need
This recipe uses simple, wholesome ingredients to deliver a moist, flavorful vanilla cake with a stunning pastel presentation. Most are pantry staples, with a touch of food coloring magic.
- For the Cake Batter:
- 2 ½ cups (312g) all-purpose flour, sifted (I like King Arthur for consistent results)
- 2 ½ teaspoons baking powder
- ½ teaspoon salt
- 1 cup (226g) unsalted butter, softened (use good quality for best flavor)
- 1 ¾ cups (350g) granulated sugar
- 4 large eggs, room temperature
- 1 tablespoon pure vanilla extract
- 1 cup (240ml) whole milk, room temperature
- For the Watercolor Frosting:
- 1 ½ cups (340g) unsalted butter, softened
- 5 cups (600g) powdered sugar, sifted
- 2 teaspoons pure vanilla extract
- 3-4 tablespoons heavy cream or whole milk
- Gel food coloring in pastel shades (pink, lavender, mint green, pale yellow) — AmeriColor or Wilton brands work great
- Extras:
- Non-stick baking spray or parchment paper
- Optional: edible glitter or pastel sprinkles for decoration
If you prefer a dairy-free option, swap the butter for vegan margarine and use almond or oat milk instead. For a gluten-free version, try a 1:1 gluten-free flour blend — just note it might affect the crumb slightly. And if you’re baking in summer, fresh lemon zest added to the batter gives a bright twist!
Equipment Needed
- Three 8-inch (20 cm) round cake pans — if you only have two, you can bake in batches.
- Electric mixer (stand or hand-held) — trust me, creaming the butter and sugar by hand is no fun.
- Mixing bowls (at least two, one for dry, one for wet ingredients).
- Rubber spatulas for folding and scraping bowls.
- Cooling racks to cool the cake layers evenly.
- Offset spatula or butter knife for frosting — an offset spatula gives the smoothest finish.
- Turntable cake stand (optional) — makes frosting easier but not mandatory.
- Measuring cups and spoons — accuracy matters here, especially with flour and leavening.
If you don’t have a turntable, no worries! I’ve frosted this cake often right on a plate and it still turns out gorgeous. Also, a bench scraper helps smooth frosting edges if you want a polished look. A budget-friendly alternative is using a dinner knife and a small spatula from your cutlery drawer.
One last pro tip: keep your butter at room temperature for at least an hour before starting — this really helps with smooth frosting.
Preparation Method
- Preheat & Prep: Set your oven to 350°F (175°C). Grease three 8-inch pans with non-stick spray and line with parchment paper for easy removal. This prep takes about 10 minutes.
- Mix Dry Ingredients: In a medium bowl, whisk together the all-purpose flour, baking powder, and salt. Set aside.
- Cream Butter & Sugar: In a large bowl, beat the softened butter and granulated sugar using an electric mixer on medium speed for 3-4 minutes until light and fluffy. This step is key for a tender cake.
- Add Eggs & Vanilla: Crack in eggs one at a time, beating well after each addition. Stir in vanilla extract. The batter might look a bit curdled here — don’t panic, it’s normal.
- Combine Wet & Dry: Add the dry ingredients in three batches alternating with the milk (start and end with dry), mixing each just until combined. Overmixing can make the cake tough.
- Divide Batter & Color: Evenly divide the batter into three bowls. Tint each with a different pastel gel color — I usually go pale pink, soft lavender, and mint green. Stir gently to keep the batter light.
- Bake: Pour each colored batter into prepared pans. Bake for 25-30 minutes or until a toothpick inserted comes out clean. Keep an eye around the 25-minute mark to avoid overbaking.
- Cool Completely: Let the cakes cool in pans for 10 minutes, then transfer to cooling racks. Cool fully before frosting, about 1 hour.
- Make Frosting: Beat softened butter on medium speed until creamy. Gradually add powdered sugar, alternating with cream and vanilla, until smooth and spreadable. Divide and tint small portions with gel colors for the watercolor effect.
- Assemble & Frost: Place the first cake layer on a serving plate or cake board. Spread a thin layer of frosting. Repeat with remaining layers. For the outside, use a spatula to apply white frosting base. Then, using a small brush or spatula, dab and swirl colored frosting patches to create the watercolor ombre look.
- Finishing Touches: Chill cake briefly to set frosting if needed. Add edible glitter or sprinkles for extra spring sparkle.
Pro tip: If your frosting softens too much while decorating, pop it in the fridge for 10-15 minutes to firm up without hardening completely. And remember, the watercolor effect is meant to be artistic and a little imperfect — no need for perfect blending.
Cooking Tips & Techniques
Creating that perfect pastel ombre vanilla spring cake requires a few insider pointers that took me a handful of tries to learn.
- Don’t Overmix the Batter: When combining wet and dry ingredients, mix just until you don’t see flour streaks. Overmixing can make the crumb dense or chewy.
- Room Temperature Ingredients Are Key: Butter, eggs, and milk all perform better when they’re not cold. I’ve had cakes crack or bake unevenly when I skipped this step.
- Use Gel Food Colors: Liquid colors can thin your batter and frosting. Gels deliver vibrant pastels without changing texture.
- Layer Evenly: Weighing your batter for each pan ensures uniform layers. I use a kitchen scale to split batter evenly, which makes the final look cleaner.
- Watercolor Frosting Technique: Apply dollops of tinted frosting around the cake and gently spread with a small offset spatula or butter knife. Less is more — you want brushstroke-like patches, not full coverage.
- Keep Tools Clean: Wiping your spatula between colors stops muddying the pastel tones.
- Timing: Bake layers ahead if needed. Wrap layers tightly in plastic wrap and refrigerate, then bring to room temperature before frosting to avoid condensation.
Learning when to chill the cake during frosting saves you from smearing colors. Also, I once forgot to grease my pans and ended up with a half-melted cake rescue mission — trust me, prepping pans properly is worth the extra minute.
Variations & Adaptations
This pastel ombre vanilla spring cake is quite flexible, so you can tailor it to different tastes and occasions.
- Flavor Swaps: Add lemon zest and a tablespoon of lemon juice to the batter for a fresh citrus twist. Or try almond extract instead of vanilla for a nutty note.
- Dairy-Free Version: Use vegan butter and coconut milk in place of dairy. The frosting can be made with shortening for a stable, dairy-free buttercream.
- Chocolate Ombre: Replace a third of the flour with cocoa powder and tint the frosting with soft browns and blush pinks for a chocolatey pastel effect.
- Gluten-Free Option: Use a gluten-free flour blend, but be mindful it may change texture slightly. Adding 1 tsp xanthan gum helps with structure.
- Frosting Technique Alternative: If you don’t want to do watercolor, try a simple ombre gradient by adding increasing amounts of one color to each layer of frosting and smoothing evenly.
My personal favorite variation is a lavender-honey frosting paired with the vanilla layers. I mixed dried culinary lavender into the buttercream and swapped sugar for honey — the flavor was subtle but unforgettable.
Serving & Storage Suggestions
This cake is best served at room temperature to let the vanilla and frosting flavors shine. I like to slice it with a sharp serrated knife to keep those pastel layers tidy.
Pair this pastel cake with a light cup of Earl Grey tea or a sparkling lemonade for a refreshing contrast. It also plays nicely alongside fresh fruit plates or delicate finger sandwiches at spring brunches.
To store, wrap leftovers tightly in plastic wrap or place in an airtight container. Refrigerate for up to 3 days; just bring to room temperature before serving for the best texture. You can freeze the unfrosted cake layers for up to 2 months—wrap each layer well and thaw overnight in the fridge.
When reheating frosted slices, a few seconds in the microwave (about 10-15 seconds) soften the frosting without melting it completely, making each bite as delightful as fresh.
Nutritional Information & Benefits
This vanilla cake is a treat, but it’s made with real butter and whole ingredients, giving it a richer flavor than boxed mixes. Here’s a rough estimate per slice (1/12th of cake):
| Calories | 320 kcal |
|---|---|
| Fat | 15g |
| Carbohydrates | 42g |
| Protein | 4g |
| Sugar | 28g |
The vanilla extract and real butter provide a comforting richness, while the pastel food colorings add no calories or sugars. Using whole milk boosts moisture and adds calcium. For those watching carbs, you could reduce sugar slightly or try almond flour substitutions.
Keep in mind, this recipe contains gluten, dairy, and eggs — so it’s not suitable for all allergies, but you can adapt it as mentioned earlier.
Conclusion
So, why give this Perfect Pastel Ombre Vanilla Spring Cake with Watercolor Frosting a try? Because it’s more than just a dessert — it’s a celebration of color, flavor, and the little joys of baking. You can tweak it to your taste, impress your guests with those dreamy pastel layers, or simply enjoy a slice with your favorite cup of tea.
Honestly, I keep coming back to this recipe because it feels like spring on a plate — soft, sweet, and a little bit magical. And I’d love to hear if you give it a whirl (or put your own spin on it).
Drop a comment with your experience or any creative twists you’ve tried. Share this recipe if it brightened your day, and let’s keep making beautiful cakes that taste as good as they look!
Frequently Asked Questions
Can I make this cake ahead of time?
Yes! You can bake the layers up to two days in advance and keep them wrapped tightly in the fridge. Assemble and frost the day you plan to serve for the freshest taste.
What if I don’t have gel food coloring?
You can use liquid food coloring, but add it sparingly as it may thin the batter or frosting. Gel colors give better pastel tones without altering texture.
How do I get the smoothest frosting finish?
Use an offset spatula and smooth with a bench scraper or chilled knife. Chilling the cake briefly between coats helps achieve a clean look.
Can I use this frosting for other cakes?
Absolutely! The watercolor buttercream works beautifully on cupcakes, sheet cakes, or even cookies.
Is this recipe suitable for beginners?
Definitely. The steps are straightforward, and the watercolor frosting technique is forgiving — you don’t need to be a pro to make it look stunning.
Pin This Recipe!
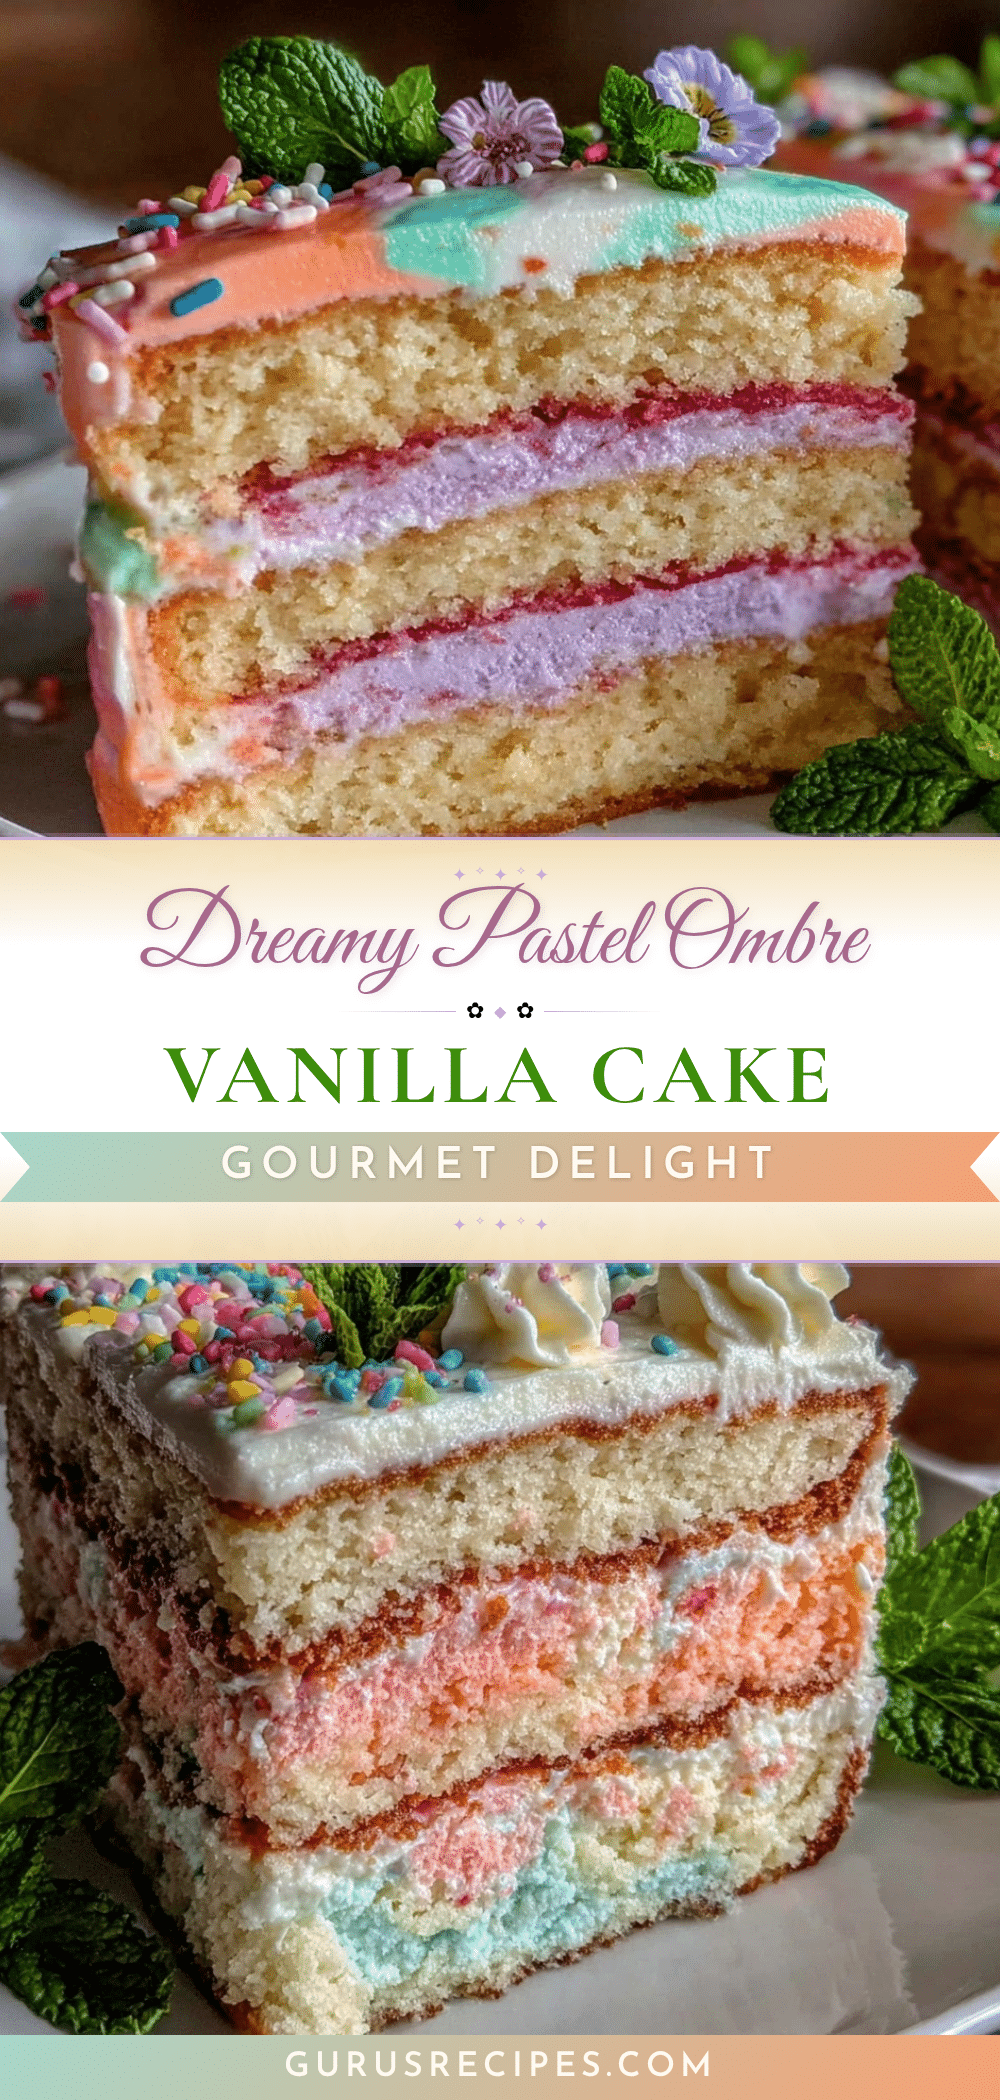

Perfect Pastel Ombre Vanilla Spring Cake with Watercolor Frosting
A moist and flavorful vanilla cake with stunning pastel ombre layers and a soft watercolor buttercream frosting, perfect for spring gatherings and celebrations.
- Total Time: 1 hour 50 minutes
- Yield: 12 servings 1x
Ingredients
- 2 ½ cups (312g) all-purpose flour, sifted
- 2 ½ teaspoons baking powder
- ½ teaspoon salt
- 1 cup (226g) unsalted butter, softened
- 1 ¾ cups (350g) granulated sugar
- 4 large eggs, room temperature
- 1 tablespoon pure vanilla extract
- 1 cup (240ml) whole milk, room temperature
- 1 ½ cups (340g) unsalted butter, softened (for frosting)
- 5 cups (600g) powdered sugar, sifted
- 2 teaspoons pure vanilla extract (for frosting)
- 3–4 tablespoons heavy cream or whole milk (for frosting)
- Gel food coloring in pastel shades (pink, lavender, mint green, pale yellow)
- Non-stick baking spray or parchment paper
- Optional: edible glitter or pastel sprinkles for decoration
Instructions
- Preheat oven to 350°F (175°C). Grease three 8-inch pans with non-stick spray and line with parchment paper.
- In a medium bowl, whisk together flour, baking powder, and salt. Set aside.
- In a large bowl, beat softened butter and granulated sugar with an electric mixer on medium speed for 3-4 minutes until light and fluffy.
- Add eggs one at a time, beating well after each addition. Stir in vanilla extract.
- Add dry ingredients in three batches alternating with milk, starting and ending with dry ingredients. Mix just until combined.
- Divide batter evenly into three bowls. Tint each with a different pastel gel color (pale pink, soft lavender, mint green). Stir gently.
- Pour each colored batter into prepared pans. Bake for 25-30 minutes or until a toothpick inserted comes out clean.
- Cool cakes in pans for 10 minutes, then transfer to cooling racks and cool completely (about 1 hour).
- For frosting, beat softened butter until creamy. Gradually add powdered sugar, alternating with cream and vanilla, until smooth and spreadable.
- Divide frosting and tint small portions with gel colors for watercolor effect.
- Assemble cake by placing first layer on serving plate. Spread thin layer of frosting. Repeat with remaining layers.
- Apply white frosting base on outside. Using a small brush or spatula, dab and swirl colored frosting patches to create watercolor ombre look.
- Chill cake briefly to set frosting if needed. Add edible glitter or sprinkles for decoration.
Notes
Use gel food colors for best pastel vibrancy without thinning frosting. Keep butter at room temperature for smooth frosting. If frosting softens too much while decorating, chill for 10-15 minutes. The watercolor effect is meant to be artistic and a little imperfect. Weigh batter for even layers. Frosting can be adapted for dairy-free or gluten-free versions.
- Prep Time: 20 minutes
- Cook Time: 30 minutes
- Category: Dessert
- Cuisine: American
Nutrition
- Serving Size: 1 slice (1/12th of c
- Calories: 320
- Sugar: 28
- Fat: 15
- Carbohydrates: 42
- Protein: 4
Keywords: vanilla cake, pastel cake, ombre cake, watercolor frosting, spring cake, easy cake recipe, buttercream frosting, pastel ombre, celebration cake


