
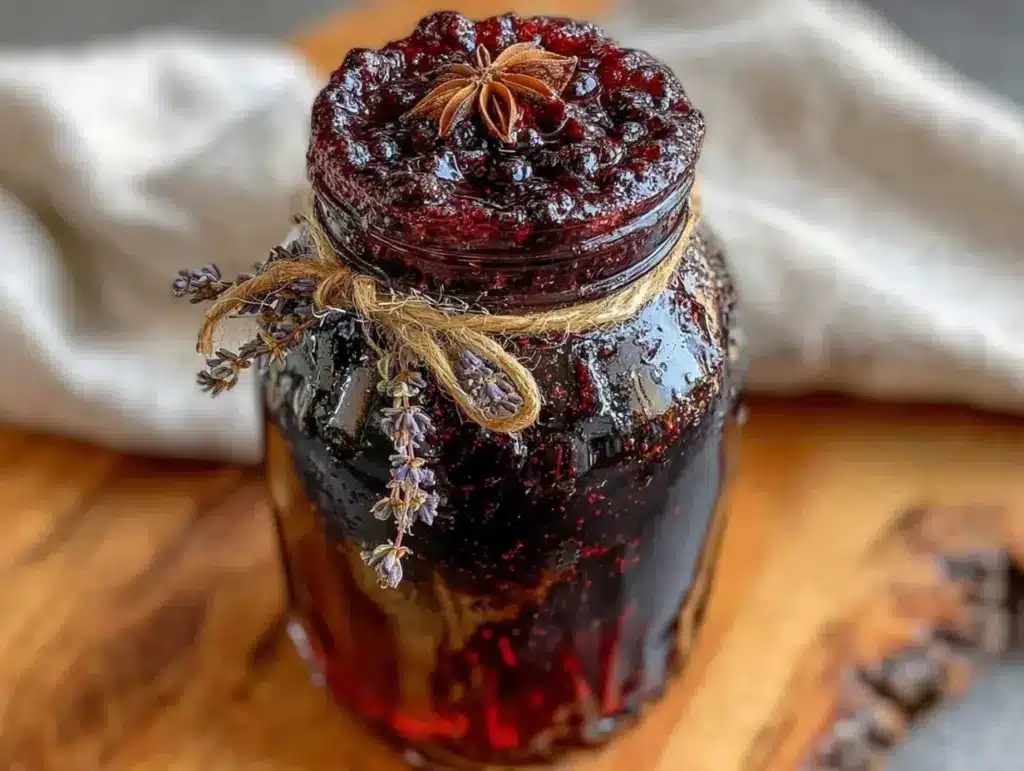
That deep, dark purple stain on my grandmother’s kitchen towel — the one that never quite washed out — still takes me straight to her tiny farmhouse kitchen in late autumn. She’d be hunched over the stove, a pot of deep purple berries bubbling away, filling the whole house with this tart, earthy smell that somehow felt like a hug. I never asked her why she made it. I just knew that come November, that smell meant we were being protected, wrapped in something ancient and good.
She called it her “winter tonic,” a thick, jewel-toned syrup she’d spoon into our tea or straight off a spoon when we started to sniffle. It wasn’t until years later, standing in my own kitchen with a bag of dried elderberries and a desperate need to fend off the creeping crud, that I realized what she was doing. She was making homemade elderberry syrup for immune support, a tradition as old as the hills, and honestly, a whole lot tastier than any pill I’ve ever taken.
This recipe isn’t complicated. It’s a slow simmer of berries, spices, and a little patience. It’s the kind of thing you make when you want to take care of your people, to have something ready in the fridge for those mornings when a scratchy throat shows up uninvited. It’s a quiet promise to yourself that you’re worth the effort.
Why You’ll Love This Recipe
Let’s be honest — there are a million elderberry syrup recipes out there. But this one? It’s the one I’ve tweaked and tested through countless cold seasons, and it’s the one that actually works for us. Here’s why it’s earned a permanent spot in my fridge.
- Simple, Real Ingredients : No weird additives or preservatives. Just dried elderberries, ginger, cinnamon, cloves, and raw honey. You can pronounce everything.
- Works for the Whole Family : From toddlers to grandmas, everyone can take a spoonful. It’s gentle enough for daily use during cold and flu season.
- Cost-Effective : A bag of dried elderberries makes several batches of syrup, costing a fraction of what you’d pay for a tiny bottle at the health food store.
- Customizable : You can dial up the ginger for extra kick, add echinacea, or swap the honey for maple syrup. It’s your kitchen, your rules.
- Surprisingly Delicious : It’s tart, a little spicy, and sweetened just enough to make it feel like a treat. My kids actually ask for it.
What makes this recipe different from the rest? It’s the method. I simmer the berries low and slow to extract every bit of goodness without destroying the delicate compounds. And I never add the honey until the syrup has completely cooled — raw honey’s benefits are too precious to boil away. This isn’t just another version of the same old thing. It’s the version I trust with my family’s health.
This recipe is the kind you make when you want to feel prepared. It’s comfort in a jar, a little bit of kitchen magic that makes you feel like you’ve got a secret weapon against the winter blues. And honestly, that feeling alone is worth the simmering time.
What Ingredients You Will Need
This recipe uses simple, wholesome ingredients to deliver a powerful immune boost without the fuss. Most of these are pantry staples in my house during fall and winter, and they come together to create something truly special.
- 1 cup dried elderberries : These are the star of the show. I buy mine from Mountain Rose Herbs or a trusted local bulk supplier. Look for deep purple-black berries that are plump and fragrant. Avoid any that smell musty or look shriveled beyond recognition.
- 4 cups filtered water : Tap water can have chlorine or other chemicals that might affect the taste. Filtered water gives you a cleaner, truer flavor.
- 1 (3-inch) piece fresh ginger, sliced : Ginger adds a warming, spicy kick and is a powerhouse for digestion and immune health. I leave the skin on for extra nutrients, just give it a good scrub.
- 1 cinnamon stick : It lends a sweet, woody warmth that balances the tartness of the berries. Plus, it makes your kitchen smell incredible.
- 1 teaspoon whole cloves : These little guys pack a punch. They’re antimicrobial and add a deep, almost floral spice note. Don’t skip them.
- 1 cup raw, local honey : This is non-negotiable for me. Raw honey has natural antibacterial properties and enzymes that are killed by heat. Always, always add it after the syrup has cooled. Local honey can also help with seasonal allergies.
Optional Add-Ins : I sometimes add a tablespoon of dried rose hips for extra vitamin C, or a few slices of astragalus root for an additional immune boost during the worst of cold season.
Substitution Guidance : If you can’t find dried elderberries, you can sometimes use fresh or frozen, but you’ll need to adjust the water ratio and cooking time. For a vegan version, swap the honey for maple syrup or agave — just know the immune-boosting properties won’t be the same.
Equipment Needed
You don’t need a fancy kitchen to make this. It’s a simple, old-fashioned process that relies on a few basic tools.
- Medium-sized saucepan : A heavy-bottomed pot works best for even heat distribution. I use a 3-quart stainless steel pot.
- Fine-mesh strainer or cheesecloth : You need something to strain out all the berries and spices. A fine-mesh strainer works great, but if you want a super clear syrup, line it with a double layer of cheesecloth.
- Glass jar or bottle for storage : A 16-ounce or 32-ounce Mason jar is perfect. Make sure it’s sterilized — I just run it through the dishwasher on the sanitize cycle.
- Wooden spoon or silicone spatula : For stirring. Nothing fancy needed.
- Funnel (optional but helpful) : Makes pouring the hot syrup into your jar a whole lot less messy.
Personal Note : I’ve made this in everything from a fancy Le Creuset pot to a beat-up old saucepan I found at a thrift store. It works just fine every time. Don’t let the lack of “perfect” equipment stop you.
Preparation Method
Alright, let’s get to it. This is the easy part — just a little patience and a lot of love.
- Combine the berries, water, and spices. In your medium saucepan, add the dried elderberries, sliced ginger, cinnamon stick, and whole cloves. Pour in the 4 cups of filtered water. Give it a quick stir to make sure everything is submerged.
- Bring to a boil, then simmer. Set the pot over medium-high heat and bring it to a gentle boil. You’ll see the water start to turn a gorgeous deep purple. Once it’s boiling, reduce the heat to low, cover the pot, and let it simmer for 45 minutes to 1 hour. The berries will plump up, and the liquid will reduce by about half. Your kitchen will smell like a cozy apothecary — it’s the best part.
- Mash the berries. After the simmering time, take the pot off the heat. Using the back of a wooden spoon or a potato masher, gently mash the berries against the side of the pot. This releases all the remaining goodness from the berries. Don’t go crazy — just a few good presses.
- Strain the liquid. Set your fine-mesh strainer or cheesecloth over a large bowl or a heat-safe measuring cup. Carefully pour the berry mixture through the strainer. Let it drain completely. You can gently press on the solids with the back of a spoon to get every last drop, but don’t force it too hard or you’ll get cloudy syrup. Discard the solids (compost them if you can!).
- Cool completely. This is the hardest step for impatient people like me. Let the dark purple liquid cool to room temperature. It needs to be completely cool before you add the honey. I usually let it sit for an hour or two, or even pop it in the fridge for a bit.
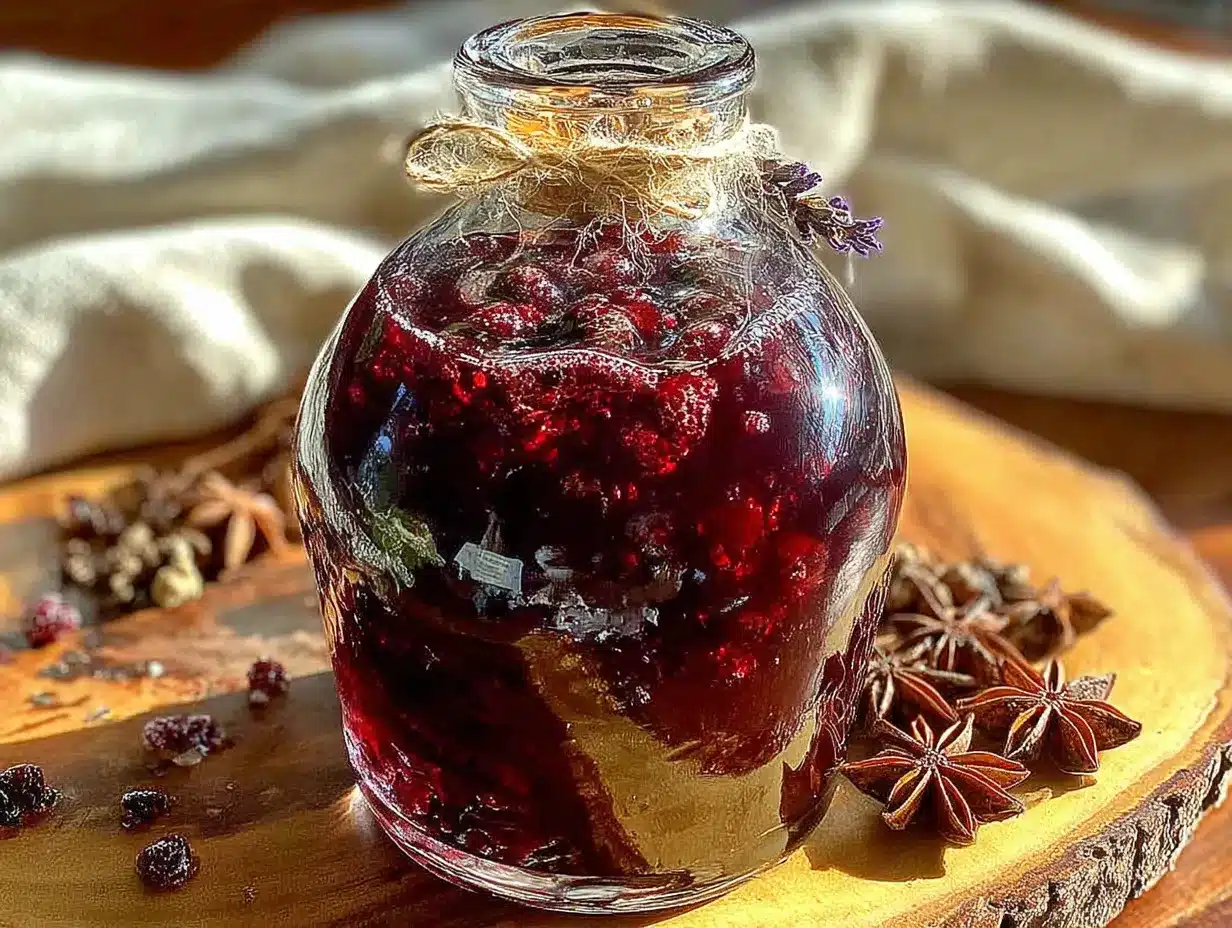
- Add the honey. Once the liquid is cool, pour in the 1 cup of raw honey. Stir gently but thoroughly until the honey is fully dissolved. The syrup will be thick, glossy, and a beautiful deep ruby color.
- Bottle and store. Using your funnel, pour the finished syrup into your sterilized glass jar or bottle. Seal it tightly and pop it in the refrigerator.
Sensory Cue : At the end, your syrup should be thick enough to coat the back of a spoon, but still pourable. If it’s too thin, you can simmer it a little longer next time. If it’s too thick, that’s fine too — it just means it’s extra concentrated!
Cooking Tips & Techniques
I’ve made this syrup more times than I can count, and I’ve learned a few things the hard way. Here’s what I wish I’d known from the start.
- Low and slow is key. Don’t rush the simmer. Boiling the heck out of the berries can make the syrup bitter and destroy some of the beneficial compounds. A gentle bubble is all you need.
- Don’t skip the mashing step. I used to just strain the berries without mashing them, and I was leaving so much goodness behind. A few gentle mashes makes a huge difference in the final yield and potency.
- Patience with the honey. I once got impatient and added the honey while the liquid was still warm. The honey dissolved fine, but I know I compromised some of its raw benefits. Now I set a timer so I don’t rush it.
- Sterilize your jars. This is a big one. Since the syrup is shelf-stable only in the fridge, you want to make sure your container is clean to prevent any mold or spoilage. A quick dishwasher cycle or a 10-minute boil does the trick.
- Taste as you go. Before you add the honey, taste the cooled liquid. If it’s too tart, you can add a little more honey. If you want more spice, you can simmer it with a little extra ginger next time. This is your syrup — make it yours.
My Biggest Failure : One year, I tried to make a double batch and used a pot that was too small. It boiled over, made a sticky mess on my stovetop, and I lost half the liquid. Now I always use a pot that’s at least twice the volume of the liquid I’m starting with.
Variations & Adaptations
This recipe is a fantastic base, and it’s fun to play around with. Here are some of my favorite twists.
- Immune-Boosting Powerhouse : Add 2 tablespoons of dried echinacea root or 1 tablespoon of dried astragalus root along with the elderberries. This turns it into a true immune-supporting dream team.
- Spicy Kick : If you love heat, add a small, dried chili pepper or a 1-inch piece of fresh turmeric root (sliced) to the simmer. It adds a whole new layer of warmth and anti-inflammatory goodness.
- Kid-Friendly Version : My kids aren’t huge fans of the clove flavor, so I sometimes reduce the cloves to 1/2 teaspoon and add a strip of orange zest instead. It makes it a little sweeter and more approachable for little palates.
- Slow Cooker Method : You can absolutely make this in a slow cooker. Combine everything except the honey in the slow cooker, cook on low for 6-8 hours, then mash, strain, cool, and add the honey. It’s a great hands-off approach.
- Dairy-Free / Vegan : As mentioned, swap the honey for maple syrup or agave. The texture will be a bit thinner, but it’s still delicious and effective.
Personal Variation : I once added a tablespoon of vanilla extract after the syrup had cooled, and it was incredible. It added a warmth that paired beautifully with the spices. I don’t do it every time, but it’s a fun treat.
Serving & Storage Suggestions
This syrup is incredibly versatile. Here’s how I use it and keep it fresh.
- Daily Dose : Adults take 1 tablespoon daily during cold and flu season. For kids, it’s 1 teaspoon daily. You can take it straight off a spoon, or mix it into a little warm water or tea.
- At the First Sign of a Sniffle : Increase the dose to 1 tablespoon every 3-4 hours for adults, and 1 teaspoon every 3-4 hours for kids. It’s a gentle way to support your body’s natural defenses.
- In Drinks : Stir a tablespoon into hot tea, lemon water, or even a little sparkling water for a refreshing immune-boosting soda. It’s also amazing drizzled over pancakes or yogurt.
- Storage : Keep your syrup in a tightly sealed glass jar in the refrigerator. It will last for 2-3 months. If you see any mold or off smells, toss it and make a fresh batch.
- Freezing : You can freeze the syrup in ice cube trays for individual servings. Pop out the cubes and store them in a freezer bag. They’ll last for up to 6 months. Just thaw a cube in the fridge overnight when you need it.
Flavor Note : The flavors actually meld and deepen after a few days in the fridge. It tastes even better on day three than it does on day one.
Nutritional Information & Benefits
While I’m not a doctor, I can tell you what the research says about these incredible ingredients. This syrup is more than just a tasty treat — it’s a little bottle of wellness.
- Elderberries : Packed with antioxidants and vitamins A, B, and C. Studies suggest they can help reduce the duration and severity of cold and flu symptoms.
- Ginger : A powerful anti-inflammatory that can soothe a sore throat and aid digestion.
- Cinnamon & Cloves : Both are antimicrobial and rich in antioxidants. They add warmth and help support the immune system.
- Raw Honey : Contains natural enzymes and antibacterial properties. It’s a natural cough suppressant and soothes a scratchy throat.
Estimated Nutritional Values (per 1 tablespoon serving) :
- Calories: 45-60
- Sugar: 10-14g (from honey)
- Carbohydrates: 12-16g
- Vitamin C: 2-4% DV
Dietary Considerations : This recipe is naturally gluten-free, dairy-free, and grain-free. It contains honey, so it is not suitable for infants under 1 year old. Always check with your healthcare provider before starting any new supplement, especially if you are pregnant, nursing, or have an autoimmune condition.
Conclusion
Making your own homemade elderberry syrup for immune support is one of those small acts of care that makes a big difference. It’s a way to take your health into your own hands, to connect with an old tradition, and to have a delicious, effective tool ready for when the seasons change. I love knowing exactly what’s in it, and I love the feeling of being prepared.
This recipe is forgiving, flexible, and deeply satisfying to make. Whether you’re a seasoned herbalist or a complete beginner in the kitchen, I promise you can do this. Start with the basic recipe, then make it your own. Add a little more ginger, a little less clove, or a splash of orange — whatever feels right.
I’d love to hear how it turns out for you! Drop a comment below and let me know if you tried any fun variations, or tag me in your photos on social media. Your kitchen is your apothecary, and you’ve got this. Happy simmering!
Frequently Asked Questions
Can I use fresh elderberries instead of dried?
Yes, you can use fresh or frozen elderberries, but you’ll need to adjust the water. Use about 2 cups of fresh berries and reduce the water to 3 cups. Simmer for 30-40 minutes instead. Just remember that raw elderberries can cause stomach upset, so they must be cooked thoroughly.
How long does homemade elderberry syrup last?
Stored in a sterilized glass jar in the refrigerator, your syrup will last for 2 to 3 months. If you freeze it in ice cube trays, it will keep for up to 6 months. Always check for any signs of mold or an off smell before using.
Can I give this syrup to my toddler?
Yes, but in smaller doses. For children ages 1 and up, a daily dose of 1 teaspoon is generally considered safe. It’s always a good idea to check with your pediatrician first. Never give honey to infants under 1 year old due to the risk of botulism.
Why did my elderberry syrup turn out too thin?
If your syrup is too thin, it likely wasn’t simmered long enough. Next time, let it simmer for a full hour or until the liquid has reduced by about half. You can also try mashing the berries more thoroughly to release their natural pectin, which helps thicken the syrup.
Can I use this syrup in cooking or baking?
Absolutely! This syrup is fantastic drizzled over pancakes, waffles, or yogurt. You can also use it as a glaze for roasted meats like chicken or pork, or stir it into salad dressings for a sweet-tart kick. Just remember that heating it will destroy the raw honey’s benefits, so save the raw syrup for direct consumption and use the cooked liquid for cooking.
Pin This Recipe!

Homemade Elderberry Syrup Recipe for Immune Support
A simple, slow-simmered syrup made with dried elderberries, ginger, cinnamon, cloves, and raw honey. This immune-supporting tonic is a comforting, cost-effective way to fend off cold and flu season.
- Total Time: 55 minutes
- Yield: 16 servings 1x
Ingredients
- 1 cup dried elderberries
- 4 cups filtered water
- 1 (3-inch) piece fresh ginger, sliced
- 1 cinnamon stick
- 1 teaspoon whole cloves
- 1 cup raw, local honey
Instructions
- Combine the berries, water, and spices. In a medium saucepan, add the dried elderberries, sliced ginger, cinnamon stick, and whole cloves. Pour in the 4 cups of filtered water. Give it a quick stir to make sure everything is submerged.
- Bring to a boil, then simmer. Set the pot over medium-high heat and bring it to a gentle boil. Once boiling, reduce the heat to low, cover the pot, and let it simmer for 45 minutes to 1 hour. The berries will plump up, and the liquid will reduce by about half.
- Mash the berries. After simmering, take the pot off the heat. Using the back of a wooden spoon or a potato masher, gently mash the berries against the side of the pot to release remaining goodness.
- Strain the liquid. Set a fine-mesh strainer or cheesecloth over a large bowl or heat-safe measuring cup. Carefully pour the berry mixture through the strainer. Let it drain completely. Discard the solids.
- Cool completely. Let the dark purple liquid cool to room temperature. This may take 1-2 hours or you can pop it in the fridge to speed up the process.
- Add the honey. Once the liquid is cool, pour in the 1 cup of raw honey. Stir gently but thoroughly until the honey is fully dissolved.
- Bottle and store. Using a funnel, pour the finished syrup into a sterilized glass jar or bottle. Seal tightly and refrigerate.
Notes
Do not add honey until the syrup has completely cooled to preserve raw honey’s benefits. For a vegan version, substitute maple syrup or agave. The syrup can be frozen in ice cube trays for up to 6 months.
- Prep Time: 10 minutes
- Cook Time: 45 minutes
- Category: Condiment
- Cuisine: American
Nutrition
- Serving Size: 1 tablespoon
- Calories: 4560
- Sugar: 1014
- Carbohydrates: 1216
Keywords: elderberry syrup, immune support, homemade, natural remedy, cold and flu, elderberry recipe, ginger, honey


