

That faint, almost-floral scent of almond extract—the kind that hangs in the air long after you’ve capped the bottle—still takes me straight back to my Aunt Carol’s kitchen every October. She wasn’t a fancy baker, not by any stretch. Her specialty was making things that looked complicated but were secretly, almost embarrassingly simple. One year, she pulled a baking sheet out of the oven, and I swear the whole room went quiet. Lying there, perfectly browned and dusted with a suspiciously pink powder, were what looked like a collection of severed fingers. My cousin shrieked. I, being the resident weird kid, leaned in closer. They were pretzel rods, cloaked in a sweet almond-flavored dough, with a single sliced almond pressed into the tip for a fingernail. They were grotesque and hilarious. They were also, honestly, the best thing I’d eaten all month. That salty-sweet, crunchy-tender combo was pure magic. It wasn’t just a snack; it was a performance. And every year since, I’ve been trying to recreate that perfect, spooky little moment.
So these Spooky Witch Finger Pretzel Rods are my love letter to that memory. They’re the Halloween treat that does double duty—they look like they belong in a horror movie, but they taste like a cozy afternoon snack. The trick is getting that balance right. The pretzel gives you that satisfying crunch and salt, while the almond-flavored dough wraps around it like a second skin, baked until it’s just golden. It’s the kind of recipe that makes you feel like a kitchen witch, conjuring up something from nothing. And the best part? You don’t need a cauldron or a spell book. Just a few pantry staples and a willingness to get a little weird with your food. Honestly, that’s half the fun of Halloween anyway.
I’ve tweaked Aunt Carol’s original method over the years. I wanted the dough to be a little more forgiving, a little less prone to cracking. I wanted the almond flavor to be present but not overwhelming. And I wanted the “fingers” to hold their shape without puffing up into fat little sausages. After a few batches that looked more like arthritic thumbs than elegant witch fingers, I landed on this version. It’s the one I make for every Halloween party, every spooky movie marathon, and every time I just need a laugh. These pretzel rods are proof that the best Halloween treats don’t have to be scary to make.
Why You’ll Love This Recipe
Let’s be real for a second. Halloween baking can be a whole production. You’ve got fondant, you’ve got food coloring, you’ve got complicated piping bags. Not this time. These Spooky Witch Finger Pretzel Rods are the opposite of that. They’re the kind of recipe that makes you look like a hero without having to break a sweat.
- Deceptively Simple: This looks like a professional bakery creation, but the dough comes together in one bowl. No stand mixer required. No chilling time. You can literally be shaping witch fingers within ten minutes of deciding you want them.
- Perfect for Parties: These are the undisputed stars of any Halloween spread. Kids love the gross-out factor. Adults love the nostalgic, salty-sweet flavor. They disappear faster than candy corn at a dentist’s office.
- Budget-Friendly Ingredients: You probably already have everything in your pantry. Flour, sugar, butter, an egg, and a bag of pretzel rods. The only “special” ingredient is almond extract, and honestly, it’s worth picking up a bottle just for this recipe.
- Customizable Creepiness: You can go full gore with red gel icing for “blood,” or keep it cute and cartoony with just the almond fingernail. It’s your spooky vision, your rules.
- Unbelievably Tasty: Forget the gimmick for a second. The flavor is genuinely fantastic. The almond-infused dough gets slightly crisp on the outside and tender on the inside, wrapping around the salty pretzel in a way that just works.
What makes this recipe different from all the other “witch finger” recipes out there? It’s the texture. A lot of versions use a sugar cookie dough that bakes up too soft and crumbly, falling right off the pretzel. My version uses a slightly sturdier dough—think a shortbread-almond hybrid—that clings to the pretzel rod like it was born there. It bakes up with a beautiful golden color and a satisfying snap. It’s not just a cookie wrapped around a stick. It’s a cohesive, delicious whole. And that’s the kind of detail that makes a recipe keeper.
What Ingredients You Will Need
This recipe is built on a foundation of simple, pantry-friendly ingredients. Each one plays a specific role in creating that perfect, spooky, salty-sweet experience. Don’t overthink it—just gather your supplies and get ready to have some fun.
- All-Purpose Flour (1 ½ cups / 188g): This is the backbone of the dough. It provides the structure that holds everything together. I don’t recommend swapping this for a gluten-free blend unless you’ve tested it, as the texture can get crumbly. For a similar rustic approach, you might enjoy our Easy Crusty Artisan Bread for another simple dough experience.
- Unsalted Butter (½ cup / 113g, softened): Butter brings richness and flavor. Using unsalted butter is key here because the pretzel rods themselves are already quite salty. You want to control the salt level. Make sure it’s properly softened to room temperature for easy creaming.
- Granulated Sugar (½ cup / 100g): Just enough sweetness to balance the salt from the pretzel. It also helps the dough brown beautifully in the oven.
- Large Egg (1): The egg acts as a binder, holding the dough together and giving it a tender crumb. Take it out of the fridge about 15 minutes before you start so it comes to room temperature.
- Almond Extract (1 ½ teaspoons): This is the secret weapon. It gives the dough that unmistakable, almost marzipan-like flavor that makes these fingers so distinctive. Don’t skip it and don’t use vanilla as a substitute—it’s a completely different vibe.
- Salt (¼ teaspoon): A tiny pinch to enhance all the other flavors. It cuts through the sweetness and keeps the dough from tasting flat.
- Pretzel Rods (24-30): The skeleton of our witch fingers. Look for standard-sized pretzel rods, not the super thick or super thin ones. The thick ones will make your fingers look like sausages, and the thin ones might snap under the dough.
- Sliced Almonds (30-36): These become the fingernails. You want the natural, unroasted, unsalted ones. Toasted almonds can burn during the baking time. Press them in firmly so they stay put.
- Pink Food Coloring Gel (Optional): For that “just-bitten” or “undead” nail look. A tiny dab on the tip of the almond before baking creates a wonderfully creepy effect.
Ingredient Selection Tips: For the best flavor, I really recommend using a pure almond extract, not the imitation stuff. The difference is night and day. Imitation extract can have a harsh, chemical aftertaste. A good bottle of pure extract will last you for years and makes a world of difference in recipes like this. Also, make sure your butter is truly softened—you should be able to press a finger into it and leave a deep indent without it being melty.
Equipment Needed
You don’t need a fully stocked professional bakery to make these. A few basic tools will get the job done. Here’s what you’ll want to have on hand.
- Large Mixing Bowl: For creaming the butter and sugar and bringing the dough together.
- Electric Hand Mixer or Stand Mixer: A hand mixer works perfectly here. If you’re feeling strong, you can cream the butter and sugar by hand with a wooden spoon, but a mixer makes it much easier.
- Baking Sheets (2): You’ll need two standard half-sheet pans to fit all the fingers without overcrowding them.
- Parchment Paper: Absolutely essential for preventing sticking. The dough isn’t overly greasy, and parchment makes cleanup a breeze.
- Measuring Cups and Spoons: For accuracy. Baking is a science, even when it’s spooky.
- Small Offset Spatula or Butter Knife: For spreading the dough around the pretzel rod. An offset spatula gives you more control.
- Cooling Rack: To let the finished witch fingers cool completely so the dough sets up properly.
A personal note on tools: I’ve made these using a cheap baking sheet that warped in the oven, and the fingers came out unevenly browned. It’s worth using a good, heavy-duty baking sheet if you have one. It distributes heat more evenly. Also, don’t skip the parchment paper. I learned that lesson the hard way when my first batch stuck to the pan and I had to peel pieces of finger off the metal. Not a good look.
Preparation Method

Alright, let’s get our hands dirty. This is where the magic—and the mischief—happens. Follow these steps closely, and you’ll have a pan of gloriously creepy witch fingers in no time.
- Preheat and Prep: Preheat your oven to 350°F (175°C). Line two large baking sheets with parchment paper. This is non-negotiable. Trust me.
- Cream the Butter and Sugar: In your large mixing bowl, beat the softened butter and granulated sugar together until light and fluffy. This takes about 2-3 minutes with an electric mixer on medium speed. You’re looking for a pale, creamy mixture. Scrape down the sides of the bowl once or twice.
- Add the Wet Ingredients: Crack the egg into the butter-sugar mixture and add the almond extract. Beat on low speed until just combined. Don’t overmix here, or the dough can get tough. It might look a little curdled at this point—that’s totally fine.
- Add the Dry Ingredients: In a separate small bowl, whisk the flour and salt together. Gradually add this dry mixture to the wet ingredients, mixing on low speed until a soft dough forms. It should pull away from the sides of the bowl and feel pliable, not sticky. If it feels too sticky, add a tablespoon more of flour.
- Assemble the Fingers: Now for the fun part. Take a small amount of dough—about a tablespoon’s worth—and roll it into a log shape about 3-4 inches long. Place a pretzel rod in the center of the log and gently press the dough around it, shaping it to look like a long, slightly knobby finger. Don’t make it perfectly smooth; the bumps and ridges are what make it look realistic. Leave about an inch of the pretzel exposed at the bottom (the “wrist” end).
- Create the Knuckles: Use the back of a butter knife or a small spatula to gently press lines into the dough to create knuckle creases. You don’t need to cut through the dough—just indent it. Press a little harder at the “knuckle” area to create a slight bulge.
- Add the Fingernail: Press a sliced almond firmly into the tip of the dough, pointed end facing out. If you’re using the pink food coloring, dab a tiny bit on the base of the almond (where it meets the dough) to look like a bloody cuticle. It’s a small touch that goes a long way.
- Bake: Place the assembled fingers on the prepared baking sheets, spacing them about an inch apart. Bake for 12-15 minutes, or until the dough is set and the edges are just barely starting to turn golden. The bottoms should be lightly browned. Don’t overbake, or the dough will become too hard.
- Cool: Let the witch fingers cool on the baking sheet for 5 minutes. They will be very fragile when hot. After 5 minutes, carefully transfer them to a wire cooling rack to cool completely. The dough will firm up as it cools.
Troubleshooting Tip: If your dough is cracking too much as you shape it around the pretzel, it’s probably a little too dry. Dip your fingertips in a tiny bit of water and smooth the cracks over. If the dough is too sticky to handle, dust your hands lightly with flour. And if an almond fingernail falls off after baking, just glue it back on with a tiny dab of frosting or melted white chocolate!
Cooking Tips & Techniques
I’ve made these Spooky Witch Finger Pretzel Rods more times than I can count, and I’ve collected a few hard-won lessons along the way. Here’s how to nail it on your first try.
The Dough Temperature is Key: If your kitchen is hot, the dough can get soft and sticky very quickly. If that happens, just pop the bowl in the fridge for 10-15 minutes. Chilled dough is much easier to handle and shape. Conversely, if your dough is too cold and stiff, let it sit at room temperature for a few minutes. You want it to be pliable but not greasy.
Don’t Overwork the Dough: This is a common mistake. When you’re mixing the flour in, stop as soon as it comes together. Overmixing develops the gluten, which will make your witch fingers tough and bread-like instead of tender and cookie-like. You want a soft, almost shortbread texture.
The “Knuckle” Trick: To make the knuckles look more realistic, use the back of a fork to press the creases. The tines leave little indentations that look like skin folds. It’s a tiny detail that makes a huge difference in the final, creepy presentation.
Batch Baking: If you’re making a double batch for a party, don’t crowd the baking sheets. The fingers need a little space for the heat to circulate. Bake them in batches if you have to. A crowded pan will lead to uneven baking and pale, sad-looking fingers.
My Biggest Failure: I once tried to use a sugar cookie dough recipe I found online. It was way too soft. The fingers slid right off the pretzel rods during baking, leaving me with a pan of naked pretzels and blobs of cookie dough. It was a disaster. That’s why I developed this specific dough—it’s sturdy enough to hold its shape but tender enough to be delicious.
Variations & Adaptations
One of the best things about this recipe is how easy it is to make it your own. Don’t be afraid to experiment! Here are a few of my favorite twists.
- Chocolate-Dipped Fingers: After the fingers have cooled completely, dip the tips in melted dark or white chocolate. Let the excess drip off, then place them on parchment to set. You can even add a sprinkle of crushed Oreos for “dirt” or a drizzle of red gel for “blood.” It’s a next-level indulgence.
- Gluten-Free Version: Swap the all-purpose flour for a good-quality 1-to-1 gluten-free baking flour blend. I’ve had great results with this. The texture will be slightly more delicate, so handle the dough gently. You might also need to add an extra tablespoon of flour if the dough feels too sticky.
- Vegan Witch Fingers: Use a plant-based butter stick (not the spreadable kind) and a flax egg (1 tablespoon ground flaxseed mixed with 3 tablespoons water). The dough will be a bit more crumbly, but it works! Bake for the same amount of time.
- Spooky Colors: Add a few drops of green or purple food coloring to the dough to make zombie or alien fingers. You can also use different colored sliced almonds—if you can find them—or paint the almonds with a little food coloring gel before pressing them on.
- Savory Twist: For a non-sweet version, reduce the sugar to 2 tablespoons and add ½ teaspoon of garlic powder and ½ teaspoon of dried rosemary to the dough. Skip the almond extract and use a little water instead. These savory witch fingers are perfect for a Halloween charcuterie board. For another savory baked good, try our Crispy Garlic Parmesan Focaccia Bread.
A Personal Variation: My favorite variation is the “Witch’s Garden” version. I add a pinch of dried lavender to the dough and use a tiny drop of purple food coloring. The floral note pairs beautifully with the almond, and the purple fingers look like something out of a fairy tale. I serve them with a bowl of honey-flavored yogurt for dipping. It’s weird, but it works.
Serving & Storage Suggestions
These Spooky Witch Finger Pretzel Rods are best served with a side of dramatic flair. Presentation is half the fun.
Serving: Arrange them on a platter as if they were just dug up from a grave. A bed of shredded coconut that’s been tossed with a little green food coloring makes for an excellent “moss” base. You can also stand them up in a jar or a small vase for a truly unsettling centerpiece. Serve them slightly warm or at room temperature. They’re fantastic on their own, but they’re also amazing with a dip. A bowl of warm caramel sauce, a dish of chocolate ganache, or even a simple cream cheese frosting are all excellent choices.
Storage: Store any leftover fingers in an airtight container at room temperature for up to 3 days. Do not refrigerate them—the fridge will make the pretzel rods go stale and soft. If you need to store them longer, you can freeze them.
Freezing Instructions: Place the cooled, unfrosted fingers in a single layer on a baking sheet and freeze for 1-2 hours, or until solid. Then transfer them to a freezer-safe bag or container. They will keep for up to 2 months. To serve, let them thaw at room temperature for about 20 minutes. The texture will be just like fresh.
Reheating: If you want to re-crisp them, pop them in a 300°F (150°C) oven for 5 minutes. This will help the pretzel regain its snap. Don’t microwave them—it will make the dough soggy.
Flavor Development: Honestly, these are best the day they’re made. The pretzel is at its crunchiest, and the dough is perfectly tender. However, they are still delicious the next day. The flavors have a chance to meld, and the almond extract becomes a little more pronounced. They just won’t be quite as crunchy.
Nutritional Information & Benefits
Let’s be honest—these are a treat, not a health food. But knowing what’s in them is always a good idea. Here’s a rough estimate per finger (based on 24 servings).
Estimated Nutritional Values (per finger):
- Calories: ~120
- Fat: 6g
- Saturated Fat: 3.5g
- Carbohydrates: 15g
- Sugar: 6g
- Protein: 2g
- Sodium: 180mg
Health Highlights: The almonds provide a small amount of healthy fats and vitamin E. The butter, in moderation, contains some vitamin A. The pretzel rod offers a quick source of energy from carbohydrates.
Dietary Considerations: This recipe contains gluten (from the flour and pretzels), dairy (from the butter), and eggs. It can be made gluten-free and vegan with the substitutions listed above. Always check your pretzel rod packaging, as some brands may contain trace amounts of other allergens.
A Personal Perspective: I think the best way to enjoy these is to not worry about the numbers. Halloween is one night a year. Have one or two, savor every salty, sweet, almond-flavored bite, and move on. Food is about joy and connection, and these pretzel rods deliver that in spades. For a lighter treat to balance things out, you might love our Creamy No-Churn Strawberry Ice Cream.
Conclusion
So there you have it. A Halloween treat that’s as fun to make as it is to eat. These Spooky Witch Finger Pretzel Rods are more than just a recipe—they’re a tradition in the making. They’re the thing you bring to the party that makes everyone stop and laugh. They’re the project you make with your kids on a rainy October afternoon. They’re the snack that turns a regular movie night into a spooky event.
I love this recipe because it’s proof that you don’t need fancy tools or complicated techniques to create something truly memorable. It’s simple, it’s silly, and it’s absolutely delicious. The combination of the salty pretzel, the sweet almond dough, and that little pop of color from the “nail” is just perfect. It’s comfort food with a costume on.
Now, I want to see your creations! Did you go for the classic look, or did you add your own gory twist? Did your kids try to freak out their friends? Drop a comment below and let me know how they turned out. And if you loved this recipe, please share it with your fellow Halloween enthusiasts. Let’s make this the spookiest, tastiest Halloween yet!
Frequently Asked Questions
Can I make the dough ahead of time?
Yes, you can! Prepare the dough, wrap it tightly in plastic wrap, and refrigerate it for up to 2 days. Let it sit at room temperature for about 15 minutes before shaping, as it will be very firm when cold.
My dough is too sticky. What should I do?
If your dough is too sticky to handle, don’t panic. Simply dust your hands with a little bit of all-purpose flour, or add an extra tablespoon of flour to the dough and mix until it comes together.
Can I use vanilla extract instead of almond extract?
You can, but it will change the flavor profile significantly. The almond extract is what gives these fingers their signature, almost marzipan-like taste. If you must substitute, use 1 teaspoon of vanilla extract, but know that the result will be a more traditional sugar cookie flavor.
How do I keep the almond fingernails from falling off?
This is a common issue! The key is to press the almond firmly into the dough before baking. You can also dab a tiny bit of the raw egg white on the back of the almond to act as a glue. If they still fall off after baking, just reattach them with a tiny bit of melted white chocolate or frosting.
Can I use pretzel sticks instead of pretzel rods?
I wouldn’t recommend it. Pretzel sticks are much thinner and more fragile. The weight of the dough will likely cause them to snap during shaping or baking. Stick with the thicker, sturdier pretzel rods for the best results.
Pin This Recipe!
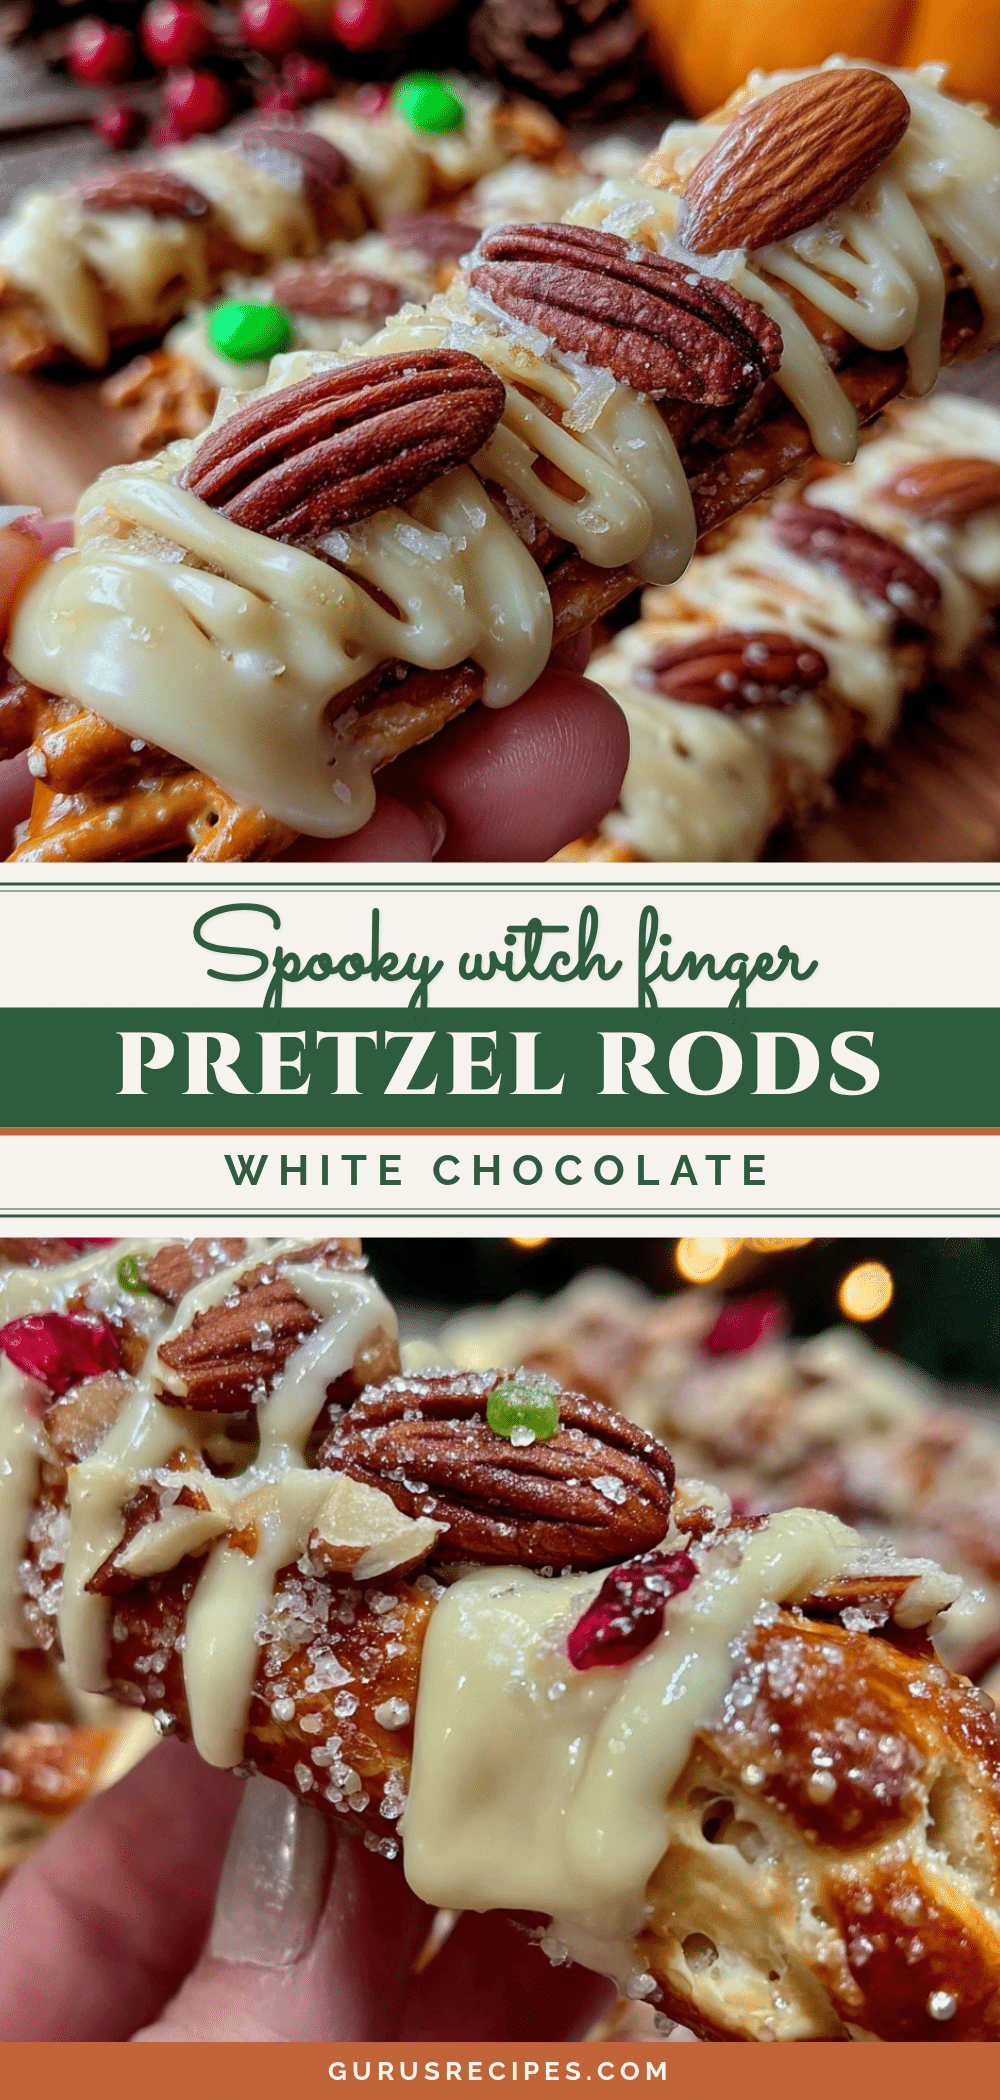

Spooky Witch Finger Pretzel Rods: Easy Halloween Treat
These Spooky Witch Finger Pretzel Rods are a fun and easy Halloween treat that looks like it belongs in a horror movie but tastes like a cozy afternoon snack. The salty pretzel is wrapped in a sweet almond-flavored dough with a sliced almond fingernail, creating a deliciously creepy snack perfect for parties.
- Total Time: 30 minutes
- Yield: 24-30 servings 1x
Ingredients
- 1 ½ cups (188g) all-purpose flour
- ½ cup (113g) unsalted butter, softened
- ½ cup (100g) granulated sugar
- 1 large egg
- 1 ½ teaspoons almond extract
- ¼ teaspoon salt
- 24–30 pretzel rods
- 30–36 sliced almonds (natural, unroasted, unsalted)
- Pink food coloring gel (optional)
Instructions
- Preheat your oven to 350°F (175°C). Line two large baking sheets with parchment paper.
- In a large mixing bowl, beat the softened butter and granulated sugar together until light and fluffy, about 2-3 minutes with an electric mixer on medium speed.
- Add the egg and almond extract to the butter-sugar mixture. Beat on low speed until just combined.
- In a separate small bowl, whisk the flour and salt together. Gradually add this dry mixture to the wet ingredients, mixing on low speed until a soft dough forms.
- Take about a tablespoon of dough and roll it into a log shape about 3-4 inches long. Place a pretzel rod in the center and gently press the dough around it, shaping it like a long, slightly knobby finger. Leave about an inch of the pretzel exposed at the bottom.
- Use the back of a butter knife to gently press lines into the dough to create knuckle creases. Press a little harder at the knuckle area to create a slight bulge.
- Press a sliced almond firmly into the tip of the dough, pointed end facing out. If using pink food coloring, dab a tiny bit on the base of the almond for a bloody cuticle effect.
- Place the assembled fingers on the prepared baking sheets, spacing them about an inch apart. Bake for 12-15 minutes, until the dough is set and the edges are just barely starting to turn golden.
- Let the witch fingers cool on the baking sheet for 5 minutes, then carefully transfer them to a wire cooling rack to cool completely.
Notes
If dough is too sticky, dust hands with flour or add an extra tablespoon of flour. If dough cracks while shaping, dip fingertips in water and smooth cracks. If almond fingernails fall off after baking, reattach with a tiny dab of frosting or melted white chocolate. Store in an airtight container at room temperature for up to 3 days. Do not refrigerate.
- Prep Time: 15 minutes
- Cook Time: 15 minutes
- Category: Dessert
- Cuisine: American
Nutrition
- Serving Size: 1 finger
- Calories: 120
- Sugar: 6
- Sodium: 180
- Fat: 6
- Saturated Fat: 3.5
- Carbohydrates: 15
- Protein: 2
Keywords: Halloween treats, witch fingers, pretzel rods, almond cookies, spooky snacks, easy Halloween recipe


