
It was a Tuesday night, the kind where the kitchen feels emptier than it should. I was staring at two chicken breasts thawed on the counter, completely uninspired by the thought of another dry, bland dinner. The air fryer sat on the counter like a quiet challenge, and I grabbed a stick of butter from the fridge almost on instinct. Honestly, I was tired of chicken that promised juiciness but delivered disappointment. That night, I decided to stop trying so hard and just listen to what the ingredients wanted to become.
I started mincing garlic, letting the smell fill the small space, and chopped a handful of herbs from the garden—rosemary, thyme, a bit of parsley. I softened the butter on the counter and mixed it all together, tasting it straight from the spoon (no judgment, you know how it is). The chicken got patted dry, seasoned simply, and then I did something reckless: I slathered that herb butter right under the skin before it even hit the air fryer basket. It was a gamble born from pure laziness, but it turned into something I still think about weeks later.
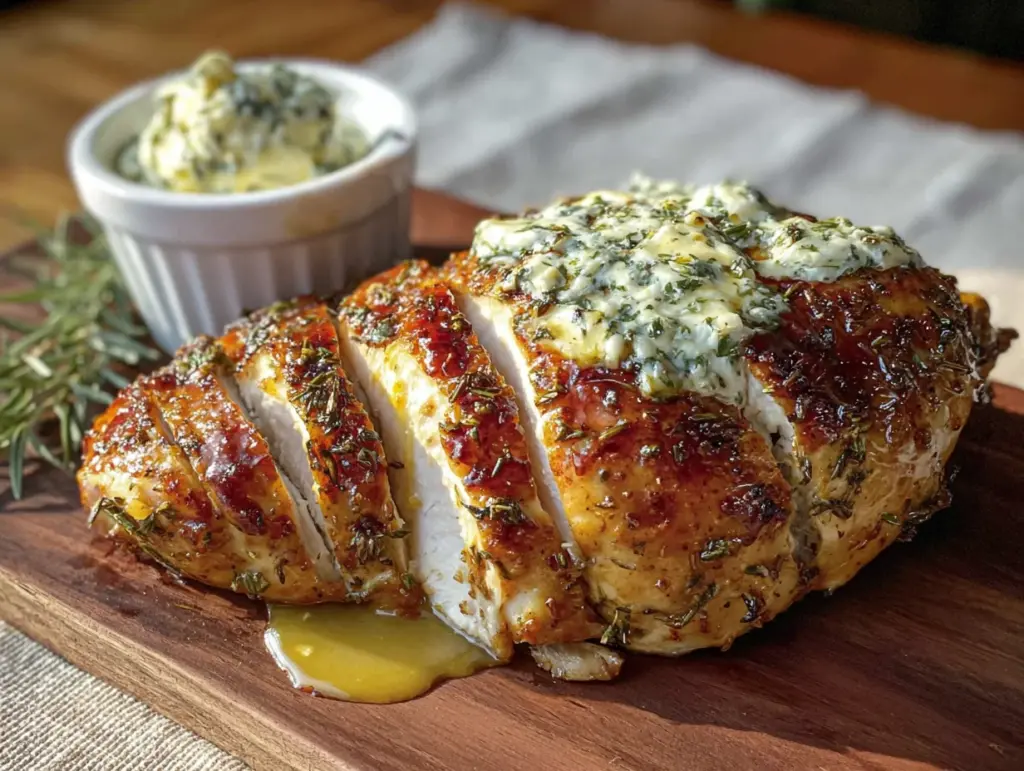
The result was this Crispy Air Fryer Chicken Breast with Garlic Herb Butter—golden, crackling skin on the outside, impossibly tender meat inside, and that garlicky, herby butter melting into every bite. It was the kind of meal that makes you slow down, chew thoughtfully, and wonder why you ever settled for less. I’ve made it four times since that Tuesday, and it keeps getting better. This recipe is the one that finally made me love cooking chicken at home.
Why You’ll Love This Recipe
Let me tell you why this recipe is different—because I’ve tested it, failed it, and perfected it so you don’t have to. I’ve been cooking chicken for over a decade, and this is the method I keep coming back to. It’s not just another air fryer recipe; it’s the one that finally delivers on the promise of crispy skin and juicy meat without a grease-splattered stove.
- Quick & Easy: From fridge to plate in under 30 minutes. Perfect for those nights when you forgot to plan dinner but still want something that feels special.
- Simple Ingredients: You probably have butter, garlic, and a few herbs already. No fancy grocery list, no stress.
- Perfect for Busy Weeknights: This is the kind of meal that makes a Tuesday feel like a Saturday. Impressive enough for guests, easy enough for a solo dinner.
- Crowd-Pleaser: I’ve served this to picky eaters, herb skeptics, and air fryer newcomers—everyone goes back for seconds.
- Unbelievably Delicious: The contrast between the shatteringly crispy skin and the butter-infused, tender meat is pure comfort food magic.
What makes this version stand out? It’s the technique of tucking the garlic herb butter under the skin before air frying. That simple step ensures the butter melts into the meat, keeping it moist from the inside out, while the skin gets perfectly crisp on the outside. No basting, no flipping halfway—just set it and let the air fryer do its thing. This is the recipe I wish I had years ago, the one that finally made me stop ordering chicken at restaurants.
What Ingredients You Will Need
This recipe relies on a handful of simple, high-quality ingredients. The magic is in how they work together, not in a long list of obscure items. Here’s what you’ll need and why each one matters.
- Boneless, skin-on chicken breasts (2 pieces, about 6-8 ounces each) – Skin-on is key here. The skin acts as a natural barrier, trapping moisture and crisping up beautifully in the air fryer. Look for breasts that are similar in size for even cooking. If you can only find bone-in, adjust cooking time by about 5-7 minutes.
- Unsalted butter (4 tablespoons, softened to room temperature) – Unsalted lets you control the salt level. Softened butter mixes more easily with the herbs and spreads smoothly under the skin. I prefer Kerrygold for its rich flavor, but any good-quality butter works.
- Fresh garlic (3 cloves, minced) – Fresh garlic is non-negotiable here. The jarred stuff has a sharper, less sweet flavor. Take the extra 30 seconds to mince it yourself—your taste buds will thank you. If you’re in a pinch, ½ teaspoon of garlic powder can work, but it won’t be the same.
- Fresh rosemary (1 tablespoon, finely chopped) – Rosemary adds an earthy, pine-like aroma that pairs beautifully with chicken. Strip the leaves from the woody stem before chopping. Dried rosemary (1 teaspoon) can substitute, but fresh really shines here.
- Fresh thyme (1 tablespoon, leaves stripped from stems) – Thyme brings a subtle, lemony floral note. Run your fingers down the stem to release the leaves easily. No stems wanted—they’re tough and woody.
- Fresh parsley (1 tablespoon, finely chopped) – Parsley adds a fresh, slightly peppery finish. Flat-leaf (Italian) parsley has more flavor than curly. Save a pinch for garnish at the end.
- Salt (1 teaspoon, preferably kosher) – Kosher salt is easier to control and dissolves more evenly. I use Diamond Crystal. If using table salt, reduce to ¾ teaspoon.
- Black pepper (½ teaspoon, freshly ground) – Freshly ground pepper has a floral, pungent kick that pre-ground just can’t match. Grind it right before using.
- Olive oil (1 tablespoon, for brushing the skin) – A light coating helps the skin crisp up and brown evenly. Use a neutral olive oil, not extra-virgin, which has a lower smoke point.
- Optional: Lemon zest (½ teaspoon) – Adds a bright, citrusy note that cuts through the richness. I add it when I want a more vibrant flavor profile.
Ingredient Selection Tip: For the best texture, choose chicken breasts that are plump and evenly thick. If one end is much thinner than the other, it may dry out before the thick part is cooked. You can pound the thicker end gently with a rolling pin to even it out, but I find that the air fryer’s circulating heat handles uneven thickness fairly well.
Equipment Needed
You don’t need a professional kitchen to make this recipe, but a few key tools make the process smoother. Here’s what I use and what I’ve learned along the way.
- Air fryer (basket-style or oven-style, 5-6 quart capacity) – The star of the show. A basket-style air fryer circulates heat more intensely, giving you a crispier skin in less time. I use a Cosori 5.8-quart model, and it’s been a workhorse. If you have an oven-style air fryer, you may need to add 2-3 minutes to the cooking time.
- Instant-read meat thermometer – This is non-negotiable. Chicken is perfectly cooked at 165°F (74°C) in the thickest part. Guessing leads to dry meat or undercooked chicken. I like the Thermapen for its speed, but any reliable digital thermometer works. Probe-style thermometers are great if you want to monitor the temperature without opening the air fryer.
- Small mixing bowl – For combining the butter, garlic, and herbs. Any small bowl works, but a narrow one makes it easier to scrape every last bit of that delicious butter mixture.
- Chef’s knife and cutting board – For mincing garlic and chopping herbs. A sharp knife makes all the difference—dull blades bruise herbs and make garlic release more of its harsh compounds. Keep your knife sharpened.
- Paper towels – Essential for patting the chicken skin completely dry. This step is critical for crispiness. Damp skin steams instead of crisps.
- Pastry brush or silicone brush – For brushing olive oil onto the chicken skin. A silicone brush is easier to clean and doesn’t shed bristles. If you don’t have one, you can use a folded paper towel to rub the oil on.
- Tongs – For handling the chicken safely, especially when transferring it to the air fryer basket. Metal tongs with silicone tips are my favorite—they grip well without scratching the basket.
Budget-Friendly Tip: You can often find air fryers on sale during holiday weekends. I got mine for half price on Black Friday. If you’re just starting out, a smaller 3-quart model works for one or two servings, but you may need to cook the chicken in batches.
Preparation Method
Let’s walk through this step by step. I’ve included all the little details I wish someone had told me the first time.
- Preheat your air fryer to 375°F (190°C). This takes about 3-5 minutes depending on your model. Preheating ensures the chicken starts cooking immediately, which helps the skin crisp up from the very beginning. Don’t skip this—cold air fryer = sad, soggy skin.
- Pat the chicken breasts completely dry with paper towels. This is the most important step for crispy skin. Press firmly and replace the paper towels if they get too wet. The skin should feel dry to the touch, not tacky. Any moisture will turn into steam and prevent browning.
- Make the garlic herb butter. In a small bowl, combine the softened butter, minced garlic, chopped rosemary, thyme, parsley, and optional lemon zest. Mix with a fork until everything is evenly distributed. The butter should be spreadable but not melted. If your butter is too hard, let it sit at room temperature for 10 more minutes.
- Season the chicken. Sprinkle both sides of each breast with salt and pepper. Don’t forget the underside—seasoning goes a long way in building flavor. Use about ¼ teaspoon of salt per breast, adjusting to your taste.
- Gently loosen the skin. Using your fingers, carefully slide them between the skin and the meat, starting from the thicker end. Go slowly to avoid tearing the skin. You want to create a pocket without detaching the skin completely. If the skin tears a little, don’t worry—the butter will still work its magic.
- Stuff the butter under the skin. Take about half of the herb butter mixture (about 2 tablespoons per breast) and spread it evenly under the loosened skin. Use your fingers to press it flat, covering as much surface area as possible. This is what keeps the meat juicy and infuses it with flavor from the inside out.
- Rub the remaining butter on top of the skin. Spread the rest of the herb butter over the outside of the skin. Don’t be shy—this adds another layer of flavor and helps the skin brown. If you have any extra, smear it on the underside of the breast.
- Brush the skin with olive oil. Use a pastry brush to lightly coat the skin with olive oil. This step helps the skin crisp up and develop a beautiful golden color. You only need a thin, even layer.
- Place the chicken in the air fryer basket. Arrange the breasts skin-side up in a single layer. Make sure they’re not touching each other or the sides of the basket. If they’re crowded, the air won’t circulate properly, and you’ll get uneven cooking. Cook in batches if necessary.
- Air fry at 375°F (190°C) for 12 minutes. Set the timer and resist the urge to open the basket. Let the air fryer do its thing. At the 12-minute mark, check the internal temperature with your instant-read thermometer. Insert it into the thickest part of the breast, avoiding the bone if using bone-in.
- Check for doneness. The chicken is done when it reaches 165°F (74°C). If it’s not there yet, continue cooking in 2-minute increments. Most of my chicken breasts are perfectly cooked at 14-16 minutes total, but thickness varies. A 6-ounce breast cooks faster than an 8-ounce one.
- Let it rest. Once cooked, transfer the chicken to a cutting board or plate. Let it rest for 5 minutes before slicing. This allows the juices to redistribute throughout the meat. Cutting into it immediately will release all those precious juices onto the board, leaving you with dry chicken.
- Garnish and serve. Sprinkle with a pinch of fresh parsley and a little flaky sea salt if you have it. Slice against the grain for the most tender bites. Serve hot with your favorite sides.
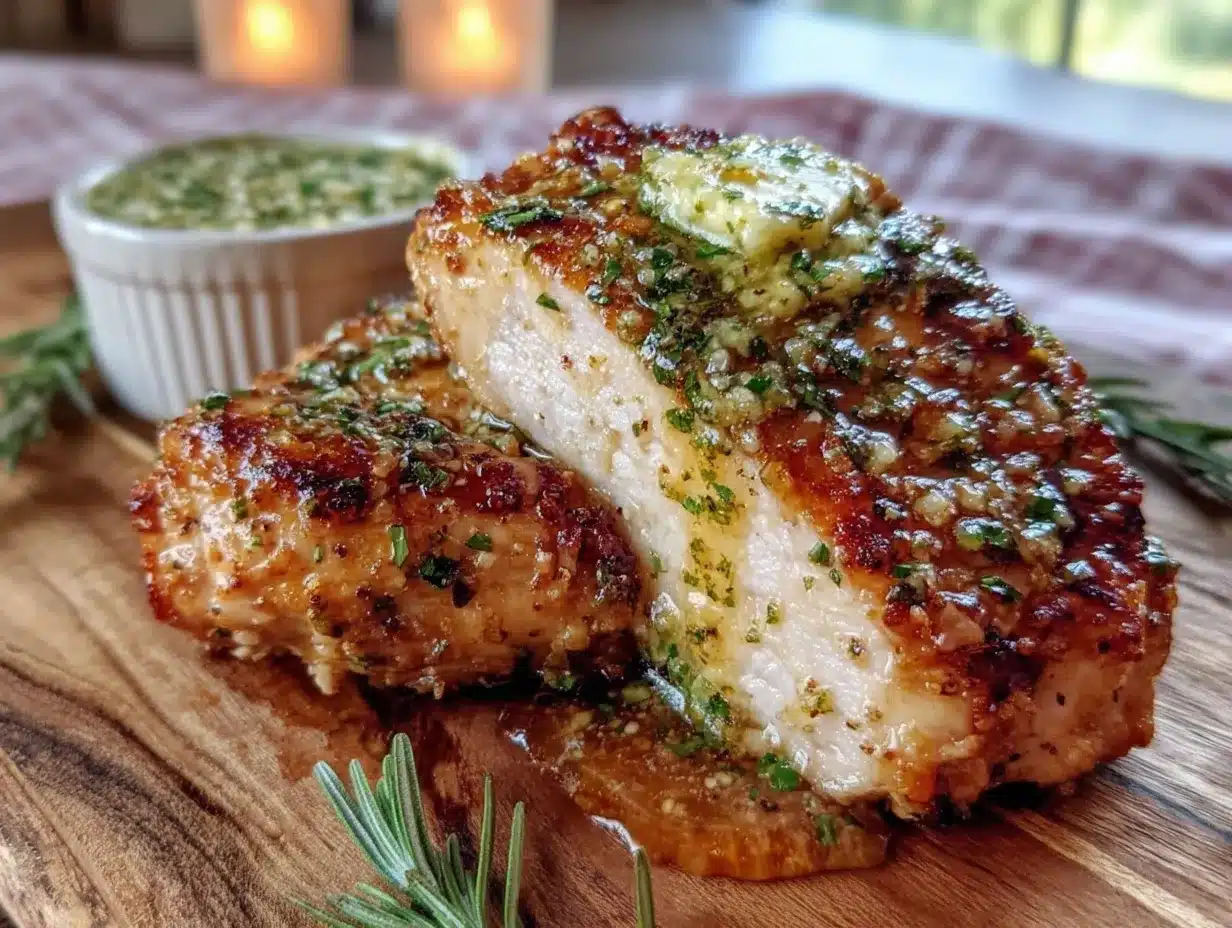
Sensory Cue: When the chicken is done, the skin should be deep golden brown and crackle when you press it gently with a fork. The butter should have melted into a fragrant pool around the chicken. If you tilt the basket, you’ll see the juices run clear, not pink.
Cooking Tips & Techniques
I’ve made this recipe more times than I can count, and I’ve learned a few things the hard way. Here are my best tips for success.
Don’t overcrowd the basket. I learned this lesson after a particularly sad batch of chicken that steamed instead of crisping. The air fryer works by circulating hot air rapidly around the food. If the basket is packed, the air can’t reach every surface, and you’ll end up with pale, soft skin. Leave at least an inch of space between each breast. If you’re cooking for a crowd, do it in batches and keep the first batch warm in a 200°F (93°C) oven.
Patience with the skin. The first time I made this, I was too impatient and didn’t dry the skin thoroughly. The result was edible but disappointing—the skin was chewy, not crispy. Now I take an extra 30 seconds to really press those paper towels into every crevice. It makes a world of difference.
Butter temperature matters. If your butter is too cold, it won’t spread easily under the skin and may tear it. If it’s too soft or melted, it will just run off. Aim for softened but still solid—like the texture of a ripe avocado. Leave it out for 30 minutes before starting.
Use a thermometer, not a timer. I can’t stress this enough. Chicken thickness varies wildly, even within the same package. A timer is a rough guide; a thermometer is the truth. I’ve had chicken that looked perfectly golden on the outside but was only 150°F inside. Don’t guess—measure.
Let it rest. I know it’s tempting to cut into that beautiful, sizzling chicken right away. But trust me on this one. Resting allows the muscle fibers to relax and reabsorb the juices. If you slice immediately, those juices will pool on your cutting board, and you’ll wonder why your chicken is dry even though you cooked it perfectly. Five minutes is all it takes.
Multitasking tip: While the chicken rests, use that time to finish your side dishes. Toss a quick salad, steam some green beans, or warm up a crusty baguette. The chicken stays hot for a good 10 minutes, so you can serve everything together at the perfect temperature.
Variations & Adaptations
This recipe is wonderfully flexible. Here are a few ways to change it up based on what you have on hand or what you’re craving.
Herb Swap: Not a fan of rosemary? Try using tarragon for a subtle anise flavor, or oregano for a Mediterranean twist. I once made this with only thyme and parsley when I ran out of rosemary, and it was still fantastic. The key is to use about 2 tablespoons of total chopped fresh herbs.
Spicy Version: Add ½ teaspoon of red pepper flakes to the butter mixture for a gentle heat. Or, rub the chicken skin with a pinch of cayenne pepper before air frying. I made this for a friend who loves spicy food, and she practically licked the basket clean.
Cheese Crust: For an extra indulgent version, sprinkle 2 tablespoons of grated Parmesan cheese over the skin during the last 3 minutes of cooking. The cheese melts and crisps up, creating a savory, cheesy crust. This works best with finely grated Parmesan, not the shaved kind.
Lemon Herb Butter: Add the zest of one whole lemon to the butter mixture for a bright, citrusy flavor. Squeeze a little lemon juice over the finished chicken before serving. This variation is especially good in spring and summer.
Dairy-Free Option: Substitute the butter with a high-quality vegan butter or ghee (if you tolerate dairy). Coconut oil also works, but it will add a subtle coconut flavor that may not pair well with the herbs. I’ve used Miyoko’s vegan butter with great results—it browns beautifully.
Different Cuts: This method works beautifully with chicken thighs (bone-in, skin-on) or chicken legs. Thighs may need an extra 2-3 minutes, and legs about 5 minutes more. Adjust cooking time based on thickness and always check with a thermometer. For a truly indulgent meal, try this technique on a whole spatchcocked chicken—just increase the cooking time significantly (about 35-40 minutes at 375°F).
Serving & Storage Suggestions
This chicken is versatile enough to pair with almost anything. Here’s how I like to serve it and how to handle leftovers.
Serving Temperature: Serve the chicken hot, straight from the air fryer. The skin is at its crispiest within the first 10 minutes. If you need to hold it, keep it in a 200°F (93°C) oven on a wire rack to prevent the bottom from getting soggy.
What to Serve With It: I love this chicken with a simple side of roasted vegetables—asparagus, broccoli, or Brussels sprouts tossed in olive oil and salt. A fresh green salad with a lemony vinaigrette cuts through the richness beautifully. For something heartier, try it with creamy mashed potatoes or a side of creamy colcannon mashed potatoes. The garlic herb butter also pairs wonderfully with a slice of crispy no-knead rosemary sea salt bread to soak up every last bit of butter.
Storage: Store leftover chicken in an airtight container in the refrigerator for up to 3 days. The skin will lose its crispiness, but the meat will stay moist. To reheat, place the chicken back in the air fryer at 350°F (175°C) for 3-4 minutes. This will help restore some of the crispiness. Avoid microwaving, which will make the skin rubbery.
Freezing: You can freeze the cooked chicken for up to 2 months. Wrap each breast individually in plastic wrap, then place them in a freezer-safe bag. To reheat, thaw overnight in the refrigerator, then reheat in the air fryer at 350°F for 5-6 minutes. The skin won’t be as crispy as fresh, but the flavor will still be excellent.
Flavor Development: Interestingly, the garlic herb flavor becomes more pronounced after a day in the fridge. The butter continues to infuse the meat as it sits. I sometimes make an extra batch just for leftovers—cold, sliced over a salad the next day is a lunch I actually look forward to.
Nutritional Information & Benefits
Here’s an approximate nutritional breakdown for one serving (one chicken breast with skin, using the butter and oil as directed). Values are estimates and will vary based on specific ingredients and portion sizes.
| Nutrient | Amount per Serving |
|---|---|
| Calories | 385 |
| Protein | 42g |
| Fat | 23g |
| Saturated Fat | 12g |
| Carbohydrates | 1g |
| Fiber | 0g |
| Sugar | 0g |
| Sodium | 680mg |
Health Benefits: Chicken breast is an excellent source of lean protein, which is essential for muscle repair and satiety. Garlic contains allicin, a compound linked to immune support and heart health. Fresh herbs like rosemary and thyme are rich in antioxidants and anti-inflammatory compounds. The butter provides fat-soluble vitamins A, D, E, and K, which help your body absorb nutrients from vegetables.
Dietary Considerations: This recipe is naturally gluten-free, low-carb, and keto-friendly. For a lower-fat version, you can reduce the butter to 2 tablespoons, but the meat won’t be as moist. For a dairy-free version, use vegan butter as mentioned above. Always check your specific ingredients for allergens if cooking for others.
Conclusion
This Crispy Air Fryer Chicken Breast with Garlic Herb Butter has become my go-to for so many reasons. It’s quick enough for a weeknight, impressive enough for company, and simple enough that I don’t need to think too hard after a long day. The contrast between the shatteringly crisp skin and the tender, butter-infused meat is something I look forward to every time.
I hope you give this recipe a try and make it your own. Maybe you’ll swap in tarragon for rosemary, or add a pinch of chili flakes for heat. That’s the beauty of cooking—you get to play and discover what you love. If you do try it, I’d love to hear how it turned out. Leave a comment below, tag me in your photos, or share your own twist on the recipe. Cooking is better when we share it, you know?
So go ahead, preheat that air fryer, and treat yourself to a dinner that feels like a little celebration. You deserve it.
Frequently Asked Questions
Can I use boneless, skinless chicken breasts?
You can, but the result will be different. Without the skin, you lose that crispy texture and the butter won’t have a pocket to melt into. The chicken will still be moist if you brush it with the herb butter, but it won’t be crispy. If you use skinless breasts, reduce the cooking time by 2-3 minutes and check for doneness at 10 minutes.
Can I make this without an air fryer?
Absolutely. You can bake the chicken in a preheated oven at 400°F (200°C) for 20-25 minutes, or until it reaches 165°F. For extra crispiness, place the chicken on a wire rack set over a baking sheet so the air can circulate underneath. You can also pan-sear it in a cast-iron skillet for 4-5 minutes per side, then finish in the oven.
How do I keep the butter from burning in the air fryer?
Butter has a smoke point around 350°F, which is why we cook at 375°F. The small amount of olive oil brushed on top helps raise the smoke point slightly. If you’re worried about burning, you can reduce the temperature to 365°F and add 2-3 minutes of cooking time. I’ve never had the butter burn at 375°F, but every air fryer runs a little differently.
Can I double this recipe?
Yes, but you’ll need to cook the chicken in batches unless you have a very large air fryer. Overcrowding the basket will prevent the skin from crisping up. Keep the first batch warm in a 200°F oven while you cook the second. The recipe scales beautifully for a crowd.
How do I know when the chicken is done without a thermometer?
A thermometer is the most reliable method, but if you don’t have one, look for these signs: the juices should run clear when you pierce the thickest part of the breast with a knife, the meat should feel firm to the touch but not hard, and the internal color should be white, not pink. When in doubt, cut into the thickest part to check. It’s better to make a small cut than to serve undercooked chicken.
Pin This Recipe!

Crispy Air Fryer Chicken Breast with Garlic Herb Butter
Golden, crackling skin on the outside, impossibly tender meat inside, and garlicky, herby butter melting into every bite. This quick and easy air fryer chicken breast recipe delivers crispy skin and juicy meat without a grease-splattered stove.
- Total Time: 26 minutes
- Yield: 2 servings 1x
Ingredients
- 2 boneless, skin-on chicken breasts (6–8 ounces each)
- 4 tablespoons unsalted butter, softened
- 3 cloves garlic, minced
- 1 tablespoon fresh rosemary, finely chopped
- 1 tablespoon fresh thyme, leaves stripped from stems
- 1 tablespoon fresh parsley, finely chopped
- 1 teaspoon kosher salt
- ½ teaspoon freshly ground black pepper
- 1 tablespoon olive oil
- ½ teaspoon lemon zest (optional)
Instructions
- Preheat your air fryer to 375°F (190°C).
- Pat the chicken breasts completely dry with paper towels.
- In a small bowl, combine softened butter, minced garlic, chopped rosemary, thyme, parsley, and optional lemon zest. Mix until evenly distributed.
- Sprinkle both sides of each breast with salt and pepper.
- Gently loosen the skin by sliding your fingers between the skin and meat, creating a pocket without detaching the skin completely.
- Spread about half of the herb butter (about 2 tablespoons per breast) evenly under the loosened skin.
- Rub the remaining herb butter over the outside of the skin.
- Brush the skin lightly with olive oil.
- Place the chicken skin-side up in the air fryer basket in a single layer, ensuring they are not touching.
- Air fry at 375°F (190°C) for 12 minutes.
- Check internal temperature with an instant-read thermometer; continue cooking in 2-minute increments until it reaches 165°F (74°C). Total cooking time is typically 14-16 minutes.
- Let the chicken rest for 5 minutes before slicing.
- Garnish with fresh parsley and flaky sea salt if desired. Slice against the grain and serve hot.
Notes
Pat the chicken skin completely dry for maximum crispiness. Use a meat thermometer to ensure doneness—don’t rely solely on time. Let the chicken rest for 5 minutes before slicing to retain juices. For dairy-free, substitute with vegan butter or ghee. For a spicy version, add ½ teaspoon red pepper flakes to the butter.
- Prep Time: 10 minutes
- Cook Time: 16 minutes
- Category: Main Course
- Cuisine: American
Nutrition
- Serving Size: 1 chicken breast
- Calories: 385
- Sodium: 680
- Fat: 23
- Saturated Fat: 12
- Carbohydrates: 1
- Protein: 42
Keywords: air fryer chicken, crispy chicken breast, garlic herb butter, quick dinner, weeknight meal, gluten-free, keto-friendly


