
My daughter looked at the bag of apples on the counter and asked the question I’d been dreading. “Can we make cookies?” It was three in the afternoon, I had no butter softened, and the last thing I wanted was a sugar-fueled kitchen disaster. I told her no. She looked at me like I’d canceled Christmas.
So I grabbed an apple. Not because I had a plan, but because I needed to buy myself some thinking time. I sliced it thin—almost too thin—and tossed the rounds in cinnamon. Then I laid them on a baking sheet and slid them into a low oven, hoping for the best. Honestly, I figured they’d either turn out chewy in a bad way or just burn.
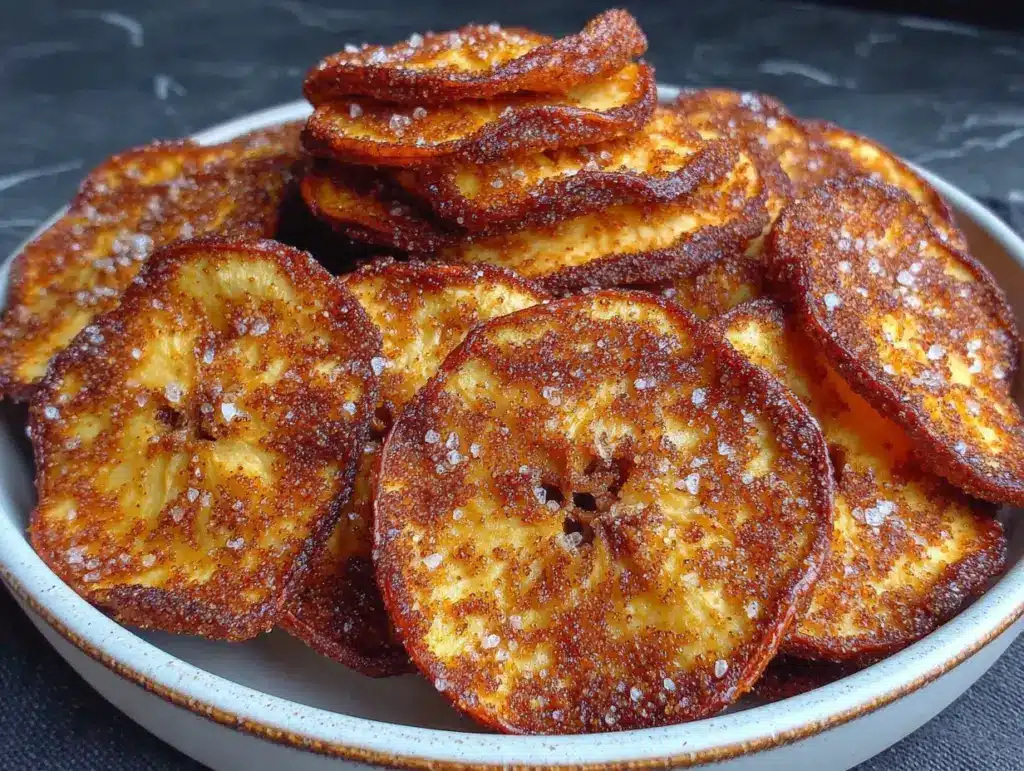
An hour later, I pulled out the most perfectly crisp, cinnamon-kissed apple chips I’d ever tasted. No sugar. No fuss. Just the natural sweetness of the apple doing all the work. My daughter ate an entire apple’s worth before dinner, and I didn’t feel the slightest bit guilty about it.
These crispy no-sugar baked apple chips aren’t trying to be candy. They’re better than candy—they’re the thing you reach for when you want something crunchy and satisfying without the crash. And honestly? They might be the easiest recipe I’ve ever accidentally stumbled into.
Why You’ll Love This Recipe
Let me tell you why these apple chips have earned a permanent spot in my kitchen. First off, they only need two ingredients. Two. Apples and cinnamon. That’s it. You don’t need a dehydrator, you don’t need special equipment, and you definitely don’t need any refined sugar. The apples bring all the sweetness themselves.
- Quick & Easy : The active prep time is maybe ten minutes. The oven does the rest of the work while you go fold laundry or finally answer those texts.
- Simple Ingredients : If you have apples and cinnamon in your pantry, you’re already halfway there. No fancy grocery store trips required.
- Perfect for Snacking : These are great for lunchboxes, afternoon cravings, movie nights, or that weird 4 PM slump when you need something crunchy.
- Crowd-Pleaser : Kids love them because they taste like a treat. Adults love them because they’re actually good for you.
- Unbelievably Delicious : The cinnamon caramelizes just enough to create this warm, cozy flavor that makes you forget you’re eating fruit.
What makes these different from every other apple chip recipe out there? It’s the technique. Slicing them thin enough—but not too thin—is the secret. Too thick and they stay chewy. Too thin and they burn before they crisp. I’ve tested this exact thickness more times than I care to admit, and I’ve finally nailed it.
This is the kind of snack that makes you feel like you’re cheating, but you’re not. It’s whole food, minimally processed, and genuinely satisfying. You know that feeling when you close your eyes after the first bite? That’s what we’re going for here.
What Ingredients You Will Need
This recipe keeps things beautifully simple. You only need a handful of ingredients to create these crispy no-sugar baked apple chips, and chances are you already have most of them at home. Here’s what you’ll need and why each one matters.
- Apples (2-3 medium, firm) : The star of the show. You want firm, crisp apples that hold their shape during long, slow baking. I prefer Honeycrisp, Fuji, or Gala for their natural sweetness. Granny Smith works too if you like a tangier chip, but you’ll miss some of that natural sugar. Look for apples that feel heavy for their size and have no soft spots. Organic is nice if you can swing it, since you’re eating the skin.
- Ground Cinnamon (1-2 teaspoons) : This is where the magic happens. Cinnamon not only adds that warm, cozy flavor we all love—it also helps the chips crisp up by drawing out a bit of moisture. I use Ceylon cinnamon when I have it because it’s milder and sweeter, but regular cassia cinnamon works perfectly fine. Don’t skip it, even if you’re tempted. The cinnamon is what makes these feel like a treat instead of just dried fruit.
- Optional: Pinch of salt : A tiny sprinkle of flaky sea salt right before baking really makes the sweetness pop. It’s completely optional, but I’ve never regretted adding it.
- Optional: Nutmeg or apple pie spice : If you’re feeling adventurous, a dash of nutmeg or a pre-mixed apple pie spice blend adds another layer of warmth. I do this when I’m making a big batch for fall gatherings.
That’s literally it. No sugar, no oil, no complicated syrups. The apples do all the heavy lifting. I’ve tested this with different apple varieties, and I keep coming back to Honeycrisp for the best balance of sweetness and structure. Fuji is a close second if Honeycrisp isn’t in season or is too pricey.
One thing I learned the hard way—avoid mealy or overly soft apples like Red Delicious. They turn into sad, mushy discs that never crisp up. Save those for applesauce. You want apples that snap when you bite into them.
Equipment Needed
You don’t need a dehydrator or any fancy gadgets for this recipe. Here’s what you’ll actually use:
- Sharp knife or mandoline slicer : A sharp chef’s knife works, but a mandoline slicer makes the job infinitely easier and more consistent. I use a basic OXO mandoline that cost about thirty bucks, and it’s paid for itself a hundred times over. If you’re using a knife, take your time and try to get slices that are all roughly the same thickness.
- Cutting board : Any sturdy cutting board will do. Just make sure it’s stable so you don’t slip while slicing.
- Baking sheets (2 large) : You’ll need enough space to lay the apple slices in a single layer without overlapping. I use two half-sheet pans for a batch of two apples.
- Parchment paper or silicone baking mats : These prevent sticking and make cleanup a breeze. Parchment paper is cheaper, but silicone mats are reusable and more eco-friendly.
- Cooling rack : This is important. As soon as the chips come out of the oven, transfer them to a cooling rack. If you leave them on the hot baking sheet, they’ll continue cooking and can burn. A wire rack lets air circulate so they cool and crisp up properly.
- Small bowl for cinnamon mixture : Just something to mix your cinnamon in before sprinkling.
If you don’t have a mandoline, you can absolutely use a knife. The key is patience. I’ve made plenty of batches using just a sharp chef’s knife, and they turned out great. The slices just weren’t quite as uniform, which meant some finished cooking before others. No big deal—just pull the done ones off the sheet and let the rest keep baking.
Preparation Method
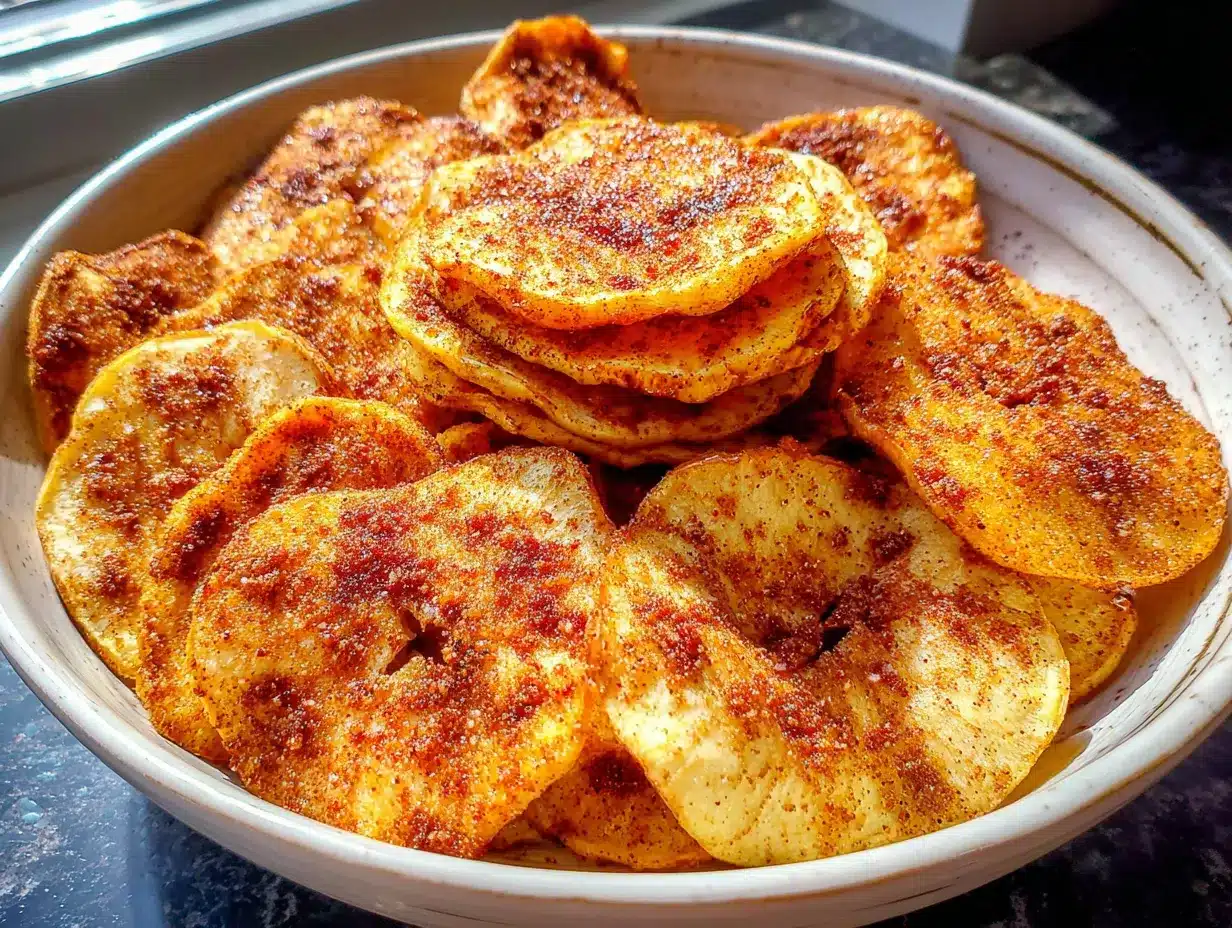
Alright, let’s get to the good part. Here’s exactly how to make these crispy no-sugar baked apple chips so they turn out perfectly every single time.
- Preheat your oven to 225°F (110°C) . Yes, this is a low temperature. That’s intentional. We’re slowly drying the apples out, not baking them. A low oven lets the moisture evaporate gradually without burning the natural sugars. Line two large baking sheets with parchment paper or silicone mats.
- Wash and core your apples . Scrub them well since you’re leaving the skin on. The skin adds fiber, color, and a nice texture contrast. You don’t need to peel them. To core, I just cut the apple into quarters and cut out the core from each piece. Some people use an apple corer, but I find it easier to just work around the core with my knife.
- Slice the apples as thinly as possible . This is the most important step. Aim for slices about 1/8 inch (3mm) thick. If you’re using a mandoline, set it to the thinnest setting that still gives you intact slices. If you’re using a knife, take your time and try to be consistent. The slices should be thin enough that you can almost see through them, but thick enough that they don’t fall apart when you pick them up.
- Arrange the slices on the baking sheets . Lay them in a single layer without overlapping. If they touch, they’ll steam instead of dry, and you’ll end up with chewy, sad chips. Leave a little space between each slice for air circulation. This might mean you need to bake in batches, but trust me, it’s worth it.
- Sprinkle with cinnamon . Mix your cinnamon in a small bowl (add a pinch of salt or nutmeg here if you’re using them). Then lightly dust the apple slices. You don’t need to coat them heavily—just a gentle sprinkle on one side. I use a fine-mesh strainer to dust the cinnamon evenly, but you can also just use your fingers. Flip the slices and give the other side a light dusting too.
- Bake for 1 hour . Place the sheets in the oven and set a timer. After one hour, rotate the pans (swap top and bottom racks) and flip each apple slice over. This ensures even drying. Return to the oven.
- Bake for another 45 minutes to 1 hour . Start checking at the 45-minute mark. The chips are done when they’re dry to the touch and slightly curled at the edges. They should feel firm and crisp, not leathery or chewy. If they still feel soft in the center, give them another 10-15 minutes.
- Cool completely on a wire rack . This is non-negotiable. As soon as you pull the chips out of the oven, transfer them to a cooling rack. They’ll continue to crisp up as they cool. If you leave them on the hot baking sheet, they’ll keep cooking and can burn. Let them cool for at least 15-20 minutes before you even think about eating them.
A few things I’ve learned from making these more times than I can count. First, check your oven temperature with an oven thermometer if you have one. My oven runs hot, so I sometimes drop the temp to 200°F if I’m making a big batch. Second, thinner slices cook faster, so if you have a mix of thicknesses, pull the thin ones out early. And third, don’t walk away completely—set a timer and check on them regularly toward the end of the baking time. Burnt apple chips are sad apple chips.
Cooking Tips & Techniques
I’ve made enough batches of these crispy no-sugar baked apple chips to fill a small orchard. Here are the things I wish someone had told me before I started.
Consistent thickness is everything. I cannot stress this enough. If your slices are different thicknesses, some will burn while others stay chewy. A mandoline is your best friend here, but if you’re using a knife, take your time. I’ve had batches where I got lazy with the knife and ended up picking out burnt pieces while leaving the thicker ones in for another ten minutes. It’s annoying. Just slice carefully from the start.
Don’t overcrowd the pans. I know it’s tempting to cram as many slices as possible onto one sheet to save time. Don’t do it. Overlapping slices trap steam, and steam is the enemy of crispiness. If they’re touching, they’ll come out soft and sad. Use two sheets, or bake in batches. Your patience will be rewarded.
Rotate and flip halfway through. Ovens have hot spots. The back might be hotter than the front, or the top rack might cook faster than the bottom. Flipping the slices and rotating the pans ensures everything dries evenly. I set a timer for one hour, then do the flip and rotate. It takes two minutes and makes a huge difference.
The cooling step is not optional. I learned this one the hard way. I pulled a batch out, thought they looked perfect, and immediately dumped them into a bowl. They were soft and disappointing. Let them cool on a wire rack for at least 15 minutes. They’ll crisp up as they cool. Patience, my friend.
Store them properly or they’ll go soft. Humidity is the enemy. Once your chips are completely cool, transfer them to an airtight container. I use a glass jar with a tight lid. If you live in a humid climate (I do), toss a silica gel packet or a piece of dry rice in a tea bag into the container to absorb moisture. They’ll stay crispy for up to a week this way.
One mistake I made early on —I tried to speed things up by baking at 300°F. The edges burned before the centers dried out. Low and slow is the only way. Trust the process.
Variations & Adaptations
One of the best things about this recipe is how easy it is to customize. Here are some variations I’ve tried and loved.
Spiced Apple Chips : Instead of just cinnamon, mix up a blend of cinnamon, nutmeg, ginger, and a tiny pinch of cloves. It tastes like apple pie in chip form. I do this in the fall when I’m craving all the warm spices.
Savory Apple Chips : This sounds weird, but hear me out. Skip the cinnamon and sprinkle the slices with a little sea salt and black pepper. The sweetness of the apple pairs surprisingly well with savory seasonings. I’ve also tried a light dusting of smoked paprika, and it was oddly addictive.
Different Apple Varieties : Each apple gives a different result. Honeycrisp and Fuji are sweet and crisp. Granny Smith is tart and tangy. Pink Lady is a nice middle ground. I once made a batch with mixed apples just to see what would happen, and it was a fun flavor adventure. Just keep in mind that sweeter apples will brown faster, so watch them closely.
Dehydrator Method : If you have a dehydrator, you can use it instead of the oven. Set it to 135°F (57°C) and dry for 6-8 hours, checking periodically. The texture is slightly different—more uniformly crispy—but the flavor is the same. I use my oven because it’s faster, but the dehydrator works great if you’re making a big batch.
Citrus Zest Addition : Before baking, grate a little lemon or orange zest over the apple slices. The citrus oils add a bright, fresh note that balances the sweetness. I did this once on a whim and it was a revelation.
And if you’re in the mood for another crispy, healthy snack, you might enjoy my crispy fried dandelion blossoms—they’re a fun, seasonal treat that scratches the same crunchy itch.
Serving & Storage Suggestions
These crispy no-sugar baked apple chips are incredibly versatile. Here’s how to serve and store them for the best experience.
Serving temperature and presentation : Serve them at room temperature. They’re perfect straight from the cooling rack. For a pretty presentation, pile them in a wooden bowl or a clear glass jar. The natural curves and cinnamon-dusted edges make them look beautiful. I’ve served them at parties and they disappear faster than any store-bought snack.
Pairing suggestions : These chips are amazing on their own, but they also pair wonderfully with other things. Try them alongside a bowl of yogurt for dipping, or crumble them over oatmeal for added crunch. They’re also great with cheese—a sharp cheddar or a creamy brie complements the sweetness beautifully. For a cozy fall snack, serve them with a cup of hot tea or spiced cider.
Storage instructions : Once the chips are completely cool, transfer them to an airtight container. A glass jar with a tight-fitting lid works perfectly. Store them in a cool, dry place away from direct sunlight. Do not refrigerate—the moisture in the fridge will make them soft.
How long they last : Properly stored, these chips will stay crispy for up to a week. In my house, they rarely last that long. If they do start to soften, you can re-crisp them in a 200°F oven for 5-10 minutes. Just watch them closely so they don’t burn.
Freezing : You can freeze apple chips, but I don’t recommend it. The texture changes when they thaw, and they lose that satisfying crunch. If you must freeze them, store them in a freezer-safe bag with as much air removed as possible, and use them within a month. They’ll be okay crumbled over yogurt or baked into granola, but they won’t be as good for snacking straight.
How flavors develop : Interestingly, these chips taste even better the day after baking. The cinnamon flavor deepens and the sweetness becomes more concentrated. So if you can resist eating them all right away, they’ll reward you.
If you’re looking for another easy, healthy snack that satisfies a sweet craving, try my homemade dandelion honey—it’s a unique, naturally sweet spread that pairs beautifully with these chips.
Nutritional Information & Benefits
Let’s talk numbers, but keep it simple. Here’s the approximate nutritional breakdown for one serving (about one medium apple’s worth of chips, which is roughly 1 ounce or 28 grams):
| Nutrient | Amount Per Serving |
|---|---|
| Calories | 95 |
| Total Fat | 0.3g |
| Sodium | 2mg |
| Total Carbohydrates | 25g |
| Dietary Fiber | 4.4g |
| Sugars | 19g (all natural) |
| Protein | 0.5g |
| Vitamin C | 14% DV |
Health benefits of key ingredients : Apples are packed with fiber, especially if you leave the skin on. That fiber helps with digestion and keeps you feeling full longer. They’re also a good source of vitamin C and antioxidants, particularly quercetin, which supports immune health. Cinnamon has anti-inflammatory properties and may help regulate blood sugar. Together, they make a snack that’s genuinely good for you.
Dietary considerations : These chips are naturally gluten-free, vegan, paleo-friendly, and free from refined sugar. They’re also nut-free and dairy-free, making them safe for most common allergies. The only potential allergen is apples themselves, which is rare.
Personal wellness perspective : I love these chips because they satisfy that craving for something crunchy and sweet without derailing my day. They’re whole food, minimally processed, and genuinely satisfying. When my daughter asks for a snack, I feel good handing her a bowl of these. They’re not a compromise—they’re a win.
Conclusion
These crispy no-sugar baked apple chips have become a staple in my kitchen for good reason. They’re simple, affordable, and genuinely delicious. No complicated techniques, no hard-to-find ingredients, no guilt. Just apples, cinnamon, and a little bit of patience.
I love that this recipe works for so many different situations. Need a healthy lunchbox snack? Done. Craving something crunchy during movie night? Got you covered. Want to impress guests with something that looks fancy but took almost no effort? This is it.
The best part? You can customize them endlessly. Change up the spices, try different apple varieties, experiment with savory seasonings. Make them your own. That’s the beauty of a simple recipe—it leaves room for creativity.
If you try these chips, I’d love to hear how they turned out. Drop a comment below and let me know what apple variety you used, or if you tried a fun variation. And if you’re looking for another crunchy, satisfying snack, don’t miss my easy crusty artisan bread—it’s the perfect companion for a cozy afternoon snack plate.
Happy snacking, friend. You’ve got this.
Frequently Asked Questions
Can I make these apple chips without a mandoline?
Absolutely. A sharp chef’s knife works perfectly fine. The key is to slice as evenly as possible. Take your time and aim for slices that are all about the same thickness. A mandoline just makes it faster and more consistent, but it’s not required.
Why did my apple chips turn out chewy instead of crispy?
This usually happens for one of two reasons. Either your slices were too thick, or they needed more time in the oven. Try slicing thinner next time, and don’t be afraid to let them bake longer. Also, make sure they cool completely on a wire rack—they crisp up as they cool.
Can I use a different sweetener or add sugar?
You can, but you don’t need to. The apples provide plenty of natural sweetness. If you really want to add sugar, a light dusting of coconut sugar or a sprinkle of stevia before baking would work. But honestly, try them without first. You might be surprised.
How do I store these chips so they stay crispy?
Once completely cool, store them in an airtight container at room temperature. A glass jar with a tight lid works great. Keep them away from humidity and direct sunlight. If you live in a humid climate, add a silica gel packet or a piece of dry rice in a tea bag to absorb moisture.
Can I use a dehydrator instead of an oven?
Yes! Set your dehydrator to 135°F (57°C) and dry for 6-8 hours. Check periodically for doneness. The texture will be slightly different—more uniformly crispy—but the flavor is the same. The oven method is faster, but the dehydrator is great for making large batches.
Pin This Recipe!


Crispy No-Sugar Baked Apple Chips: Easy Homemade Recipe
These crispy no-sugar baked apple chips are a healthy, two-ingredient snack made with apples and cinnamon. They’re naturally sweet, perfectly crunchy, and easy to make in the oven without any refined sugar.
- Total Time: 1 hour 55 minutes to 2 hours 10 minutes
- Yield: 4 servings 1x
Ingredients
- 2–3 medium firm apples (such as Honeycrisp, Fuji, or Gala)
- 1–2 teaspoons ground cinnamon
- Optional: pinch of flaky sea salt
- Optional: dash of nutmeg or apple pie spice
Instructions
- Preheat your oven to 225°F (110°C). Line two large baking sheets with parchment paper or silicone baking mats.
- Wash and core the apples. Leave the skin on. Cut into quarters and remove the core from each piece.
- Slice the apples as thinly as possible, about 1/8 inch (3mm) thick. Use a mandoline or a sharp knife for consistent slices.
- Arrange the slices in a single layer on the prepared baking sheets, without overlapping. Leave a little space between each slice.
- Mix the cinnamon in a small bowl (add salt or nutmeg if using). Lightly dust the apple slices on one side, then flip and dust the other side.
- Bake for 1 hour. After 1 hour, rotate the pans (swap top and bottom racks) and flip each apple slice over.
- Bake for another 45 minutes to 1 hour, until the chips are dry to the touch and slightly curled at the edges. They should feel firm and crisp.
- Transfer the chips to a wire rack and cool completely for at least 15-20 minutes. They will continue to crisp up as they cool.
Notes
Consistent thickness is key for even drying. Use a mandoline if possible. Do not overcrowd the pans; overlapping slices trap steam and prevent crispiness. Rotate and flip the slices halfway through baking. Cool completely on a wire rack before storing. Store in an airtight container at room temperature for up to a week. If chips soften, re-crisp in a 200°F oven for 5-10 minutes.
- Prep Time: 10 minutes
- Cook Time: 1 hour 45 minutes to 2 hours
- Category: Snack
- Cuisine: American
Nutrition
- Serving Size: 1 ounce (28g) or abo
- Calories: 95
- Sugar: 19
- Sodium: 2
- Fat: 0.3
- Carbohydrates: 25
- Fiber: 4.4
- Protein: 0.5
Keywords: apple chips, no sugar, baked apple chips, healthy snack, cinnamon apple chips, homemade apple chips, easy snack, gluten-free, vegan, paleo


