
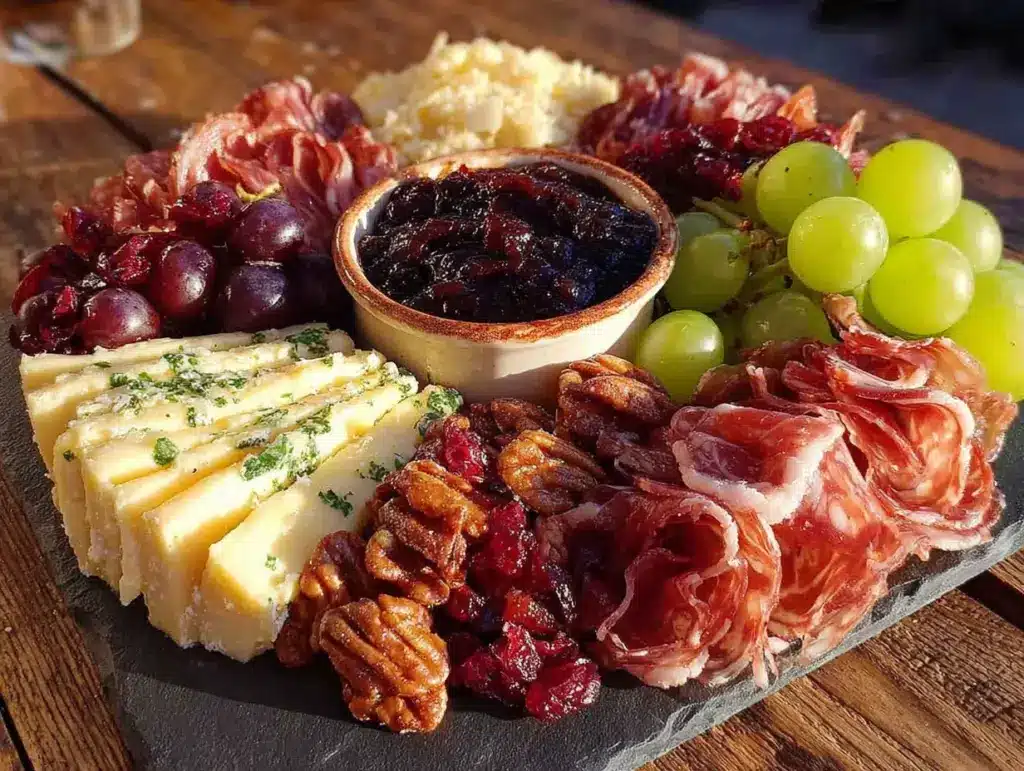
My neighbor, a retired caterer named Rosa, watched me one Tuesday evening through her kitchen window as I stood in my own kitchen, staring into the fridge like it held the secrets to the universe. I was tired, hungry, and honestly, the thought of chopping vegetables for a salad felt like a personal insult. She didn’t say anything at first. Then she appeared at my back door, holding a small wooden board piled with cheese, crackers, and what looked like a handful of olives, and said, “Sit. Eat. You’re overthinking dinner.” That was the moment I realized a proper meal doesn’t have to involve a stove, a pan, or even a single dirty dish. That board changed my weeknights forever. I started making my own versions, tweaking and testing, and let me tell you, the one I’m sharing today is the result of many happy, hungry evenings. It’s the Easy Loaded Charcuterie Board for Two in 10 Minutes, and it’s become my go-to for those nights when cooking is the last thing on my mind. Maybe you’ve been there—standing in the kitchen, exhausted, wondering if cereal counts as a balanced dinner. This board is your answer. It’s simple, it’s satisfying, and it honestly feels a little bit fancy without any of the fuss. I keep making it because it turns a tired Tuesday into something that feels like a tiny celebration, and everyone deserves that.
Why You’ll Love This Recipe
Let’s be real for a second. Weeknight dinners can feel like a chore, and sometimes the last thing you want to do is spend an hour in the kitchen. This charcuterie board flips the script entirely. It’s not just dinner; it’s an experience that takes almost no effort. Here’s why it works so well for busy evenings.
- Quick & Easy: This board comes together in under 10 minutes. No cooking, no baking, just arranging. It’s perfect for those nights when you walk through the door and just want to eat.
- Simple Ingredients: You don’t need a specialty grocery store. Most of these items are pantry staples or easy to grab at any supermarket. Think cured meats, a couple of cheeses, some crackers, and whatever bits you have on hand.
- Perfect for a Cozy Night In: This is not just a snack; it’s a proper meal for two. It’s great for a date night at home, a catch-up session with a friend, or even just a treat for yourself after a long week.
- Crowd-Pleaser: Even though it’s for two, the variety means there’s something for everyone. The combination of salty, sweet, savory, and crunchy hits all the right notes.
- Unbelievably Delicious: The magic is in the mix of textures and flavors. A sharp cheddar next to a sweet fig jam, a salty prosciutto wrapped around a creamy date—it’s comfort food that feels elegant.
What makes this version different from just throwing stuff on a plate? It’s the thoughtful arrangement and the balance of flavors. I’ve tested a dozen combinations, and this one hits the sweet spot between effort and payoff. It’s not just another snack board—it’s the one that makes you close your eyes after that first perfect bite of cheese, meat, and fruit all at once. Honestly, it’s comfort food reimagined for the modern, tired cook. It’s faster, simpler, but with the same soul-soothing satisfaction of a home-cooked meal, minus the dishes.
What Ingredients You Will Need
This recipe uses simple, mostly store-bought ingredients to deliver a big flavor punch without any fuss. The key is to pick items you genuinely like, because this board is all about personal taste. Here’s what you’ll need for the perfect loaded charcuterie board for two.
For the Meats:
- 4 oz (115g) prosciutto, thinly sliced (I prefer the slightly salty, melt-in-your-mouth kind)
- 4 oz (115g) salami, such as Genoa or soppressata, sliced (adds a nice, firm texture)
- 2 oz (55g) capicola or your favorite cured ham (optional, but adds another layer of flavor)
For the Cheeses:
- 3 oz (85g) sharp cheddar, cubed or sliced (a classic, never fails)
- 3 oz (85g) brie or camembert, at room temperature (the creaminess is a must)
- 2 oz (55g) aged gouda or manchego, sliced (adds a nutty, slightly sweet note)
For the Accompaniments:
- 1/2 cup (75g) mixed olives (kalamata and green are my go-to)
- 1/4 cup (40g) cornichons or small pickles (for that tangy crunch)
- 2 tablespoons (30g) fig jam or honey (the sweet element to balance the salt)
- 1/4 cup (30g) almonds or walnuts, toasted (adds crunch)
- 1/2 cup (75g) fresh grapes or sliced apple (for freshness)
- 1/4 cup (40g) dried apricots or figs (chewy sweetness)
For the Base:
- 1 small baguette, sliced and lightly toasted, or a box of good crackers (about 4 oz/115g)
Optional Add-Ins:
- A few sprigs of fresh rosemary or thyme for garnish (makes it look fancy)
- A small dish of whole-grain mustard (if you like a little heat)
When picking ingredients, I like to choose one or two things I haven’t tried before—it keeps the board exciting. For the cheese, look for pieces that are firm and smell fresh. For the meats, a good deli counter is your friend. And honestly, don’t stress about exact amounts. This is a forgiving recipe. If you have a little extra of something, throw it on. If you’re missing one thing, swap it for something else. The goal is a board that feels abundant and delicious, not a science experiment.
Equipment Needed
You don’t need much for this, which is part of the beauty. Here’s what you’ll need to pull it together.
- A cutting board or serving board: A wooden board looks beautiful, but any large plate or baking sheet works perfectly. I use a simple, rectangular wooden board I got at a flea market—it adds character.
- A sharp knife: For slicing the cheese and bread. A good chef’s knife or a cheese knife will do the job. I once used a butter knife in a pinch, and it was messy. Don’t recommend it.
- Small bowls or ramekins: For the olives, jam, and any other loose items. They keep things tidy and prevent flavors from mixing. I use little ceramic dishes I picked up at a thrift store.
- A cheese plane or slicer (optional): If you have one, it makes slicing hard cheeses like gouda into thin, even pieces. Not necessary, but nice.
- A toaster or oven (optional): If you want to toast your baguette slices. I just pop them under the broiler for a minute or two.
That’s it. No special gadgets, no expensive tools. If you have a plate and a knife, you’re good to go. The most important piece of equipment is a hungry appetite.
Preparation Method
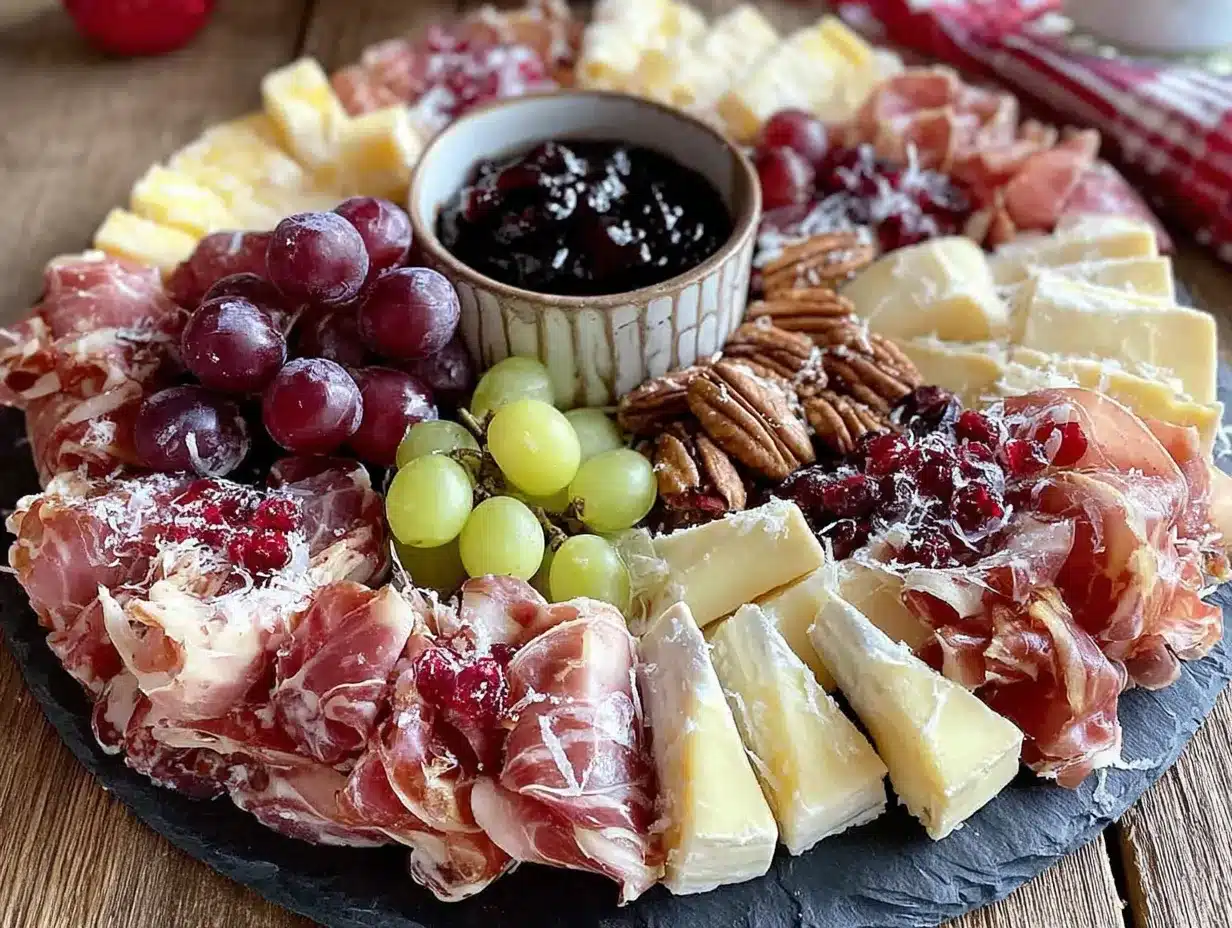
This is the easiest part. Follow these steps, and you’ll have a gorgeous charcuterie board in 10 minutes flat. I promise.
- Set the stage (1 minute): Grab your board or large plate. Place your small bowls or ramekins on the board first. This is a trick I learned from Rosa—it helps you plan the layout. Put the fig jam in one bowl, the olives in another, and the cornichons in a third. Arrange them in a triangle or a line, depending on the shape of your board.
- Add the cheese (2 minutes): Take your cheeses out of the fridge. Slice the sharp cheddar into cubes or thin triangles. Slice the aged gouda into thin, elegant slices. For the brie, leave it in a wedge—it’s easier to handle and looks beautiful. Place the cheeses around the bowls, spreading them out so they’re not all clustered together. I like to put the brie on one side and the cheddar on the other, so there’s a journey of flavors across the board.
- Fold the meats (2 minutes): Now for the fun part. Take your prosciutto slices and fold them into loose ribbons or rosettes. Just grab a slice, fold it in half, then fold it again, and place it on the board. For the salami, you can either leave the slices flat or fold them into quarters. I like to layer them in a small pile. Arrange the meats near the cheeses, but not touching—it looks better and keeps things organized.
- Add the crunch (2 minutes): Take your toasted baguette slices or crackers and arrange them in a line or a fan shape on an empty part of the board. I usually put them on one edge, so they’re easy to grab. If you’re using a baguette, slice it into thin rounds and toast them lightly. They’ll hold up better against the soft cheese.
- Fill in the gaps (2 minutes): Now it’s time to fill in the empty spaces. Scatter the almonds or walnuts in small clusters. Place the fresh grapes or apple slices in a few spots. Add the dried apricots or figs here and there. The goal is to make the board look full and abundant. Don’t be afraid to overlap things a little—it looks more inviting.
- Garnish and serve (1 minute): Finally, add a few sprigs of fresh rosemary or thyme for a pop of green. It makes the board look professional and adds a lovely aroma. Give everything a final look. If there’s a big empty spot, add a few more crackers or a handful of nuts. Then step back and admire your work. You’re done!
Your board should look vibrant and full. The key is to not overthink it. If something looks a little messy, just nudge it with your fingers. It’s supposed to look rustic and inviting, not perfect. Now, grab a plate for yourself and dig in.
Cooking Tips & Techniques
Over the years, I’ve made a few mistakes with charcuterie boards. I’ve learned a lot, and I want to share some tips so you can avoid my missteps.
Let the cheese breathe. This is the biggest lesson I learned. Take your cheese out of the fridge about 20 minutes before you start assembling. Cold cheese doesn’t have much flavor. At room temperature, the brie gets creamy, the cheddar gets sharp, and everything tastes a hundred times better. I learned this the hard way when I served a board with ice-cold cheese, and it was like eating flavorless butter.
Balance is everything. Think about the flavors and textures. You want a mix of salty (prosciutto, olives), creamy (brie, jam), crunchy (nuts, crackers), and fresh (grapes, apple). If you have too much of one thing, it gets boring. I once made a board with all hard cheeses and no fruit, and it was a dry, salty mess. Now I always make sure there’s a sweet element to balance the salt.
Don’t overcrowd the board. It’s tempting to pile everything on, but a crowded board is hard to eat from. Leave a little space between items so people can easily grab a cracker, some cheese, and a slice of meat without everything sticking together. Trust me, a less crowded board looks more inviting and is easier to navigate.
Use a separate knife for each cheese. This is a small thing, but it makes a big difference. If you use the same knife for brie and cheddar, you’ll end up with a weird mix of flavors. I keep a small cheese knife for the soft cheese and a different one for the hard cheese. It keeps everything tasting clean.
Toast the bread. If you’re using a baguette, toast the slices for a minute or two. They hold up better against the soft cheese and jam. I once served untoasted bread, and it got soggy within minutes. A quick toast makes all the difference.
Variations & Adaptations
One of the best things about a charcuterie board is how easy it is to change it up. Here are a few variations I’ve tried and loved.
Vegetarian Version: Skip the meat entirely and double up on the cheese. Add some marinated artichoke hearts, roasted red peppers, and a handful of cherry tomatoes. I’ve made this for a friend who doesn’t eat meat, and it was a hit. The roasted peppers add a smoky sweetness that makes you forget the meat is missing.
Sweet & Spicy Twist: Add a drizzle of hot honey over the brie or a sprinkle of red pepper flakes on the salami. It adds a kick that contrasts beautifully with the creamy cheese. I tried this on a whim one night, and now I can’t go back. The sweet heat is addictive.
Seasonal Swap: In the summer, use fresh berries and sliced peaches instead of grapes and apples. In the fall, add sliced pears and a handful of candied pecans. The board changes with the seasons, which keeps it exciting. I love making a fall version with apple slices and a sharp cheddar—it tastes like autumn on a plate.
Dairy-Free Option: Use vegan cheeses or skip the cheese altogether and focus on high-quality meats, olives, and nuts. There are some great nut-based cheeses out there that work perfectly. I’ve tried a cashew-based brie alternative, and it was surprisingly creamy and delicious.
Breakfast Board: Swap the meats and cheeses for smoked salmon, cream cheese, and capers. Add some bagel chips and fresh dill. It’s a fun twist for a lazy weekend brunch. I made this for a friend’s birthday brunch, and everyone loved the change of pace.
Serving & Storage Suggestions
This board is best served immediately, but there are a few things to keep in mind.
Serving: Serve the board at room temperature. It’s the perfect temperature for the cheese and meats to shine. I like to put it in the center of the table and let everyone grab what they want. It’s a communal experience, which is part of the fun. For drinks, a crisp white wine or a light red pairs beautifully. A sparkling water with a slice of lemon works just as well.
Storage: If you have leftovers (which is rare in my house), store the components separately. Wrap the cheese in wax paper or parchment paper, not plastic wrap—it lets the cheese breathe. Store the meats in an airtight container. The crackers and bread should be kept in a sealed bag to stay crisp. The fresh fruit and olives can go in the fridge. The board itself should be wiped clean with a damp cloth.
Reheating: There’s no reheating needed, but if you have leftover baguette slices, you can toast them again for a minute. The cheese is best eaten cold or at room temperature, so just pull it out of the fridge 20 minutes before you want to eat it again. The flavors actually get better after a day in the fridge—the cheese and meats meld together in a lovely way.
Make-Ahead Tip: You can prep the components a day in advance. Slice the cheese, fold the meats, and wash the fruit. Store everything separately in the fridge. When you’re ready to serve, just arrange everything on the board. It takes less than 5 minutes. I do this all the time for busy weeknights, and it’s a lifesaver.
Nutritional Information & Benefits
This board is a balanced meal in disguise. Here’s a rough estimate for one serving (half the board).
| Nutrient | Amount per Serving |
|---|---|
| Calories | 450-550 |
| Protein | 25g |
| Fat | 30g |
| Carbohydrates | 35g |
| Fiber | 5g |
| Sugar | 15g |
| Sodium | 800mg |
These values vary based on your specific choices, but it’s a good ballpark. The cheese provides calcium and protein, while the nuts and olives offer healthy fats. The fruit adds fiber and vitamins. It’s a satisfying meal that keeps you full without feeling heavy. If you’re watching your sodium, choose low-sodium meats and unsalted nuts. If you’re looking for a lower-carb option, skip the bread and crackers and use cucumber slices or bell pepper strips for dipping. This board is naturally gluten-free if you choose gluten-free crackers.
Conclusion
This Easy Loaded Charcuterie Board for Two in 10 Minutes has honestly changed the way I think about weeknight dinners. It’s proof that you don’t need a complicated recipe or a lot of time to create something that feels special. It’s simple, it’s fast, and it’s deeply satisfying. I love how it turns a regular evening into a little moment of joy. Whether you’re sharing it with someone special or just treating yourself, this board is a reminder that good food doesn’t have to be hard. I encourage you to make it your own—swap in your favorite cheeses, try a new meat, or add a fruit you love. The possibilities are endless. So go ahead, grab a board, and give it a try. You might just find yourself looking forward to those busy weeknights a little more. And when you do, I’d love to hear about it—leave a comment below or tag me in your photos. Happy eating!
FAQs
Can I make this charcuterie board ahead of time?
Yes, you can prep the components a day in advance. Slice the cheese, fold the meats, and wash the fruit. Store everything separately in the fridge. Assemble the board just before serving for the best presentation.
What if I don’t have a wooden board?
No problem! A large plate, a baking sheet, or even a clean cutting board works perfectly. The key is to have a flat surface to arrange everything on.
How do I keep the bread from getting soggy?
Toast the baguette slices or crackers lightly before adding them to the board. This helps them stay crisp, even when they’re next to soft cheese or jam.
Can I use all the same type of cheese?
Absolutely, but I recommend at least two different textures. A soft cheese like brie and a hard cheese like cheddar create a nice contrast. It makes the board more interesting to eat.
What’s the best way to store leftovers?
Store the components separately. Wrap cheese in wax paper, keep meats in an airtight container, and store crackers in a sealed bag. The fresh fruit should go in the fridge. Enjoy leftovers within 2-3 days.
Pin This Recipe!
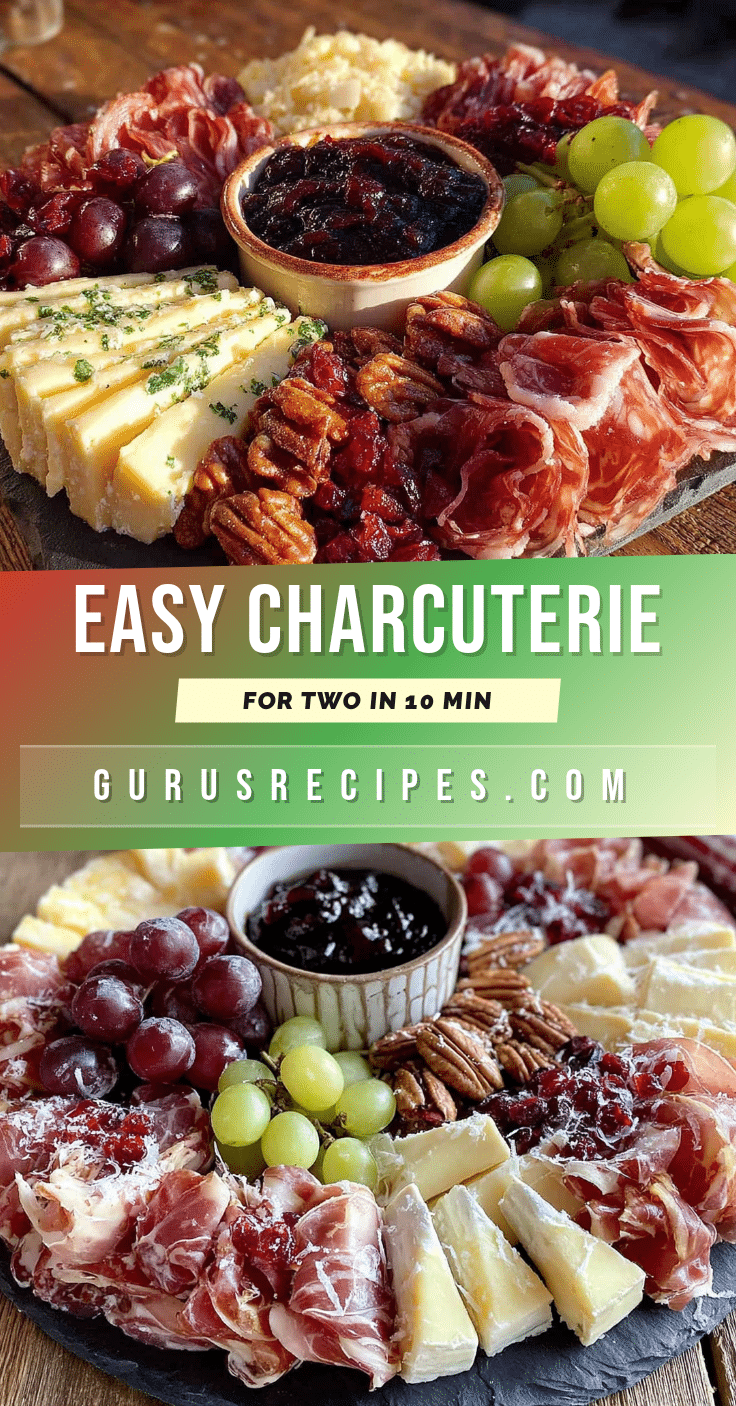

Easy Loaded Charcuterie Board for Two in 10 Minutes
A quick and satisfying charcuterie board for two that comes together in just 10 minutes. Perfect for busy weeknights when you want a fancy meal without any cooking or fuss.
- Total Time: 10 minutes
- Yield: 2 servings 1x
Ingredients
- 4 oz (115g) prosciutto, thinly sliced
- 4 oz (115g) salami, such as Genoa or soppressata, sliced
- 2 oz (55g) capicola or your favorite cured ham (optional)
- 3 oz (85g) sharp cheddar, cubed or sliced
- 3 oz (85g) brie or camembert, at room temperature
- 2 oz (55g) aged gouda or manchego, sliced
- 1/2 cup (75g) mixed olives (kalamata and green)
- 1/4 cup (40g) cornichons or small pickles
- 2 tablespoons (30g) fig jam or honey
- 1/4 cup (30g) almonds or walnuts, toasted
- 1/2 cup (75g) fresh grapes or sliced apple
- 1/4 cup (40g) dried apricots or figs
- 1 small baguette, sliced and lightly toasted, or a box of good crackers (about 4 oz/115g)
- A few sprigs of fresh rosemary or thyme for garnish (optional)
- A small dish of whole-grain mustard (optional)
Instructions
- Set the stage (1 minute): Grab your board or large plate. Place your small bowls or ramekins on the board first. Put the fig jam in one bowl, the olives in another, and the cornichons in a third. Arrange them in a triangle or a line, depending on the shape of your board.
- Add the cheese (2 minutes): Take your cheeses out of the fridge. Slice the sharp cheddar into cubes or thin triangles. Slice the aged gouda into thin, elegant slices. For the brie, leave it in a wedge. Place the cheeses around the bowls, spreading them out so they’re not all clustered together.
- Fold the meats (2 minutes): Take your prosciutto slices and fold them into loose ribbons or rosettes. For the salami, you can either leave the slices flat or fold them into quarters. Arrange the meats near the cheeses, but not touching.
- Add the crunch (2 minutes): Take your toasted baguette slices or crackers and arrange them in a line or a fan shape on an empty part of the board.
- Fill in the gaps (2 minutes): Scatter the almonds or walnuts in small clusters. Place the fresh grapes or apple slices in a few spots. Add the dried apricots or figs here and there.
- Garnish and serve (1 minute): Add a few sprigs of fresh rosemary or thyme for a pop of green. Give everything a final look. If there’s a big empty spot, add a few more crackers or a handful of nuts.
Notes
Let cheese come to room temperature for best flavor. Balance flavors with salty, creamy, crunchy, and fresh elements. Don’t overcrowd the board. Use separate knives for different cheeses. Toast baguette slices to prevent sogginess.
- Prep Time: 10 minutes
- Cook Time: 0 minutes
- Category: Appetizer
- Cuisine: American
Nutrition
- Serving Size: Half the board
- Calories: 450550
- Sugar: 15
- Sodium: 800
- Fat: 30
- Carbohydrates: 35
- Fiber: 5
- Protein: 25
Keywords: charcuterie board, easy dinner, no-cook meal, date night, quick appetizer, cheese board, prosciutto, salami, brie, cheddar, gouda, olives, fig jam, grapes, almonds, baguette


