
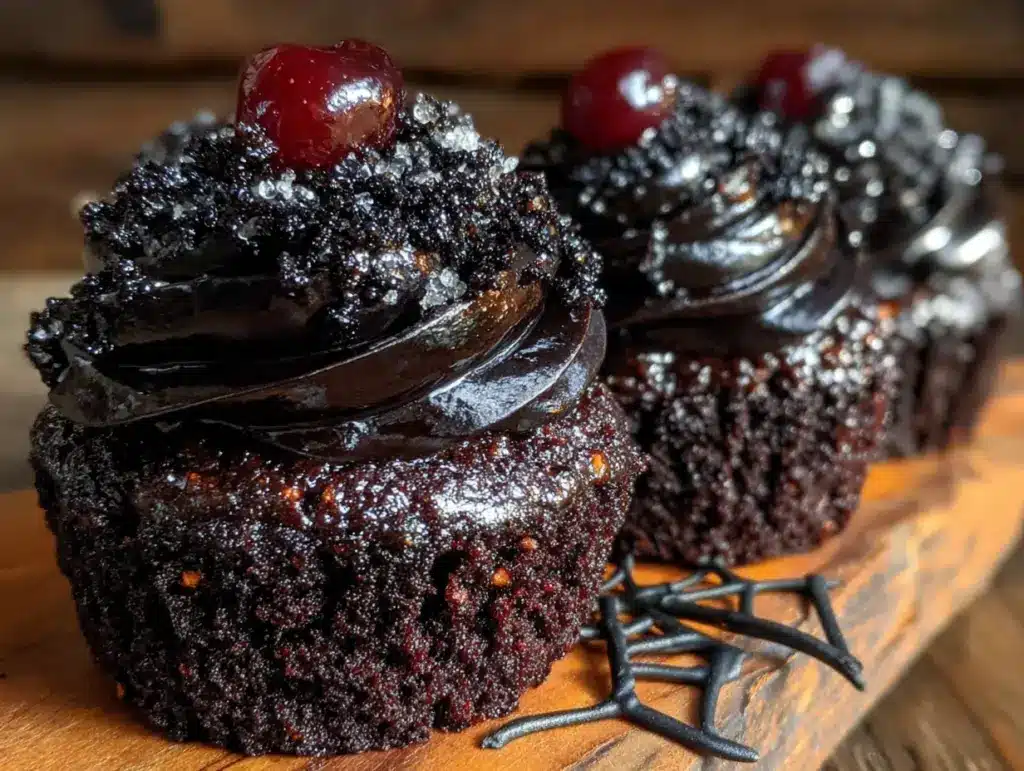
My neighbor, a retired pastry chef named Clara, watched me struggle with a batch of red velvet cupcakes one October afternoon. I was trying to get the color right, and honestly, I was failing. She didn’t say anything at first. Then she just handed me a bottle of black food coloring through the fence and said, “For Halloween, go dark. It’s more fun.” That moment stuck with me. I mean, it wasn’t just about the coloring—it was about letting go of perfection for the sake of the season. The next week, I brought her a sample of what I’d created: a dark, moist, tangy cupcake that felt like velvet but looked like midnight. She smiled and said, “Now that’s a Halloween treat.” And honestly, I’ve been making these Best One-Bowl Black Velvet Halloween Cupcakes ever since. They’re the kind of recipe that makes you feel like a kitchen wizard, even if you’re just a regular home cook trying to impress your dinner party guests.
You know that feeling when you want to bring something spooky and spectacular to a gathering, but you don’t want to spend all day in the kitchen? That’s exactly where these cupcakes come in. They’re rich, tender, and topped with a cream cheese frosting that cuts through the deep cocoa flavor. The black velvet crumb is surprisingly light, and the color is dramatic without being gimmicky. I’ve made these for Halloween parties, potlucks, and even a themed birthday dinner, and they always steal the show. The best part? You mix everything in one bowl. No stand mixer needed, no complicated steps. Just a whisk, a bowl, and a little bit of patience while they bake. Let me tell you, if you’re hosting a crowd this season, this is the recipe you want in your back pocket. Maybe you’ve been there—staring down a dessert table full of store-bought cookies, wishing you had something homemade that looks like it took hours. These cupcakes are your answer.
Why You’ll Love This Recipe
I have tested this recipe at least six times over the past two years. I’ve brought it to family gatherings, neighborhood potlucks, and even a work Halloween party where my colleague, a trained pastry chef, asked for the recipe. That moment told me I had something special. Here’s why these cupcakes stand out:
- One-Bowl Wonder: No need to dirty multiple bowls. Everything—from the dry ingredients to the wet—comes together in a single mixing bowl. Less cleanup means more time for decorating.
- Perfect for Hosting: These cupcakes are designed for a crowd. The recipe scales beautifully, and they hold up well for hours on a dessert table. Serve them at your Halloween dinner party, and watch your guests reach for seconds.
- Dramatic Presentation: The deep black crumb paired with bright white or orange frosting creates a stunning visual contrast. It’s the kind of dessert that makes people say, “Wow, did you make these?”
- Simple Ingredients: No fancy extracts or hard-to-find items. You likely have most of these in your pantry already. The black food coloring is the only specialty item, and it’s easy to find at any grocery store or online.
- Unbelievably Moist: The combination of buttermilk, oil, and a touch of vinegar creates a tender crumb that stays soft for days. I’ve had people tell me these are the moistest cupcakes they’ve ever eaten.
- Crowd-Pleaser: Kids love the spooky color, and adults appreciate the rich, not-too-sweet flavor. It’s a win-win for any gathering.
What makes this recipe different from the rest? It’s the balance of cocoa and tangy buttermilk that gives it that classic velvet texture, but with a color that screams Halloween. I’ve tried other black velvet recipes that turn out dry or taste artificial. This one uses a simple trick—black cocoa powder if you can find it, or regular cocoa with extra coloring—to achieve a deep, natural-looking black without a weird aftertaste. It’s comfort food reimagined for the spookiest season of the year.
What Ingredients You Will Need
This recipe uses simple, wholesome ingredients to deliver bold flavor and satisfying texture without the fuss. Most of these are pantry staples, and the few specialty items are easy to find. Here’s what you’ll need:
For the Cupcakes
- All-purpose flour, 1 ½ cups (180g) – The base of the cupcake. I recommend unbleached flour for the best texture.
- Granulated sugar, 1 cup (200g) – Adds sweetness and helps with browning. You can reduce it slightly if you prefer less sweet cupcakes.
- Unsweetened cocoa powder, ¼ cup (20g) – Use natural cocoa powder for the best velvet texture. If you can find black cocoa powder, it gives a deeper color, but regular works fine.
- Baking soda, 1 teaspoon – Helps the cupcakes rise and creates a tender crumb.
- Salt, ½ teaspoon – Balances the sweetness and enhances the chocolate flavor.
- Vegetable oil, ½ cup (120ml) – Keeps the cupcakes moist without making them greasy. Canola or sunflower oil also work well.
- Buttermilk, ¾ cup (180ml) – The key to that velvet texture. If you don’t have buttermilk, you can make a quick substitute by adding 1 tablespoon of vinegar or lemon juice to ¾ cup of milk and letting it sit for 5 minutes.
- Large eggs, 2, room temperature – Helps bind the batter and adds richness. Take them out of the fridge 30 minutes before baking.
- White vinegar, 1 teaspoon – Reacts with the baking soda to create a light, airy crumb. Don’t skip this—it makes a difference.
- Vanilla extract, 1 teaspoon – Adds warmth and depth to the chocolate flavor. I prefer pure vanilla extract over imitation.
- Black gel food coloring, 2 to 3 teaspoons – Gel coloring works much better than liquid. It gives a true black without thinning the batter. I recommend the Wilton brand for consistent results.
For the Cream Cheese Frosting
- Cream cheese, 8 ounces (226g), softened – Use full-fat cream cheese for the best flavor and texture. Let it sit at room temperature for at least an hour.
- Unsalted butter, ½ cup (113g), softened – Adds stability to the frosting without making it too sweet.
- Powdered sugar, 3 to 4 cups (360g to 480g) – Adjust based on your desired sweetness and consistency. Start with 3 cups and add more if needed.
- Vanilla extract, 1 teaspoon – Enhances the flavor of the frosting.
- Pinch of salt – Balances the sweetness.
Ingredient Tips: For the best results, make sure your buttermilk and eggs are at room temperature. Cold ingredients can cause the batter to curdle or not rise properly. If you’re making these for a crowd, double the frosting recipe—people always want extra.
Equipment Needed
You don’t need a fancy kitchen to make these cupcakes. Here’s what you’ll need:
- Large mixing bowl – A standard 4-quart bowl works well. You’ll mix everything in here, so make sure it’s big enough to avoid splashes.
- Whisk – For combining the dry and wet ingredients. A balloon whisk is ideal for incorporating air into the batter.
- Rubber spatula – For scraping down the sides of the bowl and folding in the food coloring.
- Standard 12-cup muffin tin – This recipe makes about 12 to 14 cupcakes. If you only have one tin, you can bake in batches.
- Paper cupcake liners – Use black or Halloween-themed liners for extra flair. I’ve found that parchment liners work best for easy removal.
- Cookie scoop or ice cream scoop – For evenly portioning the batter. A #20 scoop (about 3 tablespoons) works perfectly.
- Electric hand mixer or stand mixer – For the frosting. You can whisk by hand, but it takes some elbow grease. A hand mixer makes it much easier.
- Cooling rack – Essential for cooling the cupcakes evenly. If you don’t have one, you can use a clean kitchen towel laid flat.
- Piping bag and tip – Optional but recommended for a professional look. A large star tip (like Wilton 1M) creates beautiful swirls. If you don’t have a piping bag, you can use a zip-top bag with the corner snipped off.
Budget-Friendly Tip: If you don’t own a piping bag, you can simply spread the frosting with a butter knife. The cupcakes will still taste amazing, and a rustic look can be charming for a Halloween party.
Preparation Method
Let’s get baking! This method is straightforward, but I’ve included plenty of tips to ensure success. Preheat your oven to 350°F (175°C) and line your muffin tin with paper liners. Set aside.
- Mix the dry ingredients: In your large mixing bowl, whisk together the flour, sugar, cocoa powder, baking soda, and salt. Make sure there are no lumps in the cocoa powder. I like to sift the cocoa through a fine-mesh strainer if it looks clumpy.
- Add the wet ingredients: Make a well in the center of the dry ingredients. Pour in the vegetable oil, buttermilk, eggs, vinegar, and vanilla extract. Whisk gently until the batter is smooth. Don’t overmix—stop as soon as you don’t see any streaks of flour. Overmixing can make the cupcakes tough.
- Add the food coloring: Add 2 teaspoons of black gel food coloring to the batter. Stir with a rubber spatula until the color is evenly distributed. If the batter looks more dark gray than black, add another teaspoon of coloring. The color will deepen as the cupcakes bake, so don’t panic if it’s not pitch black at this stage. I once added too much coloring and ended up with a slightly bitter taste—trust me, 2 to 3 teaspoons is the sweet spot.
- Fill the liners: Use your cookie scoop to divide the batter evenly among the 12 liners. Fill each about two-thirds full. This ensures the cupcakes rise evenly without overflowing. If you have extra batter, you can fill a 13th liner or bake a small tester cupcake.
- Bake: Place the muffin tin in the preheated oven and bake for 18 to 22 minutes. The cupcakes are done when a toothpick inserted into the center comes out clean or with a few moist crumbs. My oven runs hot, so I start checking at 18 minutes. The tops should spring back when lightly pressed.
- Cool completely: Let the cupcakes cool in the tin for 5 minutes. Then transfer them to a cooling rack to cool completely before frosting. If you frost them while they’re still warm, the frosting will melt and slide right off. I learned this the hard way at a party—let’s just say it was a messy but delicious disaster.
For the Frosting:
- Beat the cream cheese and butter: In a separate bowl, beat the softened cream cheese and butter together with an electric mixer on medium speed until smooth and creamy. This takes about 2 minutes. Scrape down the sides of the bowl as needed.
- Add the powdered sugar: Gradually add the powdered sugar, one cup at a time, beating on low speed to prevent a sugar cloud. Once all the sugar is incorporated, add the vanilla extract and a pinch of salt. Increase the speed to medium-high and beat for another 2 minutes until the frosting is light and fluffy.
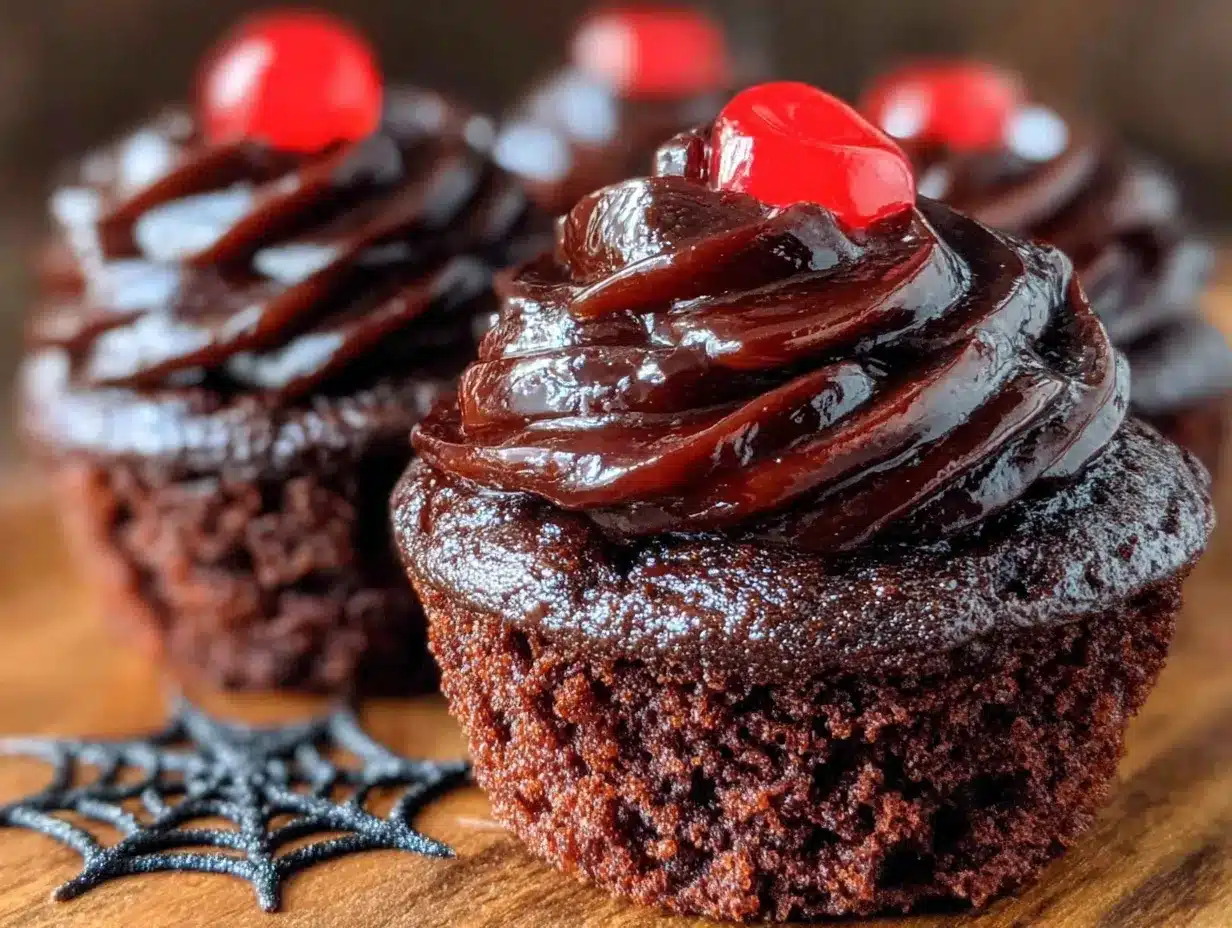
- Frost the cupcakes: Transfer the frosting to a piping bag fitted with a large star tip. Pipe a swirl onto each cooled cupcake. If you don’t have a piping bag, simply spread the frosting with a knife, leaving a slight swirl for texture. For a Halloween touch, I like to top each cupcake with a candy spider ring or a sprinkle of orange sanding sugar.
Cooking Tips & Techniques
Over the years, I’ve made a few mistakes with this recipe, and I want to help you avoid them. Here are my best tips:
- Don’t overmix the batter: This is the most common mistake. Overmixing develops the gluten in the flour, resulting in dense, tough cupcakes. Mix just until the ingredients are combined—a few small lumps are okay.
- Use room temperature ingredients: Cold buttermilk and eggs can cause the batter to seize up and not rise properly. Take them out of the fridge about 30 minutes before you start baking. If you’re in a hurry, you can warm the buttermilk in the microwave for 10 seconds and place the eggs in a bowl of warm water for 5 minutes.
- Check your food coloring: Not all black food colorings are created equal. Gel coloring is much more concentrated than liquid, so it gives a deeper color without thinning the batter. If you use liquid coloring, you’ll need to add more, which can affect the texture. I’ve had great results with the Wilton brand.
- Bake in the center of the oven: Place the muffin tin on the middle rack for even heat distribution. If you’re baking two batches, rotate the tins halfway through baking to ensure even browning.
- Timing is everything: Start checking your cupcakes at 18 minutes. Every oven is different, and overbaking will dry them out. The toothpick test is your best friend here.
- Multitask like a pro: While the cupcakes are baking, make the frosting. That way, everything is ready when the cupcakes have cooled. I like to prep my piping bag while the frosting chills in the fridge for 10 minutes—it makes piping easier.
Variations & Adaptations
This recipe is incredibly versatile. Here are some ways to make it your own:
- Gluten-Free Option: Substitute the all-purpose flour with a 1:1 gluten-free baking blend. I’ve used Bob’s Red Mill brand with great results. Add an extra tablespoon of buttermilk to compensate for the drier flour.
- Dairy-Free Version: Use a dairy-free cream cheese alternative (like Kite Hill) and replace the buttermilk with a mixture of ¾ cup unsweetened almond milk and 1 tablespoon of vinegar. The texture will be slightly denser but still delicious.
- Spooky Spiderweb Design: After frosting, pipe a small circle of black frosting in the center and drag a toothpick outward to create a web pattern. It’s easier than it sounds and looks incredible on a dessert table.
- Pumpkin Spice Twist: Add 1 teaspoon of pumpkin pie spice to the dry ingredients for a fall-flavored variation. The spices complement the chocolate beautifully and add a warm, seasonal aroma.
- Mini Cupcakes: For a party, bake the batter in mini muffin tins. Reduce the baking time to 10 to 12 minutes. You’ll get about 36 mini cupcakes—perfect for grazing.
- Stuffed Cupcakes: After baking, use a small knife to cut a cone-shaped piece from the center of each cupcake. Fill the hole with a teaspoon of raspberry jam or a dollop of chocolate ganache, then replace the top. It’s a delightful surprise for your guests.
Serving & Storage Suggestions
These cupcakes are best served at room temperature. The cream cheese frosting softens beautifully, and the cake is at its most tender. If you’re hosting a party, you can bake the cupcakes a day in advance and frost them the morning of. Here’s how to store them:
- At Room Temperature: Store unfrosted cupcakes in an airtight container at room temperature for up to 2 days. Frosted cupcakes can sit out for a few hours during a party, but they should be refrigerated if not eaten within 4 hours.
- In the Refrigerator: Frosted cupcakes can be stored in an airtight container in the fridge for up to 5 days. Let them sit at room temperature for 30 minutes before serving to soften the frosting.
- In the Freezer: Unfrosted cupcakes freeze beautifully. Place them in a single layer in a freezer-safe container and freeze for up to 3 months. Thaw at room temperature before frosting. I’ve also frozen the frosting in a piping bag—just thaw it in the fridge overnight and give it a quick whip before using.
- Reheating: If you prefer warm cupcakes, microwave an unfrosted cupcake for 10 seconds. Do not microwave the frosting—it will melt.
Presentation Tips for Hosting: Arrange the cupcakes on a black cake stand or a wooden board for a striking contrast. Add a few fake spiderwebs or plastic spiders around the base for a spooky touch. I like to serve them alongside a bowl of candy corn or pumpkin-shaped cookies for variety.
Nutritional Information & Benefits
Let’s be honest—these are indulgent treats, not health food. But here’s what you should know:
- Estimated per cupcake (with frosting): Approximately 350 calories, 18g fat, 45g carbohydrates, 4g protein, 30g sugar. Values will vary based on your specific ingredients and frosting amount.
- Health Benefits of Cocoa: Cocoa powder is rich in antioxidants called flavonoids, which can support heart health and reduce inflammation. So there’s that!
- Buttermilk Benefits: Buttermilk is a good source of probiotics and calcium, which support digestive health and bone strength. It also adds moisture without extra fat.
- Dietary Considerations: This recipe contains gluten, dairy, and eggs. For gluten-free or dairy-free options, see the variations section above. It is not suitable for vegans as written, but you can try a vegan cream cheese substitute and a flax egg.
- Allergens: Contains wheat, milk, and eggs. If you’re serving a crowd, label the cupcakes so guests with allergies are aware.
I believe in balance. These cupcakes are perfect for a celebration, and a little indulgence now and then is good for the soul. Enjoy them without guilt!
Conclusion
These Best One-Bowl Black Velvet Halloween Cupcakes are more than just a dessert—they’re a conversation starter, a showstopper, and a way to make your Halloween gathering unforgettable. The one-bowl method makes them accessible for bakers of any skill level, and the dramatic black crumb paired with creamy white frosting is pure magic. I love how this recipe lets me focus on the fun parts of hosting—decorating, arranging the dessert table, and watching my guests’ faces light up—without spending all day in the kitchen.
I encourage you to make these your own. Add a pinch of cinnamon, swap the frosting for a chocolate ganache, or top them with candy eyeballs for a laugh. The beauty of this recipe is its flexibility. If you try it, I’d love to hear how it goes. Drop a comment below and tell me about your Halloween party or how you customized the cupcakes. Did you add a spooky twist? Did your guests ask for the recipe? Share your stories—I read every single one. And if you’re looking for more crowd-pleasing desserts, check out my spiderweb dip or pumpkin bundt cake for your fall table. Happy baking, and may your Halloween be filled with sweet treats and spooky fun!
Frequently Asked Questions
Can I use liquid food coloring instead of gel?
You can, but I don’t recommend it. Liquid food coloring is less concentrated, so you’ll need a lot more to achieve a true black color. This can thin out the batter and affect the texture. Gel coloring gives a deeper color with just a teaspoon or two and doesn’t alter the consistency. If you only have liquid, add it gradually and expect the color to be more of a dark gray.
Why did my cupcakes turn out dry?
Dry cupcakes are usually a sign of overbaking or overmixing. Make sure you check the cupcakes at 18 minutes and remove them as soon as the toothpick comes out clean. Also, be gentle when mixing the batter—overmixing develops gluten and leads to a dense, dry crumb. Using room temperature ingredients also helps retain moisture.
Can I make these cupcakes ahead of time?
Absolutely! You can bake the cupcakes up to 2 days in advance and store them unfrosted in an airtight container at room temperature. Frost them the morning of your event for the freshest taste. You can also freeze the unfrosted cupcakes for up to 3 months—just thaw them at room temperature before frosting.
How do I get the frosting to be perfectly smooth?
For a silky smooth frosting, make sure your cream cheese and butter are fully softened to room temperature. Beat them together for at least 2 minutes until no lumps remain. When adding the powdered sugar, sift it first to avoid clumps. If the frosting seems too thick, add a teaspoon of milk or cream. If it’s too thin, chill it in the fridge for 15 minutes before piping.
Can I use this recipe for a cake instead of cupcakes?
Yes! This batter works beautifully as a two-layer 9-inch round cake. Grease and flour the pans, then divide the batter evenly. Bake at 350°F (175°C) for 25 to 30 minutes, or until a toothpick comes out clean. You may need to double the frosting recipe for a generous layer between the cakes and on top. The baking time will vary, so start checking at 22 minutes.
Pin This Recipe!
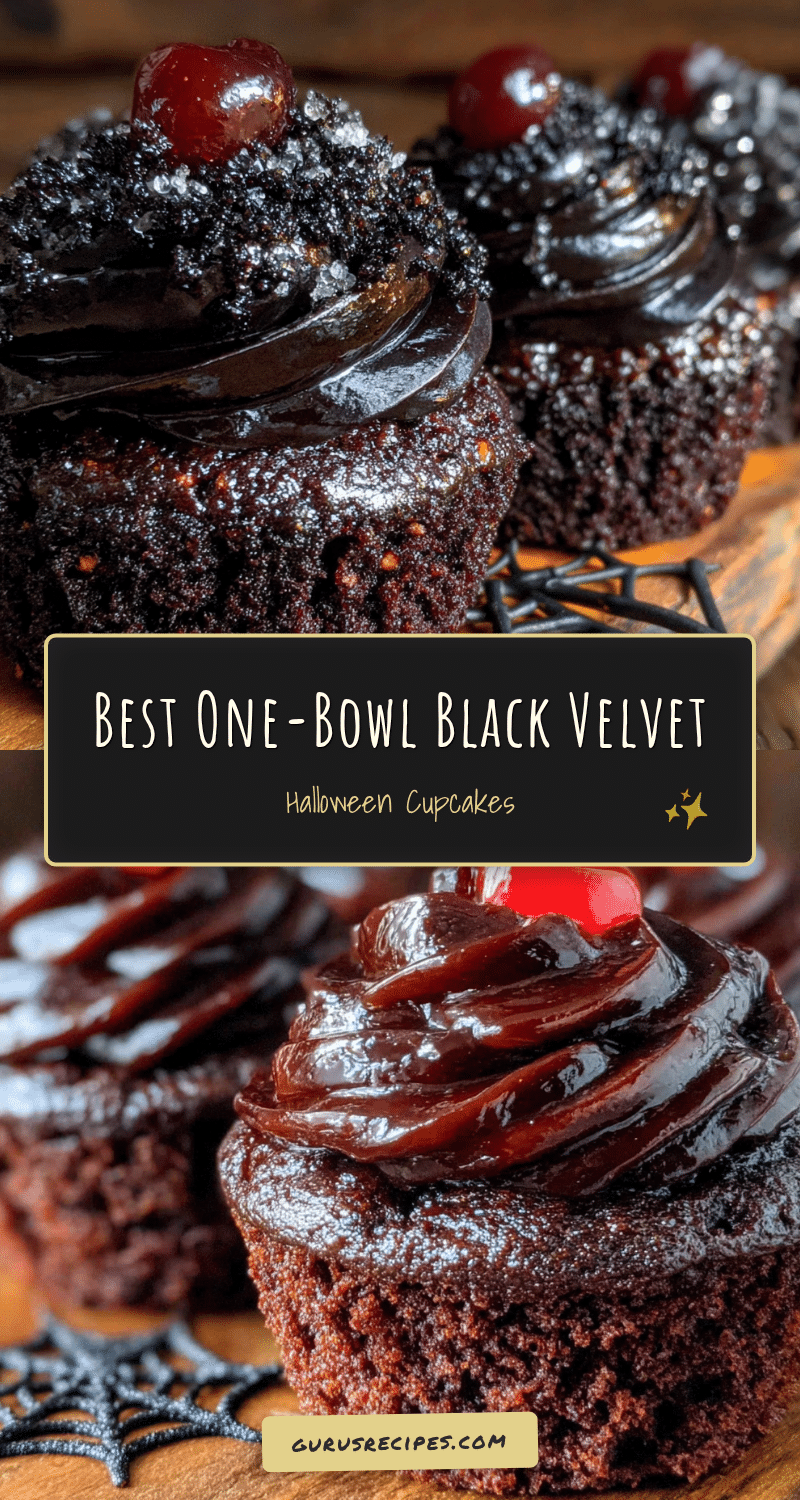

Best One-Bowl Black Velvet Halloween Cupcakes
Rich, tender black velvet cupcakes with cream cheese frosting, made in one bowl for easy cleanup. Perfect for Halloween parties and gatherings.
- Total Time: 35 minutes
- Yield: 12 to 14 cupcakes 1x
Ingredients
- 1 ½ cups (180g) all-purpose flour
- 1 cup (200g) granulated sugar
- ¼ cup (20g) unsweetened cocoa powder
- 1 teaspoon baking soda
- ½ teaspoon salt
- ½ cup (120ml) vegetable oil
- ¾ cup (180ml) buttermilk
- 2 large eggs, room temperature
- 1 teaspoon white vinegar
- 1 teaspoon vanilla extract
- 2 to 3 teaspoons black gel food coloring
- 8 ounces (226g) cream cheese, softened
- ½ cup (113g) unsalted butter, softened
- 3 to 4 cups (360g to 480g) powdered sugar
- 1 teaspoon vanilla extract
- Pinch of salt
Instructions
- Preheat oven to 350°F (175°C). Line a 12-cup muffin tin with paper liners.
- In a large mixing bowl, whisk together flour, sugar, cocoa powder, baking soda, and salt.
- Make a well in the center and add vegetable oil, buttermilk, eggs, vinegar, and vanilla extract. Whisk until smooth; do not overmix.
- Stir in 2 to 3 teaspoons black gel food coloring until evenly distributed.
- Divide batter evenly among liners, filling each about two-thirds full.
- Bake for 18 to 22 minutes, until a toothpick inserted in the center comes out clean. Cool in tin for 5 minutes, then transfer to a wire rack to cool completely.
- For frosting: Beat cream cheese and butter together until smooth. Gradually add powdered sugar, then vanilla and salt. Beat until light and fluffy.
- Frost cooled cupcakes with a piping bag or knife. Decorate as desired.
Notes
Use gel food coloring for best color. Do not overmix batter. Room temperature ingredients ensure proper texture. For gluten-free, use a 1:1 gluten-free flour blend. For dairy-free, use dairy-free cream cheese and buttermilk substitute.
- Prep Time: 15 minutes
- Cook Time: 20 minutes
- Category: Dessert
- Cuisine: American
Nutrition
- Serving Size: 1 cupcake
- Calories: 350
- Sugar: 30
- Sodium: 220
- Fat: 18
- Saturated Fat: 8
- Carbohydrates: 45
- Fiber: 1
- Protein: 4
Keywords: black velvet cupcakes, Halloween cupcakes, one-bowl cupcakes, cream cheese frosting, black food coloring, chocolate cupcakes


