

My sister-in-law, Jen, wasn’t trying to impress anyone. I’d stopped by to drop off a casserole dish I’d borrowed, and the smell of roasting poultry and thyme hit me before I even got my coat off. She was at the stove, calmly whisking a pot of something that looked like liquid gold. “Oh, it’s just gravy,” she said, waving her hand like it was nothing. Just gravy. Let me tell you, it was the most velvety, deeply savory gravy I’d ever tasted. And she made it look so easy.
I watched her for a bit, half-expecting to see a frantic last-minute scramble. But she was just… stirring. She caught me staring and laughed. “I make it the day before,” she said. “It’s the only way to keep your sanity on the big day.” Honestly, it was a revelation. I’d always thought gravy was a last-minute, pan-dripping, flour-lump gamble. But here she was, calm as a cucumber, with a jar of perfectly made gravy in her fridge. It was like she’d unlocked a secret level of holiday hosting.
That casual Tuesday afternoon changed my whole approach to holiday cooking. This isn’t just any gravy recipe; it’s a system. It’s the kind of make-ahead magic that lets you actually enjoy your own Thanksgiving dinner. Maybe you’ve been there—frantic at the stove while your turkey gets cold? This is the solution. It’s the one thing you can check off your list days in advance, and it tastes better for it. So, let me show you how to make the best, easiest make-ahead turkey gravy, just like Jen did, with zero stress and maximum flavor.
Why You’ll Love This Recipe
This isn’t just another gravy recipe. It’s a weeknight-friendly, holiday-simplifying game-changer. I’ve tested this method for years, tweaking the ratio of stock to roux, and it is foolproof. It’s the kind of recipe that gives you back your time and your peace of mind.
- Truly Make-Ahead: Make it up to three days before the big meal. One less thing to worry about! Just reheat and serve.
- Rich, Deep Flavor: By using roasted turkey parts and aromatic vegetables, you build a stock that’s far more flavorful than anything from a box or can.
- Completely Stress-Free: No last-minute whisking, no lumpy gravy panic. You can focus on carving the turkey and enjoying your guests.
- Simple Pantry Ingredients: Nothing fancy here. Turkey wings, carrots, onion, celery, butter, and flour—things you probably already have on hand.
- Perfectly Silky Texture: The key is a slow, cooked roux and a gentle simmer. This method guarantees a smooth, lump-free gravy every single time.
- Customizable to Your Taste: Add a splash of white wine, some fresh herbs, or even a dash of soy sauce for extra depth. The base is perfect for your own twist.
This recipe was born from a desire to have a holiday meal that felt calm and joyful, not chaotic. It’s the kind of recipe you’ll come back to year after year because it just works. It’s comfort, confidence, and a whole lot of flavor in a single pot.
What Ingredients You Will Need
This recipe uses simple, whole ingredients to build an incredible depth of flavor. The key is starting with a good stock, and we’re making that from scratch with turkey parts. No shortcuts here, just honest, delicious results.
- Turkey Wings (2-3 pounds): These are the backbone of your gravy. They’re inexpensive and packed with gelatin, which gives the gravy a luxurious, silky mouthfeel. You can also use turkey legs or a combination of parts. Roasting them first is non-negotiable for that deep flavor.
- Onion (1 large, quartered): Adds a savory, sweet base note. Leave the skin on for a deeper color, or peel it for a lighter gravy.
- Carrots (2, roughly chopped): They add a subtle sweetness that balances the savory elements. Don’t bother peeling them—just give them a good scrub.
- Celery (2 stalks, roughly chopped): The classic aromatic that builds a clean, savory foundation. It’s the unsung hero of good stock.
- Garlic (4 cloves, smashed): Adds a gentle warmth and depth. Smashing them releases their oils without being too overpowering.
- Fresh Thyme (4 sprigs): The classic herb for turkey gravy. It’s earthy and aromatic. You can sub in 1 teaspoon of dried thyme if that’s what you have.
- Fresh Parsley (a handful of stems): Adds a fresh, slightly peppery note. I always save the stems from other recipes for this exact purpose.
- Bay Leaves (2): For that subtle, woodsy background flavor. It’s a must-have in any good stock.
- Black Peppercorns (1 teaspoon): Whole peppercorns infuse the stock with a gentle heat without making it cloudy.
- Unsalted Butter (1/2 cup / 1 stick): The foundation of our roux. Using unsalted butter lets you control the final salt level of the gravy.
- All-Purpose Flour (1/2 cup): The thickening agent. For a gluten-free option, you can use a 1:1 gluten-free flour blend, but whisk it in a little more carefully to avoid lumps.
- Salt and Pepper: To taste. I recommend using kosher salt for its clean flavor.
Equipment Needed
You don’t need a professional kitchen to make this gravy. Here’s what you’ll need to get the job done right.
- Large Roasting Pan or Baking Sheet: For roasting the turkey wings and vegetables. A rimmed baking sheet works perfectly.
- Large Stockpot or Dutch Oven (at least 6 quarts): This is where the magic happens—for both making the stock and the gravy. A heavy-bottomed pot is best for even heat.
- Fine-Mesh Strainer: Essential for straining out all the solids to get a perfectly smooth stock. A cheesecloth-lined colander works too.
- Large Whisk: A good whisk is your best friend for making a lump-free roux. I love my sturdy stainless steel one.
- Fat Separator (optional, but recommended): This little gadget makes it incredibly easy to remove the fat from the stock. If you don’t have one, you can use a ladle or even a few ice cubes to solidify the fat.
- Measuring Cups and Spoons: For accuracy. Eyeballing it can lead to a gravy that’s too thick or too thin.
- Airtight Container or Jar: For storing your finished gravy in the fridge.
Preparation Method
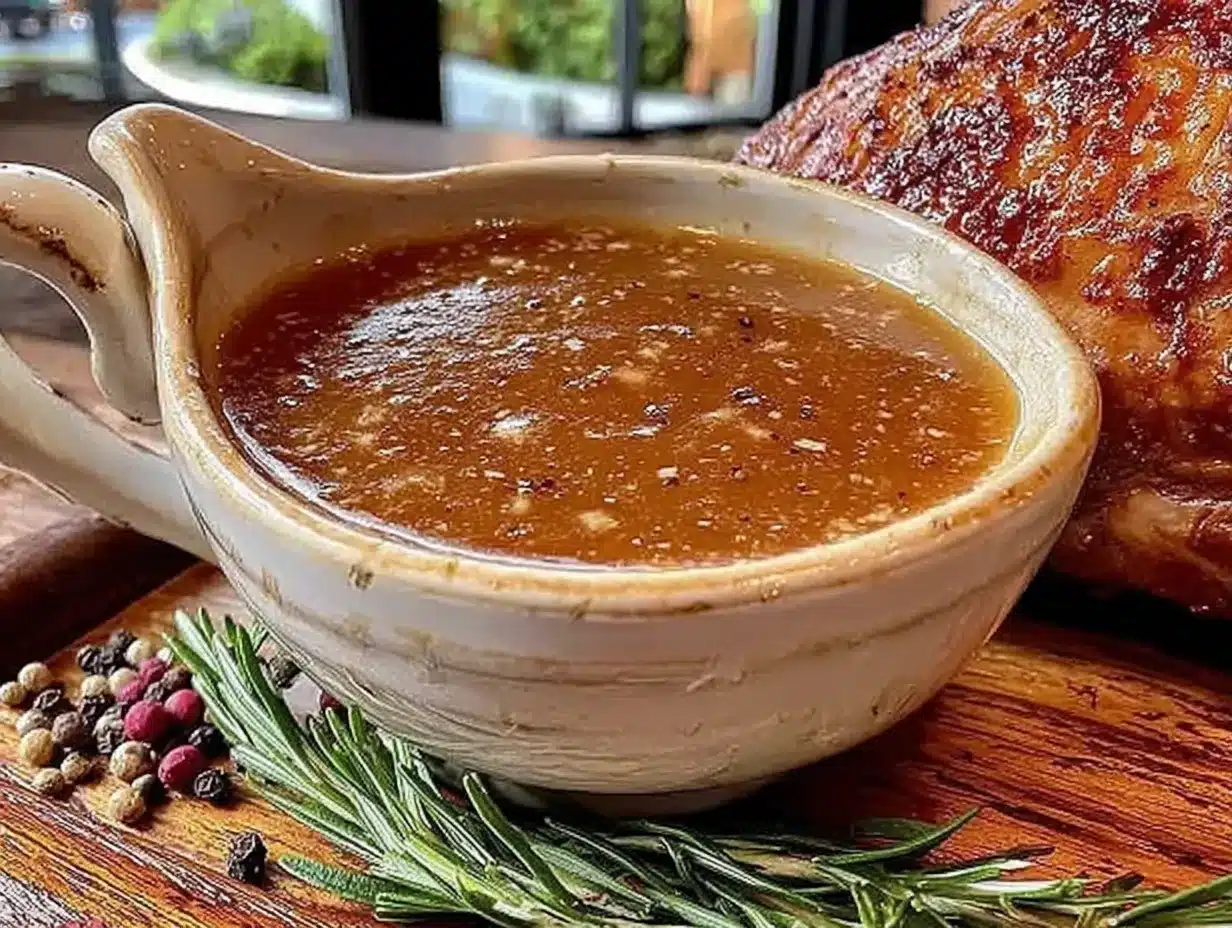
Here’s the step-by-step process for making your make-ahead turkey gravy. Take your time with each step, and you’ll be rewarded with the best gravy of your life.
- Roast the Turkey Parts: Preheat your oven to 400°F (200°C). Arrange the turkey wings, quartered onion, carrots, and celery on a large rimmed baking sheet. Drizzle with a little olive oil and toss to coat. Roast for 45-60 minutes, turning halfway through, until the turkey is deeply golden brown and the vegetables are caramelized. The smell in your kitchen will be incredible.
- Make the Stock: Transfer the roasted turkey wings and all the vegetables to your large stockpot. Add the smashed garlic, thyme, parsley stems, bay leaves, and peppercorns. Pour in enough cold water to cover everything by about an inch (roughly 8-10 cups). Bring it to a gentle boil over medium-high heat, then immediately reduce the heat to low so it’s just barely simmering.
- Simmer and Skim: Let the stock simmer gently for 2 to 3 hours. You’ll see a foam rise to the surface—that’s impurities. Use a ladle or a spoon to skim it off every 20-30 minutes. This step is key for a clear, clean-tasting stock. Don’t rush it! A low, slow simmer extracts the most flavor.
- Strain the Stock: Set your fine-mesh strainer over a large bowl or another pot. Carefully pour the stock through the strainer, discarding all the solids. You should have about 6-8 cups of rich, golden stock. Let it cool slightly.
- Defat the Stock: This is where a fat separator is a lifesaver. Pour the warm stock into the separator and let it sit for a few minutes. The fat will rise to the top. Pour the defatted stock into a clean container. If you don’t have a separator, you can chill the stock in the fridge for an hour, and the fat will solidify on top, making it easy to scoop off.
- Make the Roux: In your cleaned stockpot, melt the butter over medium heat. Once it’s foamy, whisk in the flour. Keep whisking constantly for 3-4 minutes. You want the roux to turn a light golden color and smell like toasted nuts. This cooks out the raw flour taste.
- Whisk in the Stock: Slowly pour in your defatted turkey stock, one cup at a time, while whisking constantly. This is the secret to a lump-free gravy. Start with a thin stream, then add the rest more quickly once the mixture is smooth. Bring it to a gentle simmer.
- Simmer and Season: Let the gravy simmer for 10-15 minutes, stirring occasionally, until it thickens to your liking. It will thicken a bit more as it cools. Season generously with salt and pepper. Taste it! You might be surprised how much salt it needs. Start with 1 teaspoon and go from there.
- Cool and Store: Remove the pot from the heat and let the gravy cool completely. Pour it into an airtight container and store it in the refrigerator for up to 3 days.
Cooking Tips & Techniques
I’ve made this gravy a hundred times, and I’ve learned a few things along the way. Here are my top tips for absolute success.
- Don’t Skip the Roasting: This is the single most important step. Roasting the turkey parts and vegetables creates the Maillard reaction, which is what gives the stock its deep, complex, savory flavor. It’s the difference between good gravy and unforgettable gravy.
- Low and Slow for the Stock: A gentle simmer is your friend. A rolling boil will make the stock cloudy and can make it taste bitter. If you see big bubbles, turn the heat down immediately.
- Patience with the Roux: The roux needs to cook for a few minutes to lose its raw flour taste. If your gravy tastes like paste, you didn’t cook the roux long enough. Cook it until it’s a light tan color and smells nutty.
- The Cold Stock Trick: If you’re worried about lumps, make sure your stock isn’t boiling hot when you add it to the roux. A warm or even room-temperature stock will incorporate much more smoothly. I’ve forgotten this before and ended up with a few lumps—live and learn!
- Adjusting Thickness: If your gravy is too thick after reheating, whisk in a splash of chicken or turkey stock (or even water). If it’s too thin, mix a tablespoon of cornstarch with a tablespoon of cold water to make a slurry, then whisk it into the simmering gravy.
Variations & Adaptations
This basic recipe is a perfect canvas for your own creativity. Here are a few ways to make it your own.
- Herb & Garlic Gravy: When you add the stock to the roux, toss in 2-3 fresh sage leaves and a sprig of rosemary. Let them infuse while the gravy simmers, then remove them before storing. It adds an incredible aromatic layer.
- White Wine Gravy: After making the roux, add 1/2 cup of dry white wine (like Sauvignon Blanc) and whisk vigorously, scraping up any browned bits from the bottom of the pot. Let it reduce by half before adding the stock. This adds a lovely acidity that cuts through the richness.
- Mushroom Gravy: Sauté 8 ounces of finely chopped cremini mushrooms in the pot before making the roux. Cook them until they release their liquid and start to brown, then proceed with the butter and flour. This makes an incredible vegetarian version if you use vegetable stock.
- Dairy-Free Gravy: Swap the butter for a high-quality vegan butter or a neutral oil like avocado oil. The roux will still work beautifully, and the flavor will be just as rich.
- Giblet Gravy: While the stock simmers, add the turkey giblets (neck, heart, gizzard) to the pot. Once the stock is done, finely chop the cooked giblets and stir them back into the finished gravy for a classic, old-school texture.
Serving & Storage Suggestions
This gravy is a star on its own, but here’s how to make it shine even brighter.
- Serving Temperature: Reheat the gravy gently on the stovetop over low heat, whisking occasionally. You can also reheat it in the microwave in 30-second bursts, stirring in between. Serve it hot, in a warmed gravy boat if you have one.
- What to Serve It With: This is the obvious one—it’s a dream over roasted turkey. But don’t stop there! It’s incredible on creamy mashed potatoes, stuffing, biscuits, and even roasted vegetables like Brussels sprouts or green beans.
- Storage: Keep the gravy in a sealed container in the refrigerator for up to 3 days. The flavors will actually meld and deepen over time, making it taste even better on day two.
- Freezing: This gravy freezes like a dream! Pour it into a freezer-safe bag or container and freeze for up to 3 months. Thaw it overnight in the refrigerator before reheating. It’s a lifesaver for a quick weeknight meal.
- Flavor Development: Don’t be alarmed if the gravy looks a little separated after being in the fridge. The fat will solidify on top. Just reheat it and give it a good whisk—it will come back together perfectly.
Nutritional Information & Benefits
While gravy is a treat, it’s made from whole ingredients that offer some nutritional value. Here’s a look at what’s in it.
- Estimated Nutritional Values (per 1/4 cup serving): Calories: 110, Fat: 8g, Saturated Fat: 5g, Cholesterol: 25mg, Sodium: 280mg, Carbohydrates: 8g, Protein: 2g.
- Collagen from Turkey Bones: The long simmering process extracts collagen and gelatin from the turkey wings, which is great for joint health and gives the gravy its luxurious texture.
- Vitamins from Vegetables: The carrots and celery contribute vitamins A and K, as well as antioxidants. It’s a small amount, but every bit counts!
- Dietary Considerations: This recipe is naturally nut-free and can be made gluten-free with a 1:1 flour blend. It’s not low-fat, but it’s a wholesome, from-scratch alternative to processed gravies.
- Personal Wellness Perspective: For me, the biggest benefit is knowing exactly what’s in my food. No hidden preservatives, no weird additives—just real, whole ingredients. That makes every spoonful feel a little bit better.
Conclusion
Honestly, this make-ahead turkey gravy has changed the way I host Thanksgiving. It’s not just about the incredible flavor—though that’s a big part of it. It’s about the peace of mind that comes from having one less thing to do on the big day. It’s about being able to sit down with a glass of wine and actually enjoy the company of your family and friends.
I really hope you give this method a try. Don’t be intimidated by the longer ingredient list or the time it takes to make the stock. I promise you, the result is worth every minute. And once you taste that silky, rich, deeply savory gravy, you’ll never go back to the packet stuff again. This is your new holiday tradition.
I’d love to hear how it turns out for you! Did you add any extra herbs? Did you make it for a weeknight dinner, not just a holiday? Drop a comment below and let me know. And if you loved it, please share this recipe with a friend who needs a little less stress in their kitchen. Happy cooking!
Frequently Asked Questions
Can I use chicken wings instead of turkey wings?
Absolutely! Chicken wings are a fantastic substitute. They’re often cheaper and still have plenty of skin and bones for a rich, gelatinous stock. The flavor will be slightly different, but still delicious and perfect for a chicken dinner.
My gravy is too salty. How can I fix it?
Don’t worry, it happens to the best of us! The best fix is to add a splash of unsalted stock or even a little water to dilute the saltiness. You can also add a peeled, raw potato to the pot and let it simmer for 10-15 minutes—the potato will absorb some of the excess salt.
Can I make this recipe completely gluten-free?
Yes, you can! Simply swap the all-purpose flour for a good quality 1:1 gluten-free flour blend. Be sure to whisk it in very thoroughly to avoid lumps. The texture will be slightly different, but the flavor will still be wonderful.
How far in advance can I make this gravy?
You can make this gravy up to 3 days in advance and keep it in the refrigerator. It also freezes beautifully for up to 3 months. Just thaw it overnight in the fridge before reheating. The flavor actually gets better as it sits!
My gravy is too thin. What do I do?
If your gravy is thinner than you’d like, don’t panic. Mix 1 tablespoon of cornstarch with 1 tablespoon of cold water to create a slurry. While the gravy is simmering, whisk in the slurry and let it cook for a minute or two. It will thicken right up.
Pin This Recipe!

Easy Make-Ahead Turkey Gravy from Scratch
This make-ahead turkey gravy is velvety, deeply savory, and completely stress-free. Made with roasted turkey parts and aromatic vegetables, it’s the secret to a calm and joyful holiday meal.
- Total Time: 4 hours
- Yield: 6-8 servings
Ingredients
- Turkey Wings (2-3 pounds)
- Onion (1 large, quartered)
- Carrots (2, roughly chopped)
- Celery (2 stalks, roughly chopped)
- Garlic (4 cloves, smashed)
- Fresh Thyme (4 sprigs)
- Fresh Parsley (a handful of stems)
- Bay Leaves (2)
- Black Peppercorns (1 teaspoon)
- Unsalted Butter (1/2 cup / 1 stick)
- All-Purpose Flour (1/2 cup)
- Salt and Pepper (to taste)
- Cold Water (8-10 cups)
Instructions
- Preheat your oven to 400°F (200°C). Arrange the turkey wings, quartered onion, carrots, and celery on a large rimmed baking sheet. Drizzle with a little olive oil and toss to coat. Roast for 45-60 minutes, turning halfway through, until the turkey is deeply golden brown and the vegetables are caramelized.
- Transfer the roasted turkey wings and all the vegetables to your large stockpot. Add the smashed garlic, thyme, parsley stems, bay leaves, and peppercorns. Pour in enough cold water to cover everything by about an inch (roughly 8-10 cups). Bring it to a gentle boil over medium-high heat, then immediately reduce the heat to low so it’s just barely simmering.
- Let the stock simmer gently for 2 to 3 hours. Use a ladle or a spoon to skim off the foam that rises to the surface every 20-30 minutes.
- Set your fine-mesh strainer over a large bowl or another pot. Carefully pour the stock through the strainer, discarding all the solids. You should have about 6-8 cups of rich, golden stock. Let it cool slightly.
- Defat the stock using a fat separator or by chilling it in the fridge for an hour and scooping off the solidified fat.
- In your cleaned stockpot, melt the butter over medium heat. Once it’s foamy, whisk in the flour. Keep whisking constantly for 3-4 minutes until the roux turns a light golden color and smells like toasted nuts.
- Slowly pour in your defatted turkey stock, one cup at a time, while whisking constantly. Start with a thin stream, then add the rest more quickly once the mixture is smooth. Bring it to a gentle simmer.
- Let the gravy simmer for 10-15 minutes, stirring occasionally, until it thickens to your liking. Season generously with salt and pepper.
- Remove the pot from the heat and let the gravy cool completely. Pour it into an airtight container and store it in the refrigerator for up to 3 days.
Notes
Don’t skip roasting the turkey parts—it creates deep flavor. Simmer the stock low and slow for best results. Cook the roux until it smells nutty to avoid a raw flour taste. For lump-free gravy, ensure the stock isn’t boiling hot when added to the roux. Adjust thickness with a cornstarch slurry if needed.
- Prep Time: 30 minutes
- Cook Time: 3 hours 30 minutes
- Category: Sauce
- Cuisine: American
Nutrition
- Serving Size: 1/4 cup
- Calories: 110
- Sugar: 1
- Sodium: 280
- Fat: 8
- Saturated Fat: 5
- Carbohydrates: 8
- Protein: 2
Keywords: turkey gravy, make-ahead gravy, Thanksgiving gravy, homemade gravy, turkey stock, holiday gravy, easy gravy


