
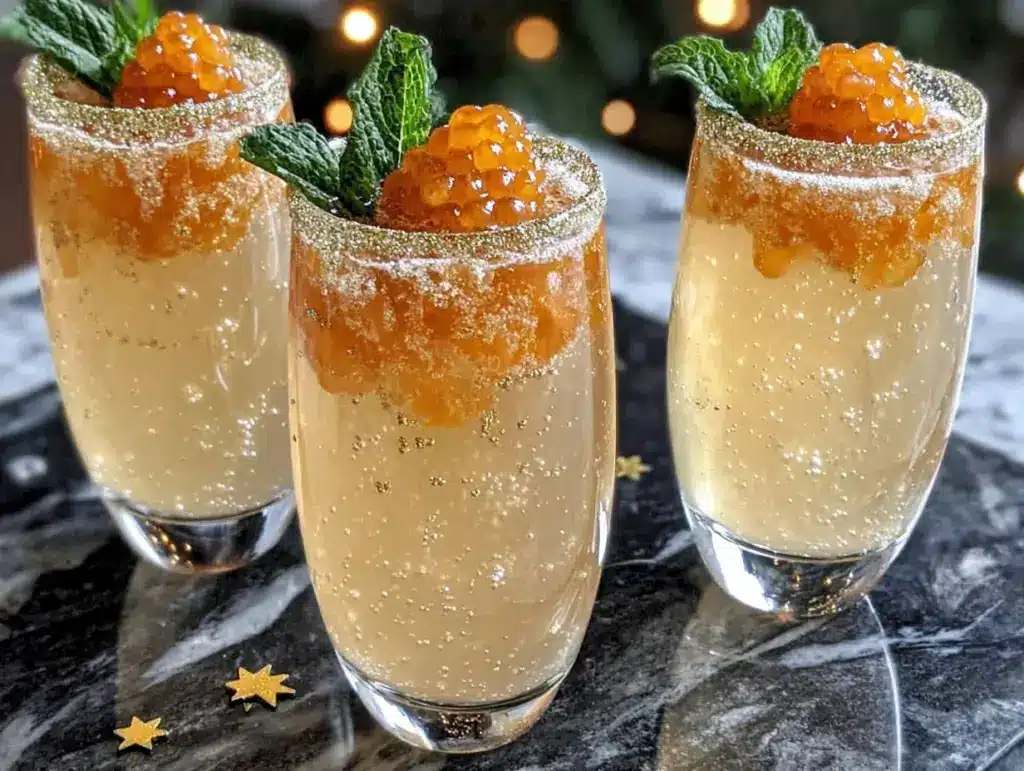
I was standing in the frozen foods aisle of my local grocery store last December 30th, utterly defeated by a bag of frozen meatballs, when the fluorescent lights caught the edge of a bottle of cheap sparkling wine in someone else’s cart. And just like that—I was twenty-three again, at my Aunt Rita’s cramped apartment in Astoria, watching her pour cheap cava into a Pyrex measuring cup with the kind of focus usually reserved for neurosurgery. She was making champagne jello shots for her annual New Year’s Eve party, the one where the radiator hissed like a angry cat and someone always ended up crying over a spilled drink. I remember the way the gelatin dissolved into the warm bubbly, the faint hiss of carbonation escaping, and her saying, “Honey, if it tastes good and makes you happy, it’s fancy enough.” She passed away five years ago, and I haven’t been to a proper NYE party since. But standing there in that cold aisle, I realized I wanted that feeling back—not the party, not the chaos, just the simple, fizzy, slightly ridiculous joy of a homemade jello shot that tastes like a celebration.
So I grabbed the champagne (the good kind, not the $4 bottle—I mean, I’m not made of money, but I’ve learned a thing or two since 2012) and headed home to recreate her recipe. Honestly? The first batch was a disaster. I used too much gelatin, the bubbles all escaped, and I ended up with a weird, flat, rubbery mess that tasted more like sadness than celebration. But I kept at it, tweaking the ratios, testing different chilling times, and finally—finally—I got it right. These festive champagne jello shots have that perfect wobbly texture, a gentle fizz that actually survives the setting process, and a sweetness that doesn’t overpower the wine. Maybe you’ve been there, standing in a grocery store aisle, hit by a random memory that makes you miss someone so badly it physically hurts. This recipe is my way of bringing a little bit of Aunt Rita’s spirit back into my kitchen, and I think it’ll bring a little sparkle to your New Year’s Eve too.
Why You’ll Love This Recipe
Let me tell you—these aren’t your college dorm room jello shots. These are the kind you serve at a party where people actually use cocktail napkins. They’re classy, they’re fun, and they’re surprisingly easy to pull off, even if you’re juggling a dozen other appetizers and trying to keep the kids from eating all the cookies before midnight.
- Quick & Easy: You only need about 20 minutes of active prep time. The rest is just waiting for the gelatin to set in the fridge, which means you can focus on other things (like figuring out why your streamer decorations keep falling down).
- Simple Ingredients: No weird specialty items here. Champagne or sparkling wine, flavored gelatin, and a little sugar. That’s it. You probably already have the gelatin in your pantry from that last baking project that didn’t quite work out.
- Perfect for New Year’s Eve: These are literally made for celebrating. They’re festive, they’re pretty, and they’re portion-controlled, so nobody gets too carried away before the ball drops.
- Crowd-Pleaser: I’ve served these at three different parties now, and every single person—from my cousin who “doesn’t do jello shots” to my neighbor who usually sticks to beer—has gone back for seconds.
- Unbelievably Delicious: The combination of the fruity gelatin and the dry champagne creates this perfect balance of sweet and tart. It’s like a grown-up version of those sparkling wine gummy candies, but better.
What makes these different from every other champagne jello shot recipe out there? It’s the technique. Most recipes tell you to just mix the gelatin with hot champagne, but that kills the bubbles and leaves you with a flat, sad result. I’ve figured out a way to preserve that gentle fizz, so each shot actually sparkles when you bite into it. Plus, I’ve tested the ratios until they’re absolutely perfect—firm enough to hold their shape, but soft enough to melt on your tongue. These aren’t just another version. This is the one you’ll come back to year after year.
And honestly? There’s something special about making these for people. It’s not just about the alcohol or the sugar. It’s about handing someone a little cup of something that took effort and care to make, something that sparkles and wobbles and makes them smile. That’s the real magic of New Year’s Eve, if you ask me.
What Ingredients You Will Need
This recipe uses simple, everyday ingredients to create something that feels surprisingly elegant. The key is using good-quality champagne and the right flavor of gelatin to complement it. Here’s what you’ll need:
For the Jello Shots
- 1 ½ cups champagne or sparkling wine (I recommend a dry brut or extra brut—the sweetness comes from the gelatin, so you don’t want a sweet wine. My go-to is a bottle of Lunetta Prosecco for about $12, but any decent sparkling wine works. Avoid the really cheap stuff; it tends to have a harsh aftertaste that doesn’t set well.)
- 1 cup water (divided into ½ cup cold and ½ cup boiling)
- 1 box (3 oz) flavored gelatin (I use Jell-O brand, and my favorite combos are strawberry-kiwi, peach-mango, or raspberry. For a more grown-up vibe, try berry blue or black cherry. Each flavor gives the shots a slightly different personality.)
- 2 tablespoons granulated sugar (This is optional, depending on how sweet you want the shots. I find that the gelatin alone is sweet enough for most palates, but if you’re using a very dry champagne, a little extra sugar balances it out nicely.)
- 2 tablespoons cold water (for blooming the gelatin—this is a crucial step that most recipes skip, but it makes a huge difference in texture)
For Garnish (Optional but Recommended)
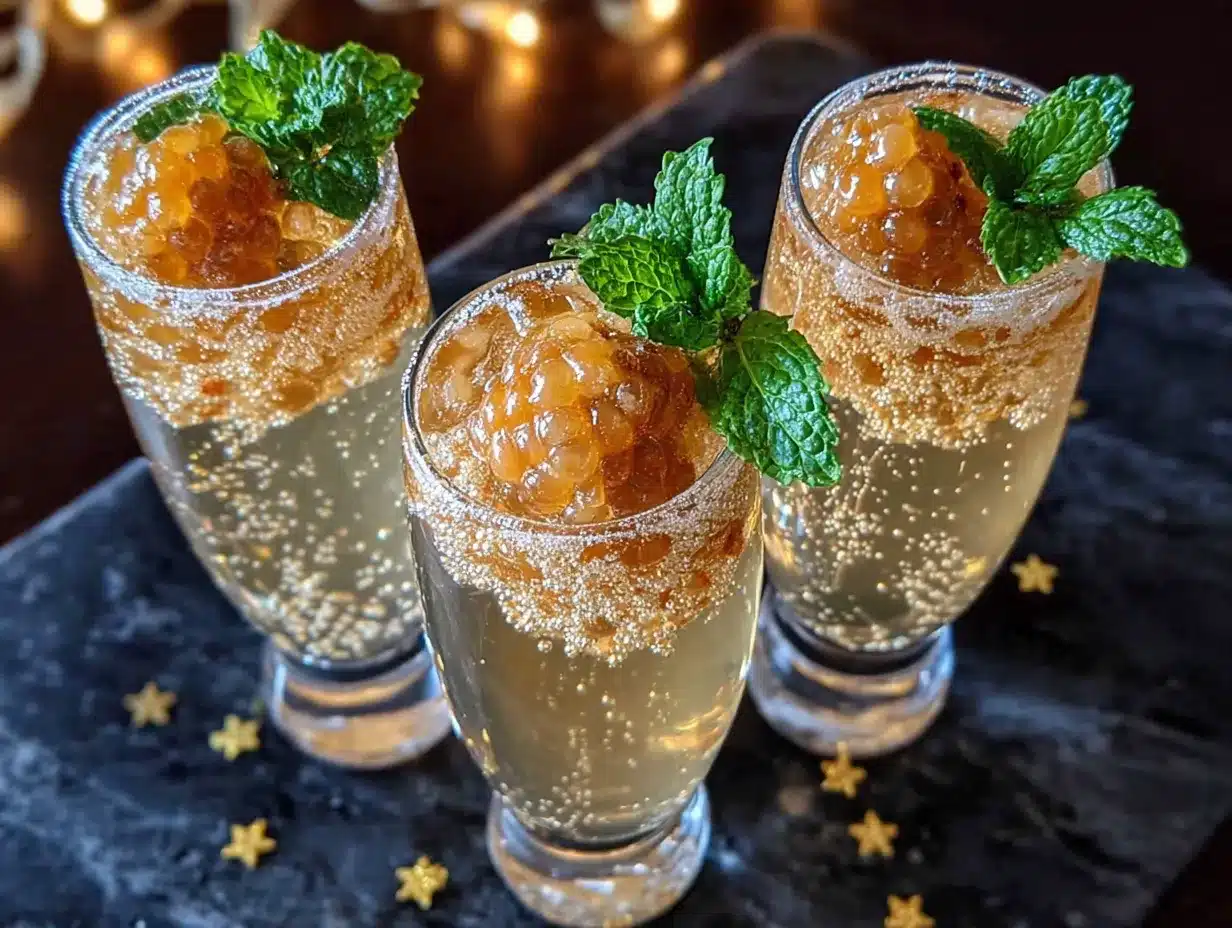
- Edible glitter or luster dust (Adds that “party in a cup” vibe. I found a set of Wilton edible glitter on Amazon for under $10, and it lasts forever.)
- Fresh berries (A single raspberry or blueberry floating on top of each shot looks gorgeous and adds a pop of freshness. I like to use frozen berries in winter when fresh ones are expensive.)
- Mint leaves (Tiny sprigs make the shots look like something from a fancy cocktail menu. Just make sure to wash them well.)
- Sand sugar or colored sugar crystals (For dipping the rims of the cups before pouring the mixture in. It adds a festive crunch.)
Ingredient Selection Tips: When choosing your champagne, look for one that’s labeled “brut” or “extra brut”—these are drier and will let the fruit flavors of the gelatin shine. If you’re using a sweeter wine like a demi-sec, you might want to reduce or skip the extra sugar. For the gelatin, stick with fruit flavors that pair well with wine. I’ve tried lemon and lime, and they’re good, but the berry flavors really sing with the champagne’s natural notes. Stay away from tropical flavors like pineapple or mango unless you’re using a sweeter wine—the combination can get cloying.
Substitution Guidance: If you’re making these for a crowd that includes non-drinkers, you can substitute the champagne with non-alcoholic sparkling wine or even sparkling apple cider. The flavor will be different, but the texture will be the same. For a lower-sugar version, use sugar-free gelatin and skip the extra sugar—just know that the texture might be slightly less firm. And if you can’t find edible glitter, don’t stress. A tiny pinch of regular glitter (the kind that’s actually edible, not craft glitter—please don’t eat craft glitter) or even a sprinkle of colored sugar does the trick.
Equipment Needed
You don’t need much fancy equipment for these, which is part of the appeal. Here’s what I use:
- Small saucepan (for boiling water. Any old pot works—I use a beat-up one from IKEA that’s seen better days.)
- Mixing bowl (a medium glass or ceramic bowl works best. Avoid metal, as it can sometimes react with the gelatin and affect the flavor.)
- Whisk (a small whisk is perfect for dissolving the gelatin without splashing. A fork works in a pinch, but you’ll have to stir longer.)
- 2-cup liquid measuring cup (for measuring the champagne and water. I prefer glass because it’s easier to see the measurements.)
- Plastic shot cups with lids (I buy the 2-ounce size from a party supply store or Amazon. A pack of 50 costs about $8 and lasts for multiple parties. You can also use small glass shot glasses, but the plastic ones with lids are more practical for serving.)
- Baking sheet or tray (to hold the filled shot cups while they set in the fridge. A rimmed baking sheet is perfect because it catches any spills.)
- Fine-mesh strainer (optional but helpful for straining out any undissolved gelatin bits. I rarely bother, but if you’re a perfectionist, it’s worth having.)
Budget-friendly tip: Don’t buy a special whisk or mixing bowl for this. Use what you have. The only thing I’d recommend spending a little extra on is the shot cups with lids—they make transporting and storing the shots so much easier, and they keep the gelatin from drying out in the fridge.
Preparation Method
Alright, let’s get to the fun part. I’ve broken this down into clear steps so you don’t end up with a mess like my first attempt. Trust me, follow these exactly, and you’ll have perfect, bubbly jello shots every time.
- Bloom the gelatin (5 minutes): In a small bowl, sprinkle the 2 tablespoons of cold water over the flavored gelatin powder. Don’t stir it yet—just let it sit for about 2 minutes. This is called “blooming,” and it helps the gelatin dissolve more evenly later. I know it seems fussy, but skipping this step is what gave me that lumpy, rubbery texture the first time. Let it sit and do its thing.
- Heat the water (3 minutes): While the gelatin is blooming, bring ½ cup of water to a boil in your small saucepan. You want it really bubbling, not just hot. Once it’s boiling, remove it from the heat immediately.
- Dissolve the gelatin (2 minutes): Pour the boiling water over the bloomed gelatin powder. Whisk vigorously for about a minute until the powder is completely dissolved. The mixture should be clear and smooth, with no grainy bits. If you see lumps, keep whisking—or pop it in the microwave for 10 seconds and whisk again. This is where the fine-mesh strainer would come in handy if you’re worried about lumps, but I’ve never needed it.
- Add the sugar (1 minute): If you’re using the extra sugar, whisk it into the hot gelatin mixture until it’s completely dissolved. Taste it at this point—it should be sweet but not cloying. Remember, the champagne will add some dryness, so you want the base to be a little sweeter than you think you need.
- Cool the mixture (5 minutes): Let the gelatin mixture cool for about 5 minutes at room temperature. You want it warm but not hot—if it’s too hot, it will kill the bubbles in the champagne. I usually let it sit until I can comfortably touch the bottom of the bowl without burning myself.
- Add the champagne (2 minutes): Here’s the crucial part. Pour the champagne into the cooled gelatin mixture slowly. Don’t dump it all in at once. Pour in a thin stream while gently stirring. You’ll see lots of bubbles rising to the surface—that’s good. Stir just until combined. Over-stirring will knock out the bubbles, and you’ll lose that lovely fizz. You want to preserve as many bubbles as possible.
- Skim the foam (1 minute): You’ll probably have a layer of foam on top of the mixture. Use a spoon to gently skim it off. This isn’t strictly necessary, but it makes the finished shots look cleaner and more professional. Plus, the foam can create air pockets in the set gelatin, which isn’t ideal.
- Fill the shot cups (5 minutes): Arrange your shot cups on a baking sheet. Pour the mixture into each cup, filling them about ¾ full. Leave a little room at the top for garnish if you’re adding any. I use a small measuring cup with a spout for this, but you can also pour directly from the mixing bowl. Work quickly, because the gelatin will start to set as it cools.
- Add garnishes (2 minutes): If you’re using berries, mint, or edible glitter, add them now, while the mixture is still liquid. Drop a berry or mint leaf into each cup, or sprinkle a tiny pinch of glitter on top. If you’re rimming the cups with sand sugar, dip the rims before filling them.
- Chill (4 hours minimum): Carefully transfer the baking sheet to the refrigerator. Don’t jostle it too much, or you’ll disturb the setting process. Let the shots chill for at least 4 hours, but overnight is better. I’ve found that 6-8 hours gives the best texture—firm but still tender, with a gentle wobble.
- Serve (2 minutes): Once set, put the lids on the cups (if using) and arrange them on a serving platter. They’ll keep in the fridge for up to 3 days, but honestly, they’re best within 24 hours. The bubbles in the gelatin will gradually dissipate over time.
Sensory cues to watch for: When you pour the champagne into the gelatin, you should hear a gentle fizzing sound. That’s the bubbles doing their thing. The mixture should look slightly cloudy from the bubbles, not completely clear. When you tap the side of the bowl, you should see tiny bubbles rising slowly to the surface. When the shots are fully set, they should jiggle slightly when you tap the cup, but hold their shape when you tip them sideways. If they’re too firm, you used too much gelatin or over-boiled the water. If they’re too soft, you didn’t use enough gelatin or didn’t chill them long enough.
Cooking Tips & Techniques
I’ve made these shots about a dozen times now, and I’ve learned a few things the hard way. Here’s what I wish someone had told me before I started:
Don’t boil the champagne. I know it sounds obvious, but I’ve seen recipes that tell you to heat the champagne with the gelatin. Don’t do it. Boiling kills the carbonation, and you’ll end up with flat, sad jello shots. Always add the champagne to the cooled gelatin mixture, not the other way around.
Watch your timing. The gelatin mixture needs to be warm enough to dissolve properly but cool enough not to kill the bubbles. I usually let it sit for a full 5 minutes after adding the boiling water. If you’re in a hurry, you can speed this up by placing the bowl in a cold water bath for 2-3 minutes, stirring gently.
Use room temperature champagne. Cold champagne will cause the gelatin to set too quickly, creating a lumpy texture. Let the bottle sit out for about 15 minutes before you open it. You want it cool but not fridge-cold. This also helps preserve more bubbles.
Don’t over-stir. I cannot stress this enough. Stir just enough to combine the champagne with the gelatin. Over-stirring knocks out the carbonation and creates a dense, rubbery texture. A gentle fold is all you need.
Skim the foam. I used to skip this step because I was lazy, and my shots always had weird air pockets at the top. Taking 30 seconds to skim off the foam makes a huge difference in the final appearance. Your guests will notice, even if they can’t put their finger on what’s different.
Chill on a level surface. If your refrigerator has wonky shelves (like mine), use a spirit level to make sure your baking sheet is perfectly flat. Otherwise, your shots will set at an angle, and they’ll look lopsided when you serve them. Learn from my mistakes.
Make them the day before. These shots actually taste better after a full day in the fridge. The flavors meld together, and the texture becomes perfectly uniform. Plus, it’s one less thing to worry about on party day. I always make mine on December 30th, so they’re ready to go on New Year’s Eve.
Variations & Adaptations
Once you’ve mastered the basic recipe, the possibilities are endless. Here are a few variations I’ve tried and loved:
Berry Blast Variation
Use raspberry or mixed berry gelatin, and add a few fresh or frozen raspberries to each cup before chilling. The berries sink to the bottom and create a beautiful layered effect. I made these for a friend’s birthday party, and they were gone in 20 minutes. The tartness of the berries cuts through the sweetness of the gelatin perfectly.
Citrus Sparkle Variation
Use lemon or lime gelatin, and add a tiny strip of lemon zest to each cup. Rim the cups with sand sugar for extra sparkle. These are brighter and more refreshing than the berry versions, and they pair beautifully with seafood appetizers. I served these alongside shrimp cocktail last year, and it was a match made in heaven.
Non-Alcoholic Version
Substitute the champagne with non-alcoholic sparkling wine or sparkling apple cider. The flavor will be sweeter and fruitier, but the texture will be the same. I make these for the kids and designated drivers at my parties, and they always appreciate having a fancy option that isn’t just soda. Use a clear or white grape juice for the closest match to champagne’s flavor profile.
Dairy-Free Adaptation
This recipe is naturally dairy-free, so no changes needed there. But if you’re serving these alongside a cheese board, make sure to label them clearly so your lactose-intolerant guests know they’re safe to eat.
Low-Sugar Version
Use sugar-free gelatin and skip the extra sugar. The texture will be slightly less firm, but the flavor will still be great. I’ve tested this with both Jell-O sugar-free and Simply Delish natural gelatin, and both work well. Just be aware that sugar-free gelatin sets faster, so you’ll need to work quickly when filling the cups.
Serving & Storage Suggestions
These shots are best served chilled, straight from the fridge. I like to arrange them on a white platter or a mirrored tray to show off their sparkly color. If you’re feeling fancy, you can nestle them in a bed of crushed ice to keep them cold throughout the party.
Presentation ideas: For a truly festive look, arrange the shots in a pattern that spells out “2025” or a champagne glass shape. Use different colored gelatin for each letter or shape. I did this last year with red and gold shots, and it was a huge hit. People actually took photos before they ate them.
What to serve with them: These shots pair beautifully with salty snacks like pretzels, potato chips, or roasted nuts. The saltiness balances the sweetness of the gelatin. For a more elegant spread, serve them alongside mini quiches, smoked salmon blinis, or stuffed mushrooms. They also go surprisingly well with chocolate—try dark chocolate truffles or chocolate-covered strawberries.
Storage instructions: Keep the shots in the refrigerator with the lids on. They’ll stay fresh for up to 3 days, but the texture is best within 24 hours. Don’t freeze them—the gelatin will break down and become watery when thawed. If you’re making them ahead of time, I recommend making them no more than 2 days before your party.
Reheating? Don’t even think about it. These are meant to be served cold. If you need to re-melt them for some reason (like if they didn’t set properly), you can gently reheat the mixture in a saucepan over low heat, but the bubbles will be completely gone. Honestly, it’s better to just start over.
How flavors develop: The first day, the shots will taste distinctly of champagne and gelatin. By the second day, the flavors have melded together into something more cohesive. The champagne flavor becomes more subtle, and the fruit notes of the gelatin become more pronounced. I actually prefer them on day two, but that’s a personal preference.
Nutritional Information & Benefits
Let’s be real—these are jello shots, not health food. But here’s the estimated nutritional breakdown for one shot (based on 2-ounce cups, using regular gelatin and brut champagne):
| Nutrient | Amount per shot |
|---|---|
| Calories | 45-60 |
| Carbohydrates | 8-10g |
| Sugar | 7-9g |
| Protein | 1g |
| Fat | 0g |
| Alcohol | ~2-3g (varies by wine) |
Health benefits? Well, gelatin is a source of collagen, which is good for your joints and skin. Champagne contains antioxidants called polyphenols, which are also found in red wine (just in smaller amounts). But honestly, you’re not eating these for the health benefits. You’re eating them because they’re fun and delicious. And that’s okay. Moderation is key, and one or two shots as part of a celebration won’t derail anyone’s health goals.
Dietary considerations: This recipe is gluten-free, dairy-free, and nut-free (depending on your gelatin brand—always check labels). It’s not suitable for vegans because gelatin is animal-derived. If you need a vegan option, look for agar-agar-based gelatin substitutes, but the texture will be different. The alcohol content is relatively low per shot, but it adds up, so pace yourself.
Potential allergens: Some commercial gelatins may be processed in facilities that handle common allergens. If you have severe allergies, look for a certified allergen-free brand. The champagne itself is typically gluten-free, but some cheaper brands may add coloring or flavorings that contain allergens. Stick with reputable brands to be safe.
Conclusion
These festive champagne jello shots are more than just a party trick—they’re a little piece of celebration you can hold in your hand. They’re easy enough for a beginner to make, impressive enough to serve at a fancy gathering, and customizable enough to fit any flavor preference or dietary need. Whether you’re ringing in the New Year with a crowd or just having a quiet night in with your family, these shots add a touch of sparkle that makes the occasion feel special.
I love this recipe because it reminds me that you don’t need a lot of money or fancy equipment to create something beautiful. You just need a little time, a little patience, and the willingness to try something new. And if you mess up the first time? That’s okay. I did too. The second batch will be better, and the third will be perfect. That’s how cooking works, and honestly, that’s how life works too.
So go ahead—grab a bottle of champagne, a box of gelatin, and give these a try. Customize them with your favorite flavors and garnishes. Make them your own. And when you serve them at your New Year’s Eve party, watch the smiles spread around the room. That’s the real magic. If you make these, I’d love to hear how they turned out. Drop a comment below, share a photo on social media, or tag me in your post. Happy New Year, and happy cooking!
Frequently Asked Questions
Can I use any type of champagne?
Yes, but I recommend a dry brut or extra brut. Sweet wines can make the shots cloying, especially if you’re using sweetened gelatin. Prosecco and cava work great too. Just avoid the really cheap stuff—it has a harsh aftertaste that doesn’t set well.
How far in advance can I make these?
You can make them up to 3 days ahead, but they’re best within 24 hours of serving. The texture starts to break down after 48 hours, and the bubbles dissipate over time. I recommend making them the day before your party for the best results.
Can I make these without alcohol?
Absolutely. Substitute the champagne with non-alcoholic sparkling wine, sparkling apple cider, or even ginger ale. The flavor will be different, but the texture will be the same. Just make sure to label them clearly so your guests know which is which.
Why did my shots turn out rubbery?
You probably used too much gelatin or over-boiled the water. The gelatin-to-liquid ratio is crucial. Stick with the measurements in the recipe, and don’t skip the blooming step. If your shots are rubbery, try reducing the gelatin by a quarter teaspoon next time.
Can I use gelatin sheets instead of powder?
Yes, but you’ll need to adjust the quantity. One packet of powdered gelatin (3 oz) is equivalent to about 4 sheets of leaf gelatin. Bloom the sheets in cold water for 5 minutes, then squeeze out the excess water before dissolving them in the hot water. The texture will be slightly different—smoother and more delicate—but it works.
Pin This Recipe!
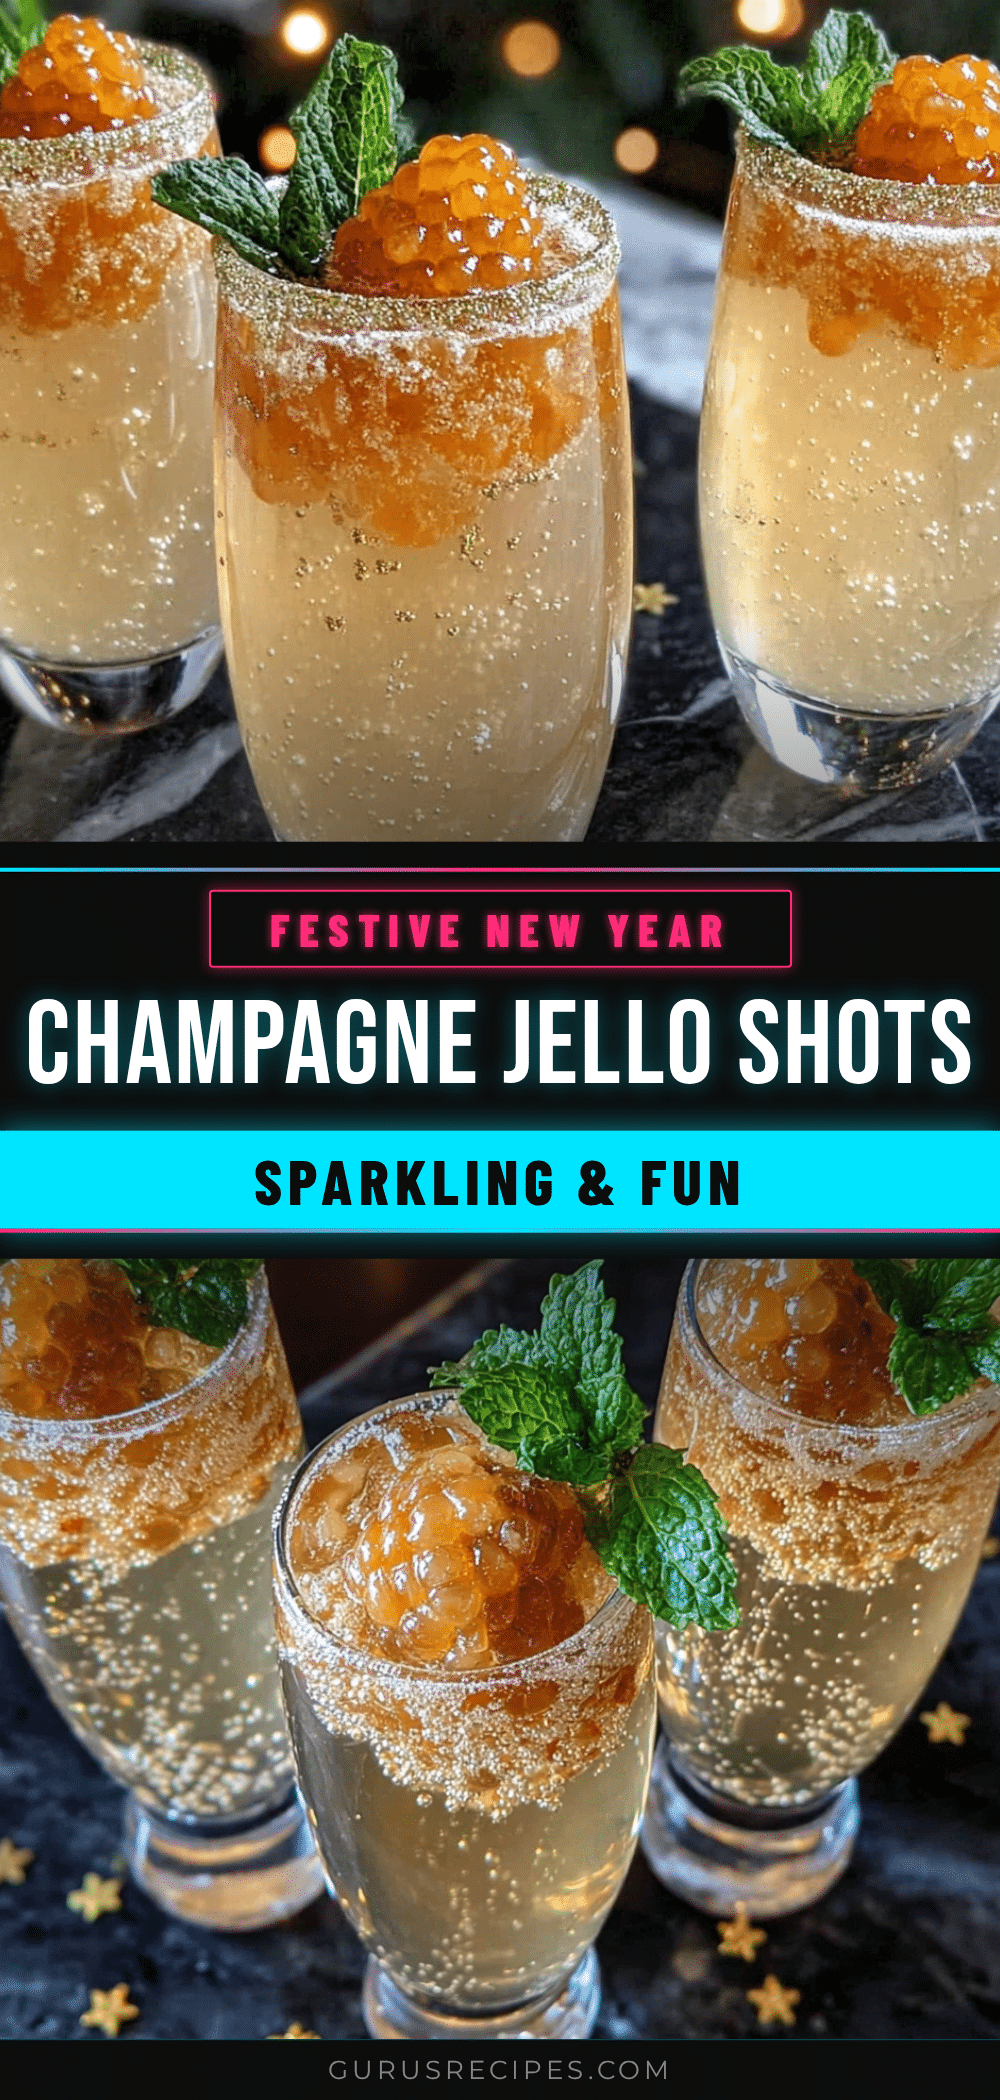

Easy Festive Champagne Jello Shots for NYE
These festive champagne jello shots have that perfect wobbly texture, a gentle fizz that actually survives the setting process, and a sweetness that doesn’t overpower the wine. They’re classy, fun, and surprisingly easy to pull off, making them the perfect addition to your New Year’s Eve celebration.
- Total Time: 4 hours 20 minutes (includes chilling time)
- Yield: 12 servings (based on 2-ounce cups) 1x
Ingredients
- 1 ½ cups champagne or sparkling wine (dry brut or extra brut recommended)
- 1 cup water (divided into ½ cup cold and ½ cup boiling)
- 1 box (3 oz) flavored gelatin (e.g., strawberry-kiwi, peach-mango, raspberry, berry blue, or black cherry)
- 2 tablespoons granulated sugar (optional)
- 2 tablespoons cold water (for blooming the gelatin)
- Edible glitter or luster dust (optional, for garnish)
- Fresh berries (optional, for garnish)
- Mint leaves (optional, for garnish)
- Sand sugar or colored sugar crystals (optional, for rimming cups)
Instructions
- Bloom the gelatin: In a small bowl, sprinkle the 2 tablespoons of cold water over the flavored gelatin powder. Let it sit for about 2 minutes without stirring.
- Heat the water: Bring ½ cup of water to a boil in a small saucepan. Remove from heat immediately once boiling.
- Dissolve the gelatin: Pour the boiling water over the bloomed gelatin powder. Whisk vigorously for about a minute until completely dissolved and smooth.
- Add the sugar: If using, whisk the granulated sugar into the hot gelatin mixture until dissolved.
- Cool the mixture: Let the gelatin mixture cool for about 5 minutes at room temperature until warm but not hot.
- Add the champagne: Slowly pour the champagne into the cooled gelatin mixture in a thin stream while gently stirring. Stir just until combined to preserve bubbles.
- Skim the foam: Use a spoon to gently skim off any foam from the surface.
- Fill the shot cups: Arrange plastic shot cups (2-ounce size) on a baking sheet. Pour the mixture into each cup, filling them about ¾ full.
- Add garnishes: If using, add berries, mint leaves, or a pinch of edible glitter to each cup while the mixture is still liquid. For rimmed cups, dip rims in sand sugar before filling.
- Chill: Carefully transfer the baking sheet to the refrigerator. Chill for at least 4 hours, preferably 6-8 hours or overnight.
- Serve: Once set, put lids on the cups (if using) and arrange on a serving platter. Serve chilled.
Notes
Don’t boil the champagne; always add it to the cooled gelatin mixture. Use room temperature champagne to prevent lumpy texture. Don’t over-stir to preserve bubbles. Skim foam for a cleaner appearance. Chill on a level surface. These shots taste better after a full day in the fridge. Store in the refrigerator with lids on for up to 3 days, but best within 24 hours. Do not freeze.
- Prep Time: 20 minutes
- Cook Time: 0 minutes
- Category: Appetizer
- Cuisine: American
Nutrition
- Serving Size: 1 shot (2 ounces)
- Calories: 4560
- Sugar: 79
- Carbohydrates: 810
- Protein: 1
Keywords: champagne jello shots, New Year's Eve, jello shots, sparkling wine, party appetizer, festive, easy, gelatin dessert


