
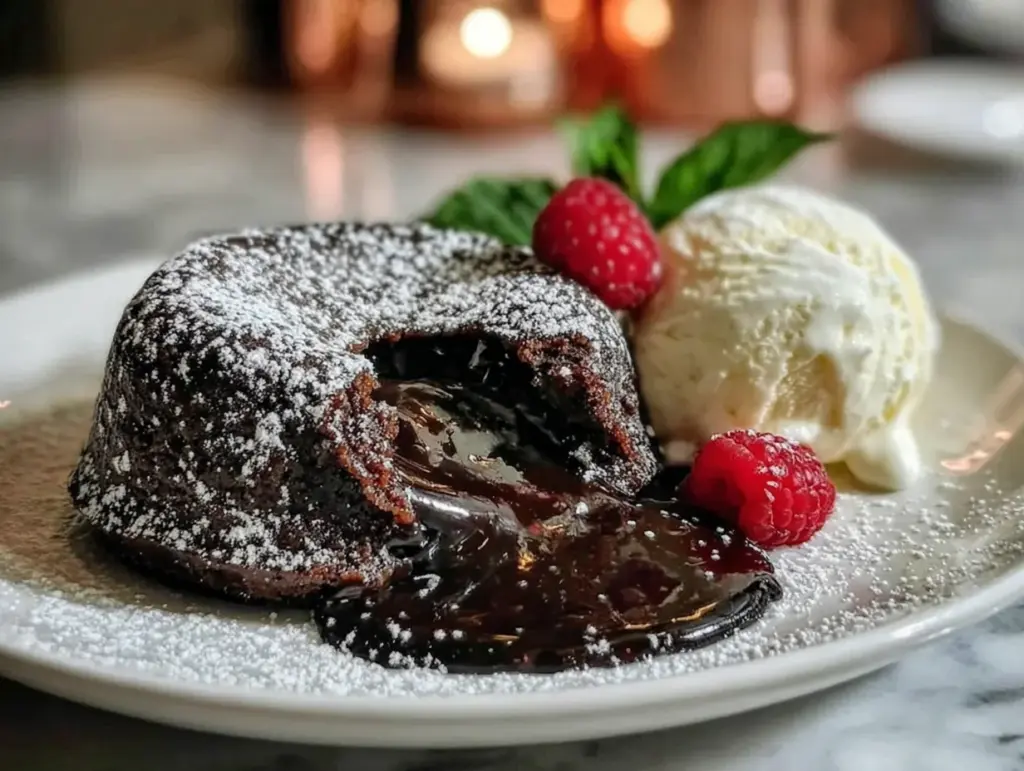
My neighbor, Mrs. Chen, watched me fumbling with a bag of chocolate chips at the community garden potluck sign-up and didn’t say anything at first. Then she reached into her tote bag and pulled out a small, slightly crumpled index card. “For you,” she said with a smile. “For when you need to impress but don’t have all day.” I thanked her, tucked it into my pocket, and honestly forgot about it until a Tuesday night three weeks later when my partner and I were craving something special but had zero energy for a complicated dessert. That index card turned out to be the blueprint for the best chocolate lava cake for two I have ever made, and let me tell you, I have tried a lot of molten chocolate recipes in my day.
The first time I made it, I was skeptical. How could something so simple—a handful of everyday ingredients, a few minutes of mixing—produce a dessert that feels like it belongs in a fancy restaurant? But there it was, a perfectly domed cake with a center that flowed like warm chocolate silk when we broke it open with our spoons. We sat there on the couch, still in our work clothes, eating straight from the ramekins, and I knew this recipe was something special. It was the kind of dessert that makes you close your eyes after the first bite, and honestly, it has become my secret weapon for hosting ever since.
This recipe is not just about the chocolate, though that part is obviously important. It is about the moment you serve it—the way your guests’ eyes widen when you place the warm ramekins in front of them, the collective gasp when the first spoon cracks through the delicate cake exterior, and the satisfied silence that follows as everyone digs in. Maybe you have been there, looking for that one dessert that feels impressive but doesn’t require a pastry chef’s degree or a kitchen full of special equipment. This is that recipe. It has stayed with me because it delivers every single time, and it makes me look like a hero in the kitchen without breaking a sweat.
Why You’ll Love This Recipe
Let’s be real for a second. Finding a dessert that feels both indulgent and achievable for a dinner party or a cozy night in can feel like a tall order. You want something that wows your guests but doesn’t leave you stressed and covered in flour when they arrive. This chocolate lava cake for two checks every single box, and then some. I have tested this recipe more times than I can count, tweaking the baking time, the chocolate ratio, and the resting period until it was absolutely foolproof. Here is why it deserves a permanent spot in your hosting rotation:
- Quick & Easy: From start to finish, this dessert comes together in under 25 minutes. No complicated techniques, no resting the batter overnight, no fuss. You can whip it up while your guests are finishing their main course, and it will be ready to serve warm and gooey.
- Simple Ingredients: You likely have everything you need in your pantry right now. Butter, eggs, sugar, flour, and good-quality chocolate. No fancy extracts, no hard-to-find specialty items, no trips to three different stores.
- Perfect for Hosting: This recipe is scaled for two, making it ideal for date nights, small dinner parties, or when you want to treat yourself without leftovers calling your name. But it scales beautifully too—double or triple it for a crowd without any issues.
- Crowd-Pleaser: I have served this to chocolate lovers, casual dessert fans, and even people who claim they are “not really dessert people.” Every single person has gone back for seconds or asked for the recipe. It is that good.
- Unbelievably Delicious: The texture is what sets this apart. The outside is a perfectly baked, slightly firm cake that gives way to a molten, fudgy center that flows like warm chocolate lava. It is the kind of dessert that feels luxurious and comforting all at once.
What makes this recipe different from the countless others out there? It comes down to two things: the chocolate-to-batter ratio and the precise baking time. I use a mix of semi-sweet and dark chocolate for a depth of flavor that is not too sweet and not too bitter—just perfectly balanced. And I have dialed in the baking time so that the edges are set while the center stays gloriously runny. No more guessing games or ending up with a fully baked cake that is missing the lava effect. This is your best version of lava cake, period.
This recipe is not just good; it is the kind that makes you feel like a rockstar in the kitchen. It is comfort food reimagined—rich, chocolatey, and soul-soothing, but fast enough for a weeknight and impressive enough for a celebration. Perfect for impressing guests without stress, or turning a simple Tuesday into something memorable.
What Ingredients You Will Need
This recipe uses simple, everyday ingredients to deliver a dessert that tastes anything but ordinary. The magic is in the quality of what you use and how they come together. Here is everything you will need, along with a few tips I have picked up along the way to make sure your lava cake turns out perfect every time.
For the Lava Cakes
- 4 ounces (113g) semi-sweet chocolate, chopped – I recommend using a good-quality brand like Ghirardelli or Guittard for the best flavor and meltability. Avoid chocolate chips if you can, as they often contain stabilizers that prevent smooth melting. If you only have chocolate chips, go for a high-quality brand and chop them finely.
- 4 tablespoons (56g) unsalted butter, plus extra for greasing – Unsalted butter gives you control over the salt level. Make sure it is at room temperature for easy melting with the chocolate. For a dairy-free version, use a high-quality vegan butter stick.
- 1/4 cup (50g) granulated sugar – Regular white sugar works perfectly here. It adds sweetness and helps create that delicate crust on the outside of the cake.
- 2 large eggs, at room temperature – Room temperature eggs incorporate more air into the batter, giving the cakes a lighter texture. If you forgot to take them out of the fridge, place them in a bowl of warm water for 5 minutes.
- 1/4 cup (31g) all-purpose flour – Standard all-purpose flour is all you need. For a gluten-free option, use a 1:1 gluten-free baking flour blend. I have tested this with King Arthur’s Measure for Measure blend, and it works beautifully.
- 1/4 teaspoon vanilla extract – Pure vanilla extract adds warmth and depth. Avoid imitation vanilla if possible—it makes a noticeable difference in the final flavor.
- Pinch of salt – This balances the sweetness and enhances the chocolate flavor. I use fine sea salt.
For Serving (Optional but Highly Recommended)
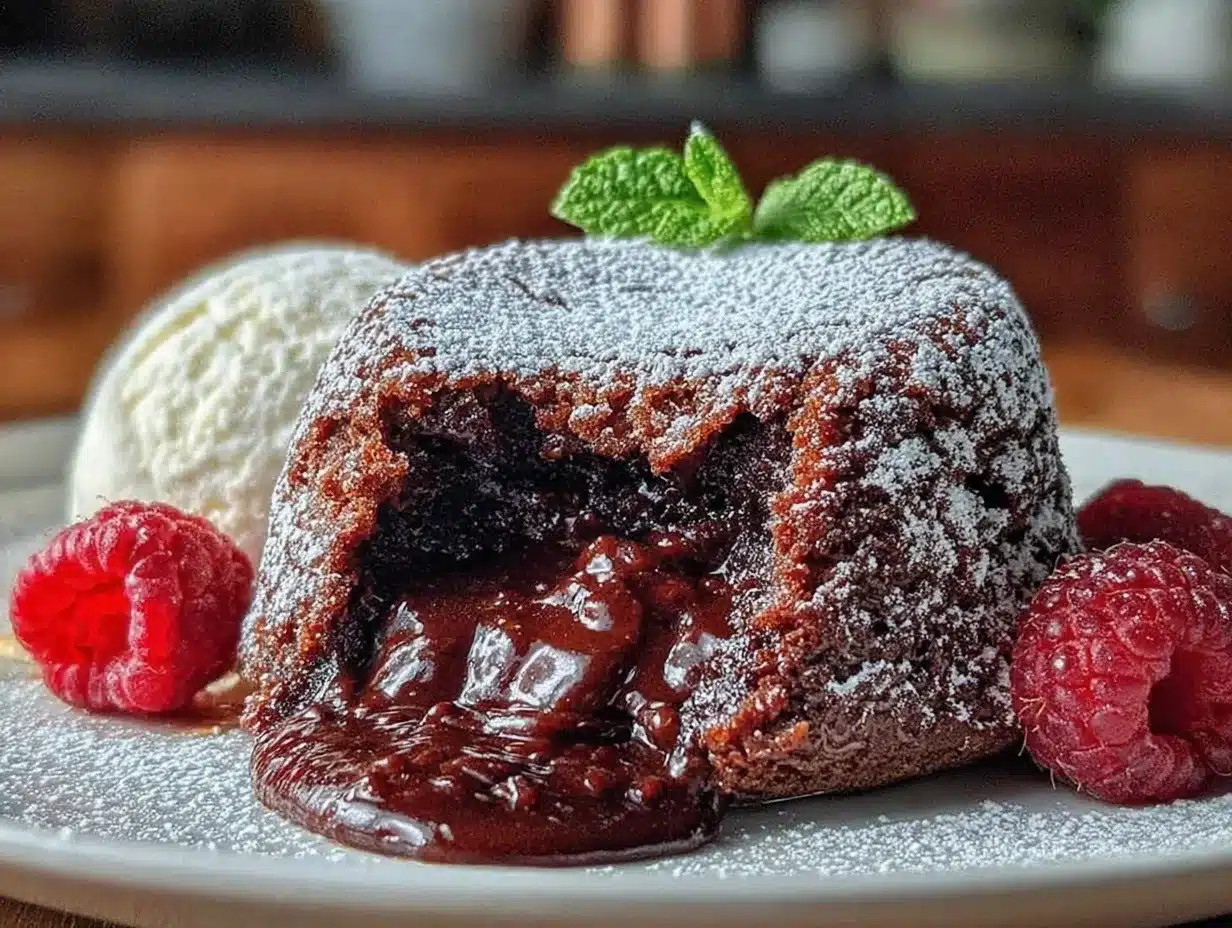
- Powdered sugar, for dusting – A light dusting adds a beautiful finishing touch and a hint of sweetness.
- Fresh berries, such as raspberries or strawberries – The tartness of berries cuts through the richness of the chocolate beautifully. I love using raspberries because their slight acidity pairs perfectly with the molten center.
- Vanilla ice cream or whipped cream – A scoop of cold vanilla ice cream melting into the warm lava cake is a match made in dessert heaven. Honestly, I never serve this without it.
- Mint sprigs, for garnish – A fresh mint sprig adds a pop of color and a refreshing aroma that complements the chocolate.
One thing I have learned from making this recipe dozens of times is that ingredient temperature matters more than you might think. Room temperature eggs emulsify into the batter smoothly, creating a uniform texture. Cold eggs can seize the chocolate mixture and lead to a grainy batter. Also, do not skip the pinch of salt—it is not just for seasoning; it actually amplifies the chocolate flavor and makes the sweetness taste more complex. Trust me on this one.
If you are hosting a dinner party and want to get ahead, you can prepare the batter up to 24 hours in advance. Simply mix the batter, divide it into the greased ramekins, cover them with plastic wrap, and refrigerate. When you are ready to bake, let them sit at room temperature for 15 minutes, then bake as directed. This is a lifesaver when you have multiple dishes to manage.
Equipment Needed
You do not need a professional pastry kitchen to make these lava cakes. In fact, you probably already have most of what you need. Here is the full list of equipment, along with a few notes from my own kitchen trials:
- Two 6-ounce (177ml) ramekins – These are the classic vessel for lava cakes. You can find them at most kitchen supply stores or online. If you do not have ramekins, you can use 6-ounce oven-safe custard cups or even small ceramic bowls. Just make sure they are oven-safe up to 400°F.
- Mixing bowls – You will need a medium heat-safe bowl for melting the chocolate and butter, and a separate bowl for whisking the eggs and sugar. Glass or stainless steel works best.
- Whisk – A standard wire whisk is perfect for combining the eggs and sugar until thick and pale. You can also use a hand mixer, but honestly, a whisk does the job in under two minutes.
- Rubber spatula – Essential for scraping down the sides of the bowl and folding the dry ingredients into the batter without overmixing.
- Baking sheet – Place the ramekins on a baking sheet before putting them in the oven. This catches any potential overflow and makes transferring them in and out of the oven much easier.
- Small saucepan or microwave – For melting the chocolate and butter together. I prefer the double boiler method (a saucepan with simmering water and a heat-safe bowl on top) because it gives you more control and reduces the risk of burning the chocolate. But the microwave works fine too—just use 30-second intervals and stir between each.
- Fine-mesh sieve – Optional, but useful for dusting powdered sugar over the finished cakes for a professional look.
A note on ramekins: I have tried making lava cakes in muffin tins when I did not have ramekins, and honestly, it is not the same. The shape and depth of ramekins are what create that perfect contrast between the baked exterior and the molten interior. If you make these often (and I suspect you will), investing in a set of good-quality ramekins is worth it. They are inexpensive and last forever. I have had my set for over a decade, and they still look and work like new.
Preparation Method
Making chocolate lava cake for two is surprisingly straightforward, but a few key details make all the difference. Follow these steps carefully, and you will have a dessert that looks like it came from a five-star restaurant. I have included time estimates and sensory cues so you know exactly what to look for at each stage.
- Preheat your oven to 425°F (218°C). Place a baking sheet on the middle rack to heat up. This helps the ramekins heat evenly from the bottom, which is crucial for getting that molten center. While the oven is heating, generously butter the inside of two 6-ounce ramekins, making sure to coat the bottom and all the way up the sides. You can also dust them with a light sprinkle of cocoa powder or flour—this helps the cakes release easily after baking. Tap out any excess.
- Melt the chocolate and butter together. In a medium heat-safe bowl, combine the chopped semi-sweet chocolate and the unsalted butter. If using a double boiler, place the bowl over a saucepan of simmering water (make sure the bottom of the bowl does not touch the water). Stir occasionally with a rubber spatula until the mixture is completely smooth and glossy. If using a microwave, heat in 30-second intervals, stirring well after each, until fully melted. This usually takes about 1 to 1.5 minutes total. Set the mixture aside to cool slightly while you work on the next step.
- Whisk the eggs and sugar. In a separate medium bowl, crack the two room-temperature eggs and add the 1/4 cup of granulated sugar. Whisk vigorously for about 1 to 2 minutes, until the mixture becomes thick, pale, and slightly frothy. You are looking for a texture similar to a thin pancake batter. When you lift the whisk, the mixture should fall in a ribbon that holds its shape for a second before disappearing. This step incorporates air into the batter, which helps the cakes rise and gives them that light, tender crumb.
- Combine the chocolate mixture with the egg mixture. Pour the slightly cooled melted chocolate and butter into the bowl with the whisked eggs and sugar. Gently fold everything together with a rubber spatula until just combined. Be careful not to overmix—you want the batter to be smooth and uniform, but you do not want to deflate all the air you just whipped into the eggs. The batter will be thick, glossy, and smell intensely of chocolate.
- Add the dry ingredients. Sprinkle the 1/4 cup of all-purpose flour, 1/4 teaspoon of vanilla extract, and a pinch of salt over the batter. Fold gently with the spatula until the flour is fully incorporated and no white streaks remain. The batter should be thick, smooth, and slightly sticky. Do not overmix at this stage, or the cakes can turn out dense and tough.
- Divide the batter between the ramekins. Using a spoon or a small cookie scoop, divide the batter evenly between the two prepared ramekins. The batter should fill each ramekin about 3/4 full. Smooth the tops gently with the back of a spoon. At this point, you can cover the ramekins with plastic wrap and refrigerate for up to 24 hours if you are preparing ahead. If baking immediately, proceed to the next step.
- Bake the lava cakes. Place the ramekins on the preheated baking sheet in the oven. Bake for exactly 12 to 14 minutes. The timing here is critical. At 12 minutes, the cakes will have a very soft, almost liquid center. At 14 minutes, the center will be thicker and more pudding-like but still molten. I personally prefer 13 minutes for a perfect balance—the edges are set and slightly firm, the top is puffed and cracked slightly, and the center jiggles when you gently shake the ramekin. The cakes should look slightly underbaked in the center. If they look fully set and firm across the top, you have overbaked them.
- Let them rest briefly. Remove the ramekins from the oven and let them cool on a wire rack for exactly 1 minute. This brief rest allows the cakes to set slightly, making them easier to unmold. Do not let them cool longer than 2 minutes, or the residual heat will continue to cook the centers and you will lose the lava effect.
- Unmold and serve. Run a thin knife around the edge of each ramekin to loosen the cake. Place a small dessert plate upside down over the ramekin, then carefully invert the ramekin onto the plate. Lift the ramekin gently—the cake should release easily and sit on the plate with the puffed top facing up. If the cake does not release immediately, give the ramekin a gentle shake or tap the bottom. Dust with powdered sugar, add a scoop of vanilla ice cream or a dollop of whipped cream, and garnish with fresh berries and a mint sprig if desired. Serve immediately while the center is still warm and flowing.
A word of caution: do not skip the resting step or let the cakes cool too long on the counter. I learned this the hard way when I got distracted by a phone call and left the ramekins sitting for 5 minutes. The centers had set completely by the time I unmolded them, and I ended up with chocolate cakes instead of lava cakes. Still delicious, but not the showstopper I was going for.
Cooking Tips & Techniques
Over the years, I have made this chocolate lava cake for two more times than I can count, and I have definitely had my share of mishaps. Here are the tips I wish someone had given me when I first started making this dessert:
Use room temperature eggs. This is non-negotiable. Cold eggs will cause the melted chocolate mixture to seize up, creating a grainy, lumpy batter. If you forget to take your eggs out of the fridge, place them in a bowl of warm (not hot) water for 5 minutes. They will be at room temperature in no time.
Do not overbake. This is the most common mistake, and I have made it plenty of times. The key is to pull the cakes out when the edges are set but the center still jiggles when you gently shake the ramekin. If you are unsure, err on the side of underbaking. You can always pop them back in for an extra minute, but you cannot undo an overbaked cake. Trust your instincts and the visual cues I mentioned earlier.
Grease the ramekins generously. I cannot stress this enough. Use a pastry brush or your fingers to coat every nook and cranny of the ramekin with softened butter. Then dust with cocoa powder or flour, tapping out the excess. This ensures the cakes release cleanly and maintain their beautiful shape when inverted. I once skimped on the greasing, and the cake stuck to the ramekin, leaving me with a crumbled mess on the plate. Not a good look when you are trying to impress guests.
Prep ahead for stress-free hosting. If you are making this for a dinner party, prepare the batter, divide it into the ramekins, and refrigerate them up to 24 hours in advance. When you are ready to bake, let the ramekins sit at room temperature for 15 minutes, then bake as directed. This takes all the pressure off and lets you focus on your guests and the main course.
Use good-quality chocolate. The flavor of this dessert hinges entirely on the chocolate you use. Skip the generic baking chocolate bars and go for something you would actually enjoy eating on its own. I have had great results with Ghirardelli, Guittard, and Valrhona. The difference is noticeable, and your guests will taste it.
Multitask like a pro. While the lava cakes are baking, prepare your garnishes and scoop the ice cream into bowls. This way, everything is ready to go the second the cakes come out of the oven. Lava cakes wait for no one, and serving them immediately is the secret to that perfect molten center.
Variations & Adaptations
One of the things I love most about this recipe is how adaptable it is. Whether you are cooking for dietary restrictions, seasonal cravings, or just a desire to mix things up, there is a version of this lava cake for you. Here are a few variations I have tried and loved:
Dark Chocolate Lava Cake: Swap the semi-sweet chocolate for 4 ounces of dark chocolate (60-70% cacao). The result is a deeper, more intense chocolate flavor that is slightly less sweet. I love this version when I am serving it after a rich meal because it feels more sophisticated and less cloying. Just note that dark chocolate can be a bit more temperamental when melting, so use the double boiler method for best results.
Gluten-Free Lava Cake: Substitute the all-purpose flour with a 1:1 gluten-free baking flour blend. I have tested this with King Arthur’s Measure for Measure blend, and it works perfectly. The texture is slightly more delicate, but the lava effect is just as dramatic. Make sure your blend contains xanthan gum for structure. If it does not, add 1/4 teaspoon of xanthan gum to the dry ingredients.
Vegan Lava Cake: Use a high-quality vegan butter stick and replace the eggs with 2 tablespoons of aquafaba (the liquid from a can of chickpeas) whisked until frothy. I was skeptical about this substitution at first, but it works surprisingly well. The cakes are slightly less rich but still have that gooey center. Use dairy-free chocolate chips or chopped dark chocolate that is labeled vegan.
Peppermint Chocolate Lava Cake: Add 1/4 teaspoon of peppermint extract to the batter along with the vanilla extract. The cool, refreshing mint flavor pairs beautifully with the warm, molten chocolate. This is a fantastic variation for the holiday season. Top with crushed candy canes for an extra festive touch.
Nutella Lava Cake: Add 2 tablespoons of Nutella to the batter after combining the chocolate and egg mixtures. Swirl it gently so there are ribbons of hazelnut chocolate running through the cake. The result is an even richer, more decadent dessert that Nutella lovers will go crazy for. I have also tried this with a dollop of Nutella in the center of each ramekin before baking, which creates an extra lava pocket.
If you are feeling adventurous, try adding a pinch of cinnamon or a dash of espresso powder to the batter. Both enhance the chocolate flavor without overpowering it. I have also experimented with adding a tablespoon of bourbon or rum, which adds a warm, boozy note that is perfect for adult gatherings.
Serving & Storage Suggestions
Presentation is everything when it comes to lava cake, especially when you are serving it to guests. Here is how I like to serve and store this dessert for the best experience:
Serving Temperature: Serve the lava cakes immediately after unmolding while the center is still warm and flowing. This is not a dessert that sits well at room temperature, so have your plates, garnishes, and ice cream ready before you pull the cakes out of the oven. I like to warm my dessert plates in the microwave for 10 seconds before serving—this keeps the cakes warm longer and prevents the ice cream from melting too quickly.
Presentation Ideas: Dust the tops with powdered sugar using a fine-mesh sieve for a snowy, elegant look. Add a small scoop of vanilla bean ice cream or a dollop of lightly sweetened whipped cream on the side. Arrange a few fresh raspberries or sliced strawberries around the plate for a pop of color and acidity that cuts through the richness. A sprig of fresh mint adds a beautiful finishing touch and a hint of freshness.
What to Serve Alongside: These lava cakes are rich, so keep the accompaniments simple. A light fruit salad, a few fresh berries, or even a simple espresso or cappuccino are perfect pairings. If you are serving these as part of a larger dinner party menu, I recommend keeping the main course light—think grilled fish, a fresh salad, or roasted vegetables. This dessert is the star of the show, and you want your guests to have room to enjoy it fully.
Storage Instructions: Lava cakes are best enjoyed fresh out of the oven, but if you have leftovers (unlikely, but possible), here is what to do. Let the cakes cool completely in the ramekins, then cover them tightly with plastic wrap and store in the refrigerator for up to 2 days. To reheat, remove the plastic wrap and microwave the ramekin on medium power for 20-30 seconds, or until the center is warm and flowing again. Alternatively, you can reheat them in a 350°F (175°C) oven for 5-7 minutes. The texture will not be quite as perfect as fresh, but it is still delicious.
Freezing Instructions: You can freeze the unbaked batter in the ramekins for up to 1 month. Wrap each ramekin tightly in plastic wrap and then in aluminum foil. When you are ready to bake, thaw the ramekins in the refrigerator overnight, let them sit at room temperature for 15 minutes, then bake as directed. I have done this multiple times when I wanted to have a special dessert on hand for unexpected guests.
Flavor Development: If you bake the cakes and then refrigerate them before serving, the chocolate flavor actually becomes more intense and fudgy. I have served chilled lava cakes as a cold dessert on hot summer days, and they are surprisingly good—like a dense, rich chocolate pudding. Just keep in mind that the lava effect will not be as dramatic when served cold.
Nutritional Information & Benefits
Let’s be honest—this is an indulgent dessert, and it is meant to be enjoyed in moderation as a treat. But there are a few surprising benefits to the ingredients used in this recipe. Here is a quick breakdown of the estimated nutritional values per serving (one lava cake, without ice cream or garnishes):
- Calories: Approximately 450
- Total Fat: 28g
- Saturated Fat: 16g
- Cholesterol: 195mg
- Sodium: 110mg
- Total Carbohydrates: 45g
- Dietary Fiber: 3g
- Sugars: 32g
- Protein: 8g
Dark chocolate, when used in moderation, is actually a source of antioxidants called flavonoids, which have been linked to heart health benefits. The eggs provide high-quality protein and essential vitamins like B12 and D. And while this is not a health food by any stretch, it is made with real, whole ingredients—no preservatives, artificial flavors, or weird additives. That alone makes it a better choice than most store-bought desserts.
If you are watching your sugar intake, you can reduce the sugar to 3 tablespoons without significantly affecting the texture. I have tested this, and the cakes are slightly less sweet but still delicious. For a lower-fat version, you can replace half the butter with unsweetened applesauce, though the texture will be slightly more cake-like and less gooey.
This recipe is naturally vegetarian and can be made gluten-free and vegan with the substitutions I mentioned earlier. It contains dairy, eggs, and gluten in its standard form, so be mindful of allergies if you are serving guests. Always check your chocolate labels—some brands contain milk solids or soy lecithin, which may be allergens for some people.
Conclusion
This chocolate lava cake for two is more than just a dessert—it is a little piece of kitchen magic that never fails to impress. It is the recipe I turn to when I want to make someone feel special, whether it is my partner on a random Tuesday or a table full of dinner guests who have no idea how easy it was to pull off. The contrast between the tender, cake-like exterior and the warm, flowing center is the kind of culinary experience that feels indulgent and comforting all at once.
What I love most about this recipe is how forgiving it is. Even on the nights when I am rushing or distracted, it still turns out beautifully. It has become my go-to for those moments when I want to create something memorable without spending hours in the kitchen. And honestly, that is the kind of recipe every home cook needs in their back pocket.
I encourage you to make this your own. Experiment with the variations, adjust the baking time to your preference, and serve it in a way that feels right for you. Whether you stick with the classic version or try the Nutella or peppermint twist, I promise you will not be disappointed. When you make it, I would love to hear how it turned out. Drop a comment below, share your photos, and let me know if you tried any fun adaptations. Happy baking, and enjoy every last spoonful of that molten chocolate goodness!
Frequently Asked Questions
Can I make chocolate lava cake in advance?
Yes! You can prepare the batter, divide it into the greased ramekins, cover them with plastic wrap, and refrigerate for up to 24 hours before baking. When you are ready to serve, let the ramekins sit at room temperature for 15 minutes, then bake as directed. This is a great option for dinner parties when you want to minimize last-minute stress.
Why did my lava cake not have a molten center?
This usually happens for one of two reasons: the cake was overbaked, or it cooled too long before serving. Make sure to pull the cakes out of the oven when the edges are set but the center still jiggles when you gently shake the ramekin. Also, serve them immediately after the 1-minute rest—do not let them sit on the counter for more than 2 minutes, or the residual heat will continue to cook the center.
Can I use milk chocolate instead of semi-sweet?
You can, but I do not recommend it. Milk chocolate has a higher sugar and milk fat content, which can make the lava cakes overly sweet and the texture less stable. If you only have milk chocolate on hand, reduce the sugar in the recipe to 2 tablespoons and expect a sweeter, slightly softer result. For the best balance of flavor and texture, stick with semi-sweet or dark chocolate.
Do I need ramekins, or can I use a muffin tin?
Ramekins are strongly recommended for the best results. Their shape and depth create the ideal contrast between the baked exterior and the molten interior. Muffin tins are shallower and wider, which means the cakes will bake more quickly and evenly, making it much harder to achieve that gooey center. If you do not have ramekins, look for 6-ounce oven-safe custard cups or small ceramic bowls as an alternative.
Can I double or triple this recipe for a crowd?
Absolutely! This recipe scales perfectly. Simply multiply the ingredients by the number of servings you need. Use a larger bowl for mixing, and bake the cakes in batches if your oven cannot fit all the ramekins at once. Just be careful not to overmix the batter when scaling up—fold gently to keep the batter light and airy. The baking time remains the same, around 12 to 14 minutes.
Pin This Recipe!
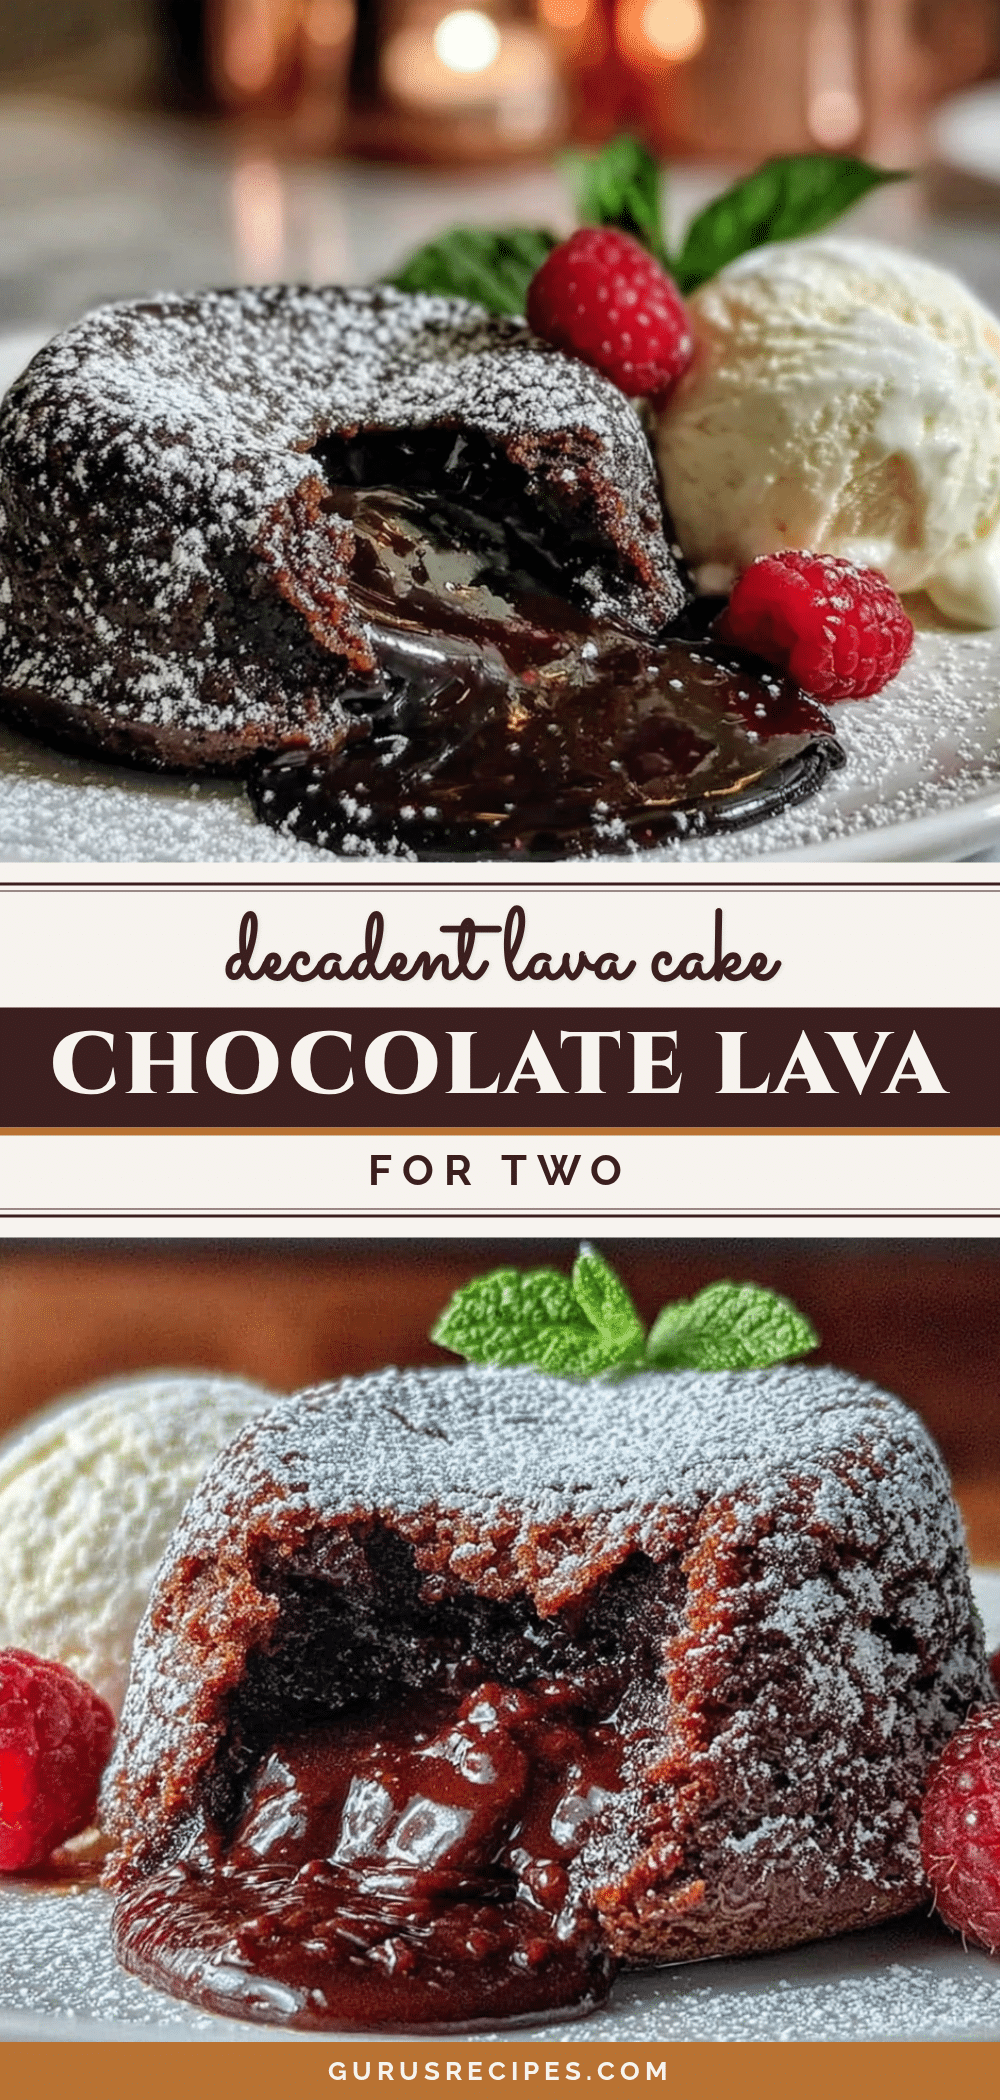

Easy Homemade Chocolate Lava Cake for Two
A quick and easy chocolate lava cake recipe for two, featuring a perfectly baked exterior with a warm, molten center. Made with simple ingredients, this dessert is perfect for date nights or small dinner parties.
- Total Time: 22-24 minutes
- Yield: 2 servings 1x
Ingredients
- 4 ounces (113g) semi-sweet chocolate, chopped
- 4 tablespoons (56g) unsalted butter, plus extra for greasing
- 1/4 cup (50g) granulated sugar
- 2 large eggs, at room temperature
- 1/4 cup (31g) all-purpose flour
- 1/4 teaspoon vanilla extract
- Pinch of salt
- Powdered sugar, for dusting (optional)
- Fresh berries, such as raspberries or strawberries (optional)
- Vanilla ice cream or whipped cream (optional)
- Mint sprigs, for garnish (optional)
Instructions
- Preheat your oven to 425°F (218°C). Place a baking sheet on the middle rack to heat up. Generously butter the inside of two 6-ounce ramekins, coating the bottom and sides. Dust with cocoa powder or flour and tap out excess.
- In a medium heat-safe bowl, combine the chopped semi-sweet chocolate and unsalted butter. Melt using a double boiler or microwave in 30-second intervals, stirring until smooth and glossy. Set aside to cool slightly.
- In a separate medium bowl, whisk the room-temperature eggs and granulated sugar vigorously for 1-2 minutes until thick, pale, and slightly frothy. The mixture should fall in a ribbon that holds its shape briefly.
- Pour the slightly cooled chocolate mixture into the egg mixture. Gently fold with a rubber spatula until just combined. Do not overmix.
- Sprinkle the all-purpose flour, vanilla extract, and pinch of salt over the batter. Fold gently until fully incorporated and no white streaks remain. The batter should be thick, smooth, and slightly sticky.
- Divide the batter evenly between the two prepared ramekins, filling each about 3/4 full. Smooth the tops gently.
- Place the ramekins on the preheated baking sheet in the oven. Bake for exactly 12-14 minutes. The edges should be set and the center should jiggle when shaken.
- Remove from the oven and let cool on a wire rack for exactly 1 minute. Do not let cool longer than 2 minutes.
- Run a thin knife around the edge of each ramekin to loosen the cake. Place a dessert plate upside down over the ramekin and carefully invert. Lift the ramekin gently. Dust with powdered sugar, add ice cream or whipped cream, and garnish with berries and mint if desired. Serve immediately.
Notes
Use room temperature eggs for best results. Do not overbake; the center should jiggle when shaken. Grease ramekins generously to ensure easy release. Batter can be prepared up to 24 hours in advance and refrigerated; let sit at room temperature for 15 minutes before baking.
- Prep Time: 10 minutes
- Cook Time: 12-14 minutes
- Category: Dessert
- Cuisine: American
Nutrition
- Serving Size: 1 lava cake
- Calories: 450
- Sugar: 32
- Sodium: 110
- Fat: 28
- Saturated Fat: 16
- Carbohydrates: 45
- Fiber: 3
- Protein: 8
Keywords: chocolate lava cake, molten chocolate cake, dessert for two, easy dessert, chocolate dessert, date night dessert


