
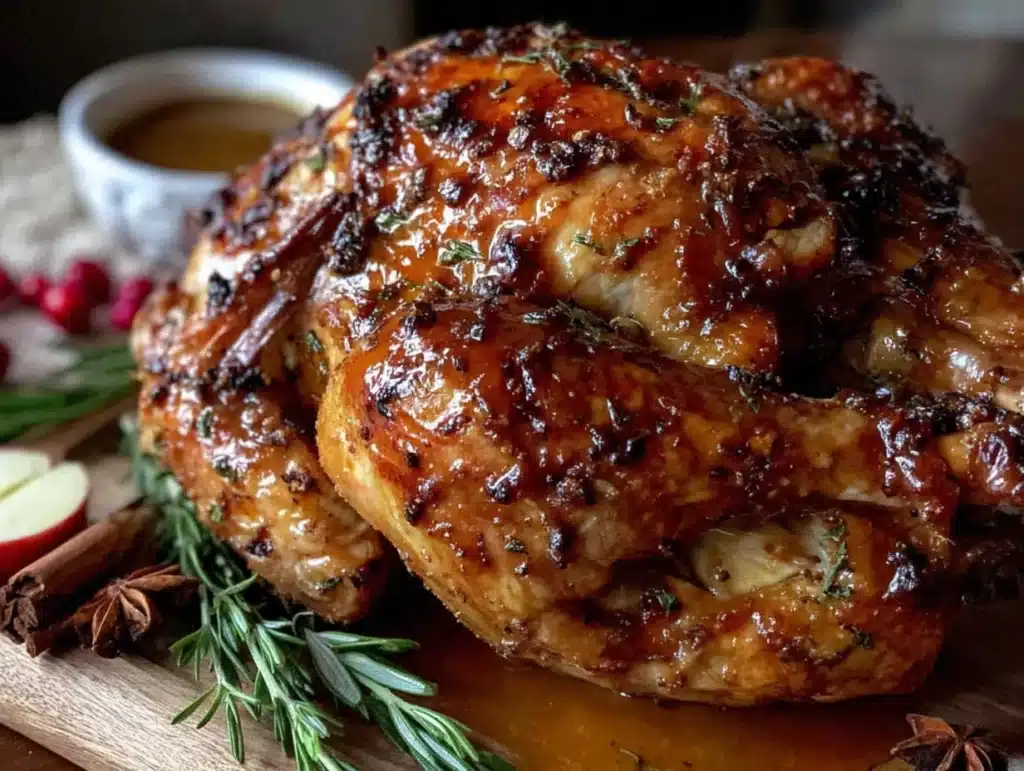
Jen wasn’t trying to impress anyone. I’d stopped by to borrow her turkey roaster—mine had developed a mysterious wobble the year before—and this incredible smell hit me before I even got past her screen door. It was November, sure, but not Thanksgiving week. Just a regular Tuesday. She was brining a turkey for no reason at all, or so she claimed. “It freezes beautifully,” she said with a shrug, wiping her hands on her jeans. “And honestly, it’s easier to do it when I’m not panicking about thirty people showing up.”
She let me peek into the pot, and I swear the liquid looked like liquid gold—pale amber, studded with cloves and cinnamon sticks, with apple cider making it smell like autumn had been distilled into a single pot. She was so casual about it. “It’s just apple cider brine,” she said, like it was no big deal. But I stood there, breathing it in, and I knew right then I’d never make turkey any other way. Maybe you’ve been there—you taste or smell something so perfect you can’t un-know it. That was this brine for me.
I asked her for the recipe, and she scribbled it on a scrap of paper she found in her junk drawer. The edges were stained with something—coffee, maybe—and I’ve kept that paper tucked into my favorite cookbook ever since. This easy apple cider turkey brine is the reason my Thanksgiving turkey actually gets compliments instead of just polite nods. It’s the reason people ask for seconds of white meat. And honestly, it’s so simple I almost feel guilty taking credit for it. Almost.
Why You’ll Love This Recipe
Look, I’ve tested a lot of brines over the years. Some are too salty. Some are too complicated. Some require ingredients you have to special-order from a spice shop you don’t even know exists. This one? It’s different. Here’s why you’ll love it:
- Incredibly Easy: You just simmer a few ingredients, cool it down, and pour it over your turkey. No fancy techniques. No all-day project. Just straightforward, foolproof results.
- Simple Ingredients: Apple cider, salt, brown sugar, and a handful of pantry spices. That’s it. You probably have most of this in your kitchen right now.
- Perfect for Thanksgiving: Whether you’re hosting a crowd or just making a turkey for a small family dinner, this brine delivers juicy, flavorful meat every single time.
- Crowd-Pleaser: I’ve served this turkey to picky eaters, turkey skeptics, and people who swear they only eat dark meat. Every single one of them went back for more.
- Unbelievably Delicious: The apple cider adds a subtle sweetness that doesn’t overpower the turkey. The spices add warmth without being aggressive. The salt does its magic, locking in moisture so every bite is tender and juicy.
This isn’t just another brine recipe. It’s the one I’ve made every year for the past six Thanksgivings. It’s the one my sister-in-law now requests by name. It’s the one that turns a dry, disappointing bird into the star of the table. And honestly, it’s so easy you’ll wonder why you ever bothered with anything else.
What Ingredients You Will Need
This recipe uses simple, wholesome ingredients to create a brine that’s both flavorful and effective. Most of these are pantry staples, which makes this recipe even more appealing when you’re already stressed about the big meal.
- Apple Cider (8 cups / 1.9 liters): This is the star of the show. Use real apple cider, not apple juice. Cider has more depth and a tangy-sweet flavor that really comes through in the finished turkey. I prefer store-bought cider from a local orchard, but any good-quality cider works.
- Kosher Salt (1 cup / 300 grams): Don’t use table salt here. Kosher salt dissolves cleanly and has the right texture for brining. I use Diamond Crystal brand because it’s less salty by volume, but any kosher salt works. If you’re using Morton’s, cut back to about 3/4 cup since it’s denser.
- Brown Sugar (1/2 cup / 100 grams, packed): Light or dark brown sugar both work. Dark brown sugar adds a slightly deeper molasses flavor, but light brown sugar is perfectly fine. The sugar balances the salt and helps with browning.
- Cinnamon Sticks (3-4 sticks): They infuse the brine with warm, cozy flavor. Don’t use ground cinnamon—it’ll make the brine cloudy and hard to strain. Whole sticks are easy to find and worth the small investment.
- Whole Cloves (1 tablespoon / 6 grams): These little guys pack a punch. They add that classic holiday spice flavor without being overwhelming. Again, use whole cloves, not ground.
- Star Anise (2-3 whole pods): This is optional but highly recommended. It adds a subtle licorice note that complements the apple cider beautifully. If you don’t have it, the brine will still be delicious.
- Black Peppercorns (1 tablespoon / 6 grams): Whole peppercorns add a gentle heat and complexity. Don’t skip these—they’re not just for show.
- Fresh Rosemary (3-4 sprigs): Rosemary and apple are a classic pairing. The herbaceous notes cut through the sweetness and add a savory element. If you only have dried, use 1 tablespoon.
- Fresh Thyme (5-6 sprigs): Thyme is subtle but essential. It adds an earthy undertone that ties everything together. Dried thyme works too—use 1 teaspoon.
- Whole Garlic Cloves (4-5 cloves, smashed): Garlic adds savory depth without being overpowering. Smash them with the flat side of your knife to release their oils.
- Cold Water (8 cups / 1.9 liters): You’ll use this to dilute the brine after it cools. Ice water works even better because it speeds up the cooling process.
Equipment Needed
You don’t need anything fancy for this brine, which is part of its beauty. Here’s what you’ll need:
- Large Stockpot (at least 8 quarts / 7.5 liters): You’ll use this to simmer the brine ingredients. I use my trusty enameled cast iron pot, but any large pot works.
- Brine Container (a 5-gallon food-grade bucket or a large brining bag): You need something big enough to hold your turkey and the brine. I prefer brining bags because they take up less space in the fridge and are easy to dispose of. If you use a bucket, make sure it’s food-grade—never use a bucket that’s held chemicals.
- Measuring Cups and Spoons: Accurate measurements matter in brining, especially with salt.
- Sharp Knife and Cutting Board: For smashing garlic and prepping any aromatics.
- Colander or Fine-Mesh Strainer: You’ll strain the brine after simmering to remove the solids. A fine-mesh strainer works best.
- Large Bowl or Pitcher: For mixing the cooled brine with cold water.
- Refrigerator Space: This is the most overlooked piece of equipment. Clear a shelf in your fridge before you start brining. Trust me on this.
Preparation Method
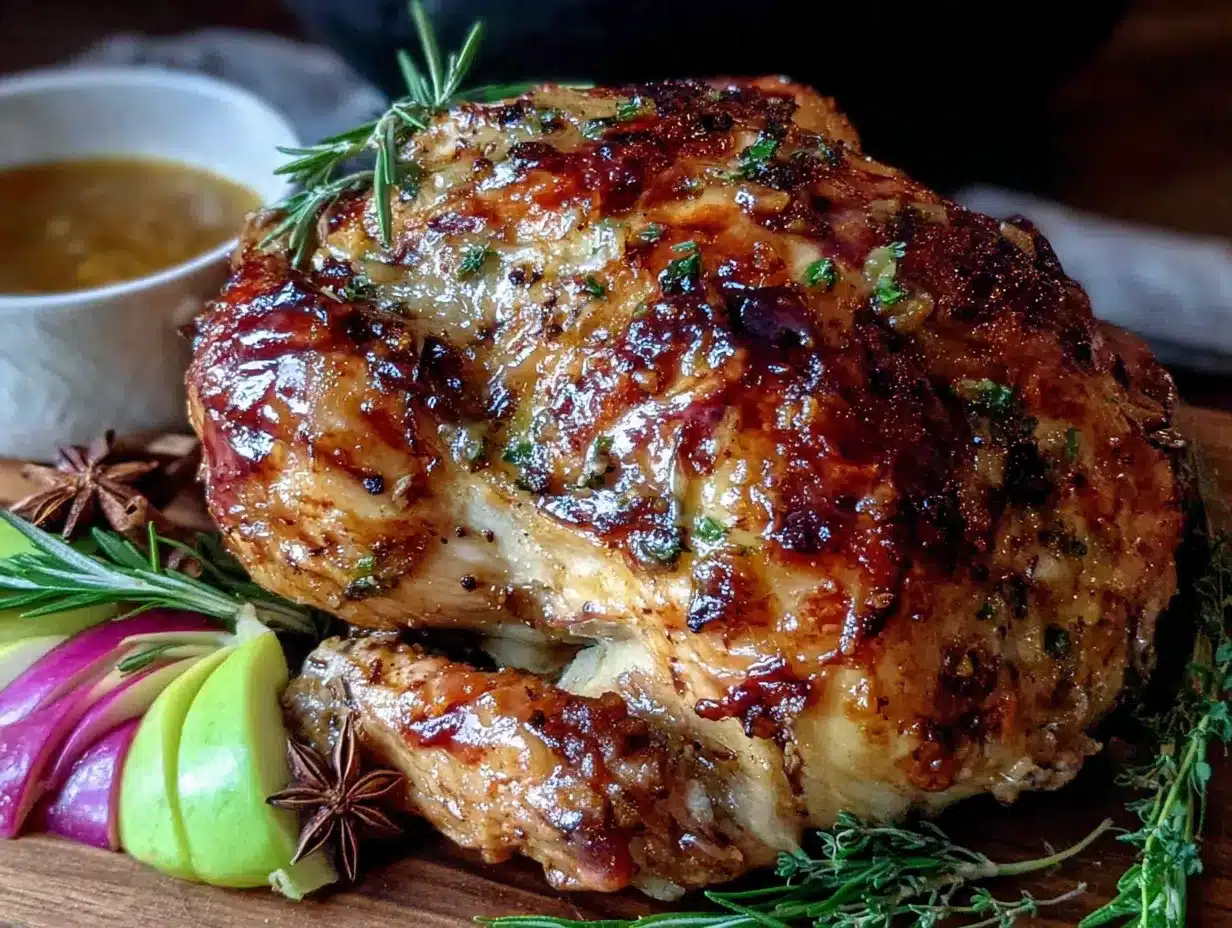
- Combine the brine ingredients: In your large stockpot, combine the apple cider, kosher salt, brown sugar, cinnamon sticks, whole cloves, star anise, black peppercorns, fresh rosemary, fresh thyme, and smashed garlic cloves. Give everything a good stir to start dissolving the salt and sugar.
- Bring to a simmer: Place the pot over medium-high heat and bring the mixture to a gentle simmer. Don’t let it boil vigorously—you just want to see small bubbles breaking the surface. This usually takes about 8-10 minutes. Stir occasionally to help the salt and sugar dissolve completely.
- Simmer for 10 minutes: Once it’s simmering, reduce the heat to medium-low and let it cook for 10 minutes. This gives the spices time to infuse their flavors into the liquid. Your kitchen will start smelling incredible at this point—like a holiday candle, but better.
- Remove from heat and cool: Take the pot off the heat and let it cool to room temperature. This is crucial—if you pour hot brine over your turkey, you’ll start cooking the meat and potentially create food safety issues. I usually let it cool for about 45 minutes to an hour. If you’re in a hurry, you can set the pot in an ice bath to speed things up.
- Strain the brine: Once the brine has cooled, pour it through a fine-mesh strainer or colander into a large bowl or pitcher. Discard the solids (cinnamon sticks, cloves, herbs, etc.). You want a clear, aromatic liquid at this point.
- Add the cold water: Stir in the 8 cups of cold water (or ice water) to dilute the brine. This brings the salt concentration to the right level and helps cool it down further if needed. The brine should be completely cool before you add the turkey.
- Prepare your turkey: Remove your turkey from its packaging. Remove the giblets and neck from the cavities (save them for gravy if you like). Rinse the turkey inside and out with cold water, then pat it dry with paper towels.
- Brine the turkey: Place your turkey in your brining bag or food-grade bucket. Pour the cooled brine over the turkey, making sure it’s completely submerged. If you’re using a bag, squeeze out as much air as possible before sealing. If you’re using a bucket, place a plate or heavy bowl on top of the turkey to keep it submerged.
- Refrigerate for 12-24 hours: Place the brining turkey in the refrigerator. I find that 16-18 hours is the sweet spot—long enough for the brine to work its magic, but not so long that the meat becomes overly salty. If you’re short on time, 12 hours will still give you great results. Don’t go over 24 hours.
- Remove and rinse: When you’re ready to cook, remove the turkey from the brine. Discard the brine. Rinse the turkey thoroughly inside and out with cold water to remove excess salt from the surface. Pat it dry with paper towels—getting the skin as dry as possible is key for crispy skin.
- Proceed with your favorite roasting recipe: Your turkey is now ready to roast. I usually let it sit uncovered in the fridge for an hour or two after rinsing to let the skin dry out even more. Then I rub it with softened butter, season it lightly with salt and pepper, and roast it according to my usual method.
Cooking Tips & Techniques
I’ve made this brine enough times to learn a few things the hard way. Let me save you some trouble.
Don’t skip the rinsing step. I know it seems counterintuitive—you just spent all that time brining, and now you’re washing it off? But trust me, if you don’t rinse the turkey, it’ll be so salty it’s almost inedible. I learned this the first time I made it. My guests were polite, but I saw them reaching for their water glasses a lot.
Temperature matters more than time. The brine works faster at room temperature, but you should never brine a turkey at room temperature for food safety reasons. Always keep it in the fridge. If your fridge is crowded (and whose isn’t at Thanksgiving?), make sure the brine has room to circulate around the turkey.
Patience with the drying step. After rinsing, let the turkey sit uncovered in the fridge for at least an hour, ideally two. This dries out the skin, which means it’ll crisp up beautifully in the oven. I know you’re busy, but this step is worth the wait.
Scale the recipe for smaller birds. If you’re brining a smaller turkey (under 12 pounds), you can halve the recipe. If you’re brining a larger bird (over 20 pounds), increase it by half. The ratio of salt to liquid stays the same, so you just need enough brine to cover the turkey.
Don’t brine a pre-basted turkey. If your turkey says “kosher,” “self-basting,” “injected with broth,” or anything like that on the label, skip the brine. These turkeys are already seasoned, and brining them will result in a salt bomb. Look for a natural, fresh turkey for best results.
Make it ahead. The brine itself can be made up to three days in advance. Just cool it completely, strain it, and store it in the fridge in a sealed container. This is a huge time-saver on Thanksgiving morning when you’re already juggling a dozen other tasks.
Variations & Adaptations
This brine is flexible, and I’ve experimented with several variations over the years. Here are a few of my favorites:
- Maple Apple Cider Brine: Replace the brown sugar with 1/2 cup of pure maple syrup. The maple flavor pairs beautifully with the apple cider and adds a slightly different sweetness. I tried this last year, and my brother-in-law said it was the best turkey he’d ever had.
- Spicy Apple Cider Brine: Add 2-3 dried chipotle peppers or 1 tablespoon of red pepper flakes to the simmering brine. The heat is subtle—it won’t make your turkey spicy, but it adds a warmth that lingers in the background. This is great if you’re serving a crowd that likes a little kick.
- Citrus Apple Cider Brine: Add the zest and juice of 2 oranges and 2 lemons to the brine. The citrus brightens everything up and cuts through the richness of the dark meat. I make this version when I’m serving a lighter meal with lots of fresh sides.
- Herb-Forward Brine: Double the rosemary and thyme, and add 4-5 fresh sage leaves. This makes the brine more savory and herbaceous, which is perfect if you’re serving a more traditional Thanksgiving spread.
- Butterfly the turkey: If you’re really short on time, consider spatchcocking (butterflying) your turkey before brining. It’ll brine faster (8-10 hours is plenty) and cook more evenly. Plus, you get that gorgeous crispy skin all over.
Serving & Storage Suggestions
This turkey is best served fresh from the oven, but let it rest for at least 20-30 minutes before carving. Tent it loosely with foil to keep it warm while it rests. The resting time lets the juices redistribute, so every slice is moist and tender.
I love serving this turkey with classic sides like garlic mashed potatoes, green bean casserole, and my homemade cranberry sauce. The apple cider notes in the turkey pair especially well with roasted root vegetables like carrots, parsnips, and sweet potatoes.
For leftovers (if you have any), store the carved turkey in an airtight container in the refrigerator for up to 4 days. The meat stays moist thanks to the brine, so it’s perfect for sandwiches, salads, and soups. I love making a turkey and wild rice soup with the leftovers—it’s become a post-Thanksgiving tradition in my house.
You can also freeze the cooked turkey for up to 3 months. Slice it or shred it first, then pack it in freezer-safe bags with as much air removed as possible. Thaw in the refrigerator overnight before using.
For reheating, I prefer to warm leftover turkey gently in a covered dish with a splash of chicken broth at 300°F for about 15-20 minutes. This keeps it from drying out. You can also reheat individual portions in the microwave, but add a damp paper towel over the top to add moisture.
Nutritional Information & Benefits
While the brine itself isn’t consumed, it does affect the final nutritional profile of your turkey. The brining process helps the meat retain moisture, which means you’re less likely to need added fats or oils during cooking. Plus, since the brine seasons the meat from the inside out, you can use less salt in your rub or seasoning.
Turkey is naturally a lean protein source, rich in B vitamins, selenium, and phosphorus. A 3-ounce serving of roasted turkey breast contains about 125 calories, 25 grams of protein, and only 2 grams of fat. The apple cider brine adds minimal calories but infuses the meat with flavor without adding significant sugar or fat.
For those watching their sodium intake, this brine does use a fair amount of salt, but remember that most of it gets rinsed off and discarded. The final turkey will be slightly higher in sodium than an unbrined bird, but the difference is modest—about 50-100 mg more per serving.
This recipe is naturally gluten-free and dairy-free. If you’re cooking for someone with celiac disease, just double-check your spice labels to ensure they’re certified gluten-free.
Conclusion
This easy apple cider turkey brine has completely changed how I approach Thanksgiving. It turns a potentially stressful, high-stakes cooking project into something I actually look forward to. The brine does the heavy lifting, and I get to relax and enjoy the day.
I love that this recipe came from a casual Tuesday afternoon at Jen’s house—no pressure, no performance, just good food made with care. That’s the kind of cooking I want to share with you. It’s not about being perfect. It’s about making something delicious that brings people together.
I’d love to hear how this brine works for you! Drop a comment below and let me know if you tried any variations, or share your own turkey tips. And if you’re looking for more holiday inspiration, check out my easy Thanksgiving side dishes or my make-ahead gravy recipe to complete your menu. Happy cooking, friends!
Frequently Asked Questions
Can I brine a frozen turkey?
No, you need to fully thaw your turkey before brining. A frozen turkey won’t absorb the brine properly, and it’s a food safety risk. Plan ahead—a 12-14 pound turkey takes about 3-4 days to thaw in the refrigerator.
How long should I brine my turkey?
I recommend 12-24 hours. 16-18 hours is the sweet spot for most turkeys. If you brine for less than 12 hours, you won’t get the full benefit. If you go over 24 hours, the meat can become too salty and develop a mushy texture.
Can I reuse the brine?
Absolutely not. Once the brine has been in contact with raw turkey, it’s contaminated with bacteria. Discard it immediately after use. If you want to make a second batch, start fresh with new ingredients.
Do I need to rinse the turkey after brining?
Yes, this is essential. Rinse the turkey thoroughly under cold water to remove excess salt from the surface. Then pat it dry with paper towels. If you skip this step, your turkey will be unpleasantly salty.
Can I use this brine for chicken?
Yes! This brine works beautifully on chicken too. For a whole chicken, brine for 8-12 hours. For chicken parts, 4-6 hours is plenty. The apple cider flavor is especially nice with roasted chicken for a fall-inspired dinner.
Pin This Recipe!

Easy Apple Cider Turkey Brine for the Juiciest Turkey
This easy apple cider turkey brine delivers juicy, flavorful meat every single time. Made with simple ingredients like apple cider, salt, brown sugar, and pantry spices, it’s the secret to a perfect Thanksgiving turkey that gets compliments instead of polite nods.
- Total Time: 1 hour 10 minutes (plus 12-24 hours brining time)
- Yield: Enough for 1 turkey (12-14 pounds) 1x
Ingredients
- 8 cups (1.9 liters) apple cider
- 1 cup (300 grams) kosher salt (use 3/4 cup if using Morton’s brand)
- 1/2 cup (100 grams, packed) brown sugar (light or dark)
- 3–4 cinnamon sticks
- 1 tablespoon (6 grams) whole cloves
- 2–3 whole star anise pods (optional)
- 1 tablespoon (6 grams) black peppercorns
- 3–4 sprigs fresh rosemary (or 1 tablespoon dried)
- 5–6 sprigs fresh thyme (or 1 teaspoon dried)
- 4–5 whole garlic cloves, smashed
- 8 cups (1.9 liters) cold water (or ice water)
Instructions
- In a large stockpot, combine apple cider, kosher salt, brown sugar, cinnamon sticks, whole cloves, star anise, black peppercorns, fresh rosemary, fresh thyme, and smashed garlic cloves. Stir to start dissolving the salt and sugar.
- Place the pot over medium-high heat and bring the mixture to a gentle simmer (small bubbles breaking the surface). Do not let it boil vigorously. This takes about 8-10 minutes. Stir occasionally.
- Reduce heat to medium-low and simmer for 10 minutes to infuse the spices.
- Remove from heat and let cool to room temperature (about 45 minutes to 1 hour). To speed up cooling, place the pot in an ice bath.
- Pour the cooled brine through a fine-mesh strainer or colander into a large bowl or pitcher. Discard the solids (cinnamon sticks, cloves, herbs, etc.).
- Stir in the 8 cups of cold water (or ice water) to dilute the brine. Ensure the brine is completely cool before adding the turkey.
- Remove the turkey from its packaging. Remove giblets and neck from cavities. Rinse the turkey inside and out with cold water, then pat dry with paper towels.
- Place the turkey in a brining bag or food-grade bucket. Pour the cooled brine over the turkey, ensuring it is completely submerged. If using a bag, squeeze out as much air as possible before sealing. If using a bucket, place a plate or heavy bowl on top to keep the turkey submerged.
- Refrigerate for 12-24 hours (16-18 hours is ideal). Do not exceed 24 hours.
- When ready to cook, remove the turkey from the brine and discard the brine. Rinse the turkey thoroughly inside and out with cold water to remove excess salt. Pat dry with paper towels.
- For best results, let the turkey sit uncovered in the refrigerator for 1-2 hours after rinsing to dry the skin. Then proceed with your favorite roasting recipe.
Notes
Do not brine a pre-basted, kosher, or self-basting turkey as they are already seasoned. The brine can be made up to 3 days in advance and stored in the refrigerator. For smaller turkeys (under 12 pounds), halve the recipe; for larger turkeys (over 20 pounds), increase by half. Always rinse the turkey thoroughly after brining to avoid excessive saltiness. Let the turkey rest for 20-30 minutes before carving.
- Prep Time: 15 minutes
- Cook Time: 10 minutes
- Category: Main Course
- Cuisine: American
Nutrition
- Serving Size: 3 ounces roasted tur
- Calories: 125
- Sodium: 200250
- Fat: 2
- Saturated Fat: 0.5
- Protein: 25
Keywords: apple cider turkey brine, turkey brine, Thanksgiving brine, juicy turkey, apple cider brine, holiday turkey brine