

I was standing in the checkout line at the hardware store last Tuesday when the smell hit me — that unmistakable mix of fried onions and warm cream. It was coming from a woman unloading her cart two spots ahead, a bag of those crispy onions from a can peeking out of her reusable tote. And just like that, I was nine years old again, sitting at my Aunt Margie’s tiny kitchen table in her apartment above the laundromat. She was pulling a glass dish out of the oven, the top bubbling and golden, and I remember thinking it looked like a treasure map. She didn’t use any fancy shortcuts. Her green bean casserole came from a real place of resourcefulness. I mean, she was feeding three kids on a part-time cashier’s salary. She couldn’t afford canned soup, honestly, so she just made her own cream sauce from what she had. I remember she spilled a little milk on the stovetop and cursed under her breath, laughing. That moment, that little imperfection, is what I associate with this dish. It wasn’t about being fancy. It was about making something comforting out of what you’ve got. Maybe you’ve been there — standing in a random place, hit by a scent, and suddenly you’re chasing a memory you can almost touch. That’s why I spent the last three years perfecting my own creamy homemade green bean casserole without a single can of soup. This is my attempt to bottle that feeling.
Why You’ll Love This Recipe
Let’s face it — the classic green bean casserole has a reputation for being a little, well, gloppy. The kind where the green beans get mushy and everything tastes like salty, canned sadness. This recipe is the opposite. It’s the version that makes people lean in and ask, “Wait, what’s in this?”
Here’s what makes it stand out:
- No Canned Soup, No Problem — We’re building the cream sauce from scratch using simple pantry staples. It’s richer, smoother, and doesn’t have that weird metallic aftertaste.
- Perfectly Tender Beans — Blanching the fresh green beans first keeps them crisp-tender. No more mushy mess.
- Budget-Friendly Ingredients — Everything you need is probably already in your fridge or pantry. Milk, butter, flour, and fresh green beans are all affordable staples.
- Family-Approved, Picky Eater Tested — My own kids, who usually push green beans to the edge of their plate, actually asked for seconds. Twice.
- Make-Ahead Magic — You can assemble this casserole the night before and just pop it in the oven when you’re ready. Perfect for busy holidays or a Tuesday night dinner.
This isn’t just another side dish. It’s the kind of creamy, savory comfort that makes you close your eyes after the first bite. It’s reimagined — richer, fresher, and faster than the original — but with the same soul-soothing satisfaction. Whether you’re hosting Thanksgiving or just trying to get a decent vegetable on the table for a weeknight meal, this recipe delivers.
What Ingredients You Will Need
This recipe uses simple, wholesome ingredients to deliver bold flavor and satisfying texture without the fuss. Most of these are pantry staples or easy to find at your local grocery store.
For the Cream Sauce (The Heart of the Dish)
- 3 tablespoons unsalted butter (adds richness; I prefer Kerrygold for its creamy flavor)
- 3 tablespoons all-purpose flour (creates the roux base; you can use gluten-free flour blend if needed)
- 1 ½ cups whole milk (room temperature works best to avoid lumps; 2% also works fine)
- ½ cup heavy cream (adds extra velvety texture; you can substitute with half-and-half)
- ½ teaspoon salt (plus more to taste)
- ¼ teaspoon black pepper (freshly ground is best)
- ¼ teaspoon garlic powder (not garlic salt — we want the flavor without extra sodium)
- ⅛ teaspoon nutmeg (trust me on this — it brightens the whole sauce)
For the Green Beans
- 1 ½ pounds fresh green beans (look for bright, firm beans without brown spots; trim the ends and cut into 2-inch pieces)
- 1 tablespoon salt (for the blanching water)
For the Topping
- 1 ½ cups crispy fried onions (store-bought is fine; I use French’s for that classic crunch)
- ½ cup panko breadcrumbs (adds extra texture; use gluten-free panko if needed)
- 2 tablespoons unsalted butter (melted, for tossing with the breadcrumbs)
- ¼ cup shredded Parmesan cheese (optional but amazing — adds a salty, nutty layer)
Ingredient Selection Tips
When choosing green beans, go for the thinner ones — they’re more tender and cook faster. If you’re using frozen green beans, thaw them completely and pat them dry before blanching to avoid watering down the sauce. For the milk, whole milk really does make a difference here. The fat content helps the sauce stay smooth and prevents it from breaking in the oven.
Substitution Guidance
- Dairy-Free: Use unsalted plant-based butter and oat milk (it’s creamier than almond milk). The sauce will be a little thinner but still delicious.
- Gluten-Free: Swap the all-purpose flour with a 1:1 gluten-free flour blend and use gluten-free panko.
- Lower Fat: Use 2% milk and skip the heavy cream. The sauce won’t be as luxurious, but it’ll still taste great.
Equipment Needed
You don’t need a fancy kitchen to pull this off. Here’s what you’ll need:
- Large pot (for blanching the green beans)
- Large bowl of ice water (to shock the beans and stop the cooking)
- Medium saucepan (for making the cream sauce)
- Whisk (a good one helps prevent lumps; I’ve used a cheap one for years and it works fine)
- 9×13-inch baking dish (a 2-quart casserole dish also works)
- Mixing bowls (one for the topping, one for combining)
- Sharp knife and cutting board (for trimming the beans)
- Slotted spoon or spider strainer (for lifting beans out of the boiling water)
If you don’t have a whisk, a fork will work in a pinch — just be prepared to work a little harder. For the baking dish, glass or ceramic is ideal because they heat evenly. A metal pan can work, but watch the cooking time as it may cook faster.
Preparation Method
Let’s get cooking. This recipe takes about 45 minutes from start to finish, with about 20 minutes of active prep time.
Step 1: Prepare the Green Beans
- Fill a large pot with water and add 1 tablespoon of salt. Bring it to a rolling boil.
- While the water heats, wash the green beans and trim off the stem ends. Cut them into 2-inch pieces. (Pro tip: line up a handful of beans and cut them all at once — saves time.)
- Prepare a large bowl of ice water and set it nearby.
- Drop the green beans into the boiling water and cook for exactly 3 minutes. They should turn bright green and be slightly tender but still have a crunch.
- Using a slotted spoon, immediately transfer the beans to the ice water bath. This stops the cooking and locks in that beautiful color. Let them sit for 3 minutes, then drain well. Pat them dry with a clean kitchen towel. (Wet beans = watery casserole, so don’t skip this step.)
Step 2: Make the Cream Sauce
- In a medium saucepan, melt 3 tablespoons of butter over medium heat.
- Once the butter is melted and bubbling, whisk in the 3 tablespoons of flour. Cook for 1-2 minutes, stirring constantly, until the mixture turns a pale golden color and smells slightly nutty. This is your roux.
- Slowly pour in the milk while whisking constantly. Keep whisking to prevent lumps. The sauce will thicken after about 3-4 minutes.
- Pour in the heavy cream and continue whisking until the sauce is smooth and thick enough to coat the back of a spoon, about 2 more minutes.
- Remove from heat and stir in the salt, pepper, garlic powder, and nutmeg. Taste and adjust seasoning. (I always add a tiny pinch more salt here — it makes a difference.)
Step 3: Assemble the Casserole
- Preheat your oven to 375°F (190°C).
- In a large mixing bowl, combine the blanched green beans and the cream sauce. Gently stir until every bean is coated.
- Pour the mixture into a greased 9×13-inch baking dish and spread it into an even layer.
Step 4: Make the Topping
- In a small bowl, combine the crispy fried onions and panko breadcrumbs.
- Pour the melted butter over the mixture and toss until everything is evenly coated.
- If using, sprinkle the Parmesan cheese over the topping and toss again.
- Sprinkle the topping evenly over the green bean mixture.
Step 5: Bake
- Place the casserole in the preheated oven and bake for 20-25 minutes, until the sauce is bubbly around the edges and the topping is deep golden brown.
- If the topping is browning too quickly (around the 15-minute mark), loosely tent the dish with foil for the remaining time.
- Let the casserole rest for 5 minutes before serving. This allows the sauce to set slightly so it doesn’t run all over the plate.
Cooking Tips & Techniques
I’ve made this casserole about a dozen times to get it right, and I’ve made plenty of mistakes along the way. Here’s what I learned:
The Blanching Mistake
The first time I made this, I skipped the ice water bath. The beans kept cooking from the residual heat and ended up soft and sad. Don’t be like me. That ice bath is non-negotiable for crisp-tender beans.
The Lumpy Sauce Problem
If your sauce turns out lumpy, don’t panic. Pour it through a fine-mesh strainer into a clean bowl. It’ll be smooth as silk. Also, make sure your milk is at room temperature — cold milk hitting a hot roux is a recipe for lumps.
Timing and Multitasking
While the beans are blanching, you can start making the sauce. Just keep an eye on the beans — 3 minutes goes fast. I like to set a timer for both tasks so I don’t forget one while focusing on the other.
The Topping Trick
For an extra crunchy topping, I sometimes broil the casserole for the last 2 minutes. Watch it like a hawk — it can go from golden to burnt in seconds. I learned that the hard way. Let’s just say my smoke detector is very sensitive.
Consistency Tip
The sauce will seem a little thin when you pour it into the baking dish. Don’t worry. It will thicken beautifully in the oven as it bakes and the starch from the flour continues to absorb liquid.
Variations & Adaptations
This recipe is a great base, but don’t be afraid to make it your own. Here are some variations I’ve tried and loved:
Mushroom Lover’s Version
Sauté 8 ounces of sliced cremini mushrooms in 1 tablespoon of butter until golden, then stir them into the cream sauce before adding the green beans. It adds an earthy depth that’s absolutely incredible.
Southern Style
Add ½ cup of cooked, crumbled bacon and ½ cup of shredded sharp cheddar cheese to the sauce. Top with extra cheese and the crispy onions. It’s indulgent, but honestly, it’s worth every calorie.
Dairy-Free Adaptation
Use unsalted plant-based butter and oat milk for the sauce. I’ve tested this with oat milk and it works surprisingly well — the sauce is slightly thinner but still creamy. Use dairy-free shredded cheese for the topping if desired.
Seasonal Twist
In the summer, swap half the green beans for fresh asparagus cut into 2-inch pieces. Blanch the asparagus for only 2 minutes. It adds a lovely, grassy flavor that pairs well with the creamy sauce.
Spicy Kick
Add ¼ teaspoon of cayenne pepper or a pinch of red pepper flakes to the sauce. It doesn’t make the dish spicy — just adds a subtle warmth that wakes up the flavors.
Serving & Storage Suggestions
This casserole is best served warm, right out of the oven, when the topping is still crispy and the sauce is bubbling. Let it rest for 5 minutes before serving to let the sauce set.
What to Serve With It
This green bean casserole is a natural side for roasted turkey, baked ham, or even a simple roast chicken. For a vegetarian meal, pair it with a grain like wild rice or quinoa and a side of crusty bread. It also goes beautifully with our creamy mashed potatoes for the ultimate comfort food plate.
Storage Instructions
Store leftovers in an airtight container in the refrigerator for up to 4 days. The topping will lose its crunch, but the flavor will still be delicious.
Reheating Methods
- Oven: Reheat in a 350°F oven for 10-15 minutes, covered with foil. Remove the foil for the last 5 minutes to crisp up the top.
- Microwave: Quick and easy, but the topping will be soft. Heat individual portions for 1-2 minutes.
- Air Fryer: Reheat at 350°F for 5-7 minutes for a surprisingly crispy topping.
Freezing
You can freeze the assembled (but unbaked) casserole for up to 3 months. Assemble in a freezer-safe dish, cover tightly with foil, and freeze. To bake, thaw overnight in the refrigerator, then bake as directed, adding 10-15 minutes to the cooking time. The texture of the cream sauce remains excellent after freezing.
Nutritional Information & Benefits
Here’s the estimated nutritional breakdown per serving (based on 8 servings):
| Nutrient | Amount Per Serving |
|---|---|
| Calories | 245 |
| Total Fat | 16g |
| Saturated Fat | 9g |
| Cholesterol | 45mg |
| Sodium | 380mg |
| Total Carbohydrates | 20g |
| Dietary Fiber | 3g |
| Sugars | 6g |
| Protein | 6g |
Green beans are a fantastic source of vitamin K, vitamin C, and fiber. They’re also low in calories, which makes this creamy dish a little easier to justify. Using homemade cream sauce instead of canned soup reduces the sodium content significantly and eliminates preservatives. If you’re watching your saturated fat intake, you can use 2% milk and skip the heavy cream — the sauce will still be delicious.
Conclusion
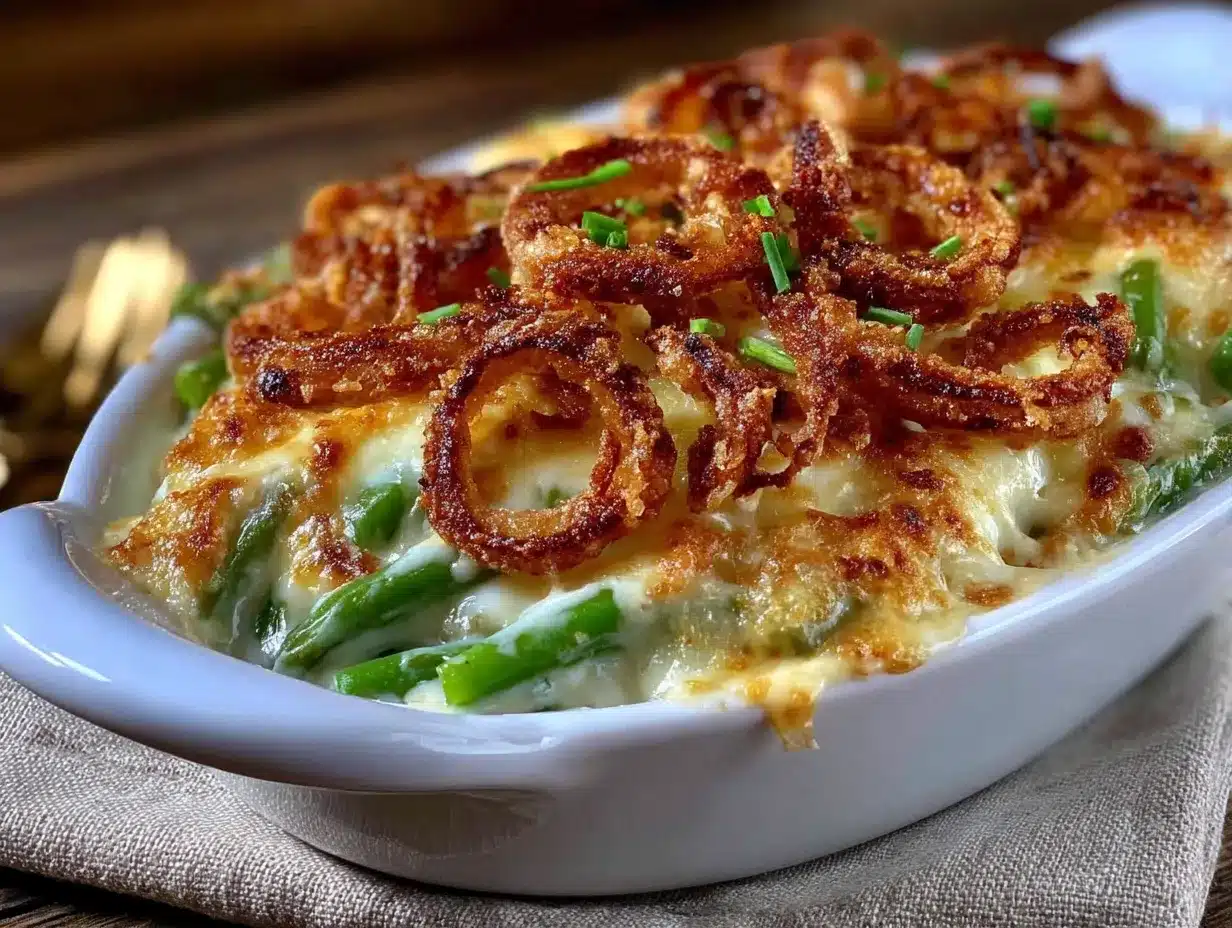
This creamy homemade green bean casserole is proof that you don’t need canned soup to make something incredible. It’s simple enough for a Tuesday night but special enough for your holiday table. The fresh green beans stay crisp-tender, the homemade sauce is velvety and rich, and that crispy topping? It’s the stuff dreams are made of.
I love this recipe because it reminds me that the best cooking comes from resourcefulness, not perfection. Aunt Margie didn’t have a fancy kitchen or expensive ingredients — she just had a willingness to make something good out of what she had. And honestly, that’s all any of us need.
I’d love to hear how this turns out for you. Did you add any twists? Did your picky eater actually eat their green beans? Drop a comment below and let me know. And if you’re looking for more no-fuss, family-friendly recipes, check out our easy weeknight dinners collection — it’s full of meals that won’t break the bank or your sanity.
Happy cooking, friends. You’ve got this.
Frequently Asked Questions
Can I use frozen green beans instead of fresh?
Yes, you can. Thaw them completely and pat them dry with a paper towel to remove excess moisture. Blanch them for 2 minutes instead of 3 since they’re already partially cooked. The texture won’t be quite as crisp as fresh, but it’ll still be good.
Why is my cream sauce lumpy?
Lumpy sauce usually happens when the milk is too cold when added to the hot roux, or when you don’t whisk constantly. To fix it, pour the sauce through a fine-mesh strainer into a clean bowl. Next time, make sure your milk is at room temperature and whisk like your life depends on it.
Can I make this casserole ahead of time?
Absolutely. Assemble the casserole completely (including the topping) up to 24 hours in advance. Cover and refrigerate. When ready to bake, add about 10 minutes to the baking time since you’re starting from cold. If the topping starts browning too fast, tent with foil.
How do I make the topping extra crispy?
For max crunch, broil the casserole for the last 2-3 minutes of baking. Keep a close eye on it — it can burn quickly. You can also add an extra handful of crispy fried onions on top halfway through baking for double the crunch.
Can I use a different type of milk?
Yes. Whole milk gives the creamiest results, but 2% works well too. For a dairy-free option, oat milk is your best bet — it’s creamier than almond milk and doesn’t separate when heated. Avoid skim milk as it can make the sauce watery.
Pin This Recipe!


Creamy Green Bean Casserole: The Best Homemade No-Soup Recipe
This creamy homemade green bean casserole is made without canned soup, using fresh green beans and a rich, velvety cream sauce. It’s simple enough for a weeknight but special enough for your holiday table.
- Total Time: 45 minutes
- Yield: 8 servings 1x
Ingredients
- 3 tablespoons unsalted butter
- 3 tablespoons all-purpose flour
- 1 ½ cups whole milk, room temperature
- ½ cup heavy cream
- ½ teaspoon salt
- ¼ teaspoon black pepper, freshly ground
- ¼ teaspoon garlic powder
- ⅛ teaspoon nutmeg
- 1 ½ pounds fresh green beans, trimmed and cut into 2-inch pieces
- 1 tablespoon salt (for blanching water)
- 1 ½ cups crispy fried onions
- ½ cup panko breadcrumbs
- 2 tablespoons unsalted butter, melted
- ¼ cup shredded Parmesan cheese (optional)
Instructions
- Fill a large pot with water and add 1 tablespoon of salt. Bring to a rolling boil.
- While water heats, wash green beans, trim stem ends, and cut into 2-inch pieces.
- Prepare a large bowl of ice water and set aside.
- Drop green beans into boiling water and cook for exactly 3 minutes until bright green and crisp-tender.
- Using a slotted spoon, immediately transfer beans to ice water bath. Let sit for 3 minutes, then drain well and pat dry.
- In a medium saucepan, melt 3 tablespoons butter over medium heat.
- Whisk in 3 tablespoons flour and cook for 1-2 minutes, stirring constantly, until pale golden and nutty.
- Slowly pour in milk while whisking constantly. Cook for 3-4 minutes until thickened.
- Pour in heavy cream and whisk until smooth and thick enough to coat the back of a spoon, about 2 minutes.
- Remove from heat and stir in salt, pepper, garlic powder, and nutmeg. Adjust seasoning to taste.
- Preheat oven to 375°F (190°C).
- In a large mixing bowl, combine blanched green beans and cream sauce. Stir until well coated.
- Pour mixture into a greased 9×13-inch baking dish and spread evenly.
- In a small bowl, combine crispy fried onions and panko breadcrumbs.
- Pour melted butter over topping mixture and toss until evenly coated. If using, add Parmesan cheese and toss again.
- Sprinkle topping evenly over green bean mixture.
- Bake for 20-25 minutes until sauce is bubbly and topping is deep golden brown. If browning too quickly, tent with foil after 15 minutes.
- Let casserole rest for 5 minutes before serving.
Notes
For extra crunchy topping, broil the casserole for the last 2 minutes, watching carefully to avoid burning. The sauce will seem thin before baking but thickens in the oven. To make ahead, assemble completely (including topping) up to 24 hours in advance, refrigerate, and add 10 minutes to baking time.
- Prep Time: 20 minutes
- Cook Time: 25 minutes
- Category: Side Dish
- Cuisine: American
Nutrition
- Serving Size: 1 serving (1/8 of ca
- Calories: 245
- Sugar: 6
- Sodium: 380
- Fat: 16
- Saturated Fat: 9
- Carbohydrates: 20
- Fiber: 3
- Protein: 6
Keywords: green bean casserole, homemade, no soup, creamy, Thanksgiving, side dish, comfort food