
Do you ever dream of a dessert that combines the rich, velvety flavor of chocolate with the creamy, nutty goodness of peanut butter? If your answer is a resounding “YES,” then this Decadent Peanut Butter Chocolate Bliss Cake is about to make your dreams come true. This recipe is a celebration of indulgence—perfect for birthdays, holidays, or any occasion that calls for a slice of pure bliss. Trust me, you’ll want to bookmark this one!
When I first made this cake, I couldn’t believe how well the flavors complemented each other. The moist chocolate layers paired with the luscious peanut butter frosting felt like a match made in dessert heaven. Whether you’re a chocoholic, a peanut butter fanatic, or both, this cake is the ultimate homemade treat you’ve been searching for.
The Story Behind Peanut Butter Chocolate Bliss Cake
The combination of peanut butter and chocolate has a long history, tracing back to the early 20th century when peanut butter became a staple in American households. It didn’t take long for inventive bakers to pair it with chocolate, creating iconic treats like peanut butter cups. This cake takes that classic pairing to the next level, blending rich chocolate with the creamy sweetness of peanut butter frosting.
I remember the first time I made this cake for a family gathering. It was during the holiday season, and I wanted to create something memorable. Watching everyone’s faces light up as they took their first bite was one of those priceless moments I’ll never forget. Over time, I’ve tweaked and perfected the recipe, making it ideal for both beginners and seasoned home bakers. And honestly, it’s perfect year-round—whether you’re cozying up in winter or hosting a summer barbecue.
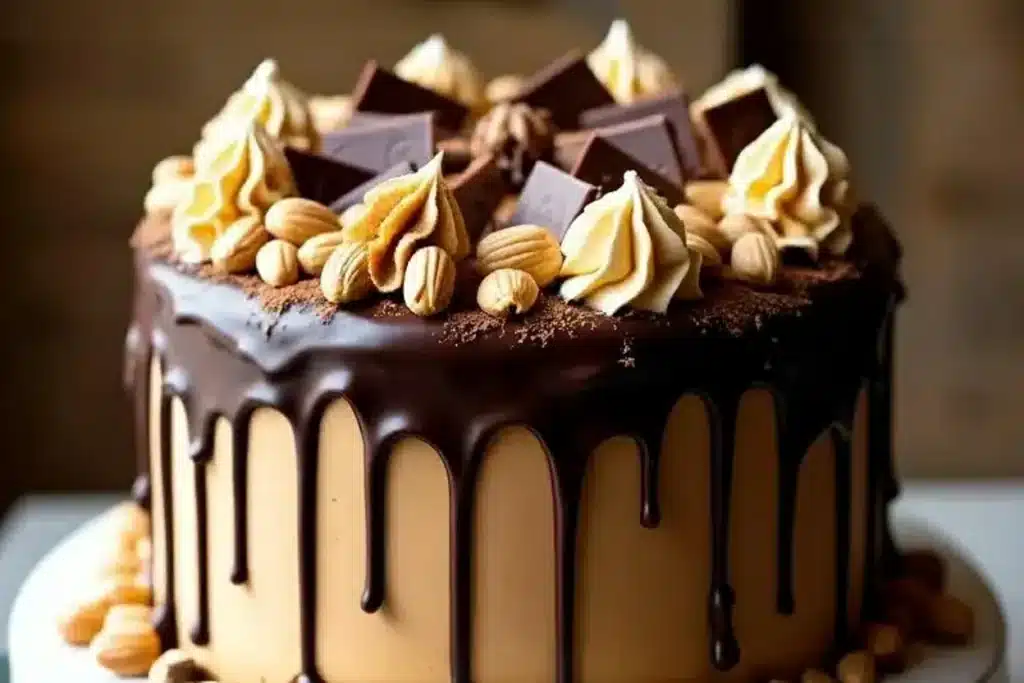
This cake is also wonderfully versatile. You can add your own spin by including chocolate chips in the batter or sprinkling crushed peanuts on top for an extra crunch. It’s a dessert with a story, and every bite feels like a celebration.
Ingredients: What You’ll Need
Let’s talk ingredients! Each one plays a vital role in creating this decadent masterpiece. Here’s a breakdown to help you select the best options and understand their importance:
- All-purpose flour: The base of the cake, ensuring structure and fluffiness. For gluten-free options, try a 1:1 gluten-free baking flour.
- Cocoa powder: Use unsweetened, high-quality cocoa for a rich chocolate flavor. Brands like Ghirardelli or Hershey’s work beautifully.
- Granulated sugar: Sweetens the cake. You can substitute with coconut sugar for a slightly healthier option.
- Brown sugar: Adds depth and moisture. Light or dark brown sugar works; darker gives a more caramel-like note.
- Eggs: Help bind the cake and add richness. For a vegan option, use flaxseed meal mixed with water.
- Vegetable oil: Keeps the cake moist. You can swap for melted coconut oil or even avocado oil.
- Milk: Adds creaminess to the batter. For dairy-free options, almond or oat milk works great.
- Peanut butter: The star of the frosting! Opt for creamy, unsweetened peanut butter for the smoothest texture.
- Powdered sugar: Sweetens the frosting perfectly. Sift it to avoid lumps.
- Butter: Essential for the frosting. Unsalted butter is best to control salt levels.
- Baking powder and baking soda: Help the cake rise and stay light. Make sure they’re fresh for maximum effectiveness.
- Vanilla extract: Adds warmth and enhances the flavors. Always go for pure vanilla extract instead of imitation.
Pro tip: If you’re feeling fancy, toss in some chocolate chips or swirl a bit of peanut butter into the batter for extra flavor layers!
Equipment Needed
Don’t worry—this recipe doesn’t require fancy gadgets. Here’s what you’ll need:
- Two 9-inch round cake pans: For even layers. If you don’t have these, you can use a rectangular pan, though the presentation will differ.
- Mixing bowls: One for dry ingredients and another for wet ingredients.
- Hand mixer or stand mixer: Perfect for whipping up the frosting and ensuring a smooth batter.
- Spatula: Ideal for folding ingredients and spreading frosting.
- Cooling rack: Helps cool the cake evenly before frosting.
- Parchment paper: Prevents sticking and makes cleanup easier.
If you’re missing anything, don’t stress—improvise! For example, if you don’t have a mixer, a whisk and a little elbow grease will do the trick.
How to Make Peanut Butter Chocolate Bliss Cake
Ready to get started? Follow these steps for a foolproof cake:
- Preheat the oven: Set it to 350°F (175°C). Grease and line your cake pans with parchment paper.
- Mix dry ingredients: In a large bowl, sift together 2 cups (250g) of all-purpose flour, ¾ cup (75g) of cocoa powder, 2 teaspoons of baking powder, and 1 teaspoon of baking soda. Add 1 cup (200g) of granulated sugar and ½ cup (100g) of brown sugar, then whisk to combine.
- Combine wet ingredients: In another bowl, whisk 2 large eggs, 1 cup (240ml) of milk, ½ cup (120ml) of vegetable oil, and 2 teaspoons of vanilla extract.
- Mix the batter: Gradually incorporate the wet ingredients into the dry, stirring until smooth. Avoid overmixing!
- Bake: Divide the batter evenly between the pans. Bake for 30-35 minutes, or until a toothpick comes out clean. Let cool completely.
- Make the frosting: Beat 1 cup (240g) of creamy peanut butter, ½ cup (115g) of unsalted butter, and 2 cups (240g) of powdered sugar until fluffy. Add 2 teaspoons of vanilla extract and mix well.
- Assemble: Place one cake layer on a platter. Spread frosting evenly. Add the second layer and frost the top and sides. Decorate as desired!
Trust your instincts here—if it looks good and smells delicious, you’re on the right track!
Cooking Tips & Techniques
Here are some key tips to ensure your cake turns out perfectly:
- Don’t overmix: It’s tempting to keep stirring, but overmixing can make the cake dense instead of fluffy.
- Room temperature ingredients: Using room-temp eggs and milk helps everything blend smoothly.
- Cool completely: Frosting a warm cake is a recipe for disaster—it’ll melt and slide off.
- Level the layers: If your cakes dome, level them with a knife for a flat surface before assembling.
- Taste as you go: Adjust the frosting’s sweetness or saltiness to your preference.
And if you make a mistake, don’t sweat it. Even imperfect cakes still taste amazing!
Variations & Adaptations
This recipe is wonderfully adaptable. Here are a few ideas:
- Gluten-free version: Use a gluten-free baking mix in place of the all-purpose flour.
- Vegan option: Swap eggs for flaxseed meal and use plant-based milk and butter.
- Extra crunch: Add crushed peanuts or chocolate chips to the batter.
- Seasonal spin: Add a touch of cinnamon in the fall or serve with fresh strawberries in the summer.
One time, I added a drizzle of caramel sauce on top—it was unexpectedly amazing!
Serving and Storage Suggestions
This cake is best served at room temperature, allowing the frosting to soften slightly. Pair it with a cold glass of milk or a warm cup of coffee for a delightful experience.
For leftovers, store in an airtight container in the refrigerator for up to 5 days. To freeze, wrap individual slices in plastic wrap and place in a freezer-safe bag for up to 3 months. Let thaw at room temperature before enjoying.
Reheat slices slightly in the microwave for a warm, gooey treat!
Nutritional Information & Benefits
Here’s a rough breakdown per serving (based on 12 slices):
- Calories: 450
- Protein: 8g
- Fat: 22g
- Carbohydrates: 55g
- Fiber: 3g
Peanut butter provides healthy fats and protein, while cocoa offers antioxidants. Of course, this cake is a treat, so enjoy in moderation!
Conclusion
This Decadent Peanut Butter Chocolate Bliss Cake is everything a dessert should be—rich, flavorful, and unforgettable. Whether you’re baking for a special occasion or just because, this recipe promises to wow your taste buds and impress your loved ones.
Give it your own twist—customize the flavors, add toppings, or try a new variation. And don’t forget to share your experience in the comments below! I’d absolutely love to hear how this cake turned out for you.
Happy baking and enjoy every indulgent bite!
FAQs
Can I make this cake ahead of time?
Yes! Bake the layers and store them in the fridge for up to 2 days. Frost before serving for maximum freshness.
What’s the best way to frost the cake?
Use an offset spatula for smooth application. Start with a crumb coat, then apply a second layer for a polished finish.
Can I use crunchy peanut butter?
Absolutely! Crunchy peanut butter adds texture to the frosting, though it might be harder to spread.
What if I don’t have cocoa powder?
You can substitute with melted dark chocolate—reduce the oil slightly to compensate for the added moisture.
How do I prevent my cake from sticking to the pan?
Grease the pans well and line them with parchment paper. It’s a game-changer!
Print
Decadent Peanut Butter Chocolate Bliss Cake
A rich and indulgent cake that combines moist chocolate layers with creamy peanut butter frosting, perfect for any special occasion.
- Total Time: 55 minutes
- Yield: 12 servings 1x
Ingredients
- 2 cups (250g) all-purpose flour
- 3/4 cup (75g) cocoa powder
- 1 cup (200g) granulated sugar
- 1/2 cup (100g) brown sugar
- 2 teaspoons baking powder
- 1 teaspoon baking soda
- 2 large eggs
- 1 cup (240ml) milk
- 1/2 cup (120ml) vegetable oil
- 2 teaspoons vanilla extract
- 1 cup (240g) creamy peanut butter
- 1/2 cup (115g) unsalted butter
- 2 cups (240g) powdered sugar
Instructions
- Preheat the oven to 350°F (175°C). Grease and line two 9-inch round cake pans with parchment paper.
- In a large bowl, sift together the flour, cocoa powder, baking powder, and baking soda. Add the granulated sugar and brown sugar, then whisk to combine.
- In another bowl, whisk together the eggs, milk, vegetable oil, and vanilla extract.
- Gradually incorporate the wet ingredients into the dry ingredients, stirring until smooth. Avoid overmixing.
- Divide the batter evenly between the prepared pans. Bake for 30-35 minutes, or until a toothpick inserted into the center comes out clean. Let the cakes cool completely on a cooling rack.
- To make the frosting, beat the peanut butter, unsalted butter, and powdered sugar together until fluffy. Add the vanilla extract and mix well.
- Place one cake layer on a platter and spread frosting evenly on top. Add the second layer and frost the top and sides of the cake. Decorate as desired.
Notes
For best results, use room-temperature ingredients and allow the cake to cool completely before frosting. Customize with chocolate chips or crushed peanuts for added texture.
- Prep Time: 20 minutes
- Cook Time: 35 minutes
- Category: Dessert
- Cuisine: American
Nutrition
- Serving Size: 1 slice
- Calories: 450
- Sugar: 35
- Sodium: 250
- Fat: 22
- Saturated Fat: 8
- Carbohydrates: 55
- Fiber: 3
- Protein: 8
Keywords: chocolate cake, peanut butter frosting, decadent dessert, homemade cake, special occasion dessert


