
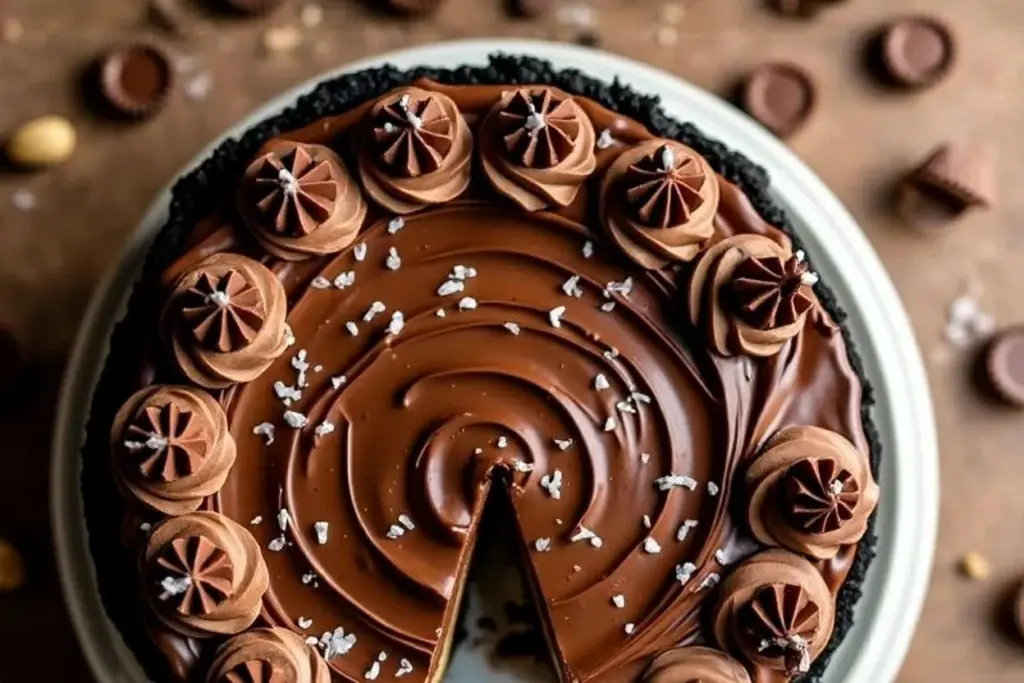
If you’re a Reese’s Peanut Butter Cup fan (and let’s face it, who isn’t?), then you absolutely need to try this Ultimate Reese’s Peanut Butter Cup Pie recipe. This pie is rich, creamy, and packed with all the chocolate and peanut butter goodness you love. Imagine a smooth peanut butter filling nestled inside a crumbly Oreo crust, topped with a luscious chocolate ganache—and yes, there are actual Reese’s Cups involved! It’s indulgent, it’s decadent, and it’s a show-stopper at any party.
This recipe has a special place in my heart because it combines nostalgia with pure dessert magic. Growing up, Reese’s were my go-to snack whenever I visited the candy aisle. This pie takes that childhood favorite and transforms it into an impressive dessert that’s perfect for birthdays, holidays, or just because you’re craving something sweet.
The Story Behind Reese’s Peanut Butter Cup Pie
Reese’s Peanut Butter Cups have been a staple in American candy culture since the 1920s. Created by H.B. Reese, the combination of chocolate and peanut butter was such a hit that it became a household name in no time. Over the years, Reese’s has inspired countless recipes, but this pie takes the classic candy to a whole new level.
I first made this pie for a potluck dinner. I wanted something that would wow the crowd but didn’t require hours of baking. The moment I placed it on the dessert table, it was like a magnet—people were drawn to it immediately. The best part? It’s surprisingly simple to put together, but it looks like you spent hours crafting it.
This pie is also incredibly versatile. While it’s fantastic for parties, it’s equally lovely for a cozy family dinner or even as a treat for yourself after a long week. And let me tell you, it’s just as good during the holidays as it is in the middle of summer.
Ingredients Breakdown
Let’s talk about the star players in this recipe and how to make sure you’re using the best of the best.
- Oreo Cookies: These create the perfect crumbly crust. You’ll need about 24 cookies, finely crushed. If you prefer a different cookie base, graham crackers or even chocolate wafer cookies will work.
- Unsalted Butter: Melted butter binds the Oreo crumbs together. Make sure it’s unsalted so you can control the flavor.
- Peanut Butter: Use creamy peanut butter for the filling. Natural peanut butter works, but it’s best to use one without too much oil separation for a smoother texture.
- Powdered Sugar: This sweetens the peanut butter filling without adding grittiness.
- Heavy Cream: You’ll use this for both the filling and the chocolate ganache topping. It makes everything velvety and rich.
- Chocolate Chips: Semi-sweet chocolate chips are ideal for the ganache. If you prefer milk chocolate, feel free to substitute.
- Reese’s Peanut Butter Cups: The pièce de résistance! These are chopped and folded into the filling, and you can use mini cups or regular-sized ones.
Optional additions include a sprinkle of flaky sea salt on the ganache for a gourmet touch or chopped peanuts for extra crunch.
Ingredient Tips:
- Choosing Peanut Butter: For the smoothest filling, avoid chunky peanut butter.
- Chocolate Alternatives: If you’re out of chocolate chips, you can use chopped chocolate bars or even baking chocolate.
- Storage: Keep ingredients like peanut butter and chocolate chips in a cool, dry place to maintain freshness.
Equipment Needed
Here’s a quick list of tools you’ll need to make this Reese’s Peanut Butter Cup Pie:
- 9-inch pie pan
- Food processor or blender (for crushing Oreo cookies)
- Mixing bowls
- Hand mixer or stand mixer
- Rubber spatula
- Microwave-safe bowl (for melting chocolate)
- Whisk
If you don’t have a food processor, you can crush the Oreos by placing them in a zip-top bag and using a rolling pin. And if you don’t own a pie pan, a springform pan works as a great alternative.
Preparation Method
- Prep the crust: Crush 24 Oreo cookies into fine crumbs using a food processor. Transfer to a mixing bowl and stir in 6 tablespoons (85g) of melted unsalted butter until combined. Press the mixture into a 9-inch pie pan to form an even crust. Chill in the refrigerator for 10 minutes.
- Make the filling: In a mixing bowl, beat 1 cup (250g) creamy peanut butter and 1 cup (120g) powdered sugar until smooth. Gradually add 1 cup (240ml) heavy cream, whipping until the mixture becomes light and fluffy. Fold in chopped Reese’s Peanut Butter Cups.
- Assemble the pie: Spread the peanut butter filling evenly over the chilled crust. Smooth the top with a spatula.
- Prepare the ganache: In a microwave-safe bowl, heat 1 cup (175g) semi-sweet chocolate chips and 1/2 cup (120ml) heavy cream in 20-second intervals, stirring after each, until smooth. Pour the ganache over the filling and spread evenly.
- Decorate: Arrange additional Reese’s Peanut Butter Cups on top of the ganache for a stunning finish.
- Chill: Refrigerate the pie for at least 4 hours or until fully set.
Cooking Tips & Techniques
Here are a few tips to ensure your pie turns out perfectly:
- Chill the crust: Don’t skip the chilling step for the crust—it helps it hold its shape.
- Room temperature peanut butter: Make sure your peanut butter is at room temperature for easier mixing.
- Ganache troubleshooting: If your ganache is too thick, add a splash of warm cream to thin it out.
- Consistency: Whip the filling until it’s light and airy; this makes the pie feel luxurious.
And don’t worry if your ganache isn’t perfectly smooth—it’ll taste amazing no matter what!
Variations & Adaptations
This pie is flexible, so feel free to get creative:
- Gluten-Free Option: Use gluten-free cookies for the crust.
- Dairy-Free Adaptation: Swap out heavy cream for coconut cream and use dairy-free chocolate chips.
- Seasonal Twist: Add crushed candy canes to the ganache for a holiday vibe.
- Extra Crunch: Stir in chopped pretzels for a salty-sweet combo.
Personally, I once tried adding a drizzle of caramel sauce on top—highly recommend!
Serving & Storage Suggestions
Serve this pie cold for the best texture. Slice it into wedges and plate it with a dollop of whipped cream and a sprinkle of crushed peanuts for extra flair. It pairs beautifully with a hot cup of coffee or a tall glass of milk.
To store, cover the pie tightly with plastic wrap and keep it in the refrigerator for up to 4 days. For longer storage, wrap individual slices in plastic wrap and freeze for up to 2 months. To thaw, let the slices sit in the fridge overnight.
Nutritional Information & Benefits
While this pie is definitely indulgent, it’s worth every bite. Here’s a rough estimate of the nutritional breakdown per serving:
- Calories: 450-500
- Fat: 25-30g
- Sugar: 35-40g
- Protein: 7-10g
Peanut butter provides a good source of protein and healthy fats, while the chocolate offers a little boost of antioxidants. Keep in mind that this pie is meant to be an occasional treat, so enjoy it guilt-free!
Conclusion
This Ultimate Reese’s Peanut Butter Cup Pie is more than just a dessert—it’s a celebration of chocolate and peanut butter in their most decadent form. Whether you’re making it for a party or treating yourself, it’s guaranteed to impress and satisfy.
I love this recipe because it’s so easy to customize and always brings smiles to everyone who tries it. If you’re a Reese’s fan like me, this pie is a must-make. Give it a try, and let me know how it turns out!
Don’t forget to share this recipe with your friends and family—or pin it to your favorite dessert board on Pinterest. I’d love to hear your variations and adaptations in the comments below. Happy baking!
FAQs
Can I use chunky peanut butter instead of creamy?
Yes, but keep in mind that the filling may be less smooth. If you love the extra crunch, go for it!
Can I make this pie ahead of time?
Absolutely! This pie can be made a day in advance and stored in the refrigerator until ready to serve.
What can I use instead of Oreo cookies for the crust?
Graham crackers or chocolate wafer cookies are great alternatives.
Can I freeze the pie?
Yes, you can freeze the pie for up to 2 months. Wrap it tightly in plastic wrap and thaw in the fridge before serving.
How do I make the ganache thinner?
If your ganache is too thick, stir in a small amount of warm cream until it reaches your desired consistency.


