
The crack of a snack bar breaking in half, the nutty aroma drifting up from a fresh batch—there’s just something wildly satisfying about making your own protein ball bars. I first got hooked on these little wonders when my afternoons turned into a chaotic dash between work calls and kid pickups. You know that moment when your stomach’s rumbling but the next meal is hours away? That’s when these protein ball bars saved me (and let’s be honest, my mood).
Honestly, the beauty of protein ball bars is how easy they are to whip up and customize. The recipe for “Protein Ball Bars Easy 10 DIY Recipe for Best Healthy Snack On the Go” was born out of my need for something quick, healthy, and portable. I’ve tested and tweaked these bars dozens of times—sometimes tossing in whatever dried fruit or nut butter I had on hand. Whether it’s for a post-workout snack, a road trip, or a school lunchbox, these bars have found a permanent spot in my kitchen routine.
What I love most is that you don’t need fancy ingredients or equipment. Plus, the flavor combos are endless! If you’re chasing more energy, needing a pick-me-up between meetings, or just want to keep the kids happy with a treat that isn’t loaded with sugar, you’re in the right place. These protein ball bars are perfect for busy families, fitness fans, and anyone who likes their snacks homemade and healthy. Let’s get rolling—your next favorite snack is about to happen!
Why You’ll Love This Recipe
- Ridiculously Quick & Easy: These protein ball bars come together in under 20 minutes, no baking required! You can literally make them during a Netflix episode.
- No Fancy Ingredients: I’m talking oats, nut butter, honey, and your favorite protein powder. Chances are, you already have most of it in your pantry.
- Perfect for Any Occasion: Whether you need a pre-gym boost, an after-school treat, or even a road trip snack, these bars are up for the job.
- Crowd-Pleaser: My kids devour these! Even my husband (who’s picky about “healthy stuff”) grabs them on the way out the door.
- Unbelievably Delicious: Each bite is chewy, nutty, and just sweet enough. The mix of textures keeps you coming back for more.
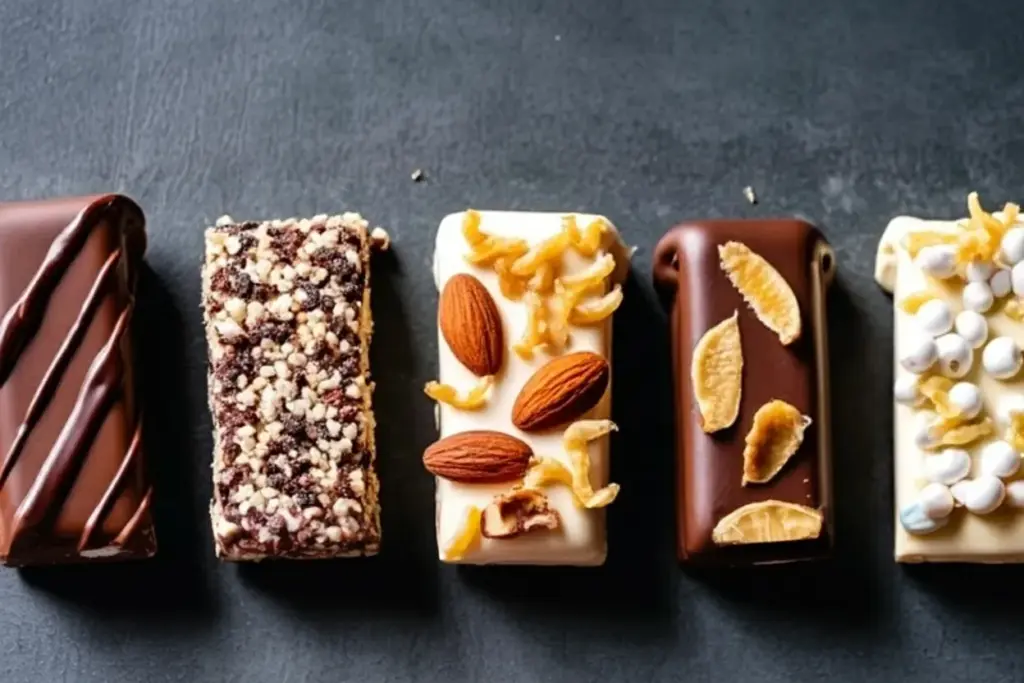
What really sets my protein ball bars apart? I always blend the oats a little for a smoother texture, and I use a mix of nut butters to keep the flavor interesting. You can swap in seeds, dried fruit, or chocolate chips—whatever makes you happy. The bars hold their shape, don’t crumble, and taste like a treat, not a compromise.
This isn’t one of those snacks you force yourself to eat just because it’s “healthy.” It’s the snack that makes you pause, savor, and maybe, just maybe, hide an extra one for yourself. Seriously, if you want a snack that’s good for you but doesn’t taste like cardboard, these protein ball bars are it. Make them for friends, stash them in your bag, or gift a batch at the holidays—they always get rave reviews.
After countless kitchen experiments, these bars are the result of trial, error, and a lot of taste-testing. Trust me, you’re about to fall in love with snack time all over again!
What Ingredients You Will Need
This recipe relies on simple, wholesome ingredients that you can mix and match to fit your taste. I like to keep the basics on hand, then jazz it up with whatever I have in the cupboard. Here’s what you’ll need for the ultimate protein ball bars:
- Old-fashioned rolled oats (2 cups / 180g): Adds bulk and chewy texture. For gluten-free, use certified GF oats.
- Vanilla or chocolate protein powder (1 cup / 120g): The star for energy and satiety. I love Orgain or Garden of Life.
- Creamy peanut butter (1/2 cup / 125g): Brings richness and helps bind everything together. Almond or cashew butter works too.
- Honey or maple syrup (1/3 cup / 100ml): For that touch of sweetness and stickiness. Maple syrup gives a deeper flavor.
- Chia seeds (2 tbsp / 20g): Adds crunch and omega-3s.
- Mini chocolate chips (1/4 cup / 40g): Optional, but let’s be real—who doesn’t love a hint of chocolate?
- Dried cranberries or raisins (1/4 cup / 35g): For tangy pops of flavor. Use chopped dried apricots for a twist.
- Ground flaxseed (2 tbsp / 14g): Adds fiber and helps hold bars together.
- Sea salt (1/4 tsp): Balances the sweetness.
- Vanilla extract (1 tsp): Optional, for extra flavor depth.
Topping Suggestions:
- Drizzle of melted dark chocolate (for a decadent finish)
- Chopped nuts (almonds, walnuts, pecans—adds crunch)
- Unsweetened shredded coconut (for tropical vibes)
Ingredient Tips:
- You can easily swap almond butter for peanut butter if allergies are a concern.
- Use sunflower seed butter for a nut-free school-safe version.
- If you’re low on honey, brown rice syrup works in a pinch.
- Add a scoop of collagen powder for extra protein—just reduce the oats slightly.
- For vegan, use plant-based protein and maple syrup.
I usually keep a stash of these ingredients, so whipping up a batch is never a hassle. If you’re missing something, don’t stress—just substitute with what you have. That’s the magic of DIY protein ball bars!
Equipment Needed
- Large mixing bowl: Roomy enough for easy stirring. I use my trusty stainless steel one for everything.
- Sturdy spatula or wooden spoon: For mixing thick doughs. Silicone spatulas are my favorite—they don’t stick.
- Measuring cups and spoons: Precision matters, especially with protein powder.
- 8×8-inch (20x20cm) baking pan: For pressing and chilling the bars. If you only have a loaf pan, just press the mixture in and slice thinner bars.
- Parchment paper: Makes lifting the bars out a breeze. If you’re out, lightly grease the pan.
- Food processor or blender (optional): If you prefer a smoother oat texture. I pulse mine for a few seconds—don’t overdo it!
- Sharp knife: For cutting clean slices once set. Serrated works well if bars are chunky.
Honestly, you can make these with just a bowl and spoon if you’re in a rush. My first batch was mixed with a salad fork (don’t judge!). If you use silicone spatulas, give them a quick rinse after sticky mixes to avoid residue build-up. For pans, budget-friendly aluminum works fine—just line with parchment for easy cleanup. These tools are all kitchen basics, so you won’t need any crazy gadgets.
Preparation Method
-
Prep your pan: Line an 8×8-inch (20x20cm) baking pan with parchment paper, leaving some overhang for easy lifting. If you’re using a loaf pan or want thicker bars, adjust accordingly.
Tip: Lightly grease the pan edges if you skip parchment; bars slide out smoother. -
Mix dry ingredients: In a large bowl, add 2 cups (180g) rolled oats, 1 cup (120g) protein powder, 2 tbsp (20g) chia seeds, 2 tbsp (14g) ground flaxseed, 1/4 tsp sea salt, and your chocolate chips or dried fruit.
Note: If you like softer bars, pulse oats in a food processor for 5 seconds. -
Combine wet ingredients: In a microwave-safe bowl, gently heat 1/2 cup (125g) nut butter and 1/3 cup (100ml) honey (about 20 seconds). Stir in 1 tsp vanilla extract.
Sensory cue: The mixture should be smooth, pourable, and fragrant. -
Mix wet and dry: Pour wet mixture over dry ingredients. Stir with a spatula until everything is evenly combined—no dry pockets! The dough will be thick and sticky.
If mixture seems too dry, add 1-2 tbsp milk (dairy or non-dairy) to loosen. -
Press into pan: Transfer mixture to prepared pan. Use a spatula or clean hands to press firmly and evenly into all corners.
Personal tip: I place a second piece of parchment on top and press with a glass for a flat surface. -
Add toppings: Sprinkle on your choice of nuts, seeds, or coconut. Gently press toppings into the mixture so they stick.
Optional: Drizzle with melted chocolate for a dessert-like treat. -
Chill: Refrigerate for at least 1 hour, or until firm enough to slice.
Time-saving tip: Pop in the freezer for 30 minutes if you’re in a hurry. -
Slice: Lift bars from pan using parchment overhang. Cut into 10 even bars with a sharp knife. Wipe blade between cuts for neat edges.
Warning: Don’t rush—bars slice best when fully chilled. -
Store & serve: Arrange bars in an airtight container. Keep refrigerated for up to 1 week, or freeze for up to 3 months.
Efficiency tip: Stack bars with parchment between layers to prevent sticking.
Honestly, the hardest part is waiting for them to chill! If your bars seem crumbly, add a touch more nut butter next time. Too sticky? Toss in extra oats. After a few batches, you’ll know the sweet spot for your ideal texture. I always sneak a corner piece before the rest are chilled—quality control, right?
Cooking Tips & Techniques
Here’s what I’ve learned after making countless batches of protein ball bars (some more successful than others):
- Don’t overmix: Stir just until combined. Overworking can make bars tough or dry.
- Protein powder matters: Not all powders blend equally. If your mix feels chalky, try a finer grind or a different brand. Whey blends smoother than plant-based, but both work.
- Chilling is key: Bars firm up as they cool. If you cut too soon, they’ll crumble.
- Watch your sweetener: Too much honey or syrup makes bars sticky and hard to slice. Stick to recommended amounts; add more oats if necessary.
- Batch prepping: Double the recipe for meal prep. Freeze half for later—future you will thank you!
- Customize texture: Pulse oats for softer bars, leave whole for chewy bites. Both are delicious!
- Common mistakes: Skipping the chill or using runny nut butter can make bars fall apart. Been there, done that!
One time, I added too many mix-ins (think: every nut in my cupboard) and the bars wouldn’t hold. Lesson learned—keep add-ins to about 1/2 cup total. Also, don’t be afraid to taste as you mix. That’s how you know the flavor’s spot on. For perfect bars every time, use a ratio of 2 parts oats to 1 part protein powder, and always press the mixture firmly into the pan.
Variations & Adaptations
Love changing things up? Me too! Here are some easy ways to adapt your protein ball bars:
- Vegan: Use plant-based protein powder, swap honey for maple syrup, and choose dairy-free chocolate chips.
- Nut-free: Use sunflower seed butter and skip nuts in toppings. Sub pumpkin seeds for crunch.
- Seasonal flavors: Add pumpkin puree and pumpkin spice in fall, or dried strawberries and lemon zest in spring.
- Chocolate craving: Mix in cocoa powder and extra chocolate chips for double chocolate bars.
- Low-carb: Use almond flour for part of the oats, and monk fruit syrup instead of honey.
- Allergen swaps: For gluten-free, use GF oats. For dairy-free, use vegan protein and plant milk.
Once, I made a “trail mix” batch—pecans, coconut, and dried cherries. My kids loved it! For a tropical twist, use macadamia nuts and pineapple bits. If you’re baking for a crowd, try shaping into balls instead of bars for easy sharing. Don’t be afraid to get creative—the basic formula is super forgiving.
Serving & Storage Suggestions
These protein ball bars are best served chilled, straight from the fridge. The texture is firm but chewy, and the flavors really pop when cold. For grab-and-go, wrap each bar in parchment or wax paper—perfect for lunchboxes, gym bags, or travel.
Pair with fresh fruit, a smoothie, or a cup of coffee for a balanced snack. They’re amazing with yogurt or as a quick breakfast on busy mornings. For dessert vibes, drizzle with dark chocolate and serve with berries.
To store, keep bars in an airtight container in the fridge for up to 1 week. If you make a big batch, freeze individual bars for up to 3 months. To reheat, let bars sit at room temperature for 10 minutes, or microwave for 10 seconds if you like them soft.
Honestly, the flavor gets even better after a day or two—everything melds together. Just keep them away from heat or humidity, or they’ll get sticky.
Nutritional Information & Benefits
Each protein ball bar (about 60g) packs in roughly:
- Calories: ~210
- Protein: 8-10g (depending on powder used)
- Fiber: 4g
- Healthy fats: 9g
- Carbs: 22g
Oats and flaxseed provide sustained energy and gut-friendly fiber. Nut butters add healthy fats that keep you full. Protein powder helps with muscle repair and satiety. Chia seeds and dried fruit bring extra vitamins and antioxidants.
If you use gluten-free oats, these bars are naturally GF. Swap nut butters for seeds to make them nut-free. Watch out for allergens in protein powders and add-ins. I love these bars for post-gym recovery and keeping blood sugar steady—way better than store-bought options!
Conclusion
If you’re searching for a snack that’s easy, healthy, and genuinely delicious, these protein ball bars are the answer. They’re quick to make, endlessly customizable, and perfect for every on-the-go moment. I love how they fit any lifestyle—whether you’re working out, wrangling kids, or just need a mid-afternoon pick-me-up.
Feel free to tweak the flavors and mix-ins to suit your taste. That’s the real magic here—these bars are yours to create! Personally, I keep a stash in my freezer and reach for one whenever the snack attack hits. It’s my little moment of happiness in a busy day.
Give these a try, and let me know how your batch turns out! Drop a comment below, share your favorite twist, or tag me on Pinterest with your creations. Happy snacking—here’s to never settling for boring bars again!
FAQs
Can I make these protein ball bars without protein powder?
Yes! Just add extra oats or almond flour to replace the protein powder. The texture will be a bit different, but still tasty.
How do I keep the bars from crumbling?
Make sure to press the mixture firmly into the pan and chill until fully set. If they’re crumbly, add a bit more nut butter or honey next time.
Can I freeze protein ball bars?
Absolutely. Wrap them individually and store in the freezer for up to 3 months. Thaw at room temperature or in the fridge.
What’s the best protein powder for these bars?
I like using a smooth vanilla or chocolate whey. For vegan, pea or rice protein works well. Choose your favorite—just make sure it tastes good!
Are these bars suitable for kids?
Yes! Just use seed butter for nut-free and keep mix-ins simple. They’re a great lunchbox treat and energy boost for busy days.
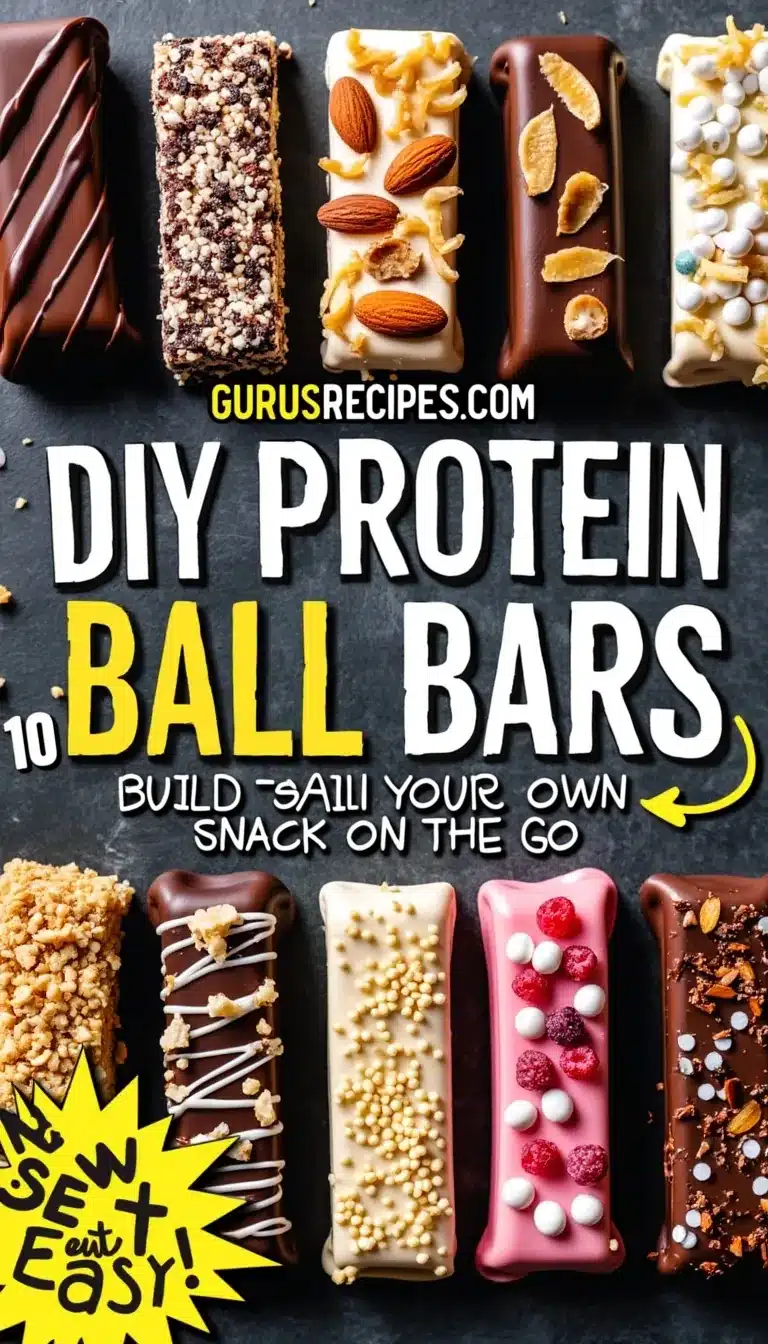

Protein Ball Bars Easy 10 DIY Recipe for Best Healthy Snack On the Go
These no-bake protein ball bars are quick, healthy, and endlessly customizable—perfect for busy families, fitness fans, and anyone needing a portable snack. Packed with oats, nut butter, protein powder, and your favorite mix-ins, they’re chewy, satisfying, and delicious.
- Total Time: 1 hour 10 minutes (includes chilling time)
- Yield: 10 bars 1x
Ingredients
- 2 cups old-fashioned rolled oats (180g)
- 1 cup vanilla or chocolate protein powder (120g)
- 1/2 cup creamy peanut butter (125g) (or almond/cashew/sunflower seed butter)
- 1/3 cup honey or maple syrup (100ml)
- 2 tablespoons chia seeds (20g)
- 1/4 cup mini chocolate chips (40g) (optional)
- 1/4 cup dried cranberries or raisins (35g) (or chopped dried apricots)
- 2 tablespoons ground flaxseed (14g)
- 1/4 teaspoon sea salt
- 1 teaspoon vanilla extract (optional)
- Toppings: drizzle of melted dark chocolate, chopped nuts, or unsweetened shredded coconut (optional)
Instructions
- Line an 8×8-inch (20x20cm) baking pan with parchment paper, leaving overhang for easy lifting. Lightly grease if not using parchment.
- In a large bowl, combine rolled oats, protein powder, chia seeds, ground flaxseed, sea salt, and chocolate chips or dried fruit. For softer bars, pulse oats in a food processor for 5 seconds.
- In a microwave-safe bowl, gently heat nut butter and honey (about 20 seconds). Stir in vanilla extract.
- Pour wet mixture over dry ingredients. Stir with a spatula until evenly combined and no dry pockets remain. If mixture is too dry, add 1-2 tablespoons milk (dairy or non-dairy).
- Transfer mixture to prepared pan. Press firmly and evenly into all corners using a spatula or clean hands. For a flat surface, place a second piece of parchment on top and press with a glass.
- Sprinkle on your choice of toppings (nuts, seeds, coconut) and gently press them in. Optionally, drizzle with melted chocolate.
- Refrigerate for at least 1 hour, or until firm enough to slice. For faster chilling, freeze for 30 minutes.
- Lift bars from pan using parchment overhang. Cut into 10 even bars with a sharp knife, wiping blade between cuts.
- Store bars in an airtight container in the fridge for up to 1 week, or freeze for up to 3 months. Stack with parchment between layers to prevent sticking.
Notes
For vegan bars, use plant-based protein powder and maple syrup. For nut-free, use sunflower seed butter and skip nuts in toppings. Pulse oats for softer bars or leave whole for more chew. If bars are crumbly, add more nut butter; if too sticky, add more oats. Bars slice best when fully chilled. Customize with your favorite mix-ins, but keep add-ins to about 1/2 cup total for best texture.
- Prep Time: 10 minutes
- Cook Time: 0 minutes
- Category: Snack
- Cuisine: American
Nutrition
- Serving Size: 1 bar (about 60g)
- Calories: 210
- Sugar: 8
- Sodium: 90
- Fat: 9
- Saturated Fat: 2
- Carbohydrates: 22
- Fiber: 4
- Protein: 9
Keywords: protein bars, healthy snack, no bake, on the go, meal prep, gluten free, nut free, vegan, energy bars, kids snack


