
You know that feeling when you walk past a bakery, and the buttery, caramel-like aroma practically pulls you in by the nose? That’s exactly what came to mind the first time I baked these blondie cookie bars. Growing up, my grandma made classic chocolate chip cookies every Saturday, but I always craved something a little different—something gooey, chewy, and just a touch decadent. That’s how my love affair with blondie cookie bars started. Honestly, if you’re hunting for a dessert that bridges the gap between a cookie and a brownie, look no further. These blondie bars hit all the right notes: golden, chewy edges, a soft center, and that deeply comforting brown sugar flavor you can’t forget.
What makes this blondie cookie bars recipe shine? It’s simple—no fancy equipment, no elusive ingredients, no fuss. Just easy, homemade dessert bars anyone can make—even if your baking skills are, well, a bit rusty. I’ve tested this recipe more times than I can count (once, I even made a double batch for a school bake sale, and they vanished in minutes). Whether you’re baking for a potluck, a cozy night in, or just because you need something sweet after a long day, these blondie bars have your back. Trust me, the hardest part is waiting for them to cool before you dig in.
So if you’re after that ultimate dessert bar recipe that’s guaranteed to become your new go-to, keep reading. These blondie cookie bars bring together everything you want in a treat: simplicity, flavor, and the kind of nostalgia that makes you smile. You’re about to discover why this recipe is a staple in my kitchen—and why it should be in yours too.
Why You’ll Love This Blondie Cookie Bars Recipe
Let’s face it: not all dessert bars are created equal. After years of experimenting with different versions, I can confidently say these blondie cookie bars check every box. Here’s why you’ll be hooked after just one bite:
- Quick & Easy: You can whip up a batch in under 40 minutes from start to finish. Perfect for last-minute cravings or when unexpected guests pop in.
- Simple Ingredients: Everything you need is probably already in your pantry or fridge. No hunting for obscure stuff—just everyday basics.
- Perfect for Any Occasion: They’re a total crowd-pleaser, whether it’s a family dinner, holiday party, school bake sale, or lazy Sunday afternoon.
- Crowd-Pleaser: I’ve yet to meet anyone who can resist these. Kids, teens, adults—everyone loves them. (My picky nephew even asked for the recipe!)
- Unbelievably Delicious: The chewy texture, gooey middle, and rich brown sugar flavor make these dessert bars truly unforgettable.
What sets these blondies apart? For starters, the technique—melting the butter first gives each bar a fudgy, dense crumb, so every bite is packed with flavor. The brown sugar isn’t just for sweetness; it brings a deep, almost toffee-like taste that you just don’t get from granulated sugar. And a hint of vanilla rounds everything out. I sometimes toss in chopped chocolate or toasted pecans for a twist (more on that later), but honestly, the classic version is perfect as is.
This is the kind of recipe that makes you close your eyes and sigh after the first bite. It’s comfort food, but with a modern twist—easy enough for beginners, reliable enough for seasoned bakers. Plus, it’s a fantastic base for all sorts of add-ins and adaptations, so you can truly make it your own. If you want a dessert that never fails to impress (without causing you stress), you’ve just found your new favorite.
What Ingredients You Will Need
This blondie cookie bars recipe uses simple, wholesome ingredients that bring major flavor and the perfect chewy texture. No complicated shopping list—just pantry staples and a few fridge regulars. Here’s what you’ll need for the ultimate dessert bars:
- Unsalted Butter, melted (1 cup / 226g): Melting the butter gives the bars that irresistible fudgy texture and deepens the flavor. I always use unsalted so I can control the saltiness. If you only have salted butter, just skip the added salt.
- Light Brown Sugar (2 cups / 400g): This is where the magic happens! Brown sugar gives blondies their signature caramel notes and chewy center. For extra richness, you can use dark brown sugar, but I prefer light for balance.
- Granulated Sugar (1/4 cup / 50g): Adds a touch of sweetness and helps with that crackly top.
- Large Eggs (2, room temperature): These bind everything together and add richness. Room-temp eggs mix in better—if you forget to set them out, soak them in warm water for a few minutes.
- Vanilla Extract (2 teaspoons): Don’t skimp—real vanilla gives these bars a bakery-level aroma and flavor. I love using Madagascar vanilla for extra punch.
- All-Purpose Flour (2 cups / 250g): The backbone of the bars. Spoon and level your flour so you don’t overpack it—no one likes dry blondies.
- Baking Powder (1 teaspoon): Gives just a little lift for that perfect chew.
- Salt (1/2 teaspoon): Balances out the sweetness and brings out all the flavors.
- Optional Mix-Ins:
- Chocolate Chips or Chunks (1 cup / 170g): For classic chocolatey pockets.
- Chopped Nuts (1/2 cup / 60g): Pecans or walnuts are my go-to for crunch.
- White Chocolate Chips (1/2 cup / 85g): For a sweeter twist.
- Toffee Bits, Dried Cranberries, or Sprinkles: For fun and flavor.
Ingredient Tips: If you need a gluten-free version, substitute a 1:1 gluten-free baking blend. For dairy-free, swap the butter with melted coconut oil or a vegan butter stick (I’ve tried both—works like a charm!). Feel free to play with the mix-ins depending on what you have or what’s in season. This recipe is super forgiving.
Equipment Needed
One of the best things about this blondie cookie bars recipe is how low-maintenance it is. Here’s what you’ll need to get baking:
- Mixing Bowls: At least one large and one medium bowl. Glass or metal both work, but glass lets you keep an eye on your mixing.
- Whisk and Rubber Spatula: A whisk helps blend the wet ingredients smoothly, while the spatula is perfect for folding in flour and scraping the bowl clean (not a crumb goes to waste!).
- 9×13-Inch Baking Pan (23×33 cm): This is the ideal size for uniform, thick bars. If you only have an 8×8 pan, halve the recipe and bake a few minutes longer.
- Parchment Paper: Makes lifting out the bars a breeze and prevents sticking. If you run out, a good greasing with butter or nonstick spray works too.
- Measuring Cups and Spoons: For accuracy—trust me, it matters in baking.
- Sharp Knife or Bench Scraper: For slicing perfect bars once cooled.
If you’re just starting out, don’t worry about fancy gear. I’ve baked these in a glass casserole dish and even in a disposable foil pan for parties. Just remember to adjust the baking time slightly if your pan is dark (it can brown the edges faster). Pro tip: keep your rubber spatula in good shape by avoiding super-hot pans—it’ll last a lot longer!
How to Make Blondie Cookie Bars
Ready to make the best blondie cookie bars ever? Here’s my step-by-step, foolproof method. Trust me, it’s easier than you think!
-
Preheat and Prep:
Preheat your oven to 350°F (175°C). Line a 9×13-inch (23×33 cm) baking pan with parchment paper, leaving a little overhang for easy lifting later. Lightly grease the paper if you’re nervous about sticking. -
Melt the Butter:
In a large microwave-safe bowl, melt 1 cup (226g) unsalted butter in 30-second bursts, stirring between each, until fully melted but not bubbling hot. Let it cool for 2-3 minutes—if it’s too hot, you risk scrambling your eggs. -
Mix Wet Ingredients:
Add 2 cups (400g) light brown sugar and 1/4 cup (50g) granulated sugar to the melted butter. Whisk until smooth and glossy—about 1 minute. The mixture will look thick and a bit grainy; that’s perfect. -
Add Eggs and Vanilla:
Crack in 2 large eggs (room temp) and pour in 2 teaspoons vanilla extract. Whisk thoroughly until the mixture lightens in color and looks creamy. If it looks separated, just keep whisking! -
Combine Dry Ingredients:
In a medium bowl, whisk together 2 cups (250g) all-purpose flour, 1 teaspoon baking powder, and 1/2 teaspoon salt. This keeps your bars fluffy and prevents any baking powder clumps. -
Fold Dry Into Wet:
Gently fold the flour mixture into the wet base using a rubber spatula. Stop as soon as you see the last streak of flour disappear—overmixing leads to tough bars. The batter will be thick and sticky (almost like cookie dough). -
Add Mix-Ins:
If using, fold in 1 cup (170g) chocolate chips or your favorite mix-ins. Save a handful to press on top for a bakery-worthy look. -
Spread and Smooth:
Scoop the dough into your prepared pan. Use the spatula to press and smooth it evenly into the corners. Wetting the spatula lightly helps if it sticks. -
Bake:
Bake on the center rack for 23-28 minutes. The top should be set, lightly golden, and just starting to crack at the edges. A toothpick inserted in the center should come out with a few moist crumbs. If it’s wet, give it another 2-3 minutes and check again. -
Cool and Slice:
Let the blondies cool in the pan for at least 30 minutes (torture, I know). Then lift them out using the parchment and cut into squares or bars with a sharp knife. For super clean edges, chill them for 10-15 minutes before slicing.
Troubleshooting: If your bars seem greasy, double-check your flour measurement—you might have shorted it a bit. If they’re too dry, bake a minute less next time. Remember, ovens vary! I always recommend checking at the 23-minute mark to play it safe.
Cooking Tips & Techniques
After baking more batches of blondie cookie bars than I care to admit (let’s just say my freezer has seen a few late-night raids), I’ve picked up a handful of tricks and things to watch out for:
- Don’t Overmix: As soon as the flour disappears, stop stirring. Overmixing is the fastest way to dry, cakey bars instead of chewy ones.
- Use Room-Temperature Eggs: This helps the eggs blend smoothly with the butter and sugar, giving the bars a uniform texture. If you forget, just soak the eggs in warm water for 5 minutes.
- Check for Doneness Early: Ovens are all over the place. Start checking at 23 minutes. You want a few moist crumbs on the toothpick—not raw batter, but not bone-dry either.
- Let Them Cool: I know, it’s tough. But blondies firm up as they cool, and slicing while hot can lead to a gooey mess (unless you’re going for blondie sundaes, which—honestly—not a bad idea!).
- Pan Matters: Glass and metal pans bake differently. Glass usually takes a few minutes longer, and metal gives crispier edges. Adjust your timing if you switch between them.
- Get Fancy with Toppings: If you want that bakery-style look, reserve some chocolate chips or nuts to sprinkle on top before baking. Press them in gently so they don’t fall off after baking.
- Trouble with Sticking? Double up on parchment or grease the pan well. If you skip parchment, let the bars cool completely before attempting to remove them.
- Personal Oops: Once I forgot to add the eggs—yep, it happens! The bars were hard as a rock. Always double-check your ingredient list before mixing!
My last tip: Don’t be afraid to trust your instincts. If your batter seems unusually dry or wet, check your measurements and adjust slightly. Baking is a little bit art, a little bit science, and a whole lot of fun.
Variations & Adaptations
Blondie cookie bars are basically a blank canvas for all your dessert dreams. Here are a few of my favorite ways to mix things up:
- Gluten-Free: Swap the all-purpose flour with a 1:1 gluten-free baking blend. I’ve used Bob’s Red Mill and King Arthur with great results—no one even notices the difference!
- Vegan: Use melted coconut oil or a vegan butter in place of regular butter and replace eggs with flax eggs (2 tablespoons ground flaxseed + 5 tablespoons water, mixed and rested for 5 minutes). The bars come out fudgy and just as delicious.
- Seasonal Flavors: Add pumpkin pie spice in the fall, or swirl in a little peanut butter or Nutella before baking. In the summer, try folding in fresh berries (just pat them dry first).
- Nut-Free: Skip the nuts entirely or use sunflower seeds for crunch if allergies are a concern.
- Chocolate Lovers: Double the chocolate chips or use a mix of milk, dark, and white chocolate for a triple-threat bar.
Once, I added a handful of butterscotch chips and a swirl of caramel sauce on top—let’s just say there were zero leftovers. Get creative and use what you have on hand. The base recipe is super forgiving, so don’t be afraid to make it your own. If you stumble on a new favorite combo, let me know in the comments—I’m always looking for new ideas!
Serving & Storage Suggestions
These blondie cookie bars are fantastic straight from the pan, but if you want to impress, here’s how I like to serve them:
- Serve Warm: Slightly warm with a scoop of vanilla ice cream or a drizzle of caramel sauce—hello, dessert heaven.
- Presentation: Cut into neat squares or triangles and stack on a pretty plate. Sprinkle with a pinch of flaky sea salt for a bakery-style finish.
- Complementary Sips: Pair with hot coffee, cold milk, or even a glass of sweet dessert wine for something special.
- Storage: Store leftovers tightly covered at room temperature for up to 4 days. For longer storage, wrap bars individually and freeze for up to 2 months. Pop them in the microwave for 15-20 seconds to refresh.
- Flavor Over Time: The flavors deepen after a day, making the bars even more irresistible. (If you can wait that long, that is!)
Pro tip—if you’re packing these for a picnic or lunchbox, put a piece of wax paper between each bar to keep them from sticking. They’re sturdy enough to travel and just as tasty on day two as day one.
Nutritional Information & Benefits
Here’s a quick look at what you’re getting in a typical blondie cookie bar (assuming 24 bars per batch):
- Calories: Around 210 per bar
- Fat: 10g (mostly from butter)
- Carbs: 28g (from flour and sugar)
- Protein: 2g
While these aren’t exactly health food, they do offer some perks. Brown sugar contains a bit of molasses, which brings trace minerals and antioxidants. Nuts add healthy fats and a little protein if you include them. For gluten or dairy sensitivities, you can easily adapt the recipe (see above). Allergens to note: contains gluten, dairy, and eggs in the classic version. My take? Dessert is all about balance—enjoy these blondie bars as a special treat, and savor every bite!
Conclusion
There’s a reason these blondie cookie bars are my ultimate dessert bar recipe: they’re easy, adaptable, and totally addictive. Whether you’re a seasoned baker or just starting out, this is a recipe you’ll want to keep in your back pocket for every occasion. I love how they bring people together—there’s just something about sharing a pan of warm, golden blondies that makes any moment special.
Feel free to put your own spin on the recipe—swap in different mix-ins, try new flavors, or tweak it for dietary needs. That’s the beauty of baking at home! Personally, I can’t resist grabbing a warm corner piece, especially when the chocolate is still a little melty. If you make these blondie cookie bars, let me know how they turn out. Share your variations, leave a comment, or tag me on social media. Happy baking—and don’t forget to save a piece for yourself!
Frequently Asked Questions
How do I know when my blondie cookie bars are done baking?
Start checking at 23 minutes. The edges should be set, the top golden, and a toothpick poked in the center should come out with a few moist crumbs. If it’s still wet, bake another 2-3 minutes and check again.
Can I make these blondie bars ahead of time?
Absolutely! They’re great made a day in advance—the flavor actually deepens. Store tightly covered at room temp or freeze for up to 2 months.
What’s the best way to cut blondie bars cleanly?
Let them cool completely, then use a sharp knife (wiped clean between cuts). For extra-neat bars, chill them for 10-15 minutes before slicing.
Can I double this recipe for a party?
Yes! Bake in two 9×13 pans or use a half-sheet pan. You may need to add a few minutes to the baking time—just keep an eye on doneness.
Are these blondie cookie bars gluten-free or dairy-free?
The classic recipe contains both, but you can easily adapt it. Use a gluten-free 1:1 flour blend and swap butter for coconut oil or vegan butter for a dairy-free treat.
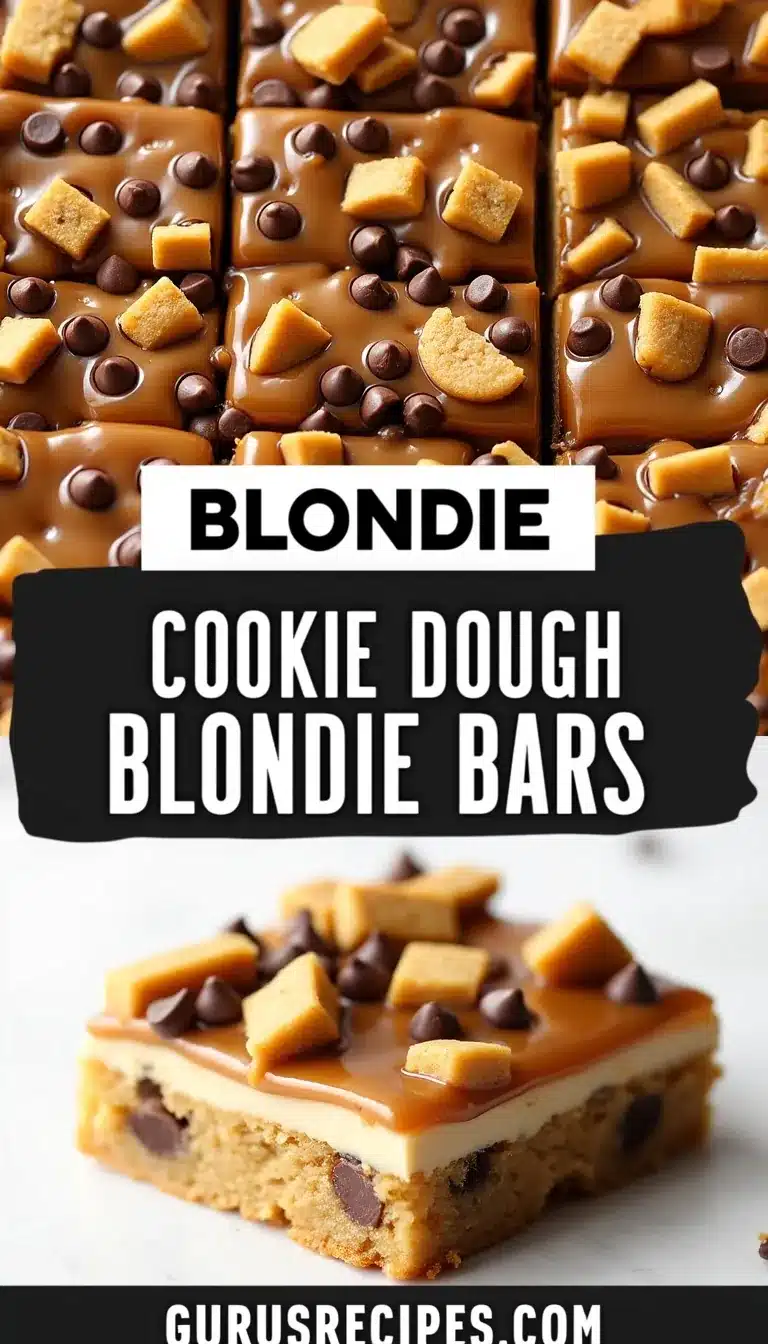

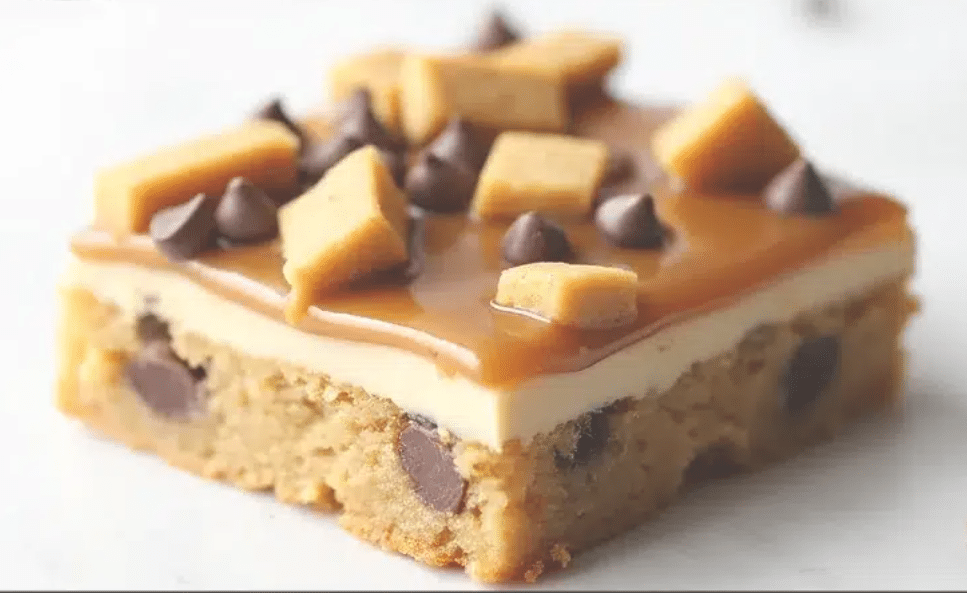
Blondie Cookie Bars
These easy homemade blondie cookie bars are chewy, gooey, and packed with rich brown sugar flavor. Perfect for any occasion, they come together quickly with simple pantry ingredients and no fancy equipment required.
- Total Time: 35 minutes
- Yield: 24 bars 1x
Ingredients
- 1 cup unsalted butter, melted
- 2 cups light brown sugar
- 1/4 cup granulated sugar
- 2 large eggs, room temperature
- 2 teaspoons vanilla extract
- 2 cups all-purpose flour
- 1 teaspoon baking powder
- 1/2 teaspoon salt
- Optional: 1 cup chocolate chips or chunks
- Optional: 1/2 cup chopped nuts (pecans or walnuts)
- Optional: 1/2 cup white chocolate chips
- Optional: Toffee bits, dried cranberries, or sprinkles
Instructions
- Preheat oven to 350°F (175°C). Line a 9×13-inch baking pan with parchment paper, leaving an overhang for easy lifting. Lightly grease the paper if desired.
- In a large microwave-safe bowl, melt the butter in 30-second bursts, stirring between each, until fully melted but not bubbling hot. Let cool for 2-3 minutes.
- Add brown sugar and granulated sugar to the melted butter. Whisk until smooth and glossy, about 1 minute.
- Add eggs and vanilla extract. Whisk thoroughly until the mixture lightens in color and looks creamy.
- In a medium bowl, whisk together flour, baking powder, and salt.
- Gently fold the dry ingredients into the wet mixture using a rubber spatula. Stop as soon as the last streak of flour disappears.
- Fold in chocolate chips or other mix-ins, reserving a handful to press on top if desired.
- Spread the batter evenly into the prepared pan, smoothing the top.
- Bake on the center rack for 23-28 minutes, until the top is set, lightly golden, and a toothpick inserted in the center comes out with a few moist crumbs.
- Let cool in the pan for at least 30 minutes. Lift out using parchment and cut into bars with a sharp knife. For cleaner edges, chill for 10-15 minutes before slicing.
Notes
For gluten-free blondies, use a 1:1 gluten-free flour blend. For dairy-free, substitute butter with melted coconut oil or vegan butter. Don’t overmix the batter to keep bars chewy. Start checking for doneness at 23 minutes; ovens vary. Let bars cool before slicing for clean edges. Store tightly covered at room temperature for up to 4 days, or freeze for up to 2 months.
- Prep Time: 10 minutes
- Cook Time: 25 minutes
- Category: Dessert
- Cuisine: American
Nutrition
- Serving Size: 1 bar
- Calories: 210
- Sugar: 19
- Sodium: 80
- Fat: 10
- Saturated Fat: 6
- Carbohydrates: 28
- Fiber: 0.5
- Protein: 2
Keywords: blondies, cookie bars, dessert bars, easy blondies, homemade blondies, chewy blondies, brown sugar bars, quick dessert, party dessert, bake sale bars


