
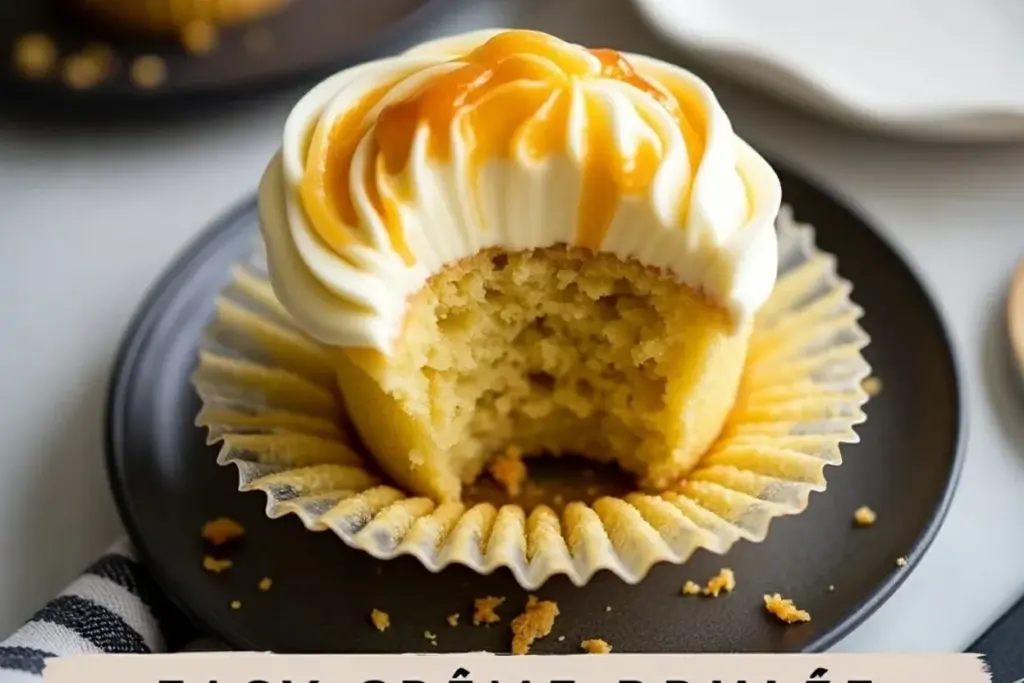
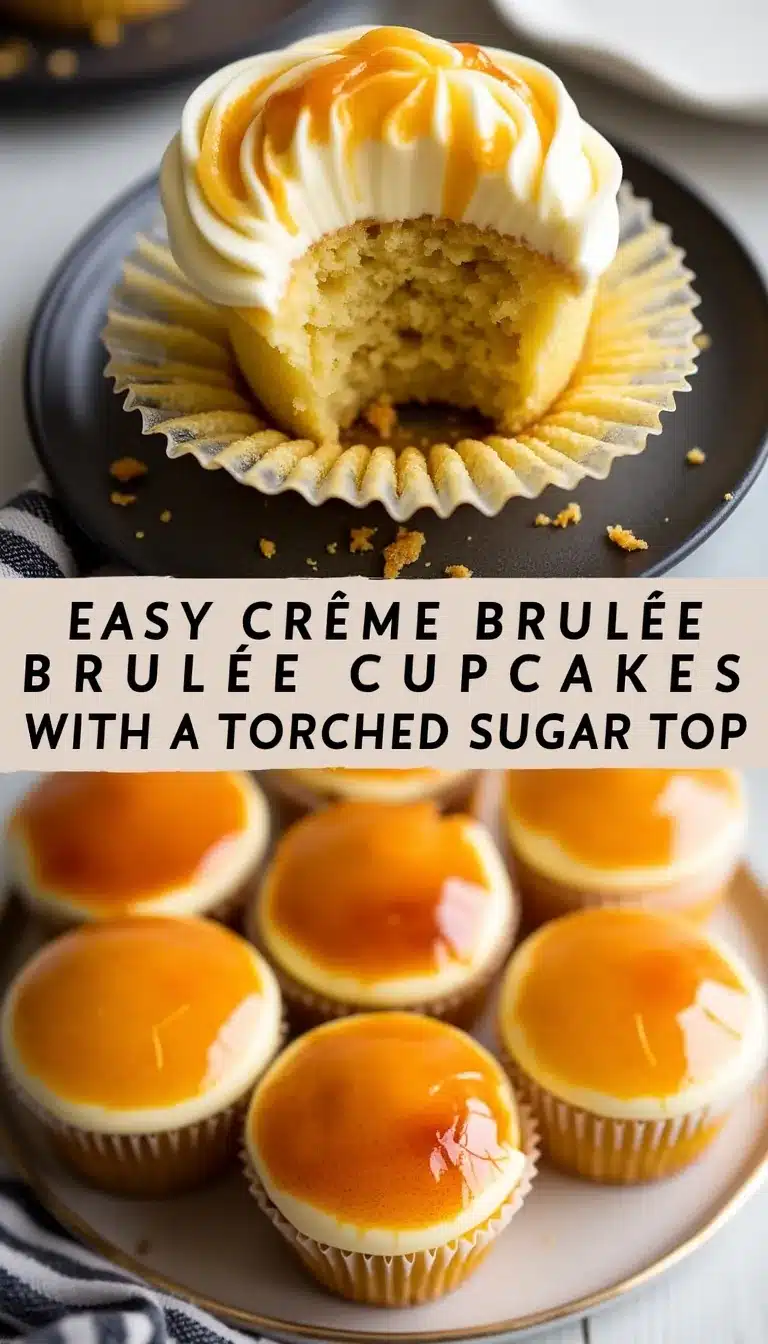
Creamy custard, a crackly caramelized sugar lid, and the pillowy softness of a cupcake—all in one bite. Honestly, the first time I made these crème brûlée cupcakes, my kitchen smelled like a Parisian patisserie collided with a hometown bakery. There’s this moment when you take a torch to the sugar topping, and it sizzles and bubbles, transforming into that iconic glassy finish. It’s pure magic. My friends still talk about the batch I brought to a sunny backyard brunch—every single cupcake disappeared before we even got to coffee.
I’ve always loved crème brûlée, but I was intimidated by the fancy ramekins and water baths. So, I started experimenting—could I get that same lush vanilla custard, the satisfying sugar shell, and a fluffy cake base? After a dozen (okay, maybe two dozen) tests, these crème brûlée cupcakes became my signature dessert. They’re the best of both worlds: sophisticated and homey, decadent and actually doable. If you’re nervous about torches or custards, trust me—this recipe is for you.
These easy crème brûlée cupcakes are the answer when you want something show-stopping without a ton of fuss. They’re perfect for birthdays, bridal showers, or just treating yourself after a long week. You don’t need a culinary degree or fancy equipment (though, you do get to play with a kitchen torch—so fun). If you’ve ever wished you could eat crème brûlée with your hands, this recipe is about to make your dessert dreams come true. I’ve tested every shortcut and tweak, so you’ll get a cupcake that’s soft, rich, and oh-so-satisfying. Let’s make crème brûlée cupcakes together—you’ll never look at dessert the same way.
Why You’ll Love This Crème Brûlée Cupcakes Recipe
I’ve baked my share of cupcakes and custards, but these crème brûlée cupcakes are something else. Every time I serve them, people’s eyes light up—especially when they tap that golden sugar top and hear the crack. After years of baking, I can confidently say this recipe is reliable, party-ready, and a total crowd-pleaser.
- Quick & Easy: No water bath, no fuss—just straightforward steps that anyone can follow. You’ll have bakery-level cupcakes in under an hour.
- Simple Ingredients: All pantry staples—no need for special orders or fancy vanilla beans (unless you want to splurge!).
- Perfect for Any Occasion: These cupcakes are a hit at brunches, dinner parties, birthdays, or even as a sweet finish to a weeknight dinner.
- Crowd-Pleaser: From picky eaters to dessert snobs, I’ve never met someone who didn’t go back for seconds.
- Unbelievably Delicious: The combo of creamy custard filling, soft vanilla cake, and crackly torched sugar is next-level comfort food.
What really sets this crème brûlée cupcakes recipe apart is the technique. Instead of just plopping custard on top, I swirl a silky vanilla pastry cream right into the cupcake center—so every bite gets that classic crème brûlée texture. The torched sugar top? Pure theater. It’s not just about looks (though they’re definitely Instagram-worthy); it adds a satisfying crunch you won’t get from regular frosting.
This isn’t just another cupcake recipe. It’s a little bit extra, in the best way. You can prep ahead, torch the tops just before serving, and wow everyone with your “secret bakery” skills. And if you’re new to using a kitchen torch, don’t stress—I’ll walk you through it. There’s something about shattering that caramel sugar lid that makes this dessert unforgettable. Trust me, once you try these, you’ll want to make them for every special moment (or just because).
What Ingredients You Will Need
This crème brûlée cupcakes recipe is all about transforming simple, classic ingredients into a show-stopping treat. Most of these you probably already have tucked away in your pantry or fridge. Here’s what you’ll need (and a few tips I’ve picked up after plenty of taste-testing):
- For the Vanilla Cupcakes:
- 1 1/4 cups (160g) all-purpose flour (I like King Arthur for a tender crumb)
- 1 cup (200g) granulated sugar
- 1/2 cup (113g) unsalted butter, softened (room temperature is key for creaming)
- 2 large eggs, room temperature
- 1/2 cup (120ml) whole milk (substitute with almond milk for dairy-free)
- 1 1/2 tsp vanilla extract (go for pure vanilla for that bakery aroma)
- 1 1/4 tsp baking powder
- 1/4 tsp fine sea salt
- For the Crème Brûlée Custard Filling:
- 1 cup (240ml) heavy cream
- 2 large egg yolks
- 1/4 cup (50g) granulated sugar
- 1 tsp vanilla bean paste or extract (bean paste really amps up the flavor, but extract works too)
- Pinch of salt
- For the Torched Sugar Top:
- 1/3 cup (65g) granulated sugar (superfine works best for that glassy crunch)
Ingredient Tips: Use fresh eggs and high-quality vanilla for the best flavor. If you’re gluten-free, swap in a 1:1 gluten-free flour blend (I’ve used Bob’s Red Mill with great results). For dairy-free folks, coconut cream and vegan butter do the trick. And don’t worry if you’re out of vanilla bean paste—extract still gives that classic crème brûlée vibe.
Honestly, the first time I made these, I tried it with half-and-half instead of heavy cream—don’t do it. Stick with heavy cream for the silkiest custard. If you want to experiment, try adding a little orange zest to the cupcake batter for a fresh twist, or swap half the vanilla for almond extract. The possibilities are endless, but the basics are tried-and-true!
Equipment Needed
You don’t need a professional pastry kitchen to make crème brûlée cupcakes, but a few tools will make it a whole lot easier. Here’s what I use (and what you can swap if you’re missing anything):
- Muffin or Cupcake Tin: Standard 12-cup size works best. If you only have a mini muffin tin, just reduce the baking time.
- Paper Cupcake Liners: Keeps cleanup easy and the cupcakes pretty.
- Mixing Bowls: At least two—one for batter, one for custard. Glass or stainless steel are my go-to.
- Electric Mixer: Hand or stand mixer makes creaming butter a breeze, but you can use a whisk and elbow grease if needed.
- Whisk & Rubber Spatula: Whisk for the custard, spatula for folding and scraping every last bit from the bowl.
- Small Saucepan: For gently heating the cream (don’t use too high a heat—trust me, I’ve had a few curdled batches!).
- Pastry Bag or Zip-Top Bag: For piping custard into the cupcakes. I’ve used a spoon in a pinch, but it gets messy.
- Paring Knife or Apple Corer: To hollow out the cupcake centers. You can use a spoon, but a corer makes it quick and tidy.
- Kitchen Torch: This is where the fun happens! Even a small, budget-friendly torch works. If you don’t have one, a broiler in your oven can work, but you’ll need to keep a close eye on it.
- Wire Cooling Rack: Letting cupcakes cool completely prevents soggy bottoms (been there, done that).
If you’re just starting out, don’t splurge on fancy gear. My first torch was $12 and lasted me years. Just wipe down your torch and cupcake tin well after each use to keep them in tip-top shape. If you’re torch-shy, the oven broiler is your backup, but you won’t get quite the same dramatic sugar crackle.
How to Make Crème Brûlée Cupcakes: Step-by-Step
-
Preheat & Prep:
Preheat your oven to 350°F (175°C). Line a 12-cup muffin tin with paper cupcake liners. Set out all your ingredients to bring them to room temperature (especially eggs, butter, and milk—this makes a huge difference for texture!). -
Make the Vanilla Cupcake Batter:
In a large mixing bowl, cream together 1/2 cup (113g) unsalted butter and 1 cup (200g) sugar for 2-3 minutes until light and fluffy. Add in 2 large eggs, one at a time, beating well after each. Mix in 1 1/2 tsp vanilla extract. -
Combine Dry Ingredients:
In a separate bowl, whisk together 1 1/4 cups (160g) all-purpose flour, 1 1/4 tsp baking powder, and 1/4 tsp salt. Gradually add the dry ingredients to the wet mixture, alternating with 1/2 cup (120ml) milk. Begin and end with flour. Don’t overmix; just blend until smooth. -
Fill & Bake:
Divide the batter evenly among the cupcake liners (about 2/3 full each). Bake for 17-20 minutes, or until a toothpick inserted in the center comes out clean. The tops should be lightly golden and springy to the touch. Cool in the pan for 5 minutes, then transfer to a wire rack to cool completely. (Warm cupcakes will melt the custard—learned that lesson the hard way!) -
Prepare the Custard Filling:
While the cupcakes cool, make the crème brûlée filling. In a small saucepan, heat 1 cup (240ml) heavy cream over medium-low until steaming (not boiling!). In a bowl, whisk together 2 egg yolks, 1/4 cup (50g) sugar, and 1 tsp vanilla bean paste or extract. Slowly pour the warm cream into the yolk mixture, whisking constantly to avoid scrambling the eggs. -
Cook the Custard:
Return the mixture to the saucepan and cook over low heat, stirring constantly, until it thickens enough to coat the back of a spoon (about 5-7 minutes). Don’t let it boil! If it looks lumpy, strain through a fine mesh sieve. Let cool to room temperature, then refrigerate for 20 minutes until slightly thickened. -
Fill the Cupcakes:
Once cupcakes are cool, use a paring knife or apple corer to cut a small hole in the center of each cupcake (about 1 inch deep). Fill a piping bag or zip-top bag with the chilled custard and pipe into each hole, just to the top. Don’t overfill or it’ll ooze out! Replace the little “lids” if you want, but I usually snack on them. -
Top with Sugar:
Sprinkle a generous, even layer of granulated sugar (about 1 teaspoon per cupcake) over each filled cupcake. The more evenly you spread it, the better it caramelizes. -
Torch the Sugar:
Using a kitchen torch, move the flame in small circles just above the sugar until it bubbles and turns golden brown. Don’t stay in one spot too long or it’ll burn. (If using the broiler, place cupcakes under high heat for 1-2 minutes, watching closely—rotate if needed for even browning.) -
Cool, Crack & Serve:
Let the sugar topping harden for 2-3 minutes before serving. The tops should make that classic “crack” sound when tapped with a spoon. Serve as-is, or with a few fresh berries for a pop of color.
Preparation Notes: If your custard splits, whisk in a bit of cold cream to bring it back together. And if you’re in a hurry, make the custard a day ahead—it holds up perfectly in the fridge!
Cooking Tips & Techniques
After making these crème brûlée cupcakes more times than I can count, I’ve picked up a few tricks (and learned from plenty of mishaps):
- Don’t Overbake: Start checking cupcakes at 16 minutes. Overbaking dries them out, and you want that soft, tender crumb. If the tops spring back gently, they’re done.
- Cool Completely Before Filling: Warm cupcakes = melted custard mess. Trust me, be patient—chilled cupcakes make filling way easier.
- Whisk Custard Constantly: The secret to silky crème brûlée filling is gentle, constant whisking over low heat. If you see lumps, strain immediately.
- Go Easy on the Torch: Keep the torch moving, and don’t get too close. Aim for a medium amber—too dark and it turns bitter fast.
- Sugar Layer Matters: Too little sugar, and you won’t get a nice shell. Too much, and it’ll be tough to crack. About one teaspoon per cupcake is the sweet spot.
- Multitasking: While cupcakes bake, make your custard. By the time they’re cool enough to fill, the custard will be set. Efficiency win!
- Practice Makes Perfect: The first time I used a torch, I scorched a few tops. Start with a light hand—it’s easy to add color, impossible to undo a burnt spot.
- Make-Ahead: You can bake cupcakes and make custard a day ahead. Fill and torch the same day for best texture.
If you’re new to caramelizing sugar, don’t sweat it. The torch can be a little intimidating at first, but after your first “crack,” you’ll be hooked. And if you don’t have a torch? The broiler is your backup plan, but keep a close watch so you don’t end up with charred cupcakes (I’ve done it—still tasty, just not as pretty!).
Variations & Adaptations
Crème brûlée cupcakes are crazy versatile—here are a few of my favorite twists:
- Chocolate Crème Brûlée Cupcakes: Add 1/4 cup (25g) unsweetened cocoa powder to the cupcake batter, and a splash of espresso to the custard for mocha vibes.
- Berry-Filled: Place a fresh raspberry or blueberry inside the cupcake before filling with custard. The tartness is an awesome contrast to the sweet custard.
- Gluten-Free: Swap in a 1:1 gluten-free flour blend in the cupcake batter. I’ve had great luck with Bob’s Red Mill.
- Lactose-Free: Use coconut cream and plant-based butter for the custard and batter. The flavor is slightly different but still rich and satisfying.
- Caramel Crème Brûlée: Stir a tablespoon of caramel sauce into the custard before filling.
- Orange Zest: Add 1 tsp of finely grated orange zest to the cupcake batter for a citrusy lift—my kids love this one!
I once made a chai-spiced version for a fall brunch, adding cinnamon, cardamom, and a pinch of ground ginger to the custard. It was a total hit! If you have nut allergies in the family, stick to the classic recipe (no almond extract or nut flours). And for a lower-sugar version, you can use a sugar substitute in the cupcake and custard, but keep real sugar for the topping so it caramelizes properly.
Serving & Storage Suggestions
I love serving crème brûlée cupcakes slightly chilled, right after torching the sugar so the top is crisp. Arrange them on a pretty platter with a few fresh berries and a dusting of powdered sugar around the edges for a bakery-worthy look.
- Best Served: Cool or at room temperature, with the sugar freshly torched for maximum crackle.
- Pairings: A pot of strong coffee or an espresso really brings out the vanilla custard notes. They’re also wonderful alongside a glass of sweet dessert wine or even a scoop of vanilla bean ice cream.
- Storage: Store cupcakes in an airtight container in the refrigerator for up to 3 days. Torch the sugar topping just before serving for best texture—otherwise, the sugar can weep and lose its crunch.
- Freezing: You can freeze unfilled cupcakes for up to 2 months. Thaw and fill with custard, then torch the tops before serving.
- Reheating: Don’t heat filled cupcakes; the custard will melt. Instead, let refrigerated cupcakes sit out for about 15 minutes before serving to take the chill off.
One of the things I love most is how the flavors deepen after a day in the fridge—the vanilla and caramel notes become even richer. Just remember: always torch the sugar topping right before eating for that signature glassy crunch!
Nutritional Information & Benefits
Each crème brûlée cupcake (with filling and sugar top) has approximately:
- Calories: 310
- Fat: 15g
- Carbohydrates: 38g
- Protein: 4g
- Sugar: 27g
Health Notes: These cupcakes are a sweet treat, but using real vanilla and eggs means you get a little protein and healthy fats. If you’re gluten-free or dairy-free, adaptation is easy (see above). The custard is naturally nut-free, so no worries for those with allergies (just check your flour blend!). Personally, I love that these cupcakes are portion-controlled—one is perfectly satisfying, even for a sweet tooth like mine.
Conclusion
Crème brûlée cupcakes are the ultimate treat when you want something special, but not complicated. They’ve got that creamy, dreamy custard, a soft vanilla cake, and the magic of a torched sugar top—all in one handheld dessert. Whether you’re baking for a crowd, a celebration, or just because, these cupcakes never fail to impress.
Don’t be afraid to put your own spin on the recipe—add citrus, swap in chocolate, or try a new extract. The heart of this dessert is its blend of comfort and wow-factor. Honestly, I always smile when I hear the first “crack” as someone taps the caramel top.
Give these a try, and let me know how they turn out! Share your creations, tips, or twists in the comments below—I love seeing your dessert victories. Happy baking, and may your sugar always caramelize perfectly!
FAQs About Crème Brûlée Cupcakes
Can I make crème brûlée cupcakes in advance?
Absolutely! Bake the cupcakes and make the custard up to two days ahead. Fill and torch the sugar topping just before serving for best results.
What if I don’t have a kitchen torch?
No worries. Use your oven’s broiler on high—place cupcakes on a baking sheet and broil for 1-2 minutes, watching closely so the sugar doesn’t burn.
Can I use store-bought custard or pudding?
You can, but homemade custard gives the richest flavor and texture. If you’re in a pinch, a thick vanilla pudding works—just make sure it’s not too runny.
How do I keep the sugar topping crisp?
Torch the sugar just before serving. If you refrigerate after torching, the caramel may soften. Always store un-torched and finish with sugar right before eating.
Can I freeze crème brûlée cupcakes?
Freeze the unfilled cupcakes only. Thaw, fill with custard, and torch the top right before serving. Filled cupcakes don’t freeze well—they get soggy as they thaw.

Crème Brûlée Cupcakes
These crème brûlée cupcakes combine creamy vanilla custard, a crackly caramelized sugar top, and soft vanilla cake for a show-stopping handheld dessert. Perfect for special occasions or an indulgent treat, they’re surprisingly easy to make at home with simple ingredients and a kitchen torch.
- Total Time: 45 minutes
- Yield: 12 cupcakes 1x
Ingredients
- 1 1/4 cups (160g) all-purpose flour
- 1 cup (200g) granulated sugar
- 1/2 cup (113g) unsalted butter, softened
- 2 large eggs, room temperature
- 1/2 cup (120ml) whole milk
- 1 1/2 tsp vanilla extract
- 1 1/4 tsp baking powder
- 1/4 tsp fine sea salt
- 1 cup (240ml) heavy cream
- 2 large egg yolks
- 1/4 cup (50g) granulated sugar
- 1 tsp vanilla bean paste or extract
- Pinch of salt
- 1/3 cup (65g) granulated sugar (for topping)
Instructions
- Preheat your oven to 350°F (175°C). Line a 12-cup muffin tin with paper cupcake liners. Bring eggs, butter, and milk to room temperature.
- In a large mixing bowl, cream together butter and 1 cup sugar for 2-3 minutes until light and fluffy. Add eggs one at a time, beating well after each. Mix in vanilla extract.
- In a separate bowl, whisk together flour, baking powder, and salt. Gradually add dry ingredients to the wet mixture, alternating with milk. Begin and end with flour. Mix until just smooth.
- Divide batter evenly among cupcake liners (about 2/3 full). Bake for 17-20 minutes, or until a toothpick inserted in the center comes out clean. Cool in pan for 5 minutes, then transfer to a wire rack to cool completely.
- While cupcakes cool, make the custard: In a small saucepan, heat heavy cream over medium-low until steaming (not boiling). In a bowl, whisk together egg yolks, 1/4 cup sugar, and vanilla bean paste or extract. Slowly pour warm cream into yolk mixture, whisking constantly.
- Return mixture to saucepan and cook over low heat, stirring constantly, until thickened enough to coat the back of a spoon (about 5-7 minutes). Strain if lumpy. Let cool to room temperature, then refrigerate for 20 minutes.
- Once cupcakes are cool, use a paring knife or apple corer to cut a small hole in the center of each cupcake (about 1 inch deep). Fill a piping bag or zip-top bag with chilled custard and pipe into each hole.
- Sprinkle about 1 teaspoon granulated sugar evenly over each filled cupcake.
- Using a kitchen torch, caramelize the sugar by moving the flame in small circles until the sugar bubbles and turns golden brown. (Alternatively, broil under high heat for 1-2 minutes, watching closely.)
- Let the sugar topping harden for 2-3 minutes before serving. Serve as-is or with fresh berries.
Notes
For best results, cool cupcakes completely before filling to prevent the custard from melting. Torch the sugar topping just before serving for maximum crunch. Custard and cupcakes can be made a day ahead and assembled before serving. For gluten-free or dairy-free adaptations, use a 1:1 gluten-free flour blend and coconut cream/vegan butter. If using the broiler instead of a torch, watch closely to avoid burning.
- Prep Time: 25 minutes
- Cook Time: 20 minutes
- Category: Dessert
- Cuisine: French-American
Nutrition
- Serving Size: 1 cupcake
- Calories: 310
- Sugar: 27
- Sodium: 140
- Fat: 15
- Saturated Fat: 9
- Carbohydrates: 38
- Protein: 4
Keywords: crème brûlée cupcakes, easy dessert, torched sugar, vanilla custard, homemade cupcakes, party dessert, French dessert, bakery-style cupcakes


