
Crushing Oreos always takes me right back to carefree afternoons with my sister—crinkly cookie packages, giggles, and that rich, chocolatey smell filling the kitchen. There’s just something about Oreo Truffle Balls that makes you feel like a kid again, but with a grown-up twist (think: smooth cream cheese, decadent chocolate shell, and a no-bake prep that’s honestly a lifesaver). I first whipped up a batch of these Oreo Truffle Balls for a last-minute birthday party, and I was amazed at how fast they vanished—faster than you can say “no-bake dessert.”
These little treats are everything I love in a sweet bite: bold chocolate flavor, creamy texture, and just the right amount of crunch. The best part? You barely need any time or fancy equipment. They’re a hit with both kids and adults, and I’ve even caught my husband sneaking a few straight from the fridge (no shame—so do I!). If you’re searching for an Oreo Truffle Balls recipe that’s quick, foolproof, and seriously delicious, you’ve landed in the right place.
Whether you’re planning a party, need a make-ahead dessert for the holidays, or just want to treat yourself after a long day, these Oreo Truffle Balls are pure joy. I’ve tested this recipe a dozen times (sometimes adding a secret ingredient or two), and it never disappoints. It’s perfect for busy families, sweet tooth emergencies, or anyone looking to impress without breaking a sweat. Let’s make dessert irresistible—one truffle at a time!
Why You’ll Love This Oreo Truffle Balls Recipe
- Quick & Easy: No oven, no fancy techniques, and you’ll be rolling these beauties in under 30 minutes. Perfect for last-minute party prep, bake sales, or those “I need chocolate now” moments.
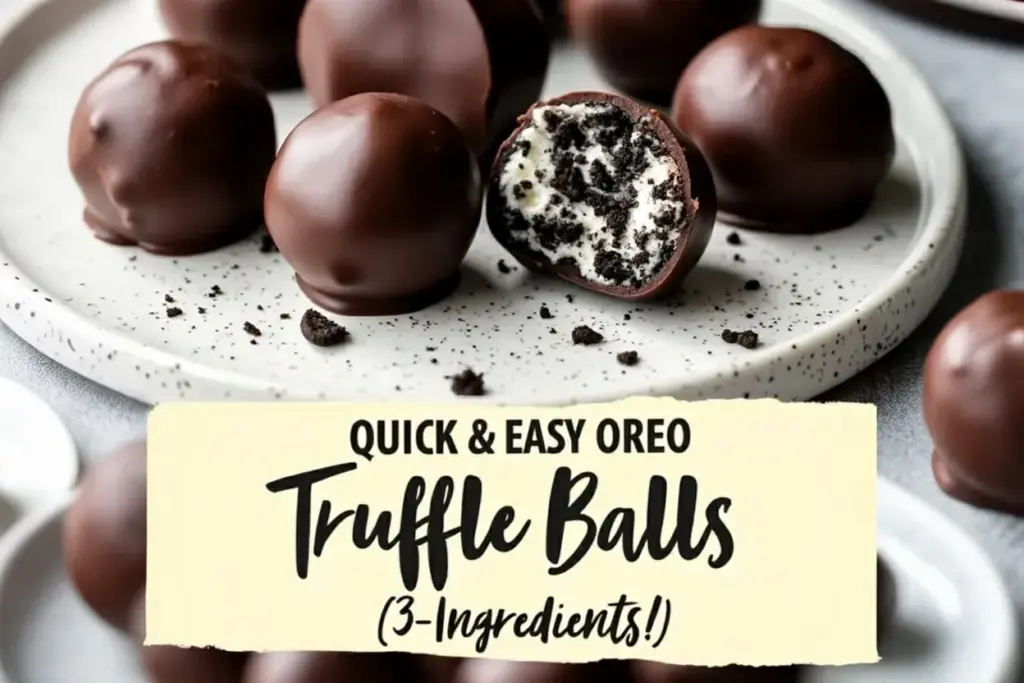
- Simple Ingredients: Just three main ingredients—Oreos, cream cheese, and chocolate. Odds are, you’ve already got them in your kitchen. No wild-goose chases to specialty stores.
- No-Bake & Stress-Free: Forget about hot ovens or complicated steps. These Oreo Truffle Balls are as easy as mix, roll, and dip. Anyone can make them, even if you’re not a “baker.”
- Perfect for Any Occasion: These are show-stoppers at parties, holidays, potlucks, or even as a fun after-school snack. Dress them up with sprinkles or keep them classic—either way, they shine on a dessert table.
- Crowd-Pleaser: Trust me, nobody can eat just one. They’re always the first thing to disappear at gatherings, and everyone will be asking you for the recipe.
- Decadently Delicious: Creamy, chocolatey, and just slightly crunchy—these truffle balls are like an elevated cookies-and-cream dream. You’ll find yourself closing your eyes and savoring every bite.
This Oreo Truffle Balls recipe isn’t just another version—it’s the one you’ll return to again and again. I use a special technique: blending the cookies super-finely (almost powdery!) for that ultra-smooth texture. And let’s face it, the creamy center surrounded by a crisp chocolate shell is pure magic. If you love recipes that bring a bit of nostalgia, big flavor, and a whole lot of fun, you’re in for a treat. These truffles are living proof you don’t need a lot of time or effort to make something unforgettable.
What Ingredients You Will Need
This recipe uses classic, easy-to-find ingredients that come together for a rich, chocolatey treat you’ll crave again and again. Here’s what you’ll need for the ultimate Oreo Truffle Balls:
- Oreo Cookies (36 cookies, about 14.3 oz / 405g): Classic Oreos work best, but double-stuf or flavored varieties (like mint or golden) are fun for a twist. Pulverize them, filling and all—it adds to the creamy texture. Pro tip: I like Nabisco brand for that authentic flavor, but store brands will do in a pinch.
- Cream Cheese (8 oz / 225g, softened): Full-fat cream cheese gives the richest flavor and smoothest truffle center. Make sure it’s at room temperature for easy mixing. You can swap for a dairy-free cream cheese if needed.
- Chocolate for Coating (12 oz / 340g): I usually use semi-sweet chocolate chips or melting wafers for that glossy finish. If you prefer milk or dark chocolate, go for it! Almond bark or white chocolate also works beautifully. Melting tip: Use a brand that melts smoothly, like Ghirardelli or Baker’s.
- Optional Toppings:
- Sprinkles, crushed Oreos, or a drizzle of white chocolate for decoration (totally up to you—kids love adding colorful sprinkles!)
- Sea salt flakes for a sweet-salty finish (my personal favorite for a grown-up touch)
Ingredient Tips & Substitutions:
- Gluten-Free: Use gluten-free sandwich cookies for a celiac-friendly version.
- Dairy-Free: Swap in your go-to plant-based cream cheese and use dairy-free chocolate chips.
- Flavor Variations: Try peanut butter Oreos, or add a splash of vanilla or a pinch of instant espresso powder to the cream cheese mixture for an extra punch.
- Freshness: Use unopened cream cheese and cookies for best results—stale cookies just don’t blend as well.
Honestly, the beauty of Oreo Truffle Balls is how forgiving they are. As long as you have the basics, you can mix and match flavors and toppings to suit your mood or occasion. It’s a great way to use up leftover cookies, too!
Equipment Needed
- Food Processor or Blender: For crushing the Oreos into a fine crumb. If you don’t have one, a sturdy zip-top bag and a rolling pin will work—just expect a little arm workout!
- Mixing Bowl: A medium bowl is perfect for combining the Oreo crumbs and cream cheese. Glass or metal both work fine.
- Hand Mixer or Sturdy Spoon: I usually use a hand mixer for super-smooth results, but you can totally get by with some elbow grease and a strong spoon.
- Small Cookie Scoop (about 1-inch / 2.5cm): Helps portion out uniform truffle balls. If you don’t have one, a tablespoon or even your hands will do the trick.
- Baking Sheet Lined with Parchment Paper: For chilling and setting the truffles. Parchment prevents sticking and makes cleanup a breeze.
- Microwave-Safe Bowl: For melting chocolate. Alternatively, use a double boiler if you prefer stovetop melting.
- Forks or Dipping Tools: To dip the truffles into melted chocolate. Two forks work just fine—fancy tools are optional.
- Refrigerator Space: Make sure there’s room to chill the truffle balls!
Honestly, you don’t need fancy gadgets—just the basics. I’ve made these with nothing but a bag and a rolling pin when traveling, and they still tasted amazing. If using a food processor, be sure to pulse in short bursts so you don’t overheat the cookies. And if you’re using an electric mixer, keep it on low to avoid splattering crumbs everywhere (learned that the hard way!).
How to Make Oreo Truffle Balls – Step-by-Step
-
Crush the Oreos:
- Place 36 Oreo cookies (about 14.3 oz / 405g) in a food processor or blender. Pulse until you have fine, even crumbs—think sand, not gravel. (If using a zip-top bag, seal the cookies inside and crush them with a rolling pin.)
- Prep tip: Don’t leave any big cookie chunks—smooth crumbs make smoother truffles.
-
Make the Truffle Mixture:
- Transfer the Oreo crumbs to a mixing bowl. Add 8 oz (225g) softened cream cheese.
- Mix until fully combined and the mixture looks like thick, sticky dough. I use a hand mixer for this (about 1-2 minutes on medium), but a sturdy spoon works too.
- Sensory cue: The dough should be uniform in color, no streaks of white cream cheese.
-
Shape the Truffle Balls:
- Using a small cookie scoop (about 1-inch / 2.5cm), scoop out the mixture and roll between your palms to form smooth balls.
- Place balls on a parchment-lined baking sheet. You should get about 24-30 truffles.
- Prep tip: If the mixture feels too sticky, chill it for 10 minutes before rolling.
-
Chill the Balls:
- Refrigerate the rolled truffle balls for at least 30 minutes, or freeze for 15 minutes. This helps them firm up, making dipping way easier.
- Troubleshooting: If the balls flatten or lose shape, they need more chilling time.
-
Melt the Chocolate:
- In a microwave-safe bowl, melt 12 oz (340g) chocolate chips or melting wafers in 30-second bursts, stirring after each, until smooth. (Alternatively, use a double boiler on the stove.)
- Warning: Don’t overheat the chocolate or it will seize—better to stir frequently and go slow.
-
Dip the Truffles:
- Using two forks, dip each chilled ball into the melted chocolate. Tap off excess chocolate on the side of the bowl.
- Return dipped truffles to the parchment-lined sheet.
- Personal tip: If the chocolate thickens as you dip, microwave it for 10 seconds to loosen it up again.
-
Add Toppings (Optional):
- While chocolate is still wet, sprinkle with crushed Oreos, sprinkles, or sea salt.
- Decorating tip: Kids love helping with sprinkles—just be ready for a little mess.
-
Chill Until Set:
- Return the truffles to the fridge for at least 20 minutes, or until the chocolate is firm.
- Sensory cue: The chocolate should be shiny and crisp to the touch.
-
Serve and Enjoy!
- Transfer the Oreo Truffle Balls to a platter or airtight container. Store in the fridge until ready to serve.
- Efficiency tip: Make these a day ahead—they taste even better after flavors meld overnight.
Cooking Tips & Techniques for Perfect Oreo Truffle Balls
- Crush Cookies Thoroughly: Finer crumbs make a smoother, creamier truffle. If you spot any big bits, pulse again or crush with your hands.
- Room Temp Cream Cheese Works Best: Cold cream cheese can leave lumps—let it sit out for at least 30 minutes before mixing. Soft cream cheese blends like a dream and gives you that velvety texture.
- Chill, Chill, Chill: Don’t skip chilling the mixture and the shaped balls. If you try to dip warm or soft truffles, they’ll break apart in the chocolate (trust me, I’ve had a few truffle “swimmers” in my time!).
- Use Good-Quality Chocolate: Melting wafers or baking chocolate melt smoother than regular chocolate chips. If using chips, add 1 teaspoon coconut oil for a glossier finish.
- Work Quickly When Dipping: The colder the truffle, the better it holds up to dipping. If the chocolate gets too thick, rewarm it in the microwave for 10 seconds.
- Decorate While Wet: Add sprinkles or toppings before the chocolate sets so they stick. I like to set up a “sprinkle station” so everything’s within reach.
- Plan for Mess: Dipping gets a little messy—use parchment for easy cleanup and keep a damp towel nearby for sticky fingers.
- Batch Efficiency: If making a double batch, keep half the balls in the fridge while you dip the first half. Warm truffles are tricky to coat!
- Troubleshooting: Truffles cracking? The chocolate might be too hot, or the truffles too cold. Let them sit out for a couple of minutes before dipping.
Honestly, my first time making these, I rushed the chilling and paid the price with misshapen truffles. Lesson learned! Take your time, and you’ll be rewarded with perfect, party-ready Oreo Truffle Balls every time.
Variations & Adaptations
- Gluten-Free Oreo Truffle Balls: Swap regular Oreos for gluten-free sandwich cookies. The process stays exactly the same—nobody will know the difference!
- Dairy-Free Version: Use plant-based cream cheese and dairy-free chocolate chips. I’ve made this for vegan friends, and the results are just as creamy and dreamy.
- Flavor Twists: Try flavored Oreos like mint, peanut butter, or birthday cake. You can also add a teaspoon of instant espresso powder, almond extract, or even a pinch of cinnamon to the filling for a grown-up vibe.
- White Chocolate Coating: Dip the truffles in melted white chocolate for a sweet contrast. Drizzle with dark chocolate for a bakery-worthy look.
- Holiday Themes: Roll in colored sprinkles for birthdays or red and green for Christmas. Crushed peppermint candies are amazing for winter parties.
- Nutty Crunch: Roll the dipped truffles in finely chopped nuts or toasted coconut for extra texture.
- Personal Favorite: I once added a spoonful of peanut butter to the cream cheese—hello, chocolate-peanut butter heaven!
Don’t be afraid to get creative. These Oreo Truffle Balls are a blank canvas for your favorite flavors and holiday colors. Let the kids pick the toppings or make a batch with different coatings for a dessert table that pops!
Serving & Storage Suggestions
- Serving Temperature: Serve chilled or at cool room temperature. I like to arrange them on a pretty platter with a sprinkle of extra cookie crumbs or festive sprinkles for extra flair.
- Presentation Tips: For parties, place each truffle in a mini cupcake liner—super cute and mess-free. Stack them in a pyramid for a Pinterest-worthy centerpiece!
- Pairings: These pair beautifully with coffee, milk, or even a glass of bubbly (for grown-ups). They make a decadent addition to dessert boards or cookie trays.
- Storage: Keep Oreo Truffle Balls in an airtight container in the fridge for up to 2 weeks. For longer storage, freeze in a single layer, then transfer to a freezer-safe bag for up to 2 months.
- Reheating/Thawing: If frozen, thaw in the fridge overnight. No need to reheat—just let them come to a cool room temp for best texture.
- Flavor Note: The flavor actually improves after a day or two as everything melds together. Make ahead for parties, and you’ll be glad you did!
Pro tip: Hide a few in the back of the fridge for yourself—you know, for “quality control.”
Nutritional Information & Benefits
Estimated Nutrition per Truffle Ball (based on 30 truffles):
- Calories: 110
- Fat: 6g
- Carbohydrates: 14g
- Sugar: 10g
- Protein: 1g
Health Notes: While Oreo Truffle Balls are definitely an indulgent treat, they’re made with simple, recognizable ingredients and portioned into bite-sized servings (built-in portion control!). Using dark chocolate adds a dose of antioxidants, and you can adapt the recipe for gluten-free or dairy-free diets with easy substitutions. Just a heads up: these do contain wheat (unless you use gluten-free cookies), dairy, and may contain soy depending on your chocolate. I’m all about balance—enjoying a couple of these truffles with a cup of tea is one of my favorite little pick-me-ups.
Conclusion
If you’re looking for a dessert that’s impossibly easy, totally irresistible, and guaranteed to impress, this Oreo Truffle Balls recipe is it. They’re the kind of sweet you’ll want on repeat—simple enough for a weekday, special enough for parties, and just plain fun to make. I love that you can customize them for any holiday or craving, and they always bring a little joy to the table (or, let’s be real, straight from the fridge).
Try them out, add your own twist, and don’t be surprised if they disappear before you even get to plate them. I’d love to hear how you make these Oreo Truffle Balls your own—drop a comment, share your photos, or let me know your favorite flavor combos. Here’s to more easy, delicious moments in your kitchen (and a few “just for me” truffles hidden in the back of the fridge)!
Happy no-baking, friends!
FAQs About Oreo Truffle Balls
How far in advance can I make Oreo Truffle Balls?
You can make them up to 2 weeks ahead and store them in the fridge, or freeze them for up to 2 months. Perfect for party prep or holiday gifting!
Can I use different flavors of Oreos?
Absolutely! Try mint, peanut butter, or golden Oreos for fun flavor variations. Just keep the quantity the same.
What if I don’t have a food processor?
No problem! Place the Oreos in a sealed zip-top bag and crush them with a rolling pin until fine. It might take a bit more elbow grease, but it works!
Why are my truffle balls falling apart when dipping?
They likely need more chilling time. Make sure the balls are very cold and firm before dipping in chocolate. If the mixture is too soft, pop them in the freezer for 10-15 minutes.
Are these safe for people with allergies?
These contain wheat and dairy, and sometimes soy (in chocolate). For gluten-free or dairy-free versions, substitute with allergy-friendly cookies and cream cheese. Always check ingredient labels to be sure.


Oreo Truffle Balls
These easy, no-bake Oreo Truffle Balls are creamy, chocolatey, and perfect for parties or a quick dessert fix. Made with just three main ingredients, they’re a crowd-pleasing treat that comes together in under 30 minutes.
- Total Time: 50 minutes
- Yield: 24-30 truffle balls 1x
Ingredients
- 36 Oreo cookies (about 14.3 oz / 405g)
- 8 oz (225g) cream cheese, softened
- 12 oz (340g) semi-sweet chocolate chips or melting wafers (for coating)
- Optional: Sprinkles, crushed Oreos, or a drizzle of white chocolate for decoration
- Optional: Sea salt flakes for topping
Instructions
- Place 36 Oreo cookies in a food processor or blender and pulse until you have fine, even crumbs. (Alternatively, crush cookies in a sealed zip-top bag with a rolling pin.)
- Transfer Oreo crumbs to a mixing bowl. Add 8 oz softened cream cheese.
- Mix until fully combined and the mixture looks like thick, sticky dough. Use a hand mixer or sturdy spoon.
- Using a small cookie scoop (about 1-inch), scoop out the mixture and roll between your palms to form smooth balls. Place on a parchment-lined baking sheet (makes about 24-30 truffles).
- Refrigerate the rolled truffle balls for at least 30 minutes, or freeze for 15 minutes, until firm.
- In a microwave-safe bowl, melt 12 oz chocolate chips or melting wafers in 30-second bursts, stirring after each, until smooth. (Alternatively, use a double boiler.)
- Using two forks, dip each chilled ball into the melted chocolate. Tap off excess chocolate and return to the parchment-lined sheet.
- While chocolate is still wet, sprinkle with crushed Oreos, sprinkles, or sea salt if desired.
- Return the truffles to the fridge for at least 20 minutes, or until the chocolate is firm.
- Transfer to a platter or airtight container and store in the fridge until ready to serve.
Notes
For best results, use room temperature cream cheese and finely crush the Oreos. Chill the truffle mixture and shaped balls thoroughly before dipping to prevent them from falling apart. Use good-quality chocolate for a smooth, glossy finish. Decorate while the chocolate is still wet. Store in the fridge for up to 2 weeks or freeze for up to 2 months. Easily adapt for gluten-free or dairy-free diets by substituting cookies and cream cheese.
- Prep Time: 20 minutes
- Cook Time: 0 minutes
- Category: Dessert
- Cuisine: American
Nutrition
- Serving Size: 1 truffle ball
- Calories: 110
- Sugar: 10
- Fat: 6
- Carbohydrates: 14
- Protein: 1
Keywords: Oreo truffle balls, no-bake dessert, party treats, easy truffles, chocolate truffles, Oreo balls, cream cheese truffles, holiday dessert, make-ahead dessert, kid-friendly dessert


