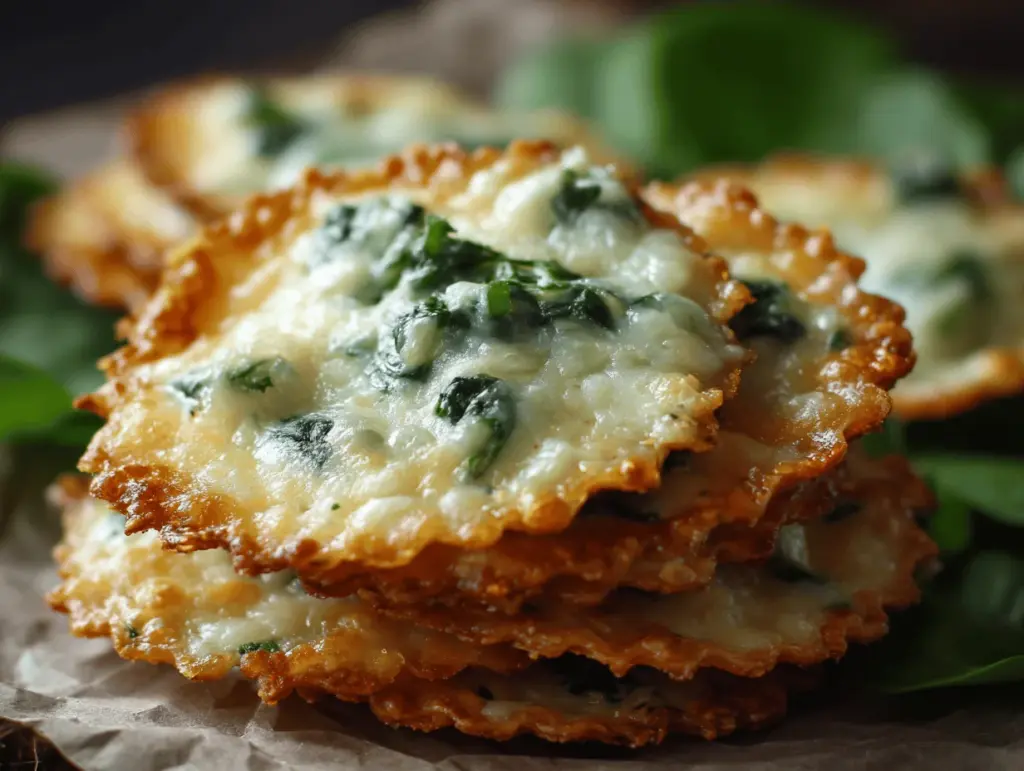
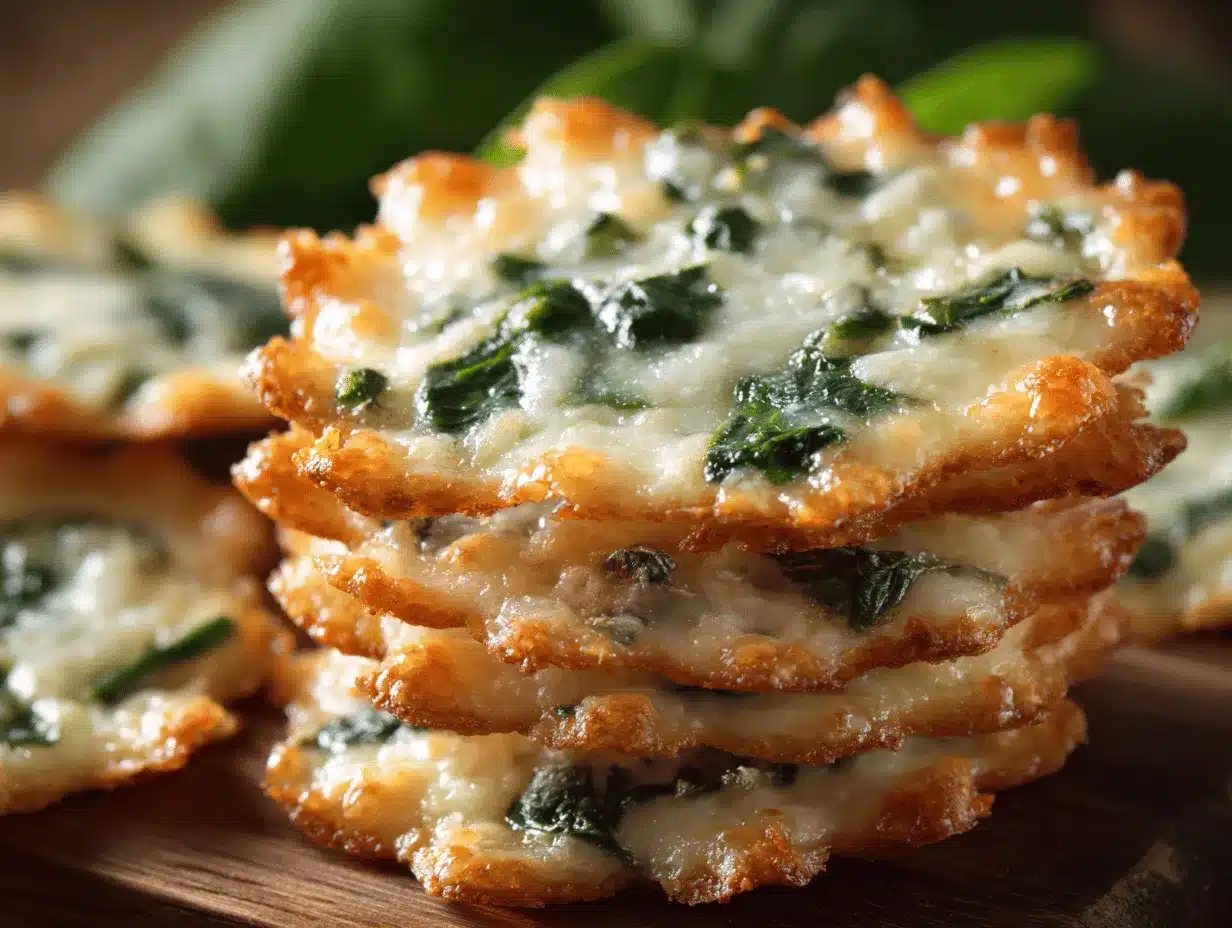
The first time I made these Spinach Dip Cheese Crisps, I was just trying to use up leftover spinach dip and a block of cheddar that had been sitting in my fridge. What I didn’t expect was to create one of the most addictive snacks ever. Imagine the creamy, tangy flavor of spinach dip combined with the golden crunch of baked cheese—it’s the kind of snack that makes you forget everything else while you savor it. These crisps are perfect for parties, lazy afternoons, or even as a guilt-free indulgence during your favorite movie night.
They’re easy to whip up, require minimal ingredients, and best of all, they’re naturally gluten-free and low-carb. Whether you’re hosting friends or simply craving something cheesy, this recipe is bound to become your new favorite. Trust me, once you make one batch, you’ll be hooked!
Why You’ll Love This Recipe
- Quick & Easy: These cheese crisps come together in under 30 minutes, making them perfect for last-minute snacks or appetizers.
- Simple Ingredients: You only need spinach dip, cheese, and a few pantry staples—no fancy shopping trips.
- Perfect for Any Occasion: Great for game days, potlucks, or simply treating yourself to something delicious.
- Crowd-Pleaser: Everyone loves cheesy snacks, and these crisps always disappear within minutes.
- Unbelievably Delicious: The combination of cheesy crunch with creamy spinach dip flavor is pure magic.
What sets these Spinach Dip Cheese Crisps apart is their texture and flavor. They’re not just crunchy—they have that melt-in-your-mouth quality paired with bold, savory notes from the spinach dip. Plus, they’re versatile! You can make them as thin crisps or slightly thicker bites, depending on your preference. It’s like having your favorite party dip in portable, crispy form. What’s not to love?
What Ingredients You’ll Need
This recipe uses simple ingredients to create bold flavors. Here’s what you’ll need:
- Spinach Dip: Use your favorite brand or homemade spinach dip. (Look for one with lots of garlic and parmesan for extra flavor.)
- Cheddar Cheese: Freshly grated works best—choose sharp cheddar for maximum flavor.
- Mozzarella Cheese: Adds a gooey texture and balances the sharpness of cheddar.
- Eggs: Helps bind the crisps together. Use large eggs for the best results.
- Almond Flour: Optional, but adds a bit of structure to the crisps. (You can swap for regular flour if not gluten-free.)
- Garlic Powder: Just a pinch for an extra layer of flavor.
- Salt & Pepper: To taste, because perfectly seasoned snacks are everything.
That’s it! Most of these are kitchen staples, and if you’ve got leftover spinach dip or shredded cheese hanging around, you’re already halfway there.
Equipment Needed
Don’t worry—you won’t need fancy gadgets for this recipe. Here’s what to grab:
- Mixing Bowl: For combining all the ingredients.
- Silicone Baking Mat or Parchment Paper: Keeps the crisps from sticking to the pan.
- Baking Sheet: A standard sheet pan works perfectly.
- Grater: If you’re using block cheese, a box grater will do the trick.
- Spatula: Useful for removing crisps from the baking sheet.
If you don’t have a silicone mat, parchment paper is an excellent alternative. Just make sure you don’t skip this step—otherwise, those cheesy bites might be tricky to remove!
Preparation Method
- Preheat the oven: Set your oven to 375°F (190°C). Line your baking sheet with a silicone mat or parchment paper.
- Mix the ingredients: In a large bowl, combine 1 cup of spinach dip, 1 cup of grated cheddar cheese, 1 cup of grated mozzarella cheese, 1 egg, and 2 tablespoons of almond flour. Add a pinch of garlic powder, salt, and pepper to taste. Stir until well combined.
- Form the crisps: Scoop small mounds of the mixture (about 1 tablespoon each) onto the prepared baking sheet. Flatten each mound gently with the back of a spoon to form thin discs.
- Bake: Place the sheet in the oven and bake for 10-12 minutes, or until the edges are golden and crispy. Keep an eye on them—cheese can burn quickly!
- Cool: Let the crisps cool on the baking sheet for 5 minutes before transferring them to a wire rack. This helps them firm up and reach maximum crunchiness.
And there you have it! Perfectly cheesy, spinach-packed crisps that are ready to be devoured.
Cooking Tips & Techniques
- Grate Your Own Cheese: Pre-shredded cheese often has additives that can affect the texture. Freshly grated is always better.
- Spread Evenly: Make sure the mounds are evenly sized for consistent cooking.
- Keep an Eye on Baking Time: Cheese crisps can go from golden to burnt quickly, so watch closely during the last few minutes.
- Experiment with Thickness: For extra crunch, flatten the crisps thinner; for a softer bite, leave them slightly thicker.
- Use a Cooling Rack: This prevents sogginess and ensures ultimate crispiness.
Variations & Adaptations
Here are a few ways to tweak this recipe to suit your taste or dietary needs:
- Keto-Friendly: Swap almond flour with coconut flour for even lower carbs.
- Spicy Twist: Add a pinch of cayenne pepper or red chili flakes for a kick.
- Herb-Infused: Mix in some chopped fresh basil or parsley for a bright, herbal note.
- Dairy-Free: Use a vegan spinach dip and dairy-free cheese alternatives.
- Extra Veggies: For added nutrition, finely chop some cooked spinach or kale and mix it in.
Feel free to experiment—you might stumble upon your own signature version!
Serving & Storage Suggestions
Spinach Dip Cheese Crisps are best served warm, straight out of the oven, but they’re equally delicious at room temperature. Here’s how to make the most of them:
- Serving: Pair them with a creamy dip like ranch or marinara sauce. They also work as crunchy toppings for salads or soups.
- Storage: Store leftovers in an airtight container in the refrigerator for up to 3 days.
- Reheating: Pop them in a 375°F (190°C) oven for 5 minutes to bring back their crispiness.
- Freezing: Freeze uncooked crisps on a tray, then transfer to a bag. Bake directly from frozen, adding a few minutes to the cooking time.
Pro tip: The flavors deepen overnight, so they’re just as good (if not better) the next day!
Nutritional Information & Benefits
If you’re watching your carb intake or looking for a high-protein snack, these crisps are a great choice. Here’s a quick breakdown (per serving, approximately 4 crisps):
- Calories: 120
- Protein: 7g
- Carbs: 2g
- Fat: 9g
Spinach is packed with vitamins like A and K, while the cheeses provide calcium and protein. Plus, they’re naturally gluten-free and keto-friendly!
Conclusion
If you’re a fan of cheesy snacks with bold flavors, these Spinach Dip Cheese Crisps are about to become your new obsession. They’re quick, easy, and endlessly customizable, making them perfect for every occasion. Whether you’re hosting a party or simply indulging in some “me-time,” these crisps deliver comfort and crunch in every bite.
Give them a try, and don’t forget to share your tweaks or serving ideas in the comments below. I’d love to hear how you made them your own! Happy snacking!
FAQs
Can I use frozen spinach dip?
Yes, just make sure to thaw it completely and drain any excess liquid before using.
What’s the best cheese for this recipe?
Sharp cheddar is ideal for bold flavor, but mozzarella adds a nice gooey texture. Feel free to mix cheeses!
Can I make these crisps dairy-free?
Absolutely! Use a vegan spinach dip and dairy-free shredded cheese for a plant-based version.
How do I prevent the crisps from sticking?
A silicone baking mat or parchment paper is key. Don’t skip this step!
Can I freeze these for later?
Yes, freeze uncooked mounds and bake directly from frozen, adding a few extra minutes to the cooking time.
Pin This Recipe!