
Imagine biting into a treat that’s equal parts fruity, creamy, and downright irresistible. That’s exactly what you get with these amazing blueberry bars with cheesecake layers. Whether you’re hosting a family gathering, attending a potluck, or just craving something sweet, this recipe is sure to be your new favorite. Trust me, once you try them, you’ll be making excuses to whip up a batch!
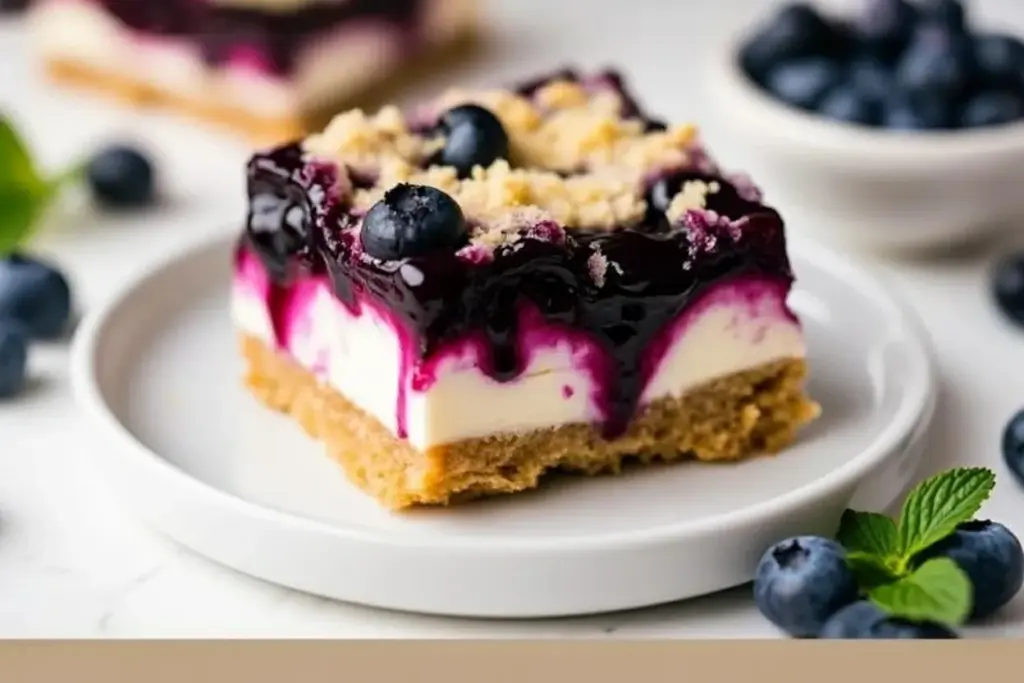
What sets this recipe apart is the perfect balance of flavors—the tartness of fresh blueberries, the creamy richness of cheesecake, and the buttery crumble that ties it all together. Plus, they’re surprisingly easy to make! Let me take you through everything you need to know to make these delightful bars.
The Story Behind Blueberry Bars
Blueberries have always been a summer staple in my kitchen. Growing up, I spent lazy afternoons picking fresh blueberries with my family, their sweet aroma filling the air. We’d freeze bags full of them to enjoy all year long. It’s no surprise that blueberry desserts hold a special place in my heart.
These blueberry bars with cheesecake layers are a modern twist on the classic blueberry pie. I wanted something portable and shareable, yet still indulgent. The idea of combining cheesecake and blueberries came to me after experimenting with layered desserts, and I’ve never looked back!
What’s great about this recipe is its versatility. While it’s perfect for summer when blueberries are at their peak, you can easily use frozen berries to enjoy it year-round. Plus, it’s the kind of dessert that feels just as appropriate for a casual backyard barbecue as it does for a holiday dinner.
Ingredient Breakdown
Let’s talk ingredients! Each element in this recipe serves a delicious purpose, and I want to make sure you get the best results possible. Here’s the lowdown:
- Blueberries: Fresh blueberries are ideal for their vibrant flavor and texture, but frozen can work in a pinch (no need to thaw). Look for berries that are plump and deep blue. If you’re feeling adventurous, try wild blueberries for an extra burst of flavor.
- Cream Cheese: Full-fat cream cheese is essential for the creamy cheesecake layer. Make sure it’s softened for easy mixing—trust me, cold cream cheese is a pain to work with!
- Sugar: A mix of granulated sugar and brown sugar adds sweetness and depth to both the crumble and the cheesecake layer. If you like a less-sweet dessert, you can reduce the sugar slightly.
- Butter: Unsalted butter brings richness to the buttery crumble topping. Use high-quality butter for the best flavor—European-style works wonderfully.
- Flour: All-purpose flour is your go-to here. If you need a gluten-free option, substitute with a 1:1 gluten-free baking mix.
- Lemon Juice: Just a splash brightens up the blueberry filling and balances the sweetness. Freshly squeezed is always better.
- Egg: The egg helps bind the cheesecake layer and gives it a smooth texture. It’s a small addition that makes a big difference.
- Vanilla Extract: Pure vanilla extract adds warm, fragrant notes to both the cheesecake and crumble layers. Avoid imitation vanilla—it won’t have the same depth.
Feel free to play with the ingredients a bit! For example, swap out blueberries for raspberries or blackberries, or add a pinch of cinnamon to the crumble for a cozy twist.
Equipment Needed
This recipe doesn’t require fancy tools, which is part of its charm. Here’s what you’ll need:
- 9×13 Baking Pan: A standard baking pan is perfect for this recipe. Line it with parchment paper for easy removal.
- Mixing Bowls: You’ll need a few bowls for the crumble, cheesecake mixture, and blueberry filling.
- Electric Mixer: A hand mixer or stand mixer will make combining the cheesecake filling a breeze.
- Spatula: A rubber spatula is great for scraping every last bit of batter from the bowls.
- Measuring Cups and Spoons: Precision matters here, so don’t eyeball ingredients.
If you don’t have a mixer, you can mix the cheesecake filling by hand—it’ll just take a bit more effort. And if you don’t have parchment paper, greasing the pan with butter will work in a pinch.
Preparation Method
- Preheat your oven: Set it to 350°F (175°C) and line your baking pan with parchment paper.
- Make the crumble: In a mixing bowl, combine 2 cups (250g) flour, 1 cup (200g) brown sugar, and 1/2 cup (115g) unsalted butter, cut into cubes. Use your fingers or a pastry cutter to create a crumbly mixture. Set aside 1/3 of it for the topping.
- Prepare the cheesecake layer: Beat 8 oz (225g) cream cheese until smooth. Add 1/2 cup (100g) sugar, 1 large egg, and 1 tsp vanilla extract. Mix until creamy and set aside.
- Make the blueberry filling: In a saucepan, combine 3 cups (450g) blueberries, 1/4 cup (50g) sugar, 1 tbsp (15ml) lemon juice, and 1 tbsp (8g) cornstarch. Cook over medium heat until thickened, about 5 minutes.
- Assemble the layers: Press 2/3 of the crumble mixture into the prepared pan to form the base. Spread the cheesecake filling evenly over the crust, followed by the blueberry filling. Sprinkle the reserved crumble mixture over the top.
- Bake: Bake in the preheated oven for 35-40 minutes, or until the top is golden brown and the cheesecake layer is set. Let cool completely before slicing.
Pro tip: These bars are easiest to cut after chilling in the fridge for at least an hour. Use a sharp knife for clean edges!
Cooking Tips & Techniques
Here are a few lessons I’ve learned while making these bars:
- Don’t rush the cooling: Letting the bars cool completely is key to achieving neat slices. If you’re impatient like me, pop them in the fridge to speed things up!
- Taste your blueberries: If they’re extra tart, you might need to add a bit more sugar to the filling.
- Layer evenly: Make sure the cheesecake and blueberry layers are spread evenly for the best texture and flavor distribution.
- Double the recipe: If you’re baking for a crowd, this recipe scales beautifully. Just use a larger pan and adjust the baking time slightly.
Variations & Adaptations
Want to make this recipe your own? Here are some ideas:
- Dietary Adaptations: Use gluten-free flour for a celiac-friendly version, or swap cream cheese for a dairy-free alternative like cashew cream cheese.
- Flavor Twists: Add a sprinkle of lemon zest to the cheesecake layer or a dash of cinnamon to the crumble mixture.
- Seasonal Swaps: Substitute blueberries with raspberries, blackberries, or even diced peaches depending on the season.
- Cooking Method: For individual portions, bake the layers in muffin tins to create mini bars.
Personally, I’ve tried adding a drizzle of white chocolate over the cooled bars—it was a game-changer!
Serving & Storage Suggestions
These bars are best served chilled or at room temperature. Slice into squares and arrange them on a platter for a pretty presentation. They pair beautifully with a cup of coffee or a glass of iced tea.
To store, place them in an airtight container in the fridge for up to 5 days. For longer storage, freeze individual slices wrapped tightly in plastic wrap; they’ll keep for up to 3 months. To reheat, let them thaw in the fridge overnight, then enjoy them as-is or warmed slightly in the microwave.
Nutritional Information & Benefits
Here’s an estimate of the nutrition per serving (based on 12 servings):
- Calories: ~220
- Fat: ~12g
- Carbohydrates: ~28g
- Protein: ~3g
Blueberries are packed with antioxidants and vitamin C, making them a healthy addition. While these bars are definitely indulgent, they’re a great way to sneak in some fruit. If you’re watching sugar intake, you can reduce the sugar in the crumble slightly.
Conclusion
These amazing blueberry bars with cheesecake layers are the kind of dessert that brings a little joy to any occasion. From their luscious layers to their buttery crumble, there’s something magical in every bite. Whether you’re making them for a crowd or just treating yourself, they’re worth every step.
I’d love to hear how yours turn out! Leave a comment below with your thoughts or any tweaks you made. And don’t forget to share pictures—there’s nothing better than seeing your creations!
Now go on, grab those blueberries and get baking. You’ve got this!
FAQs
Can I use frozen blueberries?
Absolutely! Frozen blueberries work just as well as fresh ones. No need to thaw them; just use them straight from the freezer.
Can I make these bars ahead of time?
Yes, these bars are perfect for making ahead. Store them in the fridge, and they’ll stay fresh for up to 5 days.
Can I substitute the cream cheese?
Yes, you can use a dairy-free cream cheese alternative or even mascarpone for a slightly different flavor.
How do I prevent soggy crust?
Make sure the crumble is pressed firmly into the pan to create a sturdy base. Also, let the blueberry filling thicken properly before layering.
Can I freeze these bars?
Yes! Slice them into portions, wrap tightly in plastic wrap, and freeze for up to 3 months. Let them thaw in the fridge overnight before serving.
Print
Amazing Blueberry Bars Recipe with Cheesecake Layers
These blueberry bars combine the tartness of fresh blueberries, the creamy richness of cheesecake, and a buttery crumble for a delightful treat. Perfect for any occasion, they’re easy to make and irresistibly delicious.
- Total Time: 1 hour
- Yield: 12 servings 1x
Ingredients
- 3 cups (450g) blueberries
- 8 oz (225g) cream cheese, softened
- 2 cups (250g) all-purpose flour
- 1 cup (200g) brown sugar
- 1/2 cup (115g) unsalted butter, cubed
- 1/2 cup (100g) granulated sugar
- 1/4 cup (50g) granulated sugar (for blueberry filling)
- 1 tbsp (15ml) lemon juice
- 1 tbsp (8g) cornstarch
- 1 large egg
- 1 tsp vanilla extract
Instructions
- Preheat your oven to 350°F (175°C) and line a 9×13 baking pan with parchment paper.
- In a mixing bowl, combine 2 cups (250g) flour, 1 cup (200g) brown sugar, and 1/2 cup (115g) unsalted butter. Use your fingers or a pastry cutter to create a crumbly mixture. Set aside 1/3 of it for the topping.
- Beat 8 oz (225g) cream cheese until smooth. Add 1/2 cup (100g) sugar, 1 large egg, and 1 tsp vanilla extract. Mix until creamy and set aside.
- In a saucepan, combine 3 cups (450g) blueberries, 1/4 cup (50g) sugar, 1 tbsp (15ml) lemon juice, and 1 tbsp (8g) cornstarch. Cook over medium heat until thickened, about 5 minutes.
- Press 2/3 of the crumble mixture into the prepared pan to form the base. Spread the cheesecake filling evenly over the crust, followed by the blueberry filling. Sprinkle the reserved crumble mixture over the top.
- Bake in the preheated oven for 35-40 minutes, or until the top is golden brown and the cheesecake layer is set. Let cool completely before slicing.
- Chill in the fridge for at least an hour before cutting for clean edges. Use a sharp knife to slice into bars.
Notes
For best results, let the bars cool completely before slicing. Chill in the fridge for at least an hour for cleaner cuts. Taste your blueberries beforehand and adjust sugar if needed.
- Prep Time: 20 minutes
- Cook Time: 40 minutes
- Category: Dessert
- Cuisine: American
Nutrition
- Serving Size: 1 bar
- Calories: 220
- Sugar: 18
- Sodium: 80
- Fat: 12
- Saturated Fat: 7
- Carbohydrates: 28
- Fiber: 1
- Protein: 3
Keywords: blueberry bars, cheesecake bars, dessert recipe, summer dessert, easy baking


