Introduction
There’s something downright magical about the smell of melted chocolate filling the kitchen. The first time I dipped a batch of crunchy pretzel rods into warm, glossy chocolate, I knew I had stumbled upon a dangerously easy treat that would become a family favorite. That sweet-salty combo? Pure perfection. It’s the kind of homemade goodie that makes you pause, take a deep breath, and grin because it just feels right—nostalgic, cozy, and a little fancy all at once.
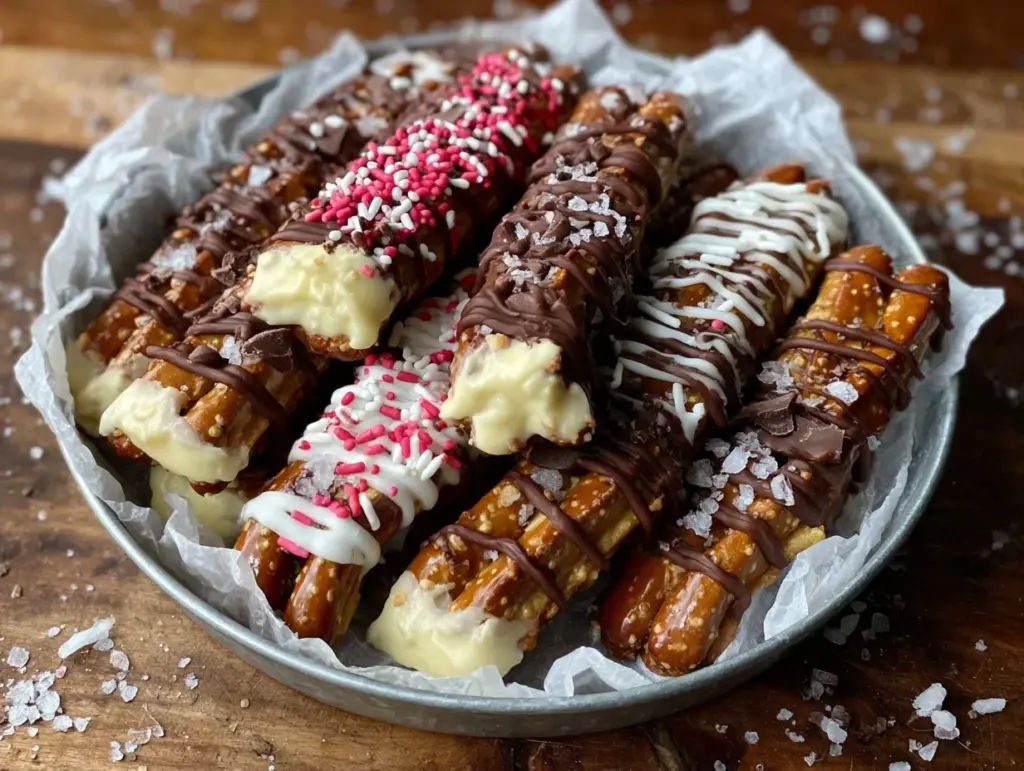
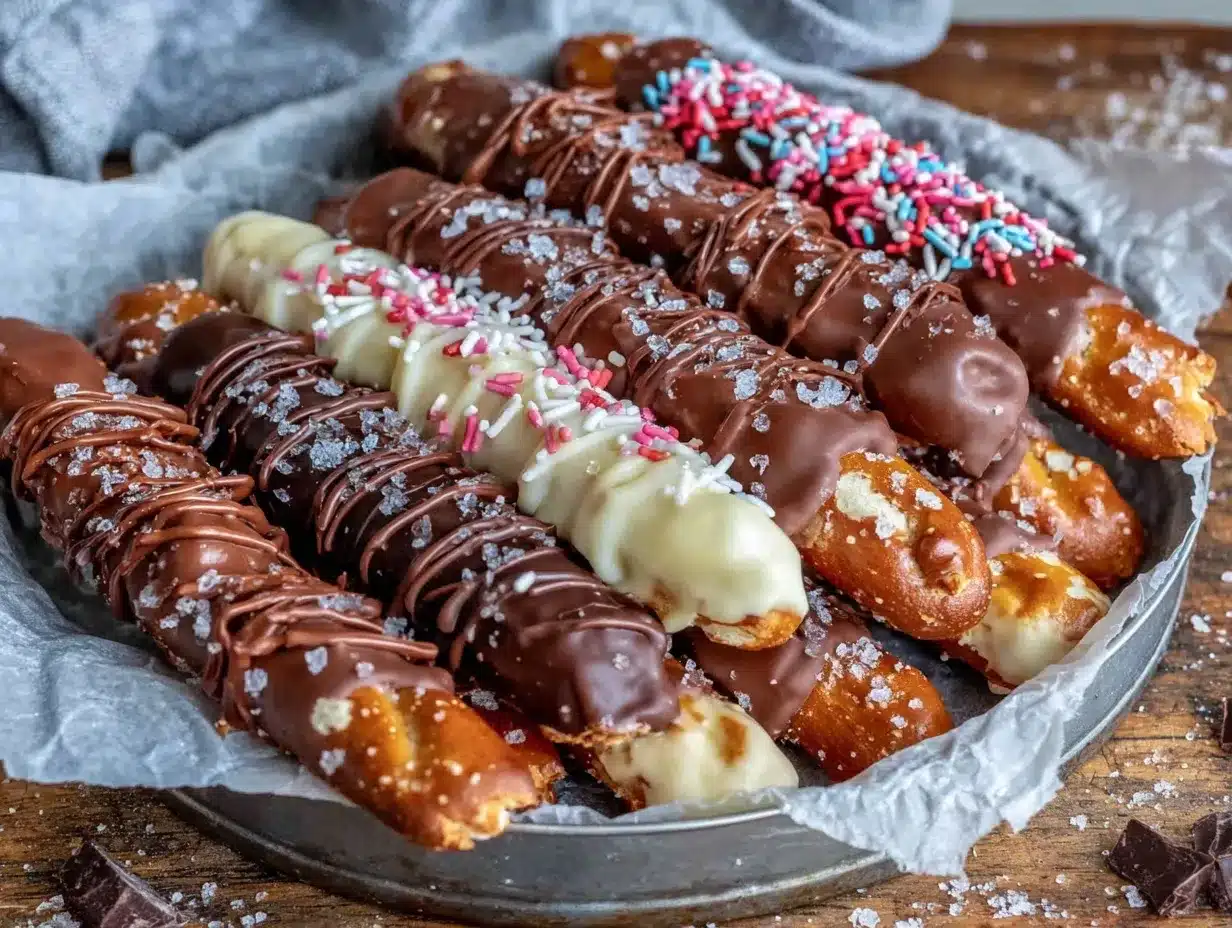
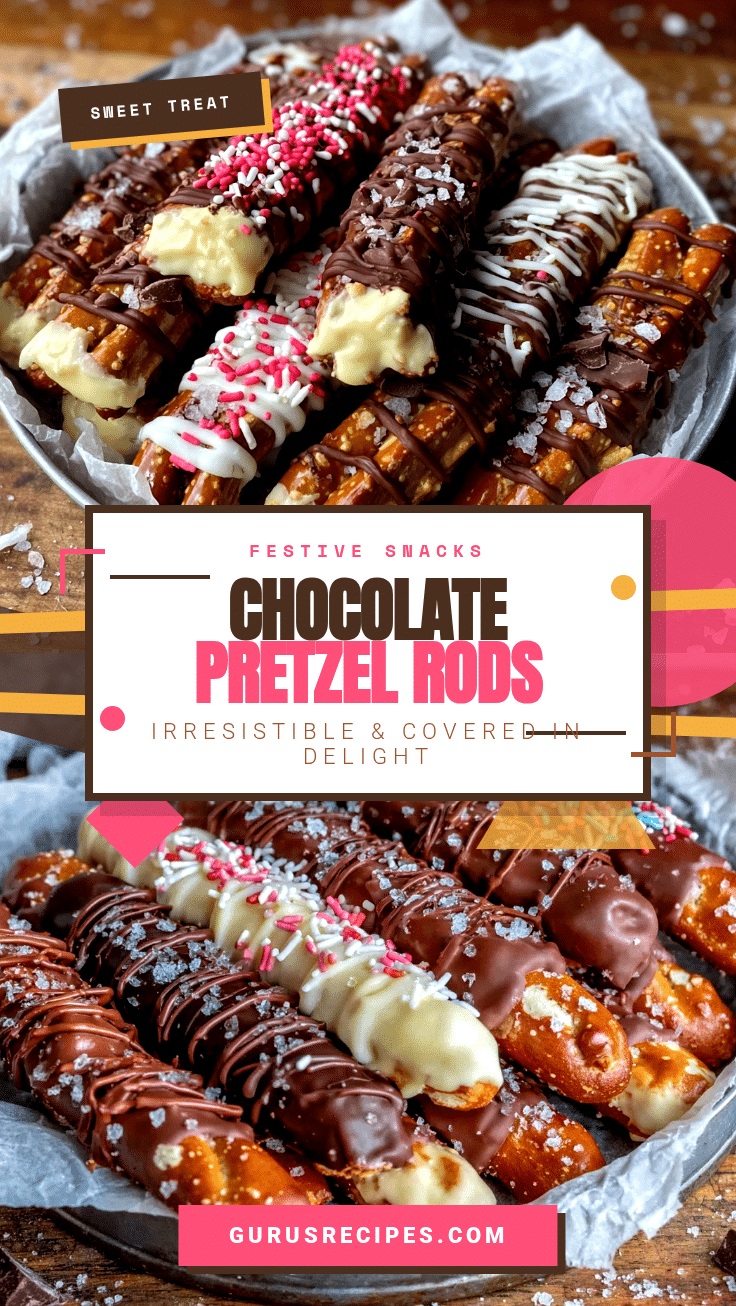
When I was knee-high to a grasshopper, my grandma used to make chocolate-dipped pretzels every Christmas. She didn’t have Pinterest or fancy packaging—just a big smile and a tin full of treats. I remember sneaking into the kitchen, trying to “check” if they were dry yet (really, I just wanted to snag one before dinner). Years later, I started making my own version of her chocolate-covered pretzel rods, adding colorful sprinkles, crushed candies, and drizzle patterns. Now, they’ve become a staple in my gift-giving rotation. Honestly, everyone loves them—neighbors, teachers, coworkers—you name it.
These chocolate covered pretzel rods are perfect for gifting in a shiny tin, wrapped with ribbon, or tucked into a holiday basket. They look beautiful, taste incredible, and keep surprisingly well. I’ve tested this recipe more times than I’d like to admit (in the name of research, of course), and every batch vanishes faster than I can package them up. So if you’re looking for a treat that’s pretty, crave-worthy, and foolproof, this one’s a keeper. Let’s face it—you’re going to want to make a double batch.
Why You’ll Love This Recipe
If you love simple recipes that bring instant joy, these chocolate covered pretzel rods are for you. I’ve tested so many versions over the years, and this one hits all the right notes: rich chocolate coating, crisp pretzel crunch, and fun customizable toppings. Whether you’re making them for a party or packing them as gifts, this recipe guarantees smiles (and maybe a few requests for “just one more”).
- Quick & Easy: They come together in under 30 minutes—no oven required, minimal mess.
- Simple Ingredients: You only need chocolate, pretzels, and toppings you probably already have in your pantry.
- Perfect for Gifting: Pack them in a festive tin or mason jar for holidays, birthdays, or thank-you treats.
- Crowd-Pleaser: Both kids and adults go nuts for that salty-sweet crunch.
- Beautifully Customizable: You can decorate them for any holiday—think red and green sprinkles for Christmas, pastel drizzle for Easter, or dark chocolate and gold dust for elegant parties.
What makes this version special is the balance of flavors and texture. I use high-quality chocolate (no waxy coating here) and a gentle melting method to keep it silky smooth. The result? A glossy, snappy finish that looks like it came from a boutique candy shop. And because the recipe’s so forgiving, it’s perfect for beginners or for making with kids. Honestly, these chocolate covered pretzel rods are the kind of treat that make you feel like a pro chocolatier—without the stress. It’s comfort food dressed up for the holidays, and it never fails to impress.
What Ingredients You Will Need
This recipe uses simple, wholesome ingredients to deliver bold flavor and satisfying crunch without any complicated steps. Most of these items are pantry staples, and you can easily swap or adjust based on what you have on hand.
For the Chocolate Coating:
- 12 oz (340 g) semi-sweet chocolate chips (I recommend Ghirardelli or Guittard for best flavor)
- 1 tbsp coconut oil or vegetable shortening (helps create a smooth, glossy texture)
- 1/2 cup (90 g) white chocolate chips (optional, for drizzling)
- 1/4 cup (45 g) milk chocolate chips (optional, for variety in coating)
For the Pretzels:
- 20–24 large pretzel rods (look for thick, unbroken rods for best presentation)
For the Toppings (optional but highly recommended):
- Crushed peppermint candies (for a festive crunch)
- Sprinkles or nonpareils (choose colors to match the occasion)
- Mini chocolate chips or chopped nuts
- Toffee bits or crushed cookies
- Sea salt flakes (for a gourmet touch)
Substitution Tips: For dairy-free, use dark vegan chocolate and skip the milk variety. You can also use gluten-free pretzel rods if needed. If you prefer a lighter flavor, swap semi-sweet chocolate for milk chocolate, or mix both for a balanced taste. The key is using good-quality chocolate that melts smoothly—cheap baking chips tend to seize or turn grainy. Trust me, quality makes all the difference here.
Equipment Needed
You don’t need fancy tools to make these chocolate covered pretzel rods. A few basic kitchen items will do the trick.
- Microwave-safe bowl or double boiler (for melting chocolate)
- Spatula or spoon (for stirring and scraping)
- Parchment or wax paper (for cooling and setting the pretzels)
- Baking sheet or tray (to hold the dipped pretzels while they set)
- Small bowls (for toppings)
- Gift tins or airtight containers (for packaging and gifting)
If you don’t have a double boiler, simply use a heatproof bowl set over a pot of simmering water. I’ve done this countless times—it works perfectly. For budget-friendly packaging, check dollar stores or craft supply shops for festive tins and ribbons. Store-bought candy bags also look adorable tied with a little twine or tag.
Preparation Method
- Prepare your workspace: Line a baking sheet with parchment or wax paper. Set out your toppings in small bowls so they’re ready to go. This step makes dipping faster and less messy.
- Melt the chocolate: In a microwave-safe bowl, combine 12 oz (340 g) semi-sweet chocolate chips and 1 tbsp coconut oil. Microwave in 30-second intervals, stirring between each, until smooth and glossy (about 1 to 1½ minutes total). If using a double boiler, stir constantly until fully melted and silky.
- Dip the pretzels: Hold each pretzel rod by one end and dip about two-thirds of it into the melted chocolate. Gently twist as you lift it out, letting excess chocolate drip off. You can use a spoon to help coat evenly if needed.
- Decorate immediately: While the chocolate is still wet, roll or sprinkle your chosen toppings over the coated section. Be generous—it’s what makes them look festive!
- Place on parchment: Lay each coated pretzel onto the prepared baking sheet. Leave space between rods so they don’t stick together.
- Drizzle (optional): Melt white or milk chocolate in separate bowls using the same method. Use a fork or small piping bag to drizzle over the coated pretzels for a fun, bakery-style look.
- Let set: Chill the pretzels in the refrigerator for 15–20 minutes, or leave them at room temperature until completely firm (about 1 hour if your kitchen isn’t too warm).
- Package and store: Once fully set, layer the pretzel rods in a gift tin lined with parchment paper. Separate layers with parchment to prevent sticking.
Tip: If your chocolate starts to thicken while dipping, simply reheat it for 10 seconds in the microwave and stir. Avoid adding water—it will cause the chocolate to seize. The texture should stay smooth and shiny throughout dipping.
Cooking Tips & Techniques
After making these for years, I’ve picked up a few tricks that make the process smoother and the results picture-perfect every time.
- Use the right chocolate: Real chocolate melts better and tastes richer than candy melts. If you want that perfect “snap” when you bite in, temper your chocolate by melting two-thirds first, then stirring in the remaining third until smooth.
- Don’t overheat: Chocolate burns easily. Always melt slowly and stir often. If it gets grainy, it’s overheated—start over with fresh chocolate.
- Keep your hands dry: Water and chocolate are mortal enemies. Even a drop can ruin the batch.
- Decorate fast: Toppings stick best when the chocolate is freshly dipped. Have everything ready before you start dipping.
- Temperature matters: If your kitchen is warm, chill the pretzels in short bursts to help them set evenly without blooming (that dull white finish that can appear on chocolate).
I’ve had batches where I got distracted mid-dip, and by the time I came back, the chocolate started stiffening up. Lesson learned—work in small batches and keep things moving. You’ll get smoother, prettier results that way.
Variations & Adaptations
One of the best parts about chocolate covered pretzel rods is how easy they are to customize. With just a few swaps, you can make endless variations for different tastes and occasions.
- Holiday Version: Use red and green sprinkles for Christmas, pastel candy melts for Easter, or orange and black for Halloween. Add edible glitter for extra sparkle.
- Nutty Delight: After dipping, roll pretzels in finely chopped peanuts, almonds, or pecans. A sprinkle of sea salt on top makes them irresistible.
- Gourmet Twist: Drizzle with caramel before adding chocolate, or sprinkle crushed espresso beans for a mocha vibe.
- Allergy-Friendly Option: Use gluten-free pretzels and dairy-free chocolate chips. Skip nuts and go for crushed freeze-dried fruit instead.
- Kid-Friendly Fun: Let kids decorate their own with mini candies or colored sugar. It’s messy in the best way possible.
Personally, I love making a “tuxedo” version—half dipped in dark chocolate, the other half in white, then drizzled with alternating colors. It looks fancy but takes no extra effort.
Serving & Storage Suggestions
These pretzel rods are best served once the chocolate has fully hardened. They look beautiful arranged upright in a glass jar, tied with ribbon, or nestled into a gift tin lined with tissue paper. The shiny chocolate coating and colorful toppings make them visually irresistible on dessert tables or party trays.
Storage: Keep them in an airtight container at room temperature for up to 2 weeks. If your home is warm, store them in the fridge (but let them come to room temp before serving to avoid condensation). You can also freeze them for up to 3 months—just thaw before gifting or serving. Layer parchment between them to prevent sticking.
Over time, the flavors mellow slightly, which actually makes them taste even better after a day or two. They’re perfect for make-ahead gifting—you can prepare them early and still have them look and taste fresh when it’s time to share.
Nutritional Information & Benefits
Each chocolate covered pretzel rod contains roughly 150–180 calories, depending on toppings. They provide a small energy boost from the carbs in pretzels and fats in chocolate. Dark chocolate offers antioxidants and a touch of magnesium, while the pretzel adds satisfying crunch and that salty counterbalance we all love.
If you’re watching your sugar, opt for dark chocolate with at least 70% cacao and skip sugary toppings. For a gluten-free version, use certified gluten-free pretzels. These treats are indulgent but portion-controlled—one or two rods are usually just the right amount to satisfy a sweet craving.
Conclusion
These chocolate covered pretzel rods aren’t just a recipe—they’re a tradition waiting to happen. They’re simple, customizable, and absolutely delightful to make and share. I love how they bring a homemade touch to any occasion, whether tucked into a holiday gift tin or served at a family gathering.
Honestly, every time I make them, I remember why they’re such a go-to: quick, gorgeous, and guaranteed to make people smile. Try them once, and you’ll find yourself reaching for pretzel rods and chocolate chips every time gift season rolls around. Give them a whirl, have fun decorating, and don’t forget to share your creations—I’d love to hear how yours turn out!
FAQs
Can I use candy melts instead of real chocolate?
Yes, candy melts work fine and are easier to handle, but real chocolate gives a richer flavor and smoother texture.
How long do chocolate covered pretzel rods last?
Stored in an airtight container, they stay fresh for up to 2 weeks at room temperature or 3 months in the freezer.
Why is my chocolate coating dull or streaky?
That’s usually from temperature changes or moisture. Make sure your pretzels are dry and avoid refrigerating too long.
Can I make them ahead for gifting?
Absolutely! They’re perfect make-ahead treats. Just prepare them a few days in advance and store in a cool, dry place until ready to package.
What are the best toppings for chocolate covered pretzel rods?
Sprinkles, crushed candies, nuts, or even a drizzle of caramel work great. Choose toppings that fit your occasion and taste preference.
Pin This Recipe!

Chocolate Covered Pretzel Rods – Easy Homemade Gift Tin Treats
These chocolate covered pretzel rods combine the perfect balance of sweet and salty flavors. They’re easy to make, beautifully customizable, and ideal for gifting during holidays or special occasions.
- Total Time: 30 minutes
- Yield: 20–24 pretzel rods 1x
Ingredients
- 12 oz (340 g) semi-sweet chocolate chips
- 1 tbsp coconut oil or vegetable shortening
- 1/2 cup (90 g) white chocolate chips (optional, for drizzling)
- 1/4 cup (45 g) milk chocolate chips (optional, for variety in coating)
- 20–24 large pretzel rods
- Crushed peppermint candies (optional)
- Sprinkles or nonpareils (optional)
- Mini chocolate chips or chopped nuts (optional)
- Toffee bits or crushed cookies (optional)
- Sea salt flakes (optional)
Instructions
- Line a baking sheet with parchment or wax paper and set out toppings in small bowls.
- In a microwave-safe bowl, combine semi-sweet chocolate chips and coconut oil. Microwave in 30-second intervals, stirring between each, until smooth and glossy (about 1 to 1½ minutes total).
- Hold each pretzel rod by one end and dip about two-thirds of it into the melted chocolate. Gently twist as you lift it out, letting excess chocolate drip off.
- While the chocolate is still wet, roll or sprinkle your chosen toppings over the coated section.
- Lay each coated pretzel onto the prepared baking sheet, leaving space between rods.
- Melt white or milk chocolate in separate bowls if desired, and drizzle over the coated pretzels using a fork or piping bag.
- Chill the pretzels in the refrigerator for 15–20 minutes, or leave them at room temperature until completely firm (about 1 hour).
- Once set, layer the pretzel rods in a gift tin lined with parchment paper, separating layers with parchment to prevent sticking.
Notes
Use high-quality chocolate for the best flavor and texture. Work quickly when decorating, as toppings stick best to freshly dipped pretzels. Store in an airtight container at room temperature for up to 2 weeks or freeze for up to 3 months.
- Prep Time: 10 minutes
- Cook Time: 10 minutes
- Category: Dessert
- Cuisine: American
Nutrition
- Serving Size: 1 pretzel rod
- Calories: 150180
- Sugar: 12
- Sodium: 150
- Fat: 8
- Saturated Fat: 5
- Carbohydrates: 20
- Fiber: 1
- Protein: 2
Keywords: chocolate covered pretzels, holiday treats, edible gifts, easy dessert, sweet and salty snacks