
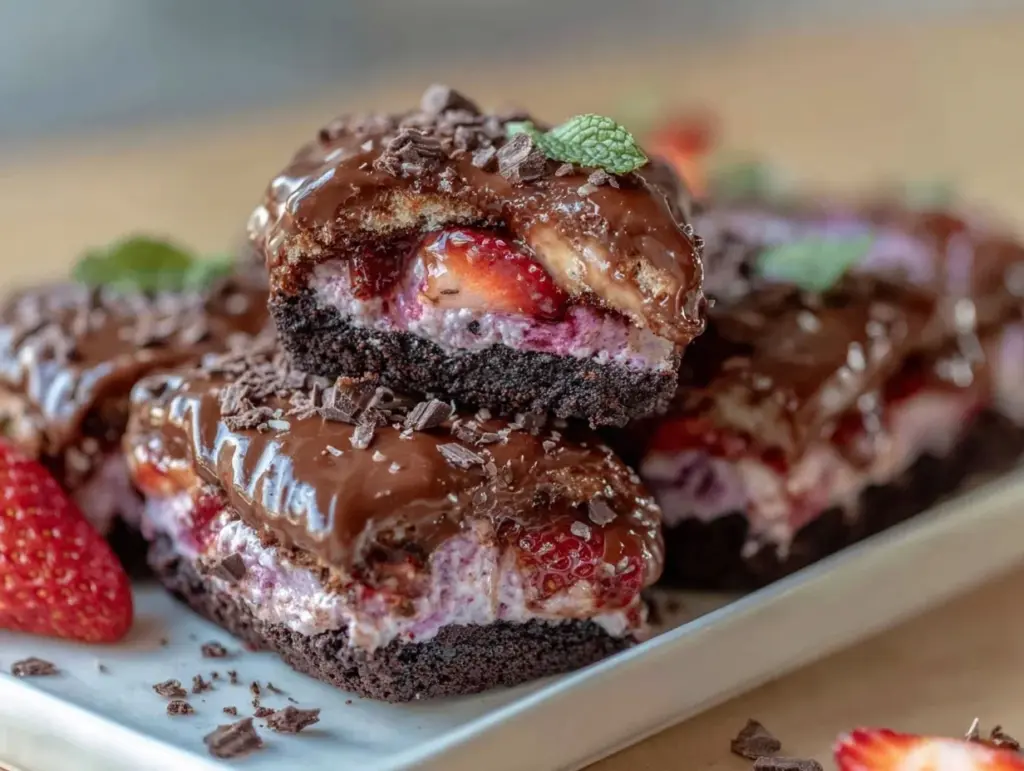
There’s just something magical about the scent of melted chocolate swirling together with fresh strawberries and crushed Oreos—it’s downright intoxicating. Picture this: warm, gooey chocolate gently sinking into a buttery Oreo crust, with pockets of sweet-tart strawberry jam peeking through every bite. The first time I pulled a pan of these Chocolate-Covered Strawberry Oreo Bars from the oven, the kitchen was filled with a smell so rich and inviting that even my notoriously picky teenager wandered in, nose first, asking, “What’s THAT?”
You know, I stumbled onto this recipe one chilly Saturday when the grocery store strawberries were calling my name and a half-eaten package of Oreos was sitting lonely in the pantry. I remember thinking, “Why not mash up my favorite chocolate-covered strawberry memories with a classic cookies-and-cream vibe?” The result was a little bit of magic—and, honestly, a lot of sticky fingers. My family couldn’t keep their hands off the cooling bars, and my husband (who usually “doesn’t like sweets”) polished off three without blinking. It was one of those moments where I paused, took a deep breath, and knew I’d discovered something truly special—right up there with grandma’s peanut butter fudge and those first summer s’mores.
These bars have become a go-to for family get-togethers, Valentine’s Day treats, and even last-minute potluck requests. They’re dangerously easy, wildly delicious, and provide that pure, nostalgic comfort you crave at the end of a long day. Plus, they look downright stunning on a dessert tray—perfect for impressing friends or just brightening up your Pinterest board. I’ve tested this recipe more times than I care to admit (in the name of research, of course), and it’s now a staple for celebrations and gifting. If you’re a dessert lover, or simply want a sweet treat that feels like a warm hug, you’re going to want to bookmark these Chocolate-Covered Strawberry Oreo Bars.
Why You’ll Love This Recipe
After dozens of batches and a few family taste-tests (my most honest critics), I can say these Chocolate-Covered Strawberry Oreo Bars check every box for the ultimate homemade dessert. Here’s why these bars are about to become your new favorite sweet fix:
- Quick & Easy: You can whip these up in under an hour, which is awesome for last-minute cravings or unexpected guests. No fancy techniques—just good old mixing, layering, and baking.
- Simple Ingredients: You probably have everything you need already. Oreos, chocolate, butter, strawberries, and a handful of basics (no trips to specialty stores, promise).
- Perfect for Any Occasion: They’re a hit at birthday parties, bake sales, Valentine’s Day, or as an after-dinner surprise. Trust me, these bars suit both casual and fancy moments.
- Crowd-Pleaser: Kids absolutely love them (the pink strawberry swirl is a bonus), and adults can’t resist that rich, chocolatey base. I’ve never seen leftovers last more than a day.
- Unbelievably Delicious: It’s the ultimate comfort food mashup—fudgy chocolate, crunchy Oreos, and bursts of real strawberry. Every bite gives you that “close your eyes and sigh” satisfaction.
What makes this recipe stand out? I blend the strawberries into a quick homemade jam for real flavor—no fake stuff here. And instead of just tossing chocolate chips on top, I melt chocolate with a splash of cream for that silky, truffle-like layer you’ll want to lick off the spoon. Plus, using both crushed Oreos and a bit of Oreo cream in the crust keeps it extra chewy and rich (a little trick from my bakery days). This isn’t just another bar recipe—it’s the best version I’ve ever made.
These bars hit that sweet spot between homemade nostalgia and bakery-worthy decadence. Whether you’re looking to impress your friends or just want a treat that makes you feel special, this dessert delivers every time. You know what? Life’s too short for boring desserts—let’s make something amazing, one chocolate-covered strawberry bite at a time.
What Ingredients You Will Need
This recipe uses basic, easy-to-find ingredients that bring the chocolate-covered strawberry Oreo dream to life. Here’s what you’ll need for each layer:
- For the Oreo Crust:
- 24 Oreo cookies (regular or Double Stuf, crushed fine—cream included)
- 6 tbsp (85g) unsalted butter, melted (adds richness and helps bind the crust)
- Pinch of salt (balances the sweetness)
- For the Strawberry Layer:
- 1 cup (150g) fresh strawberries, hulled and chopped (or use frozen, thawed and drained)
- 1/2 cup (100g) granulated sugar
- 1 tbsp (15ml) lemon juice (brightens the flavor)
- 1 tbsp (8g) cornstarch (thickens the jam)
- 1/2 tsp vanilla extract (adds warmth)
- For the Chocolate Layer:
- 1 1/4 cups (210g) semi-sweet chocolate chips (I like Ghirardelli or Guittard for best melt)
- 1/3 cup (80ml) heavy cream
- 1 tbsp (15g) unsalted butter (optional, for extra gloss)
- For Topping (Optional):
- 4-5 fresh strawberries, sliced (for garnish)
- 2-3 crushed Oreos (for extra crunch on top)
Ingredient notes & swaps:
- Oreos: Any chocolate sandwich cookie will work (store-brand is fine). For gluten-free, use gluten-free sandwich cookies.
- Butter: Dairy-free margarine can be swapped if needed.
- Strawberries: If using frozen berries, thaw and drain well to avoid watery jam. In summer, I like using a mix of strawberries and raspberries for a tangy punch.
- Chocolate Chips: You can use milk chocolate or dark chocolate if you prefer. Dairy-free chips also work (Enjoy Life is a good brand).
- Cream: For a lighter option, use evaporated milk or coconut cream.
I personally love using Ghirardelli chocolate for the best melt and flavor, but any good-quality semi-sweet chip works. Honestly, this recipe is forgiving—use what you have and don’t stress the small stuff. These bars always come out delicious.
Equipment Needed
You really don’t need much—just the basics most home cooks already have lying around. Here’s what I use every time I make these Chocolate-Covered Strawberry Oreo Bars:
- 8×8-inch (20x20cm) square baking pan: Metal or glass works fine. I prefer metal for crispier edges.
- Parchment paper: Makes lifting the bars out a breeze. Foil works in a pinch (just grease well).
- Food processor or rolling pin: For crushing Oreos. I’ve used a plastic bag and a heavy mug more than once—just bash away until fine crumbs form.
- Mixing bowls: At least two (one for the crust, one for the strawberry jam).
- Small saucepan: For making the quick strawberry jam. If you’re using store-bought jam, skip this.
- Microwave-safe bowl or double boiler: For melting chocolate and cream together. Microwave works great—just go slow.
- Spatula or wooden spoon: For stirring and spreading layers.
- Measuring cups and spoons: Nothing fancy, just the usual set.
If you don’t have a food processor, put Oreos in a zip-top bag and crush with a rolling pin or even a sturdy glass. For the pan, if you only have a 9×9-inch, just watch the baking time and know your bars will be slightly thinner. I’ve made these with dollar-store tools and they still turn out beautifully—no need for specialty gadgets.
Preparation Method

-
Prep the Pan: Line an 8×8-inch (20x20cm) baking pan with parchment paper, leaving an overhang for easy lifting. Lightly grease if using foil.
Tip: This step keeps your bars looking neat when you slice them. -
Make the Oreo Crust: Place 24 Oreos (about 250g) in a food processor and pulse until fine crumbs. If crushing by hand, seal cookies in a zip bag and crush with a rolling pin. In a medium bowl, mix the crumbs with 6 tbsp (85g) melted butter and a pinch of salt until it looks like wet sand.
Sensory cue: The mixture should hold together when pressed between your fingers.
Press mixture firmly into the bottom of your pan. Use the bottom of a glass to pack it tightly.
Chill in the fridge for 10 minutes while you make the filling. -
Prepare the Strawberry Jam Layer: In a small saucepan, combine 1 cup (150g) chopped strawberries, 1/2 cup (100g) sugar, 1 tbsp (15ml) lemon juice, and 1 tbsp (8g) cornstarch. Cook over medium heat, stirring often, until the berries break down and the mixture thickens (about 7-9 minutes).
Remove from heat and stir in 1/2 tsp vanilla extract. Let cool for 5 minutes.
Note: Jam should look glossy and mound up on a spoon—if it’s runny, simmer 2 more minutes.
For a shortcut, you can spread 1/2 cup (160g) good-quality strawberry jam instead. -
Spread the Jam: Once the crust is chilled, spread the cooled strawberry jam evenly over the Oreo base.
Tip: Dollop the jam in small spoonfuls, then gently spread with a spatula to avoid tearing the crust. -
Make the Chocolate Layer: In a microwave-safe bowl, combine 1 1/4 cups (210g) chocolate chips, 1/3 cup (80ml) heavy cream, and 1 tbsp (15g) butter. Microwave in 20-second bursts, stirring after each, until smooth and shiny (about 1 minute total).
If using a double boiler, melt gently over simmering water—don’t overheat or chocolate may seize. -
Assemble: Pour the melted chocolate mixture evenly over the strawberry layer. Use a spatula to smooth the top. Tap the pan on the counter to settle the layers.
Sensory cue: The top should be glossy and level, with the smell of chocolate filling your kitchen. -
Add Toppings (Optional): Sprinkle with crushed Oreos and arrange sliced strawberries on top.
Warning: If adding fresh strawberries, these bars are best eaten the same day or kept refrigerated. - Chill: Refrigerate the assembled bars for at least 2 hours, or until firm enough to slice. For best texture, chill overnight.
-
Slice & Serve: Use the parchment overhang to lift bars out of the pan. Slice into 16 squares with a sharp knife (wipe blade between cuts for clean edges).
Tip: Let bars sit at room temperature for 5-10 minutes before slicing for smoother cuts.
If the chocolate cracks when slicing, let the bars warm up a bit more—or run your knife under hot water, wipe dry, and slice. Little tricks like these make a big difference!
Cooking Tips & Techniques
After making these Chocolate-Covered Strawberry Oreo Bars for everything from birthday parties to rainy day “just because” treats, I’ve picked up a few handy tips:
- Crust Packing: Really press the Oreo crust firmly into the pan. If it’s loose, it’ll crumble when sliced. I use a flat-bottomed measuring cup for even pressure.
- Jam Consistency: If your strawberries are super juicy, the jam can get runny. Don’t be afraid to cook it a bit longer for a thick, spreadable texture. Runny jam will make the bars messy (though still tasty!).
- Chocolate Melting: Melt chocolate and cream slowly—if chocolate overheats, it can seize and turn grainy. If this happens, add a splash more cream and stir gently.
- Layering: Let the jam cool before adding the chocolate layer, or the chocolate may swirl into the berries and look muddy. Patience pays off.
- For Even Slices: Use a big, sharp knife and wipe it clean between cuts. For Pinterest-perfect bars, I chill them overnight and slice while cold.
- Multitasking: While the crust chills, make the strawberry jam. By the time the crust is ready, your jam will have cooled slightly—no wasted time!
- Troubleshooting: If your crust feels too soft, chill it longer, or bake briefly at 350°F (175°C) for 8 minutes, then cool before adding layers. I’ve done both ways—works great.
Honestly, my earliest attempts were messy (and still delicious), but taking the extra few minutes for each step made all the difference. Don’t rush the chilling—these bars slice best when cold. And if something doesn’t look perfect? That’s what extra chocolate drizzle is for. You’ll get better every time, I promise.
Variations & Adaptations
One of the best things about these Chocolate-Covered Strawberry Oreo Bars is how flexible the recipe is. You can make them your own with a few easy swaps or twists:
- Gluten-Free: Use gluten-free sandwich cookies instead of regular Oreos. The rest of the recipe is naturally gluten-free!
- Dairy-Free: Swap in dairy-free margarine and coconut cream for butter and heavy cream. Use dairy-free chocolate chips (Enjoy Life or Hu are my faves).
- Flavor Twists: Try raspberry or blackberry jam instead of strawberry for a darker berry punch. I once made a mixed berry version with summer farmers’ market fruit—so good.
- Nutty Crunch: Sprinkle chopped toasted almonds or hazelnuts over the chocolate layer before chilling for a Ferrero Rocher vibe.
- White Chocolate Lovers: Use white chocolate chips for the top layer and swirl in a bit of freeze-dried strawberry powder for an extra pink, berry-forward finish.
- Cooking Methods: No-bake version: Press the crust into the pan and freeze 10 minutes instead of chilling, then proceed as usual (especially handy in summer).
My favorite twist? Swapping half the Oreos for Golden Oreos for a lighter, cookies-and-cream base. It’s a hit for spring and Easter gatherings. If you have allergies in the family, sunflower seed butter cookies or allergy-friendly sandwich cookies work too. Don’t be afraid to experiment—every batch brings something new to love!
Serving & Storage Suggestions
These bars are best served chilled or at cool room temperature for clean slices and the perfect texture. Arrange them on a pretty platter, and if you’re feeling fancy, drizzle with extra melted chocolate or dust lightly with powdered sugar for that bakery look.
For beverages, a cold glass of milk, a cup of coffee, or even a sparkling strawberry lemonade pairs perfectly. They also look gorgeous next to a bowl of fresh berries at brunch or as a sweet finish after a savory meal.
To store, keep the bars in an airtight container in the refrigerator for up to 5 days. Place parchment or wax paper between layers to prevent sticking. For longer storage, freeze individual bars wrapped tightly in plastic wrap and foil—they’ll keep for up to 2 months. Thaw in the fridge or at room temperature before serving.
Pro tip: The flavors deepen and the texture improves after a day in the fridge, so don’t be shy about making them ahead for parties. Just avoid adding fresh strawberry slices until right before serving—they can weep and make the chocolate layer sticky if stored too long.
Nutritional Information & Benefits
Here’s a quick look at what you’re getting with each chocolate-covered strawberry Oreo bar (based on 16 servings):
- Calories: Approx. 230 per bar
- Fat: 13g (mainly from butter and chocolate)
- Sugar: 18g
- Carbohydrates: 28g
- Protein: 2g
While these are definitely a treat, they do offer a few perks: real strawberries provide vitamin C and antioxidants, and using dark chocolate chips can add a bit of heart-healthy flavonoids (and, let’s be honest, a lot of happiness). For gluten-free or dairy-free adaptations, see the swaps above—these bars are easily tweaked to fit most needs.
Allergens to note: Contains wheat (Oreos), dairy (butter, cream, chocolate), and possible soy (in some chocolates). If you’re making for a crowd, it’s always smart to ask about allergies first. Personally, I love that these are portion-controlled—one square is satisfying enough to hit the spot without going overboard.
Conclusion
If you’re searching for a show-stopping dessert that’s easy enough for a weekday but special enough for a celebration, these Chocolate-Covered Strawberry Oreo Bars are just the ticket. They blend all the best things—rich chocolate, sweet berries, and that classic Oreo crunch—into every bite. Plus, you can tweak them to fit your cravings or dietary needs with just a few simple swaps.
I love this recipe because it brings smiles every time and, honestly, it never gets old. Whether you’re making treats for a crowd or just indulging your sweet tooth, these bars deliver pure joy (and a little bit of kitchen magic). Give them a try, make them your own, and don’t forget to let me know how they turned out in the comments below!
Go ahead—treat yourself, share with friends, and make sweet memories, one chocolate-covered strawberry Oreo bar at a time. Happy baking!
Frequently Asked Questions
Can I use store-bought strawberry jam instead of making my own?
Absolutely! Use about 1/2 cup (160g) of your favorite strawberry jam in place of the homemade version. Just make sure it’s thick, not runny, for best results.
How do I keep the Oreo crust from crumbling?
Press the crust mixture firmly into the pan and chill it before adding layers. For extra security, you can bake the crust for 8 minutes at 350°F (175°C) and let it cool completely before assembling.
Can I double the recipe for a larger crowd?
Yes, just double all ingredients and use a 9×13-inch (23x33cm) pan. Baking and chilling times stay about the same; just keep an eye on consistency.
Do these bars need to be refrigerated?
Yes, for best texture and freshness, store them in the fridge. They’ll stay firm and slice neatly, and they taste fantastic chilled!
Can I make these chocolate-covered strawberry Oreo bars ahead of time?
You sure can. These bars are actually better the next day, once the layers have set and the flavors meld. Just wait to add fresh strawberry slices until serving.
Pin This Recipe!
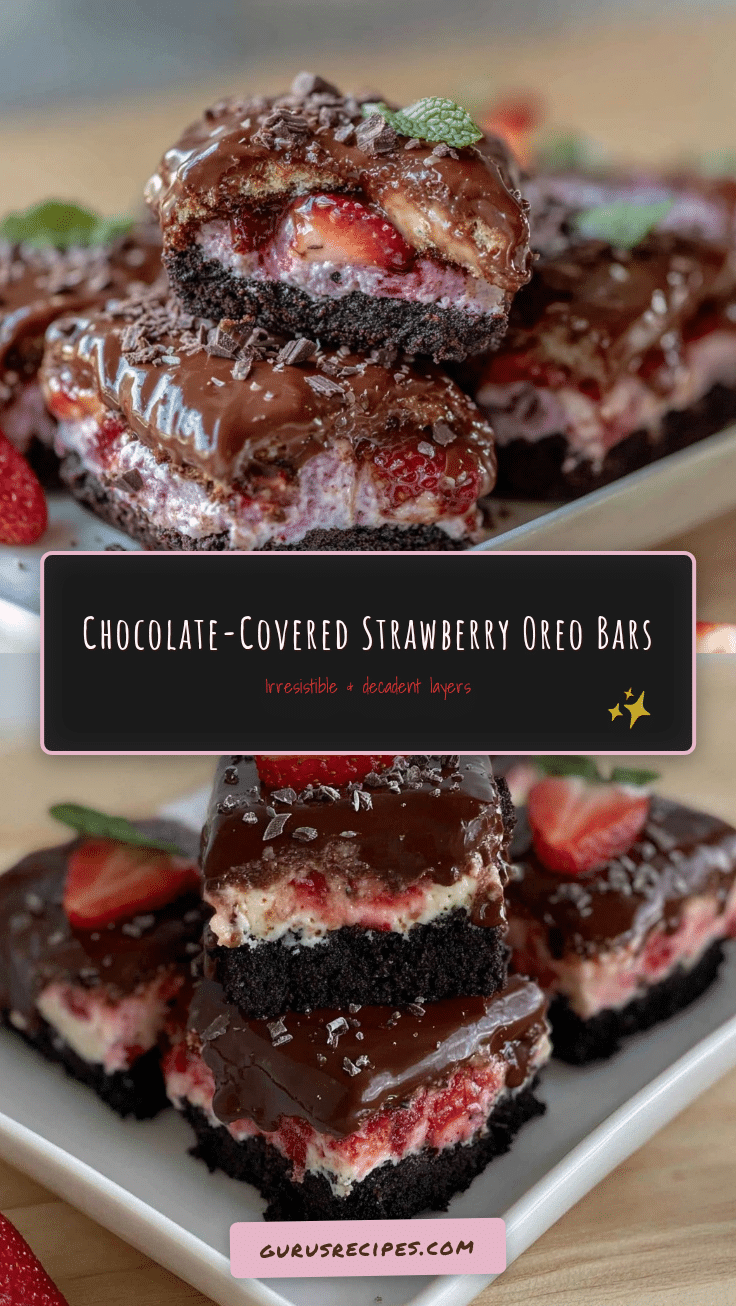

Chocolate-Covered Strawberry Oreo Bars
These easy homemade dessert bars feature a buttery Oreo crust, a layer of real strawberry jam, and a silky chocolate topping. Perfect for celebrations, gifting, or whenever you crave a nostalgic, bakery-worthy treat.
- Total Time: 2 hours 30 minutes
- Yield: 16 bars 1x
Ingredients
- 24 Oreo cookies (regular or Double Stuf, crushed fine—cream included)
- 6 tbsp unsalted butter, melted
- Pinch of salt
- 1 cup fresh strawberries, hulled and chopped (or use frozen, thawed and drained)
- 1/2 cup granulated sugar
- 1 tbsp lemon juice
- 1 tbsp cornstarch
- 1/2 tsp vanilla extract
- 1 1/4 cups semi-sweet chocolate chips
- 1/3 cup heavy cream
- 1 tbsp unsalted butter (optional, for extra gloss)
- 4–5 fresh strawberries, sliced (for garnish, optional)
- 2–3 crushed Oreos (for topping, optional)
Instructions
- Line an 8×8-inch baking pan with parchment paper, leaving an overhang for easy lifting. Lightly grease if using foil.
- Place 24 Oreos in a food processor and pulse until fine crumbs. Alternatively, crush by hand in a zip bag. In a medium bowl, mix crumbs with 6 tbsp melted butter and a pinch of salt until the mixture resembles wet sand.
- Press mixture firmly into the bottom of the pan. Chill in the fridge for 10 minutes.
- In a small saucepan, combine 1 cup chopped strawberries, 1/2 cup sugar, 1 tbsp lemon juice, and 1 tbsp cornstarch. Cook over medium heat, stirring often, until berries break down and mixture thickens (about 7-9 minutes). Remove from heat and stir in 1/2 tsp vanilla extract. Let cool for 5 minutes.
- Spread the cooled strawberry jam evenly over the chilled Oreo crust.
- In a microwave-safe bowl, combine 1 1/4 cups chocolate chips, 1/3 cup heavy cream, and 1 tbsp butter. Microwave in 20-second bursts, stirring after each, until smooth and shiny (about 1 minute total).
- Pour the melted chocolate mixture evenly over the strawberry layer. Smooth the top with a spatula and tap the pan to settle the layers.
- Sprinkle with crushed Oreos and arrange sliced strawberries on top, if desired.
- Refrigerate the assembled bars for at least 2 hours, or until firm enough to slice. For best texture, chill overnight.
- Use the parchment overhang to lift bars out of the pan. Slice into 16 squares with a sharp knife, wiping the blade between cuts.
Notes
For a gluten-free version, use gluten-free sandwich cookies. For dairy-free, substitute margarine and coconut cream, and use dairy-free chocolate chips. Bars slice best when well chilled. If using fresh strawberry garnish, add just before serving. Crust can be baked for 8 minutes at 350°F for extra firmness.
- Prep Time: 20 minutes
- Cook Time: 10 minutes
- Category: Dessert
- Cuisine: American
Nutrition
- Serving Size: 1 bar (1/16 of 8x8 p
- Calories: 230
- Sugar: 18
- Sodium: 90
- Fat: 13
- Saturated Fat: 7
- Carbohydrates: 28
- Fiber: 2
- Protein: 2
Keywords: chocolate, strawberry, Oreo, bars, dessert, easy, homemade, Valentine's Day, potluck, bake sale, kid-friendly


