

Imagine this: you walk into your kitchen, and the sweet, buttery scent of strawberry frosting mingled with the richness of melted chocolate greets you before you even spot the tray. There’s a little crackle as you break a wafer in half, glossy chocolate snapping just so, and then—pure bliss. The first time I made these chocolate-dipped strawberry frosted wafers, I was instantly transported back to childhood summers, when my grandma would hand me a pink wafer cookie while she sipped her afternoon tea. It’s the kind of moment where you pause, take a deep breath, and just smile because you know you’re onto something truly special.
I first stumbled across this idea on a rainy Saturday, desperate for a pick-me-up but not in the mood to fire up the oven. My pantry was looking a little sad (let’s face it, grocery day was overdue), but I did find a forgotten package of strawberry wafer cookies and a stray bar of dark chocolate. The rest, as they say, is delicious history. These chocolate-dipped strawberry frosted wafers have become a staple for family gatherings and last-minute potluck contributions—my kids can’t stop sneaking them off the tray, and my friends always ask for the “secret” to that perfect strawberry crunch. Honestly, I wish I’d figured out this dangerously easy treat years ago.
Whether you need a sweet treat for your kids’ lunchboxes, a pretty snack for your Pinterest dessert board, or just a little something to brighten up your day, this recipe is your ticket. These wafers have pure, nostalgic comfort in every bite, and you’re going to want to bookmark this one—trust me, I’ve tested it more times than I’d care to admit (in the name of research, of course!).
Why You’ll Love This Recipe
I’ve whipped up my fair share of no-bake treats, but this chocolate-dipped strawberry frosted wafers recipe always gets top marks in my kitchen. After plenty of taste-testing (the best kind of homework), these are the reasons you’ll be hooked:
- Quick & Easy: You can make a whole batch in under 20 minutes. No baking, no fancy gadgets, and almost zero mess. Perfect for busy weeknights, last-minute guests, or those moments when your sweet tooth just won’t quit.
- Simple Ingredients: Everything you need is probably in your pantry right now. Strawberry wafers, chocolate, a little coconut oil—done! No need to trek across town for specialty items.
- Perfect for Any Occasion: These are a hit at birthday parties, baby showers, kids’ sleepovers, or even an afternoon tea. They look like you fussed for hours, but you’ll know the real story.
- Crowd-Pleaser: I’ve yet to meet a person (child or adult!) who can resist the crispy, creamy, chocolatey combo. They disappear fast—so you might want to make extra!
- Unbelievably Delicious: The snap of chilled chocolate, the sweet strawberry filling, and the buttery wafer crunch… it’s basically happiness in snack form.
What makes my version stand out? I use a trick from my catering days—adding a tiny bit of coconut oil to the chocolate for a smoother, glossier dip that sets up like a dream (no chalky chocolate here). Sometimes I even sprinkle a little freeze-dried strawberry dust or colorful sprinkles on top for extra pizzazz. You just don’t get that with store-bought treats.
This recipe isn’t just good—it’s the kind that makes you close your eyes and savor each bite. It’s comfort food reimagined: faster, more fun, and guaranteed to make you the star of snack time. Whether you’re impressing guests, making a treat with your kids, or just treating yourself, these chocolate-dipped strawberry frosted wafers turn simple moments into sweet memories.
What Ingredients You Will Need
This recipe uses simple, wholesome ingredients to deliver big flavor and a beautiful look—without any complicated steps. You’ll find most of these are pantry staples, and a few clever swaps make them super customizable.
- Strawberry Wafer Cookies (about 24 pieces, 1 standard package)—Any brand works, but I’m partial to Voortman or Keebler for their extra-crispy texture. Make sure they’re fresh and unbroken for the prettiest results.
- Semi-Sweet or Dark Chocolate (6 oz / 170 g, roughly chopped or chips)—You can use chocolate chips, baking bars, or melting wafers. Ghirardelli and Guittard are my favorites for melting smoothly.
- Coconut Oil (2 tsp / 10 mL)—Just a bit helps the chocolate set with a glossy finish. You can swap this for vegetable shortening or leave it out if you prefer a firmer chocolate shell.
- Strawberry Frosting (for extra filling, optional, about 1/3 cup / 80 g)—If you want a thicker, creamier filling, pipe or spread a little store-bought strawberry frosting between two wafers before dipping. Duncan Hines and Pillsbury are reliable choices.
- Sprinkles or Freeze-Dried Strawberry Crumbles (optional, for decorating)—These add a festive touch and a fun crunch. I love using colorful nonpareils or a sprinkle of crushed, freeze-dried fruit for a burst of real strawberry flavor.
- White Chocolate (optional, 2 oz / 55 g for drizzling)—For a fancy look, melt some white chocolate and drizzle over the dipped wafers. It sets quickly and looks gorgeous on a dessert tray.
Ingredient Tips & Substitutions:
- For a gluten-free option, swap in gluten-free strawberry wafer cookies (Schar makes a good one, though they’re a bit more delicate).
- If you can’t find strawberry wafers, vanilla or chocolate wafers also work—just use strawberry frosting for that fruity kick.
- For dairy-free, use Enjoy Life chocolate chips and a dairy-free frosting. Coconut oil is naturally dairy-free.
- If you want a less-sweet treat, use bittersweet chocolate instead of semi-sweet.
This recipe is endlessly flexible, so don’t stress if you need to swap an ingredient or two. Honestly, I’ve tried it with whatever I had on hand, and it’s always a hit!
Equipment Needed
You don’t need anything fancy for these chocolate-dipped strawberry frosted wafers—just basic kitchen tools you probably already own.
- Microwave-Safe Bowl (for melting chocolate)—A glass measuring cup works great. If you don’t have a microwave, a small saucepan or double boiler on the stove does the job.
- Baking Sheet—Line it with parchment paper or wax paper for easy cleanup and quick release.
- Parchment or Wax Paper—Keeps the wafers from sticking and makes cleanup a breeze.
- Fork or Dipping Tool—For dipping wafers smoothly. I use a regular dinner fork (less mess, more control!), but a chocolate dipping tool is nice if you have one.
- Small Spatula or Butter Knife—For spreading frosting or smoothing chocolate if needed.
- Piping Bag or Zip-Top Bag (optional, for filling)—If you want to pipe extra strawberry frosting between wafers, a zip-top bag with the corner snipped works just fine.
- Cooling Rack (optional)—Great for letting the chocolate set evenly, but you can just use the lined baking sheet too.
I’ve made these with nothing but a bowl, a fork, and parchment paper—and they turned out just as tasty. If you’re using a double boiler, just make sure the bowl doesn’t touch the water to avoid seizing the chocolate. For easy cleanup, I always toss the parchment paper after the chocolate sets—no scrubbing required!
Preparation Method

- Prep Your Workspace (2 minutes): Line a baking sheet with parchment or wax paper. This keeps the wafers from sticking and makes cleanup a snap. Set out your wafers, sprinkles, and any other decorations so you’re ready to go.
- Melt the Chocolate (4–5 minutes): In a microwave-safe bowl, combine 6 oz (170 g) of semi-sweet chocolate and 2 tsp (10 mL) of coconut oil. Microwave in 30-second bursts, stirring after each, until smooth and glossy (usually 1 to 1.5 minutes total). If using a double boiler, gently melt over simmering water, stirring often. Tip: If the chocolate looks thick, add a tiny bit more coconut oil.
- Optional: Frost and Sandwich Wafers (5 minutes): For thicker, creamier wafers, pipe or spread about 2 tsp (10 g) strawberry frosting onto the flat side of one wafer, then press another wafer on top to make a sandwich. Repeat with all wafers. Warning: Don’t overfill, or the frosting will ooze out when dipped.
- Dip the Wafers (5–8 minutes): Hold each wafer (or sandwich) at one end and dip halfway into the melted chocolate. Let excess drip off, then lay on the prepared baking sheet. Pro tip: Use a fork to lower the wafer in for an even dip, or tilt the bowl if the chocolate is shallow.
- Decorate (2 minutes): While the chocolate is still wet, quickly sprinkle on your choice of decorations—sprinkles, freeze-dried strawberry crumbs, or a drizzle of white chocolate. Work in small batches so the chocolate doesn’t set before decorating.
- Set the Chocolate (10–15 minutes): Place the tray in the fridge for 10–15 minutes, or until the chocolate is firm. If your kitchen is chilly, they’ll set at room temperature in about 30 minutes.
- Serve or Store: Once set, carefully peel the wafers off the parchment. Arrange on a pretty platter and serve, or transfer to an airtight container for storage.
Troubleshooting: If the chocolate becomes grainy, it’s overheated—stir in 1 tsp coconut oil and keep mixing. If wafers break when dipping, try chilling them first. And don’t worry if things get messy—those little imperfections are half the fun (and proof they’re homemade!).
Cooking Tips & Techniques
If you want your chocolate-dipped strawberry frosted wafers to look Pinterest-perfect every time, here are my best tried-and-true tips:
- Use good-quality chocolate: Cheap chips can get waxy or refuse to melt. Splurge on a bar or a nicer chip for smoother results—you know, the kind you sneak a piece of while you work!
- Don’t skip the coconut oil: I tried skipping it once and ended up with dull, streaky chocolate. Just a teaspoon or two makes a world of difference in shine and snap.
- Chill your wafers: If your kitchen is warm or the wafers are soft, pop them in the fridge for 10 minutes before dipping. Helps keep them crisp and makes dipping easier.
- Dip, then decorate right away: If you wait too long, the chocolate sets and sprinkles won’t stick. I work in batches of 4–5 so I can sprinkle as I go.
- Let the chocolate set fully: It’s tempting to rush, but the flavor and texture are so much better after a quick chill in the fridge.
- Don’t overheat the chocolate: If you see graininess, your chocolate got too hot. Stir in a little more coconut oil and keep mixing—it’ll usually smooth out.
- Keep portions small: I used to try dipping the whole wafer, but it’s messier and harder to eat. Halfway looks prettier and keeps fingers clean.
- Clean as you go: Chocolate can get everywhere. I keep a damp towel handy for quick wipe-ups (and to keep my phone chocolate-free for those in-progress photos!).
- Embrace imperfection: The first few might look wonky, but by the end, you’ll be a pro. They’ll taste amazing no matter what.
Honestly, I’ve made every mistake in the book—burned chocolate, soggy wafers, sprinkles all over the floor. But with these tricks, you’ll nail it every time. The more you practice, the more fun it gets!
Variations & Adaptations
The best part about chocolate-dipped strawberry frosted wafers is how easy they are to customize. Here are a few ways to switch things up:
- Dietary Swaps: Use gluten-free or vegan strawberry wafers and dairy-free chocolate chips for a treat everyone can enjoy. I’ve made these with Schar gluten-free wafers and Enjoy Life chips for my gluten-sensitive friends—just as tasty.
- Seasonal Flavors: In spring, swap strawberry wafers for lemon or vanilla and use lemon frosting inside. Around the holidays, dip in white chocolate and dust with crushed peppermint candies for a festive twist.
- Flavor Mix-Ins: Add a teaspoon of freeze-dried strawberry powder to the melted chocolate for even more berry flavor. Or, stir in a pinch of sea salt or cinnamon for a grown-up vibe.
- Different Chocolates: Try milk, dark, or white chocolate for dipping. Drizzle with colored candy melts for birthdays or themed parties.
- Nutty Crunch: Sprinkle crushed pistachios, almonds, or hazelnuts on the wet chocolate for added texture and a fancy touch.
- Allergen Substitutions: Swap coconut oil for vegetable shortening to avoid coconut, or skip the sandwich step for a nut-free, lower-sugar option.
One of my favorite versions? Double-dip: first in white chocolate, then in dark, with a sprinkle of freeze-dried strawberries. It’s a showstopper for Valentine’s Day! Don’t be afraid to experiment and make them your own—half the fun is seeing what combinations you love best.
Serving & Storage Suggestions
For the best experience, serve your chocolate-dipped strawberry frosted wafers chilled or at cool room temperature. The chocolate keeps its snap, the wafers stay crisp, and the colors really pop on a pretty platter. These look gorgeous lined up on a white plate or tucked into a pastel cookie tin for gifting (with a little tissue paper, they travel well, too!).
Pair with a cup of tea, espresso, or a cold glass of milk for the ultimate snack. I love adding them to dessert boards—think fresh strawberries, a bowl of whipped cream, and a few extra chocolate pieces for good measure.
Storage: Place wafers in a single layer in an airtight container, separating layers with parchment paper. They’ll keep at room temperature for 2–3 days, but stay freshest in the fridge (up to a week). For longer storage, freeze in a well-sealed container for up to a month—just thaw for 10 minutes before serving to avoid condensation making the chocolate cloudy.
If you find the chocolate gets a little soft in summer, just pop them back in the fridge. The flavor deepens over a day or two, so they’re perfect for making ahead and snacking all week long!
Nutritional Information & Benefits
Each chocolate-dipped strawberry frosted wafer is about 80–100 calories, depending on the chocolate and decorations. You’ll get a nice mix of carbs for energy, a little fat from the chocolate, and just enough sweetness to satisfy dessert cravings without overdoing it.
Dark chocolate brings antioxidants and can even give a little mood boost—plus, using freeze-dried strawberries adds vitamin C and a fruity tang. If you go with gluten-free or dairy-free versions, these can fit a variety of dietary needs. Just keep in mind the wafer cookies usually contain wheat and soy, so check labels if you have allergies.
Honestly, these aren’t exactly health food, but they’re lighter than a slice of cake and way more fun. I always say, a little chocolate in life is good for the soul—and these strawberry frosted wafers tick all the boxes for a cheerful, shareable treat.
Conclusion
If you’re looking for an easy, no-bake treat that’s as pretty as it is delicious, these chocolate-dipped strawberry frosted wafers are your answer. They come together in minutes, use simple ingredients, and are endlessly customizable—no fancy baking skills required. Whether you stick to the classic recipe or try one of the fun variations, you’ll have a dessert that’s sure to make everyone smile.
I love this recipe because it’s pure nostalgia and joy on a plate—comforting, cheerful, and just a little bit whimsical. Don’t be afraid to play around with flavors, toppings, or even shapes (mini hearts, anyone?). If you try these, let me know in the comments how you made them your own, and share with anyone who needs a little extra sweetness today. You’ve got this—happy snacking!
Frequently Asked Questions (FAQs)
How long do chocolate-dipped strawberry frosted wafers last?
They’ll stay fresh in an airtight container in the fridge for up to a week. For longer storage, freeze them for up to a month—just thaw before serving.
Can I use other wafer flavors instead of strawberry?
Absolutely! Vanilla, lemon, or chocolate wafers all work well with the same method. Just use your favorite frosting and chocolate combo.
What’s the best chocolate for dipping?
Semi-sweet or dark chocolate melts smoothly and tastes great. If you prefer a sweeter shell, use milk or white chocolate. Good-quality chocolate chips or bars give the best results.
Can I make these gluten-free or dairy-free?
Yes! Use gluten-free wafer cookies and dairy-free chocolate chips and frosting. Double-check labels to avoid hidden allergens.
Why is my chocolate coating dull or streaky?
This usually happens if the chocolate is overheated or not enough coconut oil is added. Melt slowly and stir in a little extra coconut oil for a glossy finish.
Pin This Recipe!
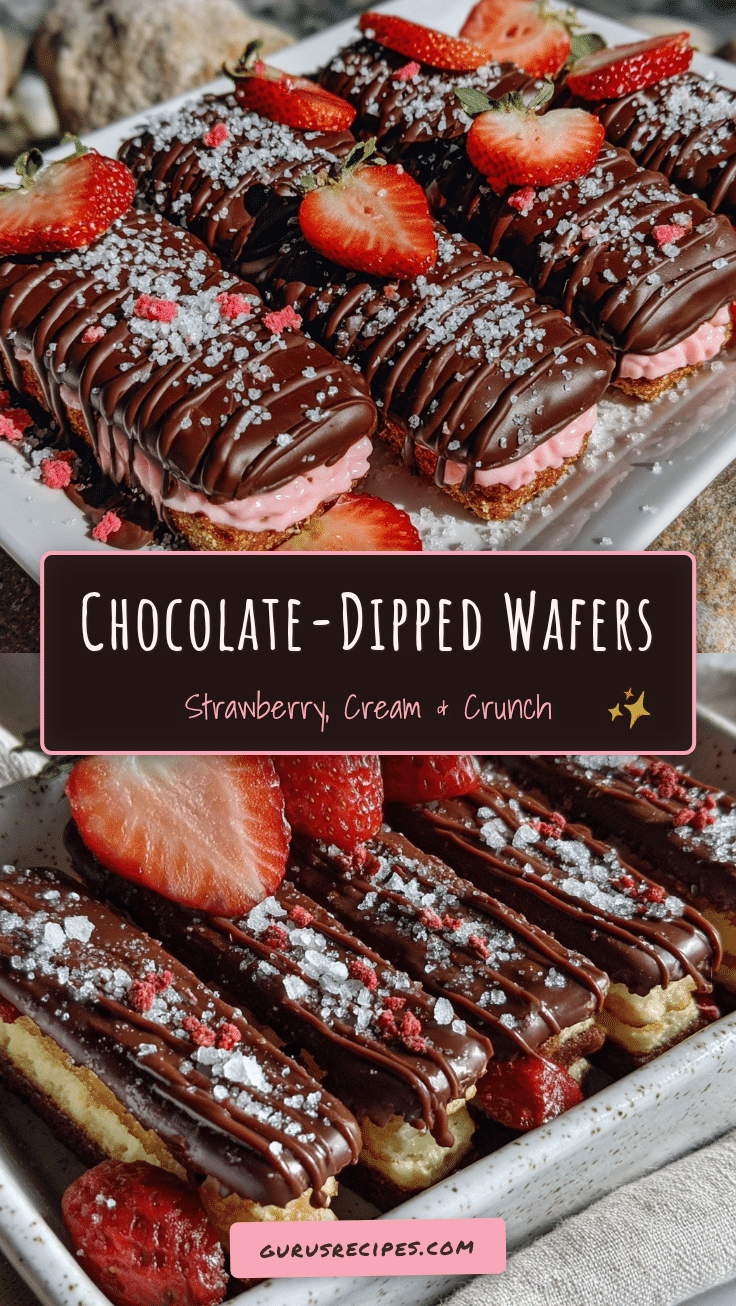

Chocolate-Dipped Strawberry Frosted Wafers
These easy, no-bake chocolate-dipped strawberry frosted wafers are a nostalgic, crowd-pleasing treat with a crisp, creamy, and chocolatey bite. Perfect for parties, lunchboxes, or a quick dessert fix, they come together in under 20 minutes with simple pantry ingredients.
- Total Time: 20 minutes
- Yield: 24 wafers 1x
Ingredients
- 1 package (about 24 pieces) strawberry wafer cookies
- 6 oz semi-sweet or dark chocolate, roughly chopped or chips
- 2 teaspoons coconut oil
- 1/3 cup strawberry frosting (optional, for extra filling)
- Sprinkles or freeze-dried strawberry crumbles (optional, for decorating)
- 2 oz white chocolate (optional, for drizzling)
Instructions
- Line a baking sheet with parchment or wax paper. Set out wafers, sprinkles, and decorations.
- In a microwave-safe bowl, combine chocolate and coconut oil. Microwave in 30-second bursts, stirring after each, until smooth and glossy (about 1 to 1.5 minutes total). Alternatively, melt gently over simmering water using a double boiler.
- Optional: For thicker wafers, pipe or spread about 2 teaspoons strawberry frosting onto the flat side of one wafer, then press another wafer on top to make a sandwich. Repeat with all wafers.
- Hold each wafer (or sandwich) at one end and dip halfway into the melted chocolate. Let excess drip off, then lay on the prepared baking sheet.
- While the chocolate is still wet, quickly sprinkle on decorations or drizzle with melted white chocolate. Work in small batches so the chocolate doesn’t set before decorating.
- Place the tray in the fridge for 10–15 minutes, or until the chocolate is firm. Alternatively, let set at room temperature for about 30 minutes.
- Once set, carefully peel the wafers off the parchment. Arrange on a platter and serve, or transfer to an airtight container for storage.
Notes
For best results, use good-quality chocolate and don’t skip the coconut oil for a glossy finish. Chill wafers before dipping if your kitchen is warm. Decorate immediately after dipping for best sprinkle adhesion. Store in the fridge for up to a week or freeze for up to a month. Gluten-free and dairy-free options are easy with the right wafers and chocolate.
- Prep Time: 7 minutes
- Cook Time: 5 minutes
- Category: Dessert
- Cuisine: American
Nutrition
- Serving Size: 1 wafer
- Calories: 90
- Sugar: 7
- Sodium: 35
- Fat: 4
- Saturated Fat: 2.5
- Carbohydrates: 13
- Fiber: 1
- Protein: 1
Keywords: no-bake, chocolate dipped, strawberry wafers, easy dessert, party snack, kid-friendly, quick treat, potluck, summer dessert


