
Introduction
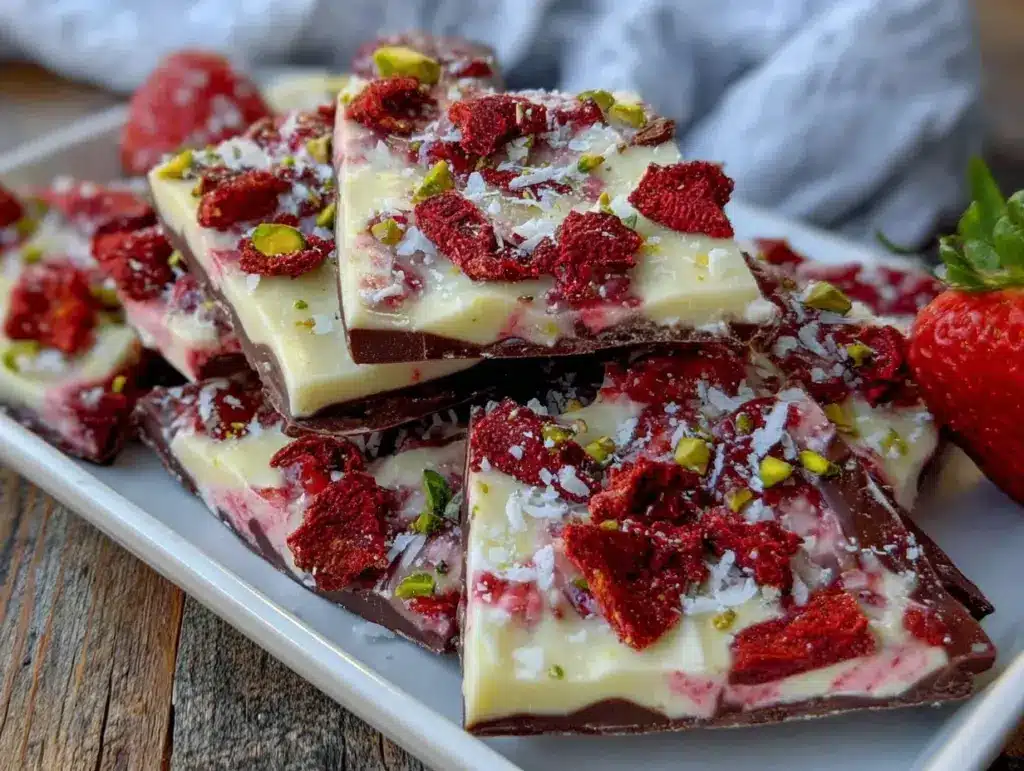
Let me set the scene—imagine opening your freezer and being greeted by the sweet, creamy aroma of strawberries mingling with crisp, velvety chocolate. That’s exactly what hits you when you break into a piece of this chocolate-dipped strawberry ice cream bark with warbled toppings. The first time I made this, it was a sweltering summer afternoon, and all I wanted was a cool treat that didn’t require firing up the oven. I still remember the first bite: icy, creamy, a rush of sweet-tart strawberry, and a satisfying chocolate snap. It was the kind of moment where you pause, take a deep breath, and just smile because you know you’re onto something truly special.
My love affair with bark recipes started years ago when I was knee-high to a grasshopper, watching my grandma swirl melted chocolate with nuts and fruits for the holidays. But honestly, this ice cream bark takes the cake—er, bark. I stumbled onto the idea while trying to jazz up a plain pint of strawberry ice cream for a backyard barbecue. A little chocolate here, a sprinkle of colorful toppings there, and suddenly, my family couldn’t stop sneaking pieces off the tray (and I can’t really blame them). The best part? It looks like Pinterest magic but is dangerously easy to throw together.
Whether you need something to brighten up your summer dessert board, a quick sweet treat for the kids after school, or a show-stopping snack for movie night, this chocolate-dipped strawberry ice cream bark delivers pure, nostalgic comfort with a twist. I’ve tested it more times than I care to admit—in the name of research, of course—and now it’s a staple for family gatherings and gifting. It feels like a warm hug from your favorite childhood memory, but with a modern, colorful flair you’re going to want to bookmark for all seasons. Let’s face it: life’s too short not to have a stash of ice cream bark in your freezer!
Why You’ll Love This Recipe
After plenty of sweet experiments and honest taste tests from my toughest critics (a.k.a. my kids and their friends), I can say this chocolate-dipped strawberry ice cream bark has earned its place at the top of my treat list. Here’s why you’ll love making—and eating—it as much as we do:
- Quick & Easy: It comes together in about 15 minutes (plus freezing time), making it perfect for last-minute cravings or when you’re short on time.
- Simple Ingredients: You likely have most of what you need already—no hunting for fancy chocolate or hard-to-find toppings.
- Perfect for Any Occasion: Whether it’s a birthday party, backyard picnic, or just a Tuesday afternoon, this treat fits right in.
- Crowd-Pleaser: The combination of creamy ice cream, juicy strawberries, and crispy chocolate always gets rave reviews from kids and adults alike.
- Unbelievably Delicious: The play of textures—crunchy, creamy, melty—is downright addictive.
What makes this chocolate-dipped strawberry ice cream bark recipe stand out is the warbled toppings. Instead of just a plain chocolate drizzle, you get a colorful, fun look that’s made for Instagram (or let’s be honest—just making you smile every time you open the freezer). I use a special trick: drizzling both dark and white chocolate, then swirling with a toothpick for that signature warbled effect.
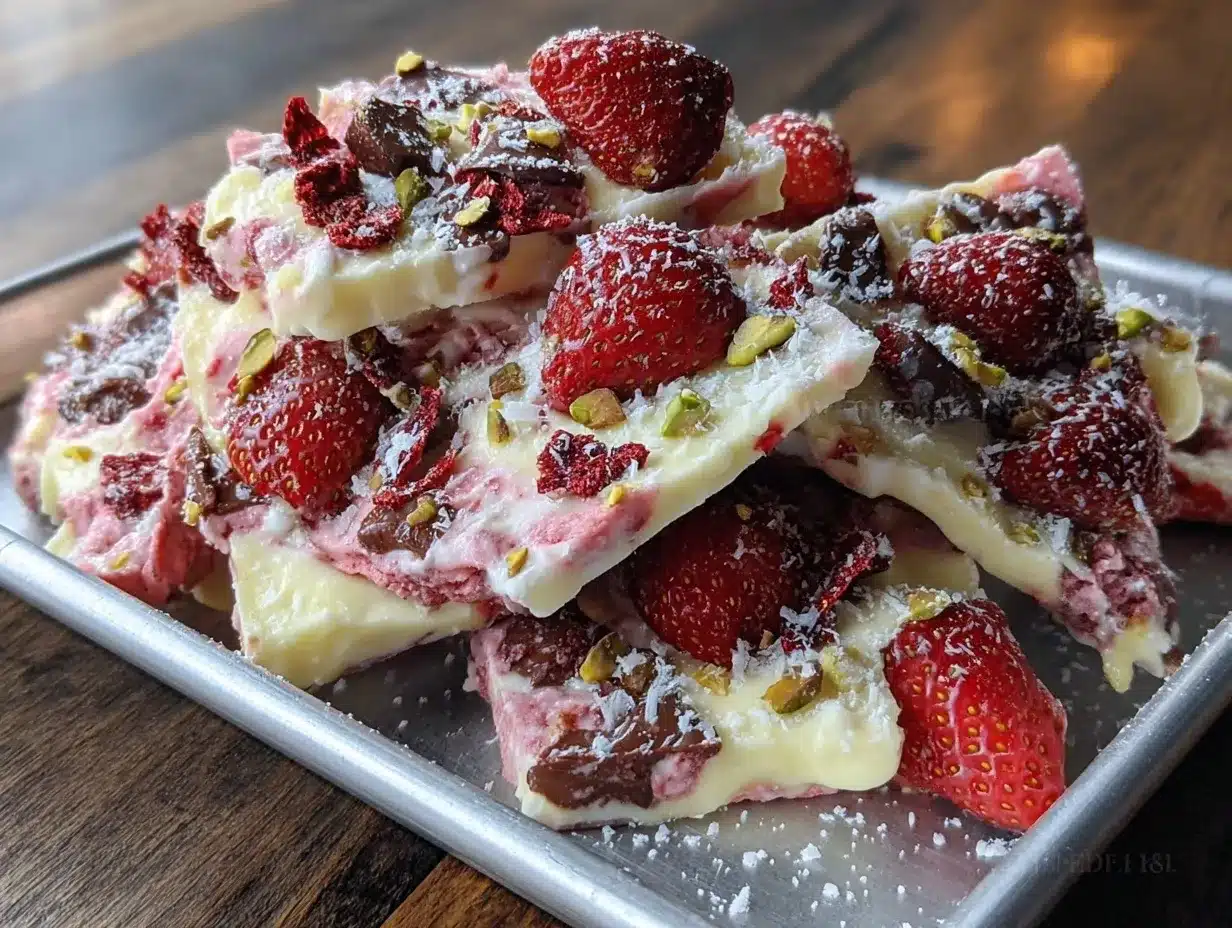
But the secret sauce, if you will, is in the balance. The strawberries aren’t just an afterthought—they’re folded into the ice cream base and layered on top, so you get bursts of real fruit flavor in every bite. Plus, you can customize the toppings to suit any craving (rainbow sprinkles, nuts, freeze-dried berries… the sky’s the limit).
I think this recipe is comfort food reimagined—it’s as fun to make as it is to eat. It’s the kind of treat that makes you close your eyes after the first bite, just soaking it all in. Whether you’re impressing guests without breaking a sweat or making a simple day feel special, you’ll want to keep this one on repeat. Trust me!
What Ingredients You Will Need
This chocolate-dipped strawberry ice cream bark recipe uses simple ingredients to create a dessert that’s both stunning and scrumptious. Most of these are pantry staples, and there’s plenty of room for swaps if you need them.
- For the Ice Cream Layer:
- Strawberry ice cream, slightly softened (3 cups / about 700g) – use your favorite brand or homemade for extra flavor; I like to set it out for 5-10 minutes before spreading.
- Fresh strawberries, chopped (1 cup / about 150g) – ripe, juicy berries make all the difference. If strawberries aren’t in season, frozen (thawed and drained) work too.
- Vanilla extract (1 teaspoon / 5ml) – optional, but adds lovely depth and warmth.
- For the Chocolate Coating:
- Dark chocolate chips or bar, chopped (6 ounces / 170g) – I recommend Ghirardelli or Guittard for a smooth melt. Semi-sweet works too.
- White chocolate chips or bar, chopped (3 ounces / 85g) – for the warbled effect; use real white chocolate for best results.
- Coconut oil (2 teaspoons / 10ml, divided) – helps the chocolate set with a nice snap.
- For the Warbled Toppings:
- Sprinkles (2 tablespoons / 20g) – go wild! I love rainbow jimmies for a playful look.
- Freeze-dried strawberries, crushed (2 tablespoons / 10g) – these add tart, crisp flavor and a pop of color.
- Chopped nuts (optional, 2 tablespoons / 15g) – pistachios or pecans add crunch; skip for nut-free.
- Mini chocolate chips or shavings (1 tablespoon / 10g) – for extra chocolatey bites.
Ingredient Tips: If you’re dairy-free, swap in coconut-based strawberry ice cream and use dairy-free chocolate chips. For a gluten-free treat, double-check your toppings. I love Trader Joe’s freeze-dried strawberries for their bright flavor, and any good-quality chocolate will do the trick for the dipping layer. In summer, you can add a handful of fresh berries on top for extra juiciness, or mix in raspberries for a fun twist.
Don’t be afraid to make this your own! Use almond flour as a crunchy topping if you want a gluten-free crunch, or skip the nuts entirely if you’re serving a crowd with allergies. The warbled toppings are where you can really get creative—think crushed cookies, edible flowers, or even a drizzle of peanut butter for a wild treat.
Equipment Needed
- Baking sheet (at least 9×13 inches / 23x33cm): A rimmed baking sheet is perfect for spreading the ice cream layer evenly. A silicone baking mat or parchment paper helps with easy removal—trust me, don’t skip lining your pan.
- Offset spatula or rubber spatula: Makes smoothing the ice cream a breeze. A butter knife works in a pinch.
- Microwave-safe bowls or double boiler: For melting the chocolates. I usually use glass bowls in the microwave (30-second bursts), but a double boiler works if you’re old-school.
- Toothpick or skewer: For swirling the chocolate and creating that signature warbled look—kids love helping with this part!
- Sharp knife: For cutting the bark into neat pieces (run it under hot water for cleaner cuts).
- Freezer space: Make sure your baking sheet fits in your freezer. I learned this the hard way one busy weekend—measure first!
If you don’t have an offset spatula, just use the back of a big spoon. For melting chocolate, a simple saucepan with a heatproof bowl on top gets the job done. And if you’re worried about stickiness, a quick spritz of nonstick spray under your parchment makes cleanup as easy as pie. Budget tip: Dollar store parchment paper works just as well as fancy brands!
Preparation Method
- Line your tray: Place parchment paper or a silicone baking mat on a rimmed baking sheet (9×13 inches / 23x33cm). This keeps the bark from sticking and makes it easy to lift out later.
-
Soften the ice cream: Let 3 cups (700g) of strawberry ice cream sit at room temperature for 5-10 minutes. You want it scoopable but not melted—think soft-serve consistency.
Note: Too melted, and it’ll refreeze icy. Too firm, and it’s hard to spread. -
Mix in strawberries: In a large bowl, gently fold in 1 cup (150g) chopped fresh strawberries and 1 teaspoon (5ml) vanilla extract (if using) into the softened ice cream.
Sensory cue: You should see pretty pink streaks and juicy berry chunks throughout the ice cream. -
Spread the ice cream layer: Scoop the mixture onto your lined tray. Use an offset spatula or the back of a spoon to spread it into an even layer, about 1/2 inch (1.25cm) thick.
Tip: Work quickly so the ice cream doesn’t melt too much. -
Freeze until firm: Place the tray in the freezer for at least 1 hour, or until the ice cream is solid.
Quick tip: If your freezer isn’t super cold, leave it for 90 minutes. -
Melt the chocolates: In microwave-safe bowls, melt 6 ounces (170g) dark chocolate with 1 teaspoon (5ml) coconut oil, and 3 ounces (85g) white chocolate with 1 teaspoon (5ml) coconut oil. Heat in 30-second bursts, stirring each time, until smooth.
Caution: White chocolate burns fast—watch closely! -
Drizzle and swirl: Remove the ice cream layer from the freezer. Drizzle the melted dark chocolate over the surface, then add lines or dollops of white chocolate on top. Use a toothpick or skewer to gently swirl the chocolates together, creating a warbled effect.
Note: Don’t over-swirl or the colors will muddy. -
Add toppings: While the chocolate is still wet, quickly sprinkle on 2 tablespoons (20g) sprinkles, 2 tablespoons (10g) crushed freeze-dried strawberries, 2 tablespoons (15g) chopped nuts (if using), and 1 tablespoon (10g) mini chocolate chips or shavings.
Tip: Press toppings in gently so they stick. -
Freeze again: Return the tray to the freezer for at least 2 hours, or until everything is fully set.
Warning: Don’t rush this step—the chocolate needs to harden! - Cut and serve: Lift the bark out of the tray using the parchment. Use a sharp knife (run under hot water and wipe dry) to slice or break the bark into pieces. Serve immediately or store in an airtight container in the freezer.
If your bark cracks unevenly, don’t stress—those rustic, jagged pieces are part of the charm. If the chocolate layer separates from the ice cream, try letting it sit at room temp for 1 minute before cutting. And if you have little helpers, let them go wild with the toppings—after all, it’s about the fun as much as the flavor!
Cooking Tips & Techniques
Here are some of my top tricks (learned the hard way, you know!) for perfect chocolate-dipped strawberry ice cream bark every single time:
- Work fast with ice cream: Have all your toppings and chocolates ready before you take the ice cream out of the freezer. Ice cream melts quickly, especially in a warm kitchen.
- Don’t skip the coconut oil: Adding just a bit to the chocolate helps it set with a nice snap and prevents that weird, waxy texture you sometimes get with plain melted chips.
- Use parchment or silicone liner: This is one thing I learned after spending way too long chiseling bark off an unlined pan—clean-up is so much easier, and you get beautiful, neat pieces.
- Swirl, don’t stir: For that gorgeous warbled look, gently drag your toothpick through the chocolate in S-shaped curves. If you swirl too much, the colors blend together and look muddy.
- Cut with a hot knife: For tidy slices, dip your knife in hot water and wipe dry between cuts. It glides right through the chocolate and ice cream without shattering.
- Store smart: Once cut, keep the bark pieces in a single layer in an airtight container, separated by parchment if stacking. This prevents sticking and keeps the toppings crisp.
Common mistakes? Spreading the ice cream too thick (it takes forever to freeze and can get icy) or adding toppings before the chocolate drizzle (they won’t stick). If you find your chocolate seizing up, add a tiny splash of coconut oil and stir—works like a charm.
One last tip: If you want to serve to a crowd, make a double batch on two trays. It disappears fast, and you’ll wish you had more (ask me how I know). Multitask by melting chocolates while the ice cream freezes, and you’ll be ready in record time. Consistency is all about prep and patience—don’t rush the freezing steps, and you’ll have perfect bark, every time.
Variations & Adaptations
The beauty of chocolate-dipped strawberry ice cream bark is how easy it is to customize. Here are a few favorite twists:
- Dairy-Free/Vegan: Swap in coconut-based or oat milk strawberry ice cream and dairy-free chocolate chips. Top with coconut flakes and chopped dark chocolate for extra richness.
- Nut-Free: Skip the nuts and double up on sprinkles or use crushed pretzels for a salty-sweet crunch.
- Seasonal Flavors: Try raspberry ice cream with white and dark chocolate, or use blueberry ice cream with lemon zest and dried blueberries for a summer twist.
- Low-Sugar: Use a light or no-sugar-added ice cream and sugar-free chocolate chips. Top with toasted seeds, unsweetened coconut, and a few fresh berries.
- Different Cooking Methods: If you don’t have a freezer-safe pan, make mini bark rounds by spreading the ice cream and toppings on lined muffin tins.
- Personal Favorite: Sometimes, I mix in a spoonful of peanut butter to the melted dark chocolate before drizzling—it gives a rich, nutty swirl that’s irresistible.
Allergens? This bark is naturally gluten-free if you skip cookie toppings and check your chocolates. For a nut-free batch, just stick with seeds or plain chocolate. The warbled toppings are a blank canvas—so don’t be shy about trying new combos. I once added candied ginger and dried mango for a tropical twist, and it was a surprise hit!
Serving & Storage Suggestions
Serve chocolate-dipped strawberry ice cream bark straight from the freezer for best texture—icy cold and perfectly crisp. If you want to wow guests, arrange the bark on a platter with extra fresh strawberries and a few mint leaves for color. It’s also adorable on a stick for little hands (just insert popsicle sticks before the final freeze).
Pair with lemonade, iced tea, or even a bubbly rosé for a grown-up treat. For a full dessert board, add mini cupcakes, fresh fruit, and chocolate-covered pretzels.
To store, layer pieces of bark in an airtight container, separating layers with parchment paper. Keep in the freezer for up to 1 month (though I doubt it’ll last that long!). For best flavor, let pieces sit at room temperature for 2-3 minutes before eating—this softens the ice cream just enough for the flavors to really pop.
Reheating isn’t necessary, but if you accidentally leave the bark out for too long and it softens, just pop it back in the freezer to firm up. The flavors actually deepen after a day or two in the freezer, so it’s a great make-ahead treat for parties or busy weeks.
Nutritional Information & Benefits
Estimated per serving (about 1/12th of the recipe): 180 calories, 9g fat, 20g carbs, 3g protein, and 12g sugar. These numbers will vary based on the ice cream and toppings you use.
Strawberries are loaded with vitamin C and antioxidants, while dark chocolate adds a little heart-healthy flavonoid boost. If you make the bark with dairy-free or reduced-sugar options, it fits into lower-carb or allergy-friendly diets. Just watch out for nuts if you have allergies, and double-check any toppings for gluten if you’re sensitive.
Personally, I love that this treat feels indulgent but can be tweaked to fit your nutritional goals. It’s real food, real flavor, and a real smile in every bite!
Conclusion
There you have it—chocolate-dipped strawberry ice cream bark with warbled toppings, the easy homemade treat that’s as gorgeous as it is delicious. Whether you’re making it for a special celebration, a family movie night, or just because you need a little pick-me-up, this recipe delivers on both flavor and fun.
Don’t be afraid to experiment with your favorite ice cream flavors or go wild with toppings. That’s the joy of bark—every batch is a little different, and every bite brings a new surprise. Honestly, this is one of those recipes I keep coming back to, year after year, because it never fails to bring a smile (and it’s so darn easy, too).
I’d love to hear how your bark turns out! Drop a comment below, tag me in your Pinterest creations, or let me know your favorite warbled topping combo. Happy snacking—and may your freezer always be stocked with something sweet and colorful!
FAQs
How long does chocolate-dipped strawberry ice cream bark last in the freezer?
Stored in an airtight container, it stays fresh and tasty for up to one month. Separate layers with parchment to prevent sticking.
Can I use a different ice cream flavor?
Absolutely! Vanilla, raspberry, or even pistachio ice cream works beautifully. Just match your toppings to the flavors for a fun twist.
What if I don’t have freeze-dried strawberries?
No worries—just use extra fresh strawberries, dried fruit, or even more sprinkles. The warbled chocolate is the real star!
Is this recipe gluten-free?
Yes, as long as you use gluten-free ice cream and check your toppings for hidden gluten. Always double-check labels if you’re sensitive.
Can I make this bark dairy-free?
You sure can! Use your favorite non-dairy ice cream and dairy-free chocolate chips. It’ll still be creamy, chocolatey, and delicious.
Pin This Recipe!
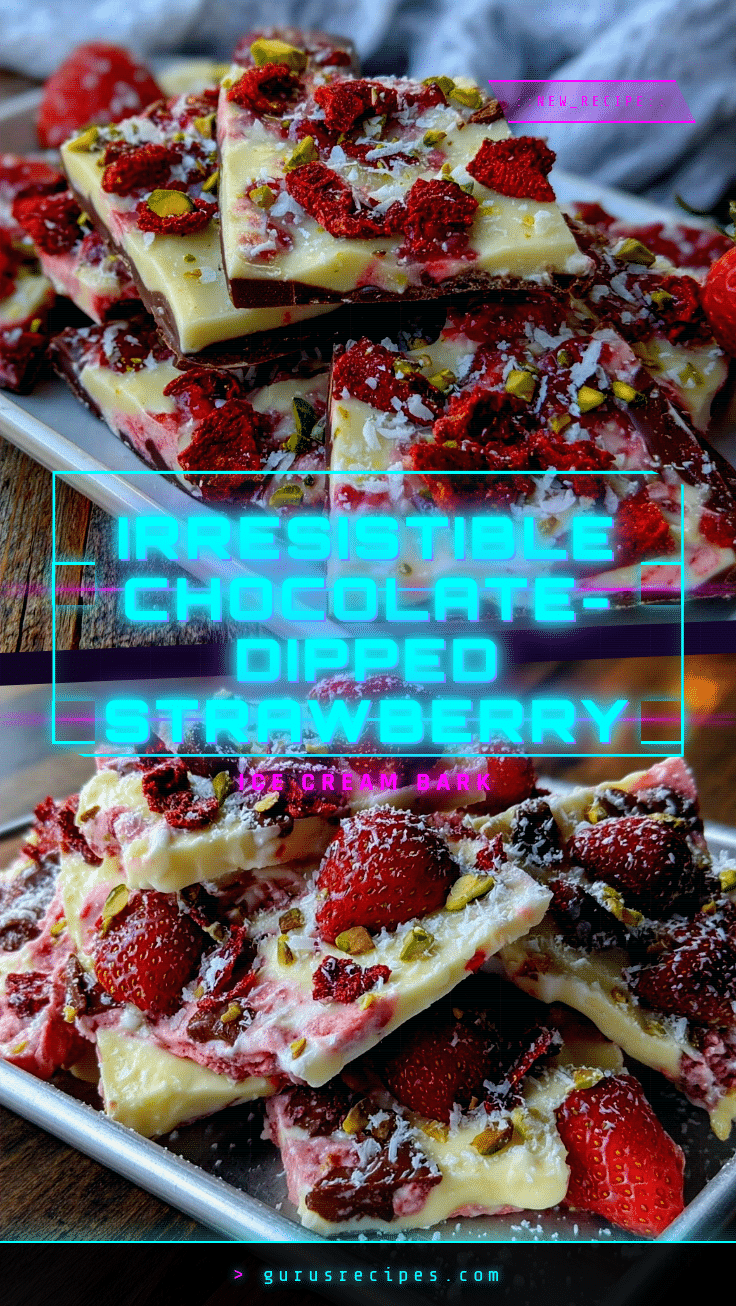

Chocolate-Dipped Strawberry Ice Cream Bark
This easy homemade ice cream bark features creamy strawberry ice cream, juicy strawberries, and a warbled swirl of dark and white chocolate, topped with colorful sprinkles, freeze-dried berries, and crunchy nuts. It’s a no-bake, freezer-friendly treat perfect for summer parties, gifting, or a fun family dessert.
- Total Time: 3 hours (includes freezing time)
- Yield: 12 servings 1x
Ingredients
- 3 cups strawberry ice cream, slightly softened (about 1.5 pints or 700g)
- 1 cup fresh strawberries, chopped (about 150g)
- 1 teaspoon vanilla extract (optional)
- 6 ounces dark chocolate chips or bar, chopped (170g)
- 3 ounces white chocolate chips or bar, chopped (85g)
- 2 teaspoons coconut oil, divided (10ml)
- 2 tablespoons sprinkles (20g)
- 2 tablespoons freeze-dried strawberries, crushed (10g)
- 2 tablespoons chopped nuts, such as pistachios or pecans (optional, 15g)
- 1 tablespoon mini chocolate chips or chocolate shavings (10g)
Instructions
- Line a rimmed baking sheet (at least 9×13 inches) with parchment paper or a silicone baking mat.
- Let the strawberry ice cream sit at room temperature for 5-10 minutes until scoopable but not melted.
- In a large bowl, gently fold in the chopped strawberries and vanilla extract (if using) into the softened ice cream.
- Scoop the mixture onto the lined tray and spread into an even layer about 1/2 inch thick using an offset spatula or the back of a spoon.
- Freeze the tray for at least 1 hour, or until the ice cream is solid.
- In microwave-safe bowls, melt the dark chocolate with 1 teaspoon coconut oil, and the white chocolate with 1 teaspoon coconut oil, heating in 30-second bursts and stirring until smooth.
- Remove the ice cream layer from the freezer. Drizzle the melted dark chocolate over the surface, then add lines or dollops of white chocolate. Use a toothpick or skewer to gently swirl the chocolates together for a warbled effect.
- While the chocolate is still wet, quickly sprinkle on the sprinkles, crushed freeze-dried strawberries, chopped nuts (if using), and mini chocolate chips or shavings. Press toppings in gently.
- Return the tray to the freezer for at least 2 hours, or until fully set.
- Lift the bark out of the tray using the parchment. Use a sharp knife (run under hot water and wipe dry) to slice or break the bark into pieces. Serve immediately or store in an airtight container in the freezer.
Notes
Work quickly with the ice cream to prevent melting. Use parchment or a silicone liner for easy removal. Swirl the chocolates gently for a pretty effect. For tidy slices, cut with a hot knife. Store bark in a single layer or with parchment between layers in an airtight container in the freezer for up to 1 month. Customize toppings as desired.
- Prep Time: 15 minutes
- Cook Time: 0 minutes
- Category: Dessert
- Cuisine: American
Nutrition
- Serving Size: About 1/12th of the
- Calories: 180
- Sugar: 12
- Sodium: 40
- Fat: 9
- Saturated Fat: 6
- Carbohydrates: 20
- Fiber: 2
- Protein: 3
Keywords: ice cream bark, chocolate dipped, strawberry dessert, summer treat, no bake, freezer dessert, easy recipe, kid friendly, gluten free, party snack


