
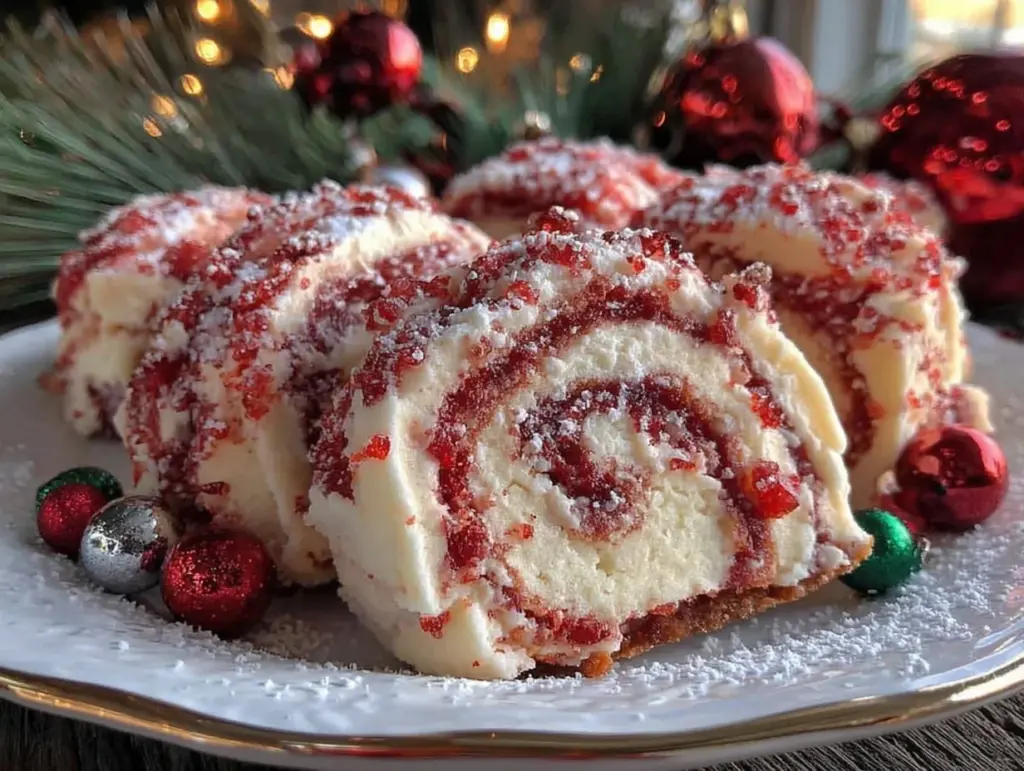
Oh, the sweet aroma of butter and sugar swirling in the air—honestly, nothing says “Christmas” in my house like a batch of freshly baked Christmas Pinwheel Cookies. The first time I rolled out these vibrant, swirly beauties, the kitchen was filled with the kind of excitement you’d expect at a surprise birthday party. I paused over the dough, almost afraid to mess up those perfect red and green layers. It was one of those moments where you stop, take a deep breath, and just smile because you know you’re onto something truly special (and a little bit magical).
I can still picture my grandma at her old oak table, her hands dusted with flour, telling stories while we pressed cookie cutters into dough. When I was knee-high to a grasshopper, I loved anything bright and cheerful, so stumbling upon this Christmas Pinwheel Cookies recipe felt like rediscovering a bit of childhood joy. Years ago, I tried to recreate the bakery cookies I saw at holiday markets—honestly, I wish I’d found this recipe sooner. It’s dangerously easy and packed with pure, nostalgic comfort.
Let’s face it, these cookies aren’t just showstoppers for Pinterest boards; they’re the kind of treats kids sneak off the cooling rack when you’re not looking (my family can’t resist them, and I don’t blame them at all). They’re perfect for potlucks, gifting, or just brightening up a snowy afternoon with something sweet. Every batch I’ve tested—in the name of research, of course—has become a staple for family gatherings and last-minute holiday surprises. These Christmas Pinwheel Cookies feel like a warm hug on a cold winter day, and you’re going to want to bookmark this one for every festive occasion.
Why You’ll Love This Recipe
You know what I love about these Christmas Pinwheel Cookies? They’re not just pretty—they tick every box for a holiday treat. After countless batches (and more than a few late-night taste tests), I can say with confidence that this recipe is a keeper. Here’s why you’ll reach for it again and again:
- Quick & Easy: Comes together in under 45 minutes, so you can whip up a batch even when your schedule is packed.
- Simple Ingredients: No fancy grocery trips needed; I bet you’ve got everything in your kitchen already.
- Perfect for Festive Occasions: These cookies are made for Christmas parties, cookie swaps, and cozy movie nights.
- Crowd-Pleaser: Kids go wild for the swirls, and adults always ask for seconds.
- Unbelievably Delicious: Buttery, soft, with a hint of vanilla—comfort food at its best.
What sets this Christmas Pinwheel Cookies recipe apart is the process. Instead of just coloring the dough and hoping for the best, I use a layering technique that keeps the colors vibrant and the texture perfectly tender. The dough rolls smoothly (no cracks or crumbles!) thanks to a secret chilling step I learned after a few mishaps. And let’s not forget the balanced sweetness—just enough to make them addictive, but not over-the-top.
This isn’t just another Christmas cookie—it’s my best version, perfected after years of baking for family, friends, and the occasional bake sale. The recipe is forgiving, so you don’t need to be a pastry chef to pull off those gorgeous spirals. Each bite brings back memories of holiday mornings, laughter, and a little bit of frosting on your nose. If you’re looking for a treat that’s as fun to make as it is to eat, these Christmas Pinwheel Cookies are your ticket to festive happiness.
What Ingredients You Will Need
This recipe uses wholesome, pantry-friendly ingredients to create cookies that are both beautiful and delicious. I love that most of these items are probably already sitting in your kitchen—no need for anything fancy or hard to find. Here’s what you’ll need for the perfect batch of Christmas Pinwheel Cookies:
- For the dough:
- 2 3/4 cups (345g) all-purpose flour (King Arthur or Gold Medal work great)
- 1 cup (226g) unsalted butter, softened (adds richness and a melt-in-your-mouth texture)
- 1 cup (200g) granulated sugar (for just the right amount of sweetness)
- 1 large egg, room temperature (binds the dough and adds tenderness)
- 1 1/2 teaspoons vanilla extract (use pure vanilla for the best flavor)
- 1/2 teaspoon almond extract (optional, but it gives that special holiday aroma)
- 1/2 teaspoon salt (balances the sweetness)
- For the colors:
- Red gel food coloring (Wilton or AmeriColor—gel is best for vibrant color without thinning the dough)
- Green gel food coloring (same as above)
- For decorating (optional):
- Sprinkles or sanding sugar (adds sparkle and crunch)
Ingredient tips: For a gluten-free option, swap the all-purpose flour with your favorite 1:1 gluten-free blend (Bob’s Red Mill is reliable). Dairy-free butter (like Earth Balance) also works if needed. If you’re out of almond extract, simply leave it out—the vanilla carries the flavor just fine. The gel food coloring is key for vivid swirls; liquid food coloring tends to fade and can make the dough sticky.
For a seasonal twist, you can add a pinch of cinnamon or nutmeg to the dough for a subtle warmth. In summer, swap the green for blue and make “Patriotic Pinwheels” (trust me, they’re just as fun). If you prefer less sugar, use a touch less in the dough—these Christmas Pinwheel Cookies are forgiving, and you won’t lose that soft texture.
I recommend sticking with trusted brands for consistency. Over the years, I’ve found that King Arthur flour and Wilton gel colors give me the best results every time. If you’re making these for a crowd, doubling the recipe is easy, and the dough holds up beautifully for batch baking.
Equipment Needed
You don’t need a bunch of fancy gadgets for these Christmas Pinwheel Cookies—just a few reliable kitchen tools. Here’s what I reach for every time:
- Mixing bowls (one large, one medium—sturdy glass or metal are my go-tos)
- Electric mixer (stand or hand mixer both work; I’ve used a basic hand mixer for years with no issues)
- Measuring cups and spoons (accurate measurements make all the difference)
- Rolling pin (wooden or silicone—if you don’t have one, a clean wine bottle works in a pinch!)
- Plastic wrap or parchment paper (for rolling and chilling the dough)
- Baking sheets (heavy-duty, rimmed for best results)
- Sharp knife or dough cutter (for slicing those perfect pinwheels)
- Cooling rack (prevents sogginess and keeps cookies crisp)
If you’re missing a rolling pin, honestly, a sturdy glass jar or bottle does the trick. For parchment paper, wax paper is a decent substitute, though parchment is less likely to stick. I’ve had a few disasters with cheap baking sheets warping, so investing in a thicker one saves headaches. After baking, let your tools soak in warm water to make cleanup easy—especially that sticky dough residue.
Budget-friendly tip: Most equipment can be found at discount stores or even thrift shops, and you don’t need anything high-end to nail these Christmas Pinwheel Cookies.
Preparation Method
- Cream the Butter and Sugar:
In a large mixing bowl, beat 1 cup (226g) unsalted butter and 1 cup (200g) granulated sugar together until pale and fluffy—about 2-3 minutes with a stand mixer or 4 minutes with a hand mixer. The mixture should look light and almost whipped.
- Add Wet Ingredients:
Mix in 1 large egg, 1 1/2 teaspoons vanilla extract, and 1/2 teaspoon almond extract (if using). Beat until well combined, scraping down the sides as needed.
- Combine Dry Ingredients:
In a separate bowl, whisk together 2 3/4 cups (345g) all-purpose flour and 1/2 teaspoon salt. Gradually add this to the wet mixture, mixing on low until just combined. The dough will be soft but not sticky.
- Divide and Color Dough:
Split the dough into two equal parts. Place each in its own bowl. Add red gel food coloring to one half and green to the other (start with 1/4 teaspoon each and add more for deeper color). Knead gently until the color is uniform, but don’t overwork—too much mixing makes tough cookies.
- Roll Out the Dough:
Between sheets of parchment paper, roll each colored dough into a rectangle about 11×8 inches (28x20cm), roughly 1/4 inch (0.6cm) thick. Chill in the fridge for 15-20 minutes—a critical step for easy rolling and sharp pinwheels.
- Layer and Roll:
Remove dough from the fridge. Peel the parchment off one rectangle and place it on top of the other (I usually put green on the bottom, but you do you). Press gently to seal. Using parchment paper to help, roll the layered dough tightly into a log—work slowly to avoid cracks. Wrap the log in plastic wrap and chill for another 30 minutes (or up to 2 hours for extra neat slices).
- Slice the Cookies:
Preheat your oven to 350°F (175°C). Unwrap the log and use a sharp knife to slice cookies about 1/4 inch (0.6cm) thick. If the dough crumbles, let it sit for a few minutes to soften slightly.
- Bake:
Place slices on a parchment-lined baking sheet, spacing them about 1 inch (2.5cm) apart. Sprinkle with sanding sugar or sprinkles if you like. Bake for 9-11 minutes, until the edges are just set and the cookies look dry on top. They won’t brown much.
- Cool:
Let cookies cool on the baking sheet for 5 minutes, then transfer to a cooling rack. They’ll firm up as they cool and show off those gorgeous pinwheel swirls.
Preparation notes: If the dough gets sticky while rolling, chill it longer. If it’s too firm to slice, let it sit out for a few minutes. For extra sharp spirals, wipe your knife between each slice. Don’t skip the chilling steps—it’s what keeps the colors clean and the texture perfect. Oh, and if you ever mess up the swirl, just call them “abstract art cookies”—I’ve done it more than once!
Cooking Tips & Techniques
After many batches of Christmas Pinwheel Cookies, I’ve learned a trick or two—mostly from trial and error (and a few flops). Here are my top pro tips, so you don’t have to learn the hard way:
- Chill, Chill, Chill: Chilling the dough is non-negotiable. It keeps the colors sharp and the cookies from spreading too much in the oven.
- Use Gel Food Coloring: Liquid food colors can make the dough sticky and dull. Gel gives vibrant swirls without mess.
- Roll Evenly: Uneven thickness leads to lopsided cookies. Use parchment paper and a steady hand (or a ruler, if you’re precise!) for best results.
- Knife Wiping: Wipe your knife after every few slices to keep colors crisp (I didn’t the first time—big mistake).
- Don’t Overmix: Overworking the dough toughens cookies. Mix just until colors are combined.
- Work Quickly: If your kitchen is warm, move fast! Soft dough is hard to roll and slice.
- Test Bake: Bake one or two cookies first. Check for spreading or color bleeding—then adjust chill time or oven temp if needed.
Common mistakes? Skipping the chill time (hello, flat cookies), using liquid colors (messy, pale dough), or slicing too thick (they’ll be cakey, not crisp). If you mess up, don’t stress—just call it a rustic batch and start again. Multitask by prepping sprinkles or making hot chocolate while the dough chills. Consistency comes from measuring flour accurately and using room temperature butter. Trust me, these little details make all the difference.
Variations & Adaptations
Christmas Pinwheel Cookies are super flexible. Here are some of my favorite tweaks, whether you need a dietary adjustment or just want a new flavor:
- Gluten-Free: Swap in a 1:1 gluten-free flour blend. Bob’s Red Mill and King Arthur have solid options. The cookies stay soft and swirl up beautifully.
- Dairy-Free: Use plant-based butter. Earth Balance or Miyoko’s both work. You won’t miss the dairy, promise!
- Flavor Twists: Add a teaspoon of peppermint extract for minty pinwheels, or sprinkle cinnamon-sugar for a “snickerdoodle” vibe. Lemon zest in the dough is a bright, cheery change for springtime parties.
- Color Combos: Try blue and white for Hanukkah, or pink and purple for birthday celebrations. Just swap out the gel food colors.
- Baking Methods: For crispier cookies, bake 1-2 minutes longer. For extra-soft, pull them early and cool on the sheet.
- Allergen Substitutions: For egg-free cookies, use 1 tablespoon flaxseed meal mixed with 2.5 tablespoons water. Works like a charm.
My personal favorite adaptation? Peppermint pinwheels with crushed candy canes sprinkled on top. It’s a hit every year at our holiday party (kids love the crunch, adults love the flavor). Feel free to experiment—the dough is forgiving, and the possibilities are endless. Just don’t be afraid to make them your own!
Serving & Storage Suggestions
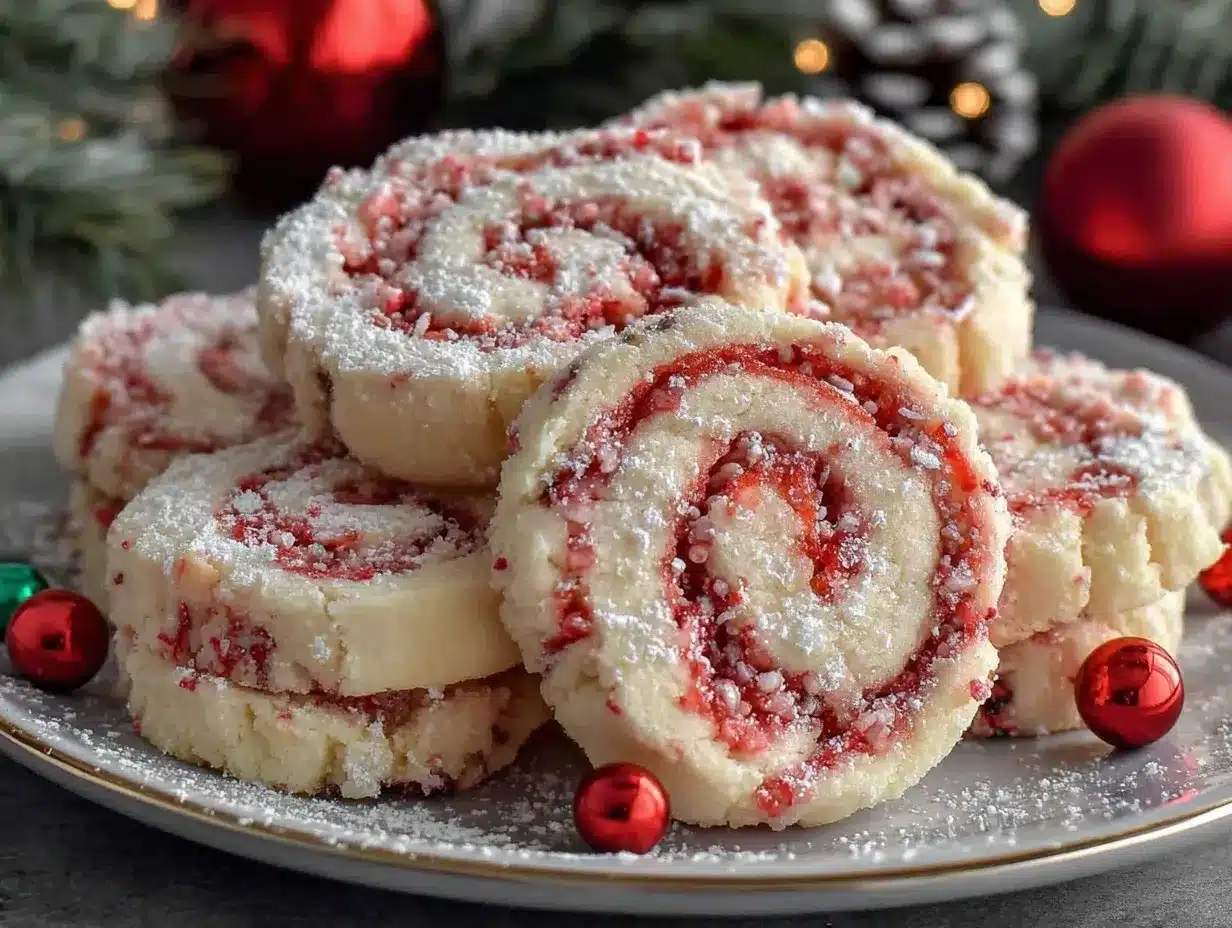
These Christmas Pinwheel Cookies shine brightest when served fresh and beautifully displayed. I love arranging them on a festive platter, maybe with a sprig of holly or a dusting of powdered sugar for a snowy effect. Serve them at room temperature—they’re soft, buttery, and the colors pop best when they’re not chilled.
Pair with hot cocoa, spiced tea, or a glass of cold milk. They also look stunning as part of a holiday cookie board alongside gingerbread and thumbprints. For parties, stack them in clear jars or wrap them in cellophane with a ribbon—perfect for gifting.
Storage is easy: Place cooled cookies in an airtight container. They’ll keep at room temperature for up to 5 days, or in the fridge for 7-10 days. For longer storage, freeze them in layers separated by wax paper for up to 2 months. To thaw, let them sit at room temp for an hour—no need to reheat, but if you want a fresh-baked feel, a quick 2-minute warm-up in a 300°F (150°C) oven does the trick.
The flavors mellow and blend over time, making day-two cookies even better for dunking. Just watch out—if you leave them on the counter, they have a habit of disappearing fast!
Nutritional Information & Benefits
Each Christmas Pinwheel Cookie contains approximately:
- Calories: 110
- Fat: 6g
- Carbohydrates: 13g
- Protein: 1g
- Sugar: 6g
Key ingredients like butter provide a rich source of energy, while the moderate sugar keeps these treats light and enjoyable. Using almond extract can add a hint of beneficial antioxidants. If you go gluten-free or dairy-free, you’ll avoid common allergens without sacrificing flavor. These cookies are nut-free if you skip the almond extract, and easily adaptable for most dietary needs.
From a wellness perspective, I believe holiday treats should be enjoyed in moderation—and with a little joy. Christmas Pinwheel Cookies are a cheerful, portion-controlled way to celebrate the season. Always check ingredient labels for allergens if you’re gifting these. They’re festive, fun, and fit into most balanced holiday eating plans!
Conclusion
Christmas Pinwheel Cookies are more than just a festive treat—they’re a celebration of holiday joy, family tradition, and pure buttery comfort. The swirls make every bite a little party, and the recipe’s forgiving nature means anyone can pull off a Pinterest-worthy batch. Whether you go classic red and green or try a new twist, these cookies will brighten up your celebrations and leave everyone smiling.
I love this recipe because it’s easy, fast, and flexible. It’s the kind of cookie that brings people together (and makes your kitchen smell amazing). Don’t hesitate to make them your own—add flavors, switch colors, or let the kids help with the rolling. The memories are just as sweet as the cookies themselves.
If you try these Christmas Pinwheel Cookies, let me know in the comments—share your favorite variations, party stories, or holiday memories. Spread a little cheer by pinning, sharing, or gifting a batch. Wishing you a season full of sweetness and smiles!
Frequently Asked Questions
How do I keep my pinwheel cookies from spreading too much?
Chill the rolled dough log thoroughly before slicing and baking. This helps the cookies hold their shape and keeps the swirls crisp.
Can I make Christmas Pinwheel Cookies ahead of time?
Absolutely! The dough can be made and chilled up to 2 days in advance. Sliced cookies freeze well for up to 2 months—just bake straight from frozen, adding 1-2 minutes to the baking time.
What’s the best food coloring for bright swirls?
Gel food coloring is ideal—it gives vivid color without making the dough sticky or runny. Brands like Wilton or AmeriColor are reliable.
Can I use other flavors in the dough?
Yes! Try peppermint, lemon, or orange extract for fun flavor twists. A pinch of cinnamon or nutmeg adds warmth, too.
Are these cookies safe for nut allergies?
If you skip the almond extract, the recipe is nut-free. Always check your ingredient labels, especially if baking for others, just to be safe.
Pin This Recipe!
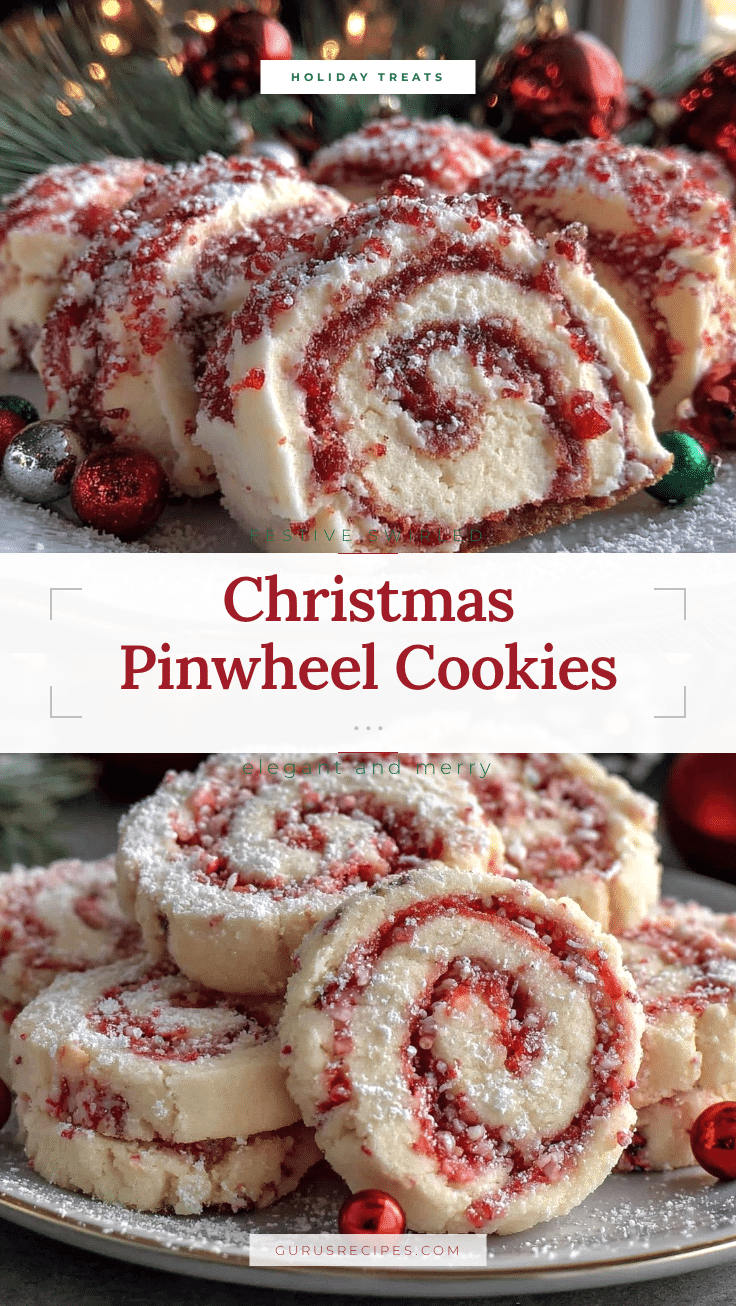

Christmas Pinwheel Cookies
Christmas Pinwheel Cookies are festive, buttery sugar cookies with vibrant red and green swirls, perfect for holiday parties, gifting, and family gatherings. They’re easy to make, crowd-pleasing, and bring a cheerful touch to any celebration.
- Total Time: 45 minutes
- Yield: 36 cookies 1x
Ingredients
- 2 3/4 cups (345g) all-purpose flour
- 1 cup (226g) unsalted butter, softened
- 1 cup (200g) granulated sugar
- 1 large egg, room temperature
- 1 1/2 teaspoons vanilla extract
- 1/2 teaspoon almond extract (optional)
- 1/2 teaspoon salt
- Red gel food coloring
- Green gel food coloring
- Sprinkles or sanding sugar (optional, for decorating)
Instructions
- In a large mixing bowl, beat butter and sugar together until pale and fluffy (2-3 minutes with a stand mixer or 4 minutes with a hand mixer).
- Mix in egg, vanilla extract, and almond extract (if using). Beat until well combined, scraping down the sides as needed.
- In a separate bowl, whisk together flour and salt. Gradually add to the wet mixture, mixing on low until just combined.
- Divide dough into two equal parts. Add red gel food coloring to one half and green to the other, kneading gently until color is uniform.
- Between sheets of parchment paper, roll each colored dough into a rectangle about 11×8 inches and 1/4 inch thick. Chill in the fridge for 15-20 minutes.
- Remove dough from fridge. Peel parchment off one rectangle and place it on top of the other. Press gently to seal. Roll the layered dough tightly into a log, wrap in plastic wrap, and chill for another 30 minutes (or up to 2 hours).
- Preheat oven to 350°F (175°C). Unwrap the log and slice cookies about 1/4 inch thick.
- Place slices on a parchment-lined baking sheet, spacing about 1 inch apart. Sprinkle with sanding sugar or sprinkles if desired.
- Bake for 9-11 minutes, until edges are just set and tops look dry.
- Cool cookies on the baking sheet for 5 minutes, then transfer to a cooling rack.
Notes
Chilling the dough is essential for sharp swirls and preventing spreading. Use gel food coloring for vibrant colors. For gluten-free or dairy-free adaptations, substitute flour and butter as needed. Wipe your knife between slices for clean pinwheels. Store cookies in an airtight container for up to 5 days or freeze for up to 2 months.
- Prep Time: 20 minutes
- Cook Time: 10 minutes
- Category: Dessert
- Cuisine: American
Nutrition
- Serving Size: 1 cookie
- Calories: 110
- Sugar: 6
- Sodium: 40
- Fat: 6
- Saturated Fat: 4
- Carbohydrates: 13
- Protein: 1
Keywords: Christmas cookies, pinwheel cookies, holiday dessert, festive treats, sugar cookies, party cookies, easy Christmas recipe


