

The first time I made coconut rice krispy treats, my kitchen smelled like a tropical bakery—sweet, creamy, and just a bit nutty. I still remember my kids sneaking pieces straight from the pan (honestly, I couldn’t blame them!). These chewy bars are my answer to every coconut craving. They’re loaded with real coconut flavor, a gooey marshmallow base, and that perfect snap from crispy rice cereal.
Coconut rice krispy treats aren’t just your average snack. They’ve got this dreamy texture—soft and creamy, with a little crunch in every bite. I started making them for holiday parties, and now they’re my go-to for potlucks, after-school treats, and even late-night dessert emergencies. You can whip up a batch in under 30 minutes, and you don’t need fancy equipment or rare ingredients. (Let’s face it, sometimes simple is best!)
Why coconut? It’s one of those flavors that feels special—like you’re treating yourself, even if it’s just a Tuesday. Plus, coconut adds a richness that makes these rice krispy treats way more interesting than the classic version. After testing out a bunch of tweaks—different kinds of coconut, a splash of coconut milk, and even a layer of white chocolate—I settled on this version. It’s chewy, creamy, and coconutty in all the right ways.
If you’re a coconut lover (or want to convert someone!), this coconut rice krispy treats recipe will win you over. They’re perfect for busy families, picky kids, sweet-toothed adults, or anyone looking for an easy dessert with a twist. I’ve made these dozens of times, and they never last long—so let’s get baking!
Why You’ll Love This Recipe
When it comes to coconut rice krispy treats, I’ve got more than a few reasons to keep them in my regular rotation. After years of making them for parties, school events, and random snack attacks, here’s what makes this recipe stand out:
- Quick & Easy: Ready in less than 30 minutes, no oven required.
- Simple Ingredients: You probably already have everything—no wild grocery hunts.
- Perfect for Any Occasion: Brunch, birthday parties, summer picnics, or cozy nights in.
- Crowd-Pleaser: Kids and adults both go nuts for these. My neighbors always ask for the recipe!
- Unbelievably Delicious: The combo of creamy coconut and marshmallow is next-level comfort food.
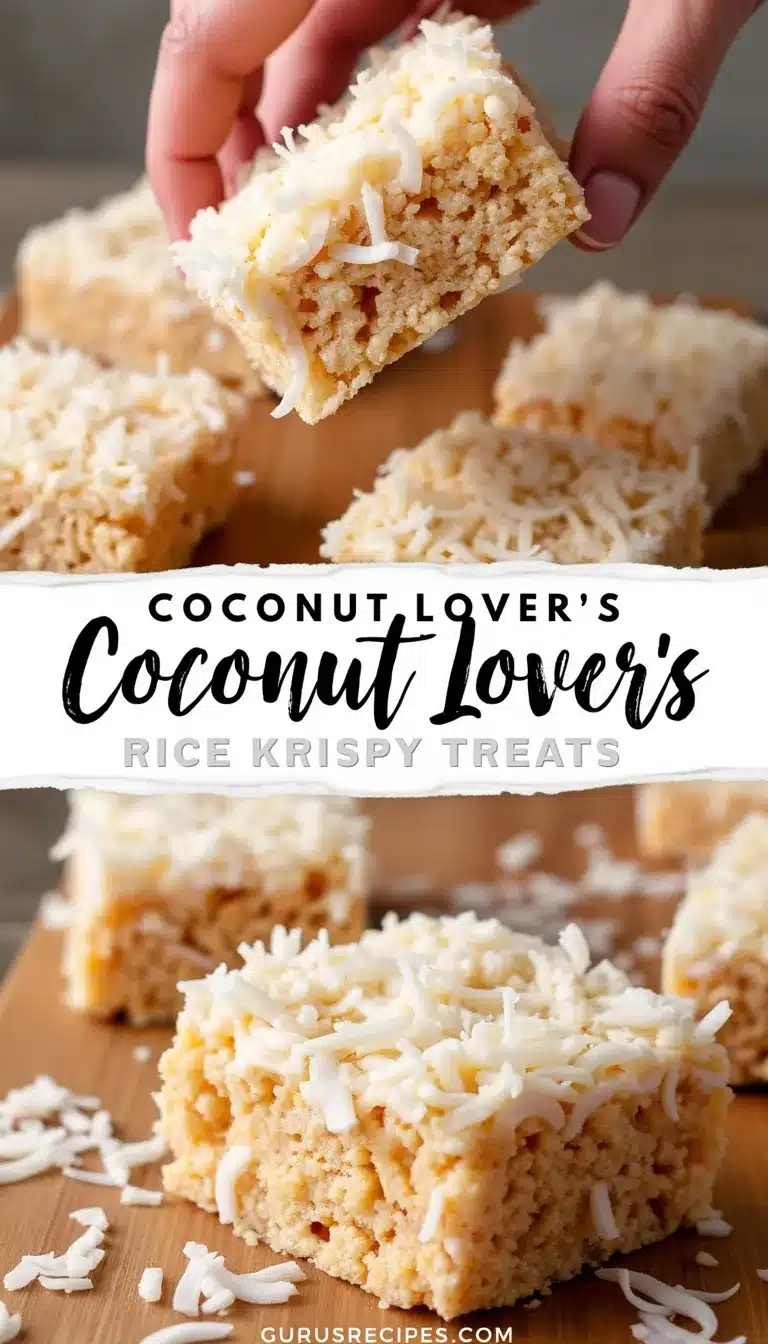
What makes these coconut rice krispy treats different from the rest? I blend shredded coconut right into the marshmallow base, then sprinkle extra toasted coconut on top for a satisfying crunch. The secret ingredient—a splash of coconut milk—adds a creamy richness you won’t find in basic recipes. I’ve tried swapping in coconut oil, but the milk gives it that luscious texture without making things greasy.
Honestly, these treats are the kind you close your eyes for after the first bite. They’re sweet, chewy, and just a little bit decadent. If you’re new to making rice krispy treats, don’t stress—this recipe is totally forgiving. You’ll be making them for every get-together (and sneaking a few for yourself). Comfort food doesn’t have to be complicated, and these bars prove it!
Whether it’s impressing guests with something special or just treating yourself, this coconut rice krispy treats recipe delivers on flavor, texture, and pure coconut joy. Trust me, you’ll want to keep this one handy.
What Ingredients You Will Need
This coconut rice krispy treats recipe uses pantry staples and a few coconut-centric twists for incredible flavor. You don’t need anything fancy—just a handful of ingredients you might already have.
- For the Base:
- 6 cups (180g) crispy rice cereal (any brand works, but I love Kellogg’s for classic crunch)
- 4 cups (200g) mini marshmallows (fresh is best for gooey texture)
- 1/4 cup (60g) unsalted butter (adds richness and helps everything stick together)
- 1/2 cup (120ml) coconut milk (full-fat for creaminess, or light for a lighter treat)
- Coconut Flavor Boosters:
- 1 cup (80g) sweetened shredded coconut (mixes into the base for chewy texture)
- 1/2 cup (40g) toasted coconut flakes (for sprinkling; gives a nutty flavor and pretty finish)
- 1/2 teaspoon coconut extract (optional, but really amps up the coconut flavor!)
- Optional Add-Ons:
- 1/2 cup (85g) white chocolate chips (melted and drizzled on top—makes them extra decadent)
- Pinch of sea salt (balances sweetness, especially if you’re adding chocolate)
Ingredient Tips: For the best chewy texture, look for moist, fresh shredded coconut rather than the super dry kind. If you want to go dairy-free, swap the butter for coconut oil and use dairy-free marshmallows. No coconut extract? Just skip it, or use a touch of vanilla instead. Almond extract can add a nice twist too. For gluten-free treats, double-check your crispy rice cereal—some brands sneak in gluten.
I’ve tried store brands and name brands for the cereal—honestly, the difference isn’t huge, but the classic Kellogg’s stays crunchiest. If you’re feeling adventurous, try unsweetened shredded coconut for a less-sweet treat, or swap half the coconut with chopped macadamia nuts for a tropical vibe. During summer, I love tossing in diced dried pineapple or mango. Just keep the ratios the same, and you’re good to go!
One last tip: Toasting coconut flakes in a dry skillet makes all the difference. Watch it closely—it burns fast! (I learned that the hard way.) The golden color and deep flavor are worth the extra minute.
Equipment Needed
You don’t need much to whip up these coconut rice krispy treats. Here’s what you’ll want to have handy:
- Large saucepan (heavy-bottomed works best for even melting)
- Heatproof spatula or wooden spoon (for stirring the gooey mixture)
- 9×13-inch (23x33cm) baking pan (lined with parchment or greased for easy removal)
- Measuring cups and spoons (accuracy matters for the marshmallow ratio)
- Small skillet (for toasting the coconut flakes, if you’re going for extra flavor)
If you don’t have a baking pan that size, use two smaller ones or a rimmed cookie sheet. For the saucepan, nonstick is nice but not essential—just stir gently to keep marshmallows from sticking. I’ve used both silicone and wooden spatulas; silicone is easier to scrape every last bit out. Pro tip: Grease your spatula for less sticking!
No fancy equipment here. If you’re on a budget, dollar-store pans and utensils work just fine. Just make sure to clean up sticky marshmallow right away—it’s a pain if it sets. And for the toasted coconut, any small skillet (even a frying pan) will do the trick. Simple tools, great results.
Preparation Method
- Prep your pan: Line a 9×13-inch (23x33cm) baking pan with parchment paper or lightly grease it. This keeps the treats from sticking. (Trust me, prying sticky bars out of an unlined pan is no fun.)
- Toast the coconut flakes: Heat a small skillet over medium-low, add 1/2 cup (40g) coconut flakes, and stir constantly for 2–3 minutes until golden brown and fragrant. Remove from heat and let cool.
- Make the marshmallow base: In a large saucepan, melt 1/4 cup (60g) unsalted butter over low heat. Add 4 cups (200g) mini marshmallows and stir until almost completely melted (about 3–4 minutes). Don’t rush—low heat keeps it creamy and prevents burning.
- Add coconut milk and extract: Pour in 1/2 cup (120ml) coconut milk and 1/2 teaspoon coconut extract (if using). Stir until smooth. The mixture will smell amazing and look glossy.
- Mix in shredded coconut: Add 1 cup (80g) sweetened shredded coconut to the marshmallow mixture. Stir until evenly combined. It’ll look thick and sticky—perfect!
- Stir in crispy rice cereal: Remove saucepan from heat. Gently fold in 6 cups (180g) crispy rice cereal. Mix until every piece is coated. (If it looks dry, add a handful more marshmallows and a splash of coconut milk.)
- Press into pan: Transfer mixture to your prepared pan. Use a greased spatula or wax paper to press it down evenly. Don’t pack too hard—just enough to hold together.
- Add toppings: Sprinkle toasted coconut flakes evenly over the top. If using, drizzle melted white chocolate chips and a pinch of sea salt.
- Cool and set: Let the pan sit at room temperature for 30–60 minutes (or pop it in the fridge for 15–20 if you’re impatient). The treats should firm up but stay chewy.
- Cut and serve: Lift out using the parchment paper, then cut into squares or bars. (Pro tip: Use a sharp, greased knife for clean edges.) Serve and enjoy!
Troubleshooting: If the mixture is too sticky, add a little more cereal. If it’s too dry, melt a few more marshmallows with a splash of coconut milk. The base should look thick but not stiff.
Efficiency tip: Measure out all ingredients first—once you start melting marshmallows, it moves quickly. And always toast coconut flakes before starting the marshmallow—otherwise, you’ll be scrambling at the last minute. The color and aroma are your cues: golden and nutty is perfect!
Don’t worry if the top isn’t perfectly smooth—imperfection means homemade goodness. The real magic is in the chewy, creamy texture and that coconut crunch.
Cooking Tips & Techniques
After making coconut rice krispy treats more times than I can count, I’ve picked up a few tricks for success. Here’s what works (and what doesn’t):
- Don’t rush the marshmallows: Melting on low heat gives you a creamy, stretchy base. High heat can make them dry and tough—trust me, I’ve made that mistake.
- Grease everything: Your spatula, mixing bowl, even your hands if you’re pressing the mixture. Marshmallow sticks to everything, so a thin layer of butter or coconut oil saves a lot of frustration.
- Work quickly: Once you add the cereal, mix fast and press into the pan right away. The mixture sets up fast and gets harder to shape.
- Don’t over-pack: Gently press the mixture in the pan—packing too tight makes dense treats. A light touch keeps them chewy.
- Toast coconut with care: Coconut burns in seconds! Stir constantly, and pull off the heat as soon as you see golden edges.
- Multitasking tip: Toast coconut and measure cereal while marshmallows melt to save time.
- Consistency: Use fresh marshmallows and cereal for the best texture. Stale cereal gets soggy, and old marshmallows don’t melt smoothly.
I’ve had a few fails—like forgetting to grease the pan (major sticky disaster) or using stale cereal (sadly limp bars). The good news? Rice krispy treats are forgiving, so even a slightly messy batch tastes great. Just remember, low and slow is the way to go for melting, and fresh ingredients really make a difference.
Variations & Adaptations
These coconut rice krispy treats are super flexible. You can tweak them for dietary needs, flavor kicks, or just to use what’s on hand.
- Dairy-Free: Swap butter for coconut oil and use dairy-free marshmallows. Coconut milk keeps it creamy.
- Gluten-Free: Double-check your crispy rice cereal—some brands contain gluten. Most mainstream brands are safe, but always read the label.
- Seasonal Add-Ins: Stir in dried pineapple, mango, or cranberries for a fruity twist. In winter, add a dash of cinnamon or nutmeg for warmth.
- Nutty Crunch: Toss in chopped macadamia nuts or almonds for texture. (My personal favorite is coconut + macadamia!)
- Chocolate Lovers: Melt dark or milk chocolate and drizzle on top, or stir mini chocolate chips into the base.
- For Allergies: Use sunflower seed butter instead of coconut oil or butter if you’re avoiding nuts. Unsweetened coconut works for lower sugar.
I once swapped half the coconut for slivered almonds—so good! If you’re making these for kids, skip nuts and add some rainbow sprinkles for color. For adults, the toasted coconut and a pinch of sea salt make them sophisticated enough for cocktail parties. You can even use a round cake pan and cut into wedges for a fun presentation.
Don’t be afraid to experiment—just keep the base ratios the same for chewy, creamy bars every time.
Serving & Storage Suggestions
Coconut rice krispy treats taste best at room temperature. Set them out on a pretty platter, or stack them in cupcake liners for easy grabbing. I love serving them with fresh fruit, iced coffee, or even a scoop of vanilla ice cream on the side for extra indulgence.
For parties, cut the bars small—bite-sized squares are perfect for mingling. If you’re packing for lunchboxes, wrap each piece in wax paper to keep them from sticking. These treats travel well, so they’re great for picnics or road trips.
Storage: Keep in an airtight container at room temperature for up to 4 days. For longer storage, pop them in the fridge for up to a week (they’ll stay chewy, but a little firmer). To freeze, wrap individual bars in plastic wrap and place in a zip-top bag—thaw at room temp before serving.
Reheating isn’t necessary, but if you want a softer treat, microwave for 5–10 seconds. The coconut flavor gets even richer after a day, so don’t worry if they’re not eaten right away (though honestly, they rarely last!).
Nutritional Information & Benefits
Each coconut rice krispy treat (based on a 24-bar batch) is about 120 calories, with 4g fat, 18g carbs, and 1g protein. Coconut adds healthy fats and a hint of fiber, while marshmallows keep things light and sweet.
Coconut is a great source of medium-chain triglycerides (MCTs), which support energy and metabolism. The treats are naturally nut-free (unless you add nuts), and can be made gluten-free or dairy-free with simple swaps. If you’re watching sugar, use unsweetened coconut and skip the chocolate drizzle.
Allergen note: Contains coconut and dairy (unless you adapt). Always check marshmallow and cereal labels for hidden allergens. Personally, I love that these treats feel satisfying without being heavy—perfect for a sweet pick-me-up!
Conclusion
If you’re searching for a dessert that’s quick, easy, and just a little bit special, this coconut rice krispy treats recipe delivers every time. The creamy coconut flavor, chewy texture, and crispy base make these bars totally irresistible. Whether you’re making them for a crowd or just for yourself, there’s something comforting about a treat that’s both nostalgic and new.
Customize them with your favorite mix-ins, make them allergy-friendly, or keep them classic—either way, you’ll come back to this recipe again and again. I love sharing these with friends, but they’re also my secret weapon for busy weeks and last-minute get-togethers.
Give them a try, then let me know how you put your own spin on it! Leave a comment with your favorite variations, share with friends, or tag me if you post a photo. Here’s to chewy, creamy coconut bliss—happy snacking!
FAQs
Can I make coconut rice krispy treats ahead of time?
Yes! Make them up to two days in advance and store in an airtight container. They stay chewy and fresh.
What’s the best way to toast coconut flakes?
Use a dry skillet over medium-low heat, stirring constantly. Pull off the heat as soon as they turn golden.
Can I make these treats nut-free?
Absolutely. Just skip any nut add-ins and use plain coconut. Always check ingredient labels for cross-contamination.
How do I cut rice krispy treats cleanly?
Use a sharp knife, greased with butter or coconut oil. Wipe the blade between cuts for perfect squares.
Can I freeze coconut rice krispy treats?
Yes, wrap each piece in plastic and freeze for up to a month. Thaw at room temperature before serving.

Coconut Rice Krispy Treats
These chewy, creamy coconut rice krispy treats are loaded with real coconut flavor, a gooey marshmallow base, and a crispy snap from rice cereal. Perfect for parties, potlucks, or a quick dessert fix, they come together in under 30 minutes with simple pantry ingredients.
- Total Time: 30 minutes
- Yield: 24 bars 1x
Ingredients
- 6 cups crispy rice cereal
- 4 cups mini marshmallows
- 1/4 cup unsalted butter
- 1/2 cup coconut milk (full-fat or light)
- 1 cup sweetened shredded coconut
- 1/2 cup toasted coconut flakes
- 1/2 teaspoon coconut extract (optional)
- 1/2 cup white chocolate chips (optional, for drizzling)
- Pinch of sea salt (optional)
Instructions
- Line a 9×13-inch baking pan with parchment paper or lightly grease it.
- Toast 1/2 cup coconut flakes in a dry skillet over medium-low heat, stirring constantly for 2–3 minutes until golden brown and fragrant. Remove from heat and let cool.
- In a large saucepan, melt 1/4 cup unsalted butter over low heat. Add 4 cups mini marshmallows and stir until almost completely melted (about 3–4 minutes).
- Pour in 1/2 cup coconut milk and 1/2 teaspoon coconut extract (if using). Stir until smooth and glossy.
- Add 1 cup sweetened shredded coconut to the marshmallow mixture and stir until evenly combined.
- Remove saucepan from heat. Gently fold in 6 cups crispy rice cereal until every piece is coated. If mixture looks dry, add a handful more marshmallows and a splash of coconut milk.
- Transfer mixture to the prepared pan. Use a greased spatula or wax paper to press it down evenly (do not pack too hard).
- Sprinkle toasted coconut flakes evenly over the top. If desired, drizzle with melted white chocolate chips and a pinch of sea salt.
- Let the pan sit at room temperature for 30–60 minutes (or refrigerate for 15–20 minutes) until set but still chewy.
- Lift out using parchment paper and cut into squares or bars with a sharp, greased knife. Serve and enjoy!
Notes
For best results, use fresh marshmallows and cereal. Grease your spatula and knife for easy handling. Toast coconut flakes just until golden for maximum flavor. To make dairy-free, substitute coconut oil for butter and use dairy-free marshmallows. For gluten-free, ensure your rice cereal is certified gluten-free. Store in an airtight container at room temperature for up to 4 days, or freeze for up to a month.
- Prep Time: 10 minutes
- Cook Time: 10 minutes
- Category: Dessert
- Cuisine: American
Nutrition
- Serving Size: 1 bar (1/24 of recipe)
- Calories: 120
- Sugar: 9
- Sodium: 60
- Fat: 4
- Saturated Fat: 3
- Carbohydrates: 18
- Fiber: 1
- Protein: 1
Keywords: coconut rice krispy treats, coconut dessert, easy rice krispy treats, party dessert, no bake coconut bars, chewy coconut bars, marshmallow treats, coconut snacks


