
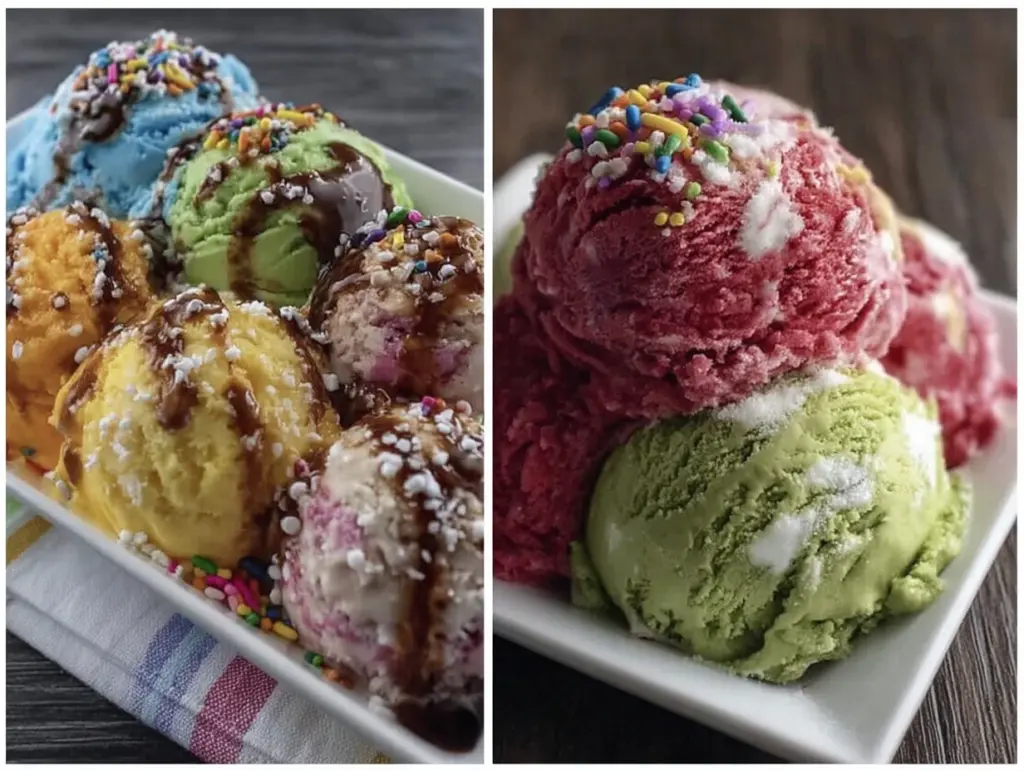
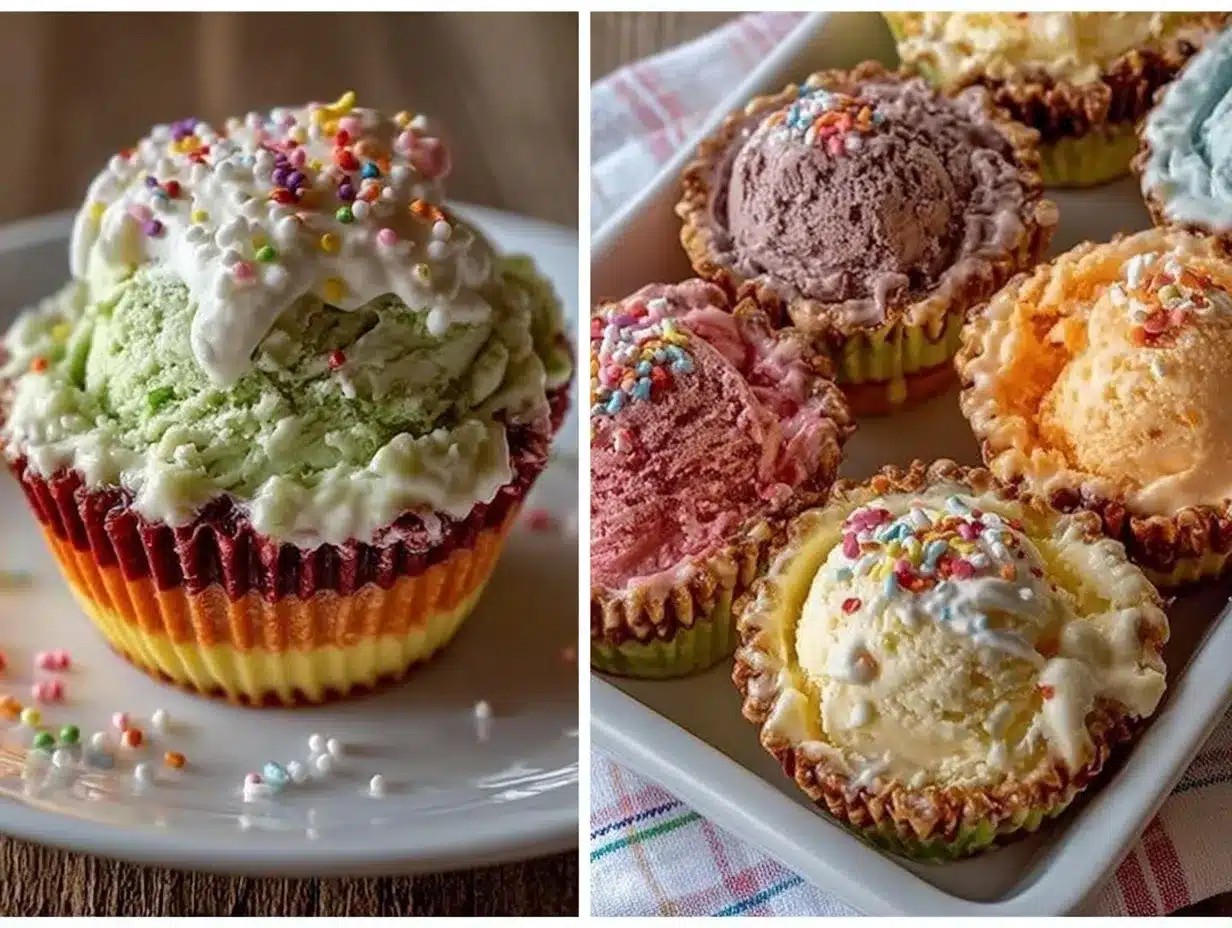
There’s something absolutely magical about a swirl of colors melting together in a chilly, creamy scoop—especially when those colors look straight out of a Dr. Seuss book. Imagine opening your freezer to a parade of vibrant pinks, blues, yellows, and greens, all tumbled together in a cup that’s just begging to be eaten. The first time I made these Creamy Dr. Seuss Rainbow Ice Cream Cups for a kids’ party, the kitchen was filled with giggles, sticky fingers, and those wide-eyed “wow” moments only kids can give you. You know, the kind of moment where you pause, take a deep breath, and just smile because, honestly, you know you’re onto something truly special.
My own introduction to the world of rainbow ice cream happened years ago, when I was knee-high to a grasshopper. My grandma would scoop out bright, sherbet colors into little bowls at every summer birthday, and I’d spend half the time just staring at the swirls, not wanting to ruin the pattern. It’s pure, nostalgic comfort—now, I wish I’d figured out how simple it can be to recreate that joy at home way sooner! I stumbled into this creamy, no-churn version on a rainy weekend, trying to whip up something playful for my kids’ birthday. Let’s face it, nothing lights up a Pinterest board (or a kid’s face) quite like a rainbow treat.
My family couldn’t stop sneaking these ice cream cups off the tray before the party even started (I can’t really blame them). Friends still ask for the recipe every time, and I’ve tested it more times than I care to admit (all in the name of research, of course). Whether you’re looking for a show-stopping dessert for a Dr. Seuss birthday party, a sweet treat to brighten up a rainy afternoon, or just a little something to add color to the chaos, these Creamy Dr. Seuss Rainbow Ice Cream Cups are about to become your go-to. They’re a staple for family gatherings, gifting, or just making any day feel extra special. Trust me—bookmark this one, because it feels like a warm (or maybe frosty) hug every time.
Why You’ll Love This Creamy Dr. Seuss Rainbow Ice Cream Cups Recipe
Let’s talk about why these Creamy Dr. Seuss Rainbow Ice Cream Cups are kid-party gold (and honestly, adults aren’t immune either). After years of birthday parties, bake sales, and “just because” kitchen experiments, I can promise this recipe hits all the right notes. Here’s why you’re going to fall for it:
- Quick & Easy: Comes together in under 20 minutes (plus freeze time)—perfect for last-minute party prep or an impromptu “let’s make something fun!” afternoon.
- Simple Ingredients: No weird chemicals or fancy mix-ins, just pantry basics and a few drops of food coloring. You probably have everything on hand right now.
- Perfect for Kids Parties: The colors are a showstopper—think Dr. Seuss meets Willy Wonka. These cups light up any dessert table and double as a fun party activity if you want the kids to help swirl the colors.
- Crowd-Pleaser: I’ve never met a kid who didn’t ask for seconds. Even the “I don’t like ice cream” crowd (yes, those exist!) gets drawn in by the colors and creamy texture.
- Unbelievably Delicious: The texture is softer and creamier than store-bought, with a vanilla base that’s sweet but not cloying. It’s like birthday cake and ice cream had a very colorful baby.
This recipe stands out because it’s not just about looks—there’s a secret technique that sets it apart. By folding the whipped cream into a condensed milk mixture and gently swirling the colors, you get a light, mousse-like ice cream without any churning or icy chunks. No rock-hard scoops, no ice crystals—just smooth, dreamy bites every time.
And honestly, this is the kind of treat that makes you close your eyes with the first bite. It’s comfort food reimagined for the kid-at-heart: still sweet, still silly, but so much easier and healthier than the store-bought stuff. You can impress a whole room of sugar-hyped kids (and their parents!) with almost zero stress. Whether you’re looking to create a memorable birthday moment, satisfy picky eaters, or just make a regular Tuesday magical, these Creamy Dr. Seuss Rainbow Ice Cream Cups deliver every time.
What Ingredients You Will Need
This recipe uses simple, wholesome ingredients to deliver bold flavor and an irresistibly creamy texture—without the fuss. Most of these are pantry staples, and you can easily customize them to fit your needs or what you have in your fridge.
- For the Base:
- 2 cups (475 ml) heavy whipping cream, very cold (for best results, I use Organic Valley or your local dairy brand)
- 1 can (14 oz / 397 g) sweetened condensed milk (adds sweetness and that classic ice cream richness)
- 2 teaspoons pure vanilla extract (for depth of flavor; Nielsen-Massey is my go-to, but any pure vanilla works)
- Pinch of salt (balances the sweetness and brings out the flavors)
- For the Rainbow Colors:
- Assorted gel food coloring—red, yellow, green, blue, and purple (gel works better than liquid for vibrant results; Wilton or Americolor are great!)
- Optional: natural food colorings (if you prefer, look for beet, turmeric, and spirulina-based colors for a cleaner version)
- For Assembly:
- 6-8 small clear cups (8 oz / 240 ml, or smaller if you want mini servings)
- Optional: rainbow sprinkles, edible glitter, or mini marshmallows for topping
Ingredient tips and swaps:
- Dairy-free? Use full-fat coconut cream and coconut condensed milk. The texture is nearly identical, with a subtle coconut flavor.
- No vanilla? Swap in almond or coconut extract for a fun twist.
- Want more protein? Add 2 tablespoons of Greek yogurt to the condensed milk mixture (it adds a slight tang, which is lovely with the sweet base).
- Food coloring sensitivity? Stick with natural colors, or use fruit purees (a tablespoon of pureed berries, mango, or spinach for soft, pastel hues).
Honestly, this ingredient list couldn’t be simpler. No eggs, no cooking, no ice cream maker—just a few things you probably already have, and you’re on your way to a magical Dr. Seuss-inspired treat.
Equipment Needed
You don’t need a fancy ice cream machine or chef’s toolkit for these Creamy Dr. Seuss Rainbow Ice Cream Cups—just a few basics you already have in your kitchen:
- Electric mixer (stand mixer or hand mixer): For whipping the cream. You can do it by hand, but it’s an arm workout!
- Mixing bowls: At least one large (for the whipped cream) and 4-6 small bowls (for coloring the mixture).
- Spatulas or large spoons: For folding and swirling. Silicone ones are easiest to clean and gentle on your bowls.
- Measuring cups and spoons: For accuracy (I still eyeball sometimes, but precision is your friend for consistency).
- Small clear cups: 6-8 cups, 8 oz (240 ml) each—plastic, glass, or even sturdy paper cups work well for kids.
- Plastic wrap or lids: To cover the cups as they freeze (keeps out freezer smells and ice crystals).
- Piping bags or zip-top bags (optional): For neater color layering, but a spoon works just fine, too.
If you’re short on small bowls, rinse between colors. No mixer? A whisk and some elbow grease will do, but it’ll take a bit longer (I’ve been there!). Clear cups are best for showing off the rainbow, but any small freezer-safe container works. I’ve even used recycled yogurt cups in a pinch—just wash them well. Fancy tools aren’t necessary, but a good spatula makes swirling easier and cleanup faster.
Preparation Method
-
Chill your tools and ingredients.
Place your mixing bowl and beaters in the freezer for 10-15 minutes. Make sure your heavy cream is very cold—this helps it whip up fluffy and stable. -
Whip the heavy cream.
Pour 2 cups (475 ml) heavy cream into the chilled bowl. Beat on medium-high speed for 3-4 minutes, until stiff peaks form. The cream should hold its shape and look like soft clouds. Don’t overwhip (if it looks grainy or starts to separate, you’ve gone too far—just back off and fold gently). -
Mix the base.
In a second bowl, combine 1 can (14 oz / 397 g) sweetened condensed milk, 2 teaspoons vanilla extract, and a pinch of salt. Stir until smooth and well blended. -
Fold the cream into the base.
Scoop about 1/3 of the whipped cream into the condensed milk mixture. Gently fold with a spatula until just combined (this lightens the mix). Add the rest of the whipped cream and fold until you get a smooth, uniform base—don’t overmix, or you’ll lose the fluffiness. -
Divide and color the mixture.
Split the ice cream base evenly into 4-6 small bowls (one for each color you want). Add a few drops of gel food coloring to each bowl—red, yellow, green, blue, purple, or whatever Seuss-inspired colors you love. Stir each bowl gently until the color is vibrant and fully mixed. If the color looks too pale, add another drop or two. -
Layer and swirl into cups.
Using a spoon (or piping bags for neater layers), drop spoonfuls of each color into your clear cups, alternating colors as you go. Fill to the top but leave a little room for expansion. Use a clean skewer or butter knife to gently swirl the colors—don’t overdo it, or they’ll blend into brown. You want bold, distinct swirls! -
Add toppings (optional).
Sprinkle with rainbow sprinkles, edible glitter, or mini marshmallows for extra fun. Press toppings in lightly so they stick. -
Cover and freeze.
Cover each cup with plastic wrap or a lid. Freeze for at least 4 hours, or until firm. Overnight is best if you can wait! If you’re in a hurry, they’ll be scoopable after about 2 hours but a bit softer. -
Serve and enjoy!
Let the cups sit at room temperature for 5-10 minutes before serving—this softens them up for the perfect creamy bite. Grab some spoons and watch the colors (and smiles) appear!
Troubleshooting: If your cream isn’t whipping, it’s probably too warm—pop it (and the bowl) back in the freezer for a few minutes. If your colors blend too much, swirl less and use gel colors for best separation. And if you forget to cover the cups before freezing, just scrape off any ice crystals before serving—no biggie!
Cooking Tips & Techniques
Here’s what I’ve learned (sometimes the hard way) after making these Creamy Dr. Seuss Rainbow Ice Cream Cups more times than I can count:
- Use gel food coloring. It’s so much more vibrant than liquid, and you need less to get those bold Seuss colors. If you use liquid, go slow—too much can water down your base.
- Don’t overwhip the cream. Stop as soon as stiff peaks form. Overwhipping can make your ice cream grainy or even turn it to butter—ask me how I know!
- Fold, don’t stir. When combining the whipped cream and condensed milk, use gentle, upward “scooping” motions. Stirring hard knocks out the air, and you’ll lose that fluffy texture.
- Work quickly. Once colors are mixed, layer and swirl before the base gets too soft. This helps keep the colors from blending together (especially if your kitchen is warm).
- For perfect swirls: Use a skewer or chopstick and just make one or two figure-eight motions through the layers—any more, and you risk creating a muddy mess.
- Make it ahead. These hold up beautifully in the freezer for up to 2 weeks. If you’re prepping for a big party, have them ready a day or two ahead so you’re not rushing. Just add toppings right before serving if you’re using marshmallows (they can get a little chewy if frozen).
- Let them soften before eating. Straight from the freezer, the texture will be firm. Five to ten minutes on the counter makes them perfectly scoopable and creamy—don’t rush it!
Timing is your friend here—whip the cream, color, and assemble all in one go. If you’re making a double batch, have all your bowls and colorings ready. And if you ever end up with leftovers (rare, but it happens), pop the cups in a freezer bag to keep them fresh. The only real mistake? Not making enough.
Variations & Adaptations
These Creamy Dr. Seuss Rainbow Ice Cream Cups are crazy flexible—here’s how to switch things up for every kid (or grown-up) at your party:
- Dairy-Free/Vegan: Use full-fat coconut cream (chill and only use the solid part) and coconut sweetened condensed milk. I’ve tried this version for a friend’s dairy-free kid—just as creamy, with a tropical twist.
- Low Sugar: Swap the sweetened condensed milk for a low-sugar or sugar-free version (there are a few brands out now). Use natural food colorings and top with fruit instead of sprinkles.
- Seasonal Swaps: For a spring party, use pastel colors and top with edible flowers. In autumn, try orange, gold, and chocolate swirls with a sprinkle of cinnamon sugar.
- Flavor Twists: Add 1/2 teaspoon of lemon or orange zest to the vanilla base for a fruity note. Or, swirl in a little strawberry or blueberry puree for a berry-licious version (just go easy or the texture will change).
- Gluten-Free: The base is naturally gluten-free. Just check your toppings for hidden gluten (some sprinkles can surprise you!).
- Nut-Free: No nuts in the base, but avoid almond extract or nut-based toppings for allergy safety.
- Party DIY: Set out bowls of colors and let kids swirl their own cups—messy, but memorable!
Personal favorite? I once made a “Grinch” version for a Christmas party with just green, white, and red—topped it with a heart-shaped sprinkle, and it was a hit. The possibilities are endless, and you can always adjust the sweetness, colors, or toppings for your crowd.
Serving & Storage Suggestions
These Creamy Dr. Seuss Rainbow Ice Cream Cups are all about fun and flair—here’s how I like to serve and keep them:
- Best served: Straight from the freezer, let them sit for 5-10 minutes before serving. The colors pop even more as they soften a bit.
- Presentation: Use clear cups for full rainbow effect. For parties, set them on a tray with colorful napkins and spoons. If you want to get fancy, layer the cups on a cake stand or tuck in a striped paper straw for a Seussical touch.
- Pairings: Great with lemonade, fruit punch, or a simple vanilla cupcake. They also love the company of fresh berries or a bowl of animal crackers for dipping.
- Storage: Cover tightly with plastic wrap or lids and freeze for up to 2 weeks. If they’re in the freezer longer, slip the cups into a zip-top bag to keep out ice crystals.
- Reheating: Okay, not exactly reheating, but always let the cups sit out for a few minutes before serving. Don’t try to microwave or they’ll melt unevenly!
- Flavor develops: The vanilla flavor gets deeper after a night or two in the freezer. Honestly, they taste even better the next day.
These are perfect make-ahead treats for busy parents—just pull them out when the party starts, and watch them disappear!
Nutritional Information & Benefits
Here’s the scoop on what you’re actually eating:
- Estimated per cup (8 oz / 240 ml serving):
- Calories: 280
- Fat: 15g
- Saturated fat: 10g
- Carbohydrates: 34g
- Sugar: 30g
- Protein: 4g
- Health benefits: Real cream (vitamin D, calcium), no artificial stabilizers or preservatives. You control the ingredients and sugar.
- Dietary notes: Gluten-free as written, easily dairy-free or vegan with swaps. No nuts unless you add them as toppings.
- Potential allergens: Contains dairy. Use coconut substitutes for dairy allergies.
From a personal wellness perspective, I love that these Creamy Dr. Seuss Rainbow Ice Cream Cups are made with real, pronounceable ingredients. It’s a special occasion treat that doesn’t rely on mystery chemicals or fake flavors—a win for parents and kids alike!
Conclusion
If you’re searching for a party treat that’s as fun to make as it is to eat, these Creamy Dr. Seuss Rainbow Ice Cream Cups are your answer. They bring pure, joyful color to any table, and the creamy, no-churn base is about as easy as it gets. Whether you stick to the classic rainbow or create your own palette, you’ll end up with a dessert that’s memorable, delicious, and sure to spark smiles (and maybe a few sticky fingers, but that’s half the fun).
Don’t be afraid to customize—switch up the colors, swap in your favorite flavors, or let the kids go wild with toppings. I love this recipe because it’s impossible to mess up, and every batch comes out a little different but always spectacular. If you try it, I’d love to hear your twists or see your party pics—drop a comment below or share your creations! Here’s to more color, more joy, and a freezer full of happy memories. You’ve got this!
FAQs About Creamy Dr. Seuss Rainbow Ice Cream Cups
How far in advance can I make these ice cream cups?
You can prepare them up to 2 weeks ahead. Just keep them tightly covered in the freezer, and add toppings right before serving for the freshest look and taste.
Can I use liquid food coloring instead of gel?
Yes, but gel food coloring is recommended for the most vibrant colors. If you use liquid, add it slowly to avoid thinning the base, and expect slightly softer hues.
Do these need an ice cream maker?
Nope! The no-churn method means you just need a mixer and a freezer. It’s as easy as whipping cream and folding in the other ingredients—no machines required.
How do I make them dairy-free?
Use full-fat coconut cream instead of heavy cream and coconut condensed milk instead of regular. The texture stays creamy, and you get a subtle coconut flavor kids usually love.
Can I make this recipe into a big cake or loaf instead of cups?
Absolutely! Just layer and swirl the colors in a freezer-safe loaf pan, cover tightly, and freeze. Slice and serve for a show-stopping rainbow ice cream cake effect.
Pin This Recipe!

Creamy Dr. Seuss Rainbow Ice Cream Cups
These no-churn rainbow ice cream cups are a magical, creamy treat bursting with vibrant colors—perfect for kids’ parties or any occasion that needs a little extra fun. With a simple vanilla base and bold swirls, they’re easy to make, endlessly customizable, and guaranteed to spark smiles.
- Total Time: 4 hours 20 minutes
- Yield: 6-8 servings 1x
Ingredients
- 2 cups heavy whipping cream, very cold
- 1 can (14 oz) sweetened condensed milk
- 2 teaspoons pure vanilla extract
- Pinch of salt
- Assorted gel food coloring (red, yellow, green, blue, purple, etc.)
- Optional: natural food colorings (beet, turmeric, spirulina-based)
- 6–8 small clear cups (8 oz each)
- Optional: rainbow sprinkles, edible glitter, or mini marshmallows for topping
Instructions
- Chill your mixing bowl and beaters in the freezer for 10-15 minutes. Ensure your heavy cream is very cold.
- Pour heavy cream into the chilled bowl. Beat on medium-high speed for 3-4 minutes until stiff peaks form.
- In a second bowl, combine sweetened condensed milk, vanilla extract, and a pinch of salt. Stir until smooth.
- Scoop about 1/3 of the whipped cream into the condensed milk mixture. Gently fold until just combined. Add the rest of the whipped cream and fold until smooth and uniform.
- Divide the ice cream base evenly into 4-6 small bowls. Add a few drops of gel food coloring to each bowl and gently stir until vibrant.
- Using a spoon or piping bags, layer spoonfuls of each color into clear cups, alternating colors. Swirl gently with a skewer or butter knife for a marbled effect.
- Add optional toppings like sprinkles, edible glitter, or mini marshmallows.
- Cover each cup with plastic wrap or a lid. Freeze for at least 4 hours, or overnight for best results.
- Let cups sit at room temperature for 5-10 minutes before serving for the creamiest texture.
Notes
For best color separation, use gel food coloring and swirl gently. Don’t overwhip the cream or overstir the base. These cups can be made up to 2 weeks ahead—just add toppings before serving. For dairy-free, use coconut cream and coconut condensed milk. The recipe is naturally gluten-free; check toppings for allergens.
- Prep Time: 20 minutes
- Cook Time: 0 minutes
- Category: Dessert
- Cuisine: American
Nutrition
- Serving Size: 1 cup (8 oz / 240 ml
- Calories: 280
- Sugar: 30
- Sodium: 60
- Fat: 15
- Saturated Fat: 10
- Carbohydrates: 34
- Protein: 4
Keywords: rainbow ice cream, no-churn ice cream, kids party dessert, Dr. Seuss dessert, colorful ice cream, easy ice cream cups, homemade ice cream, birthday party treat


