
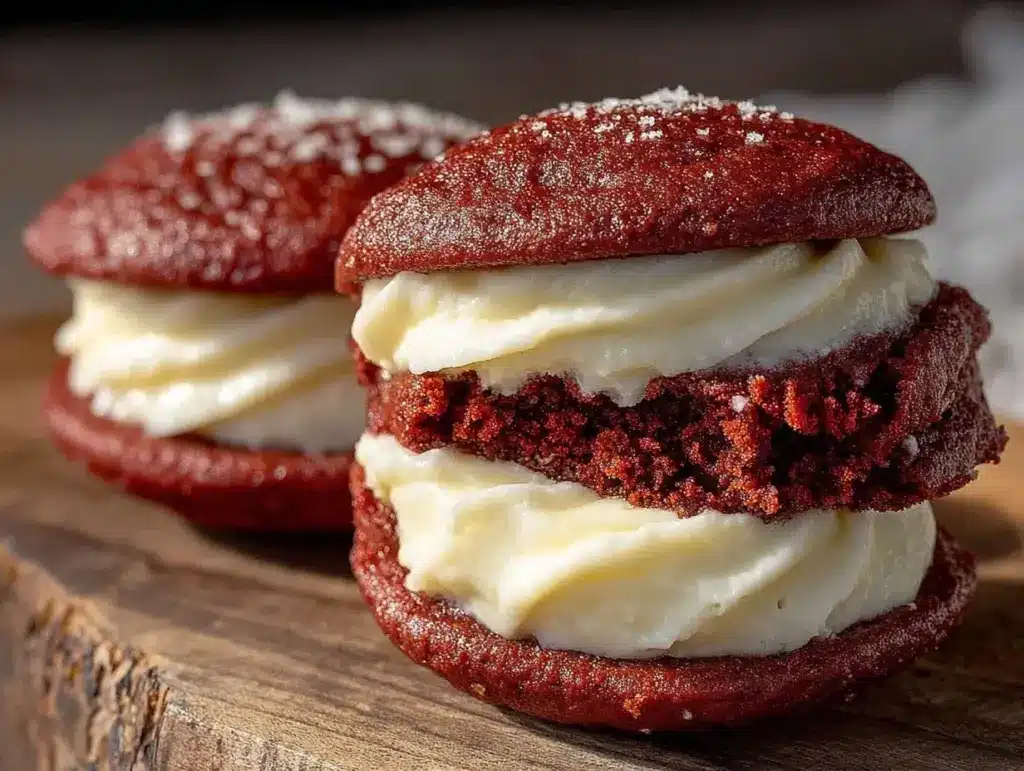
Let me tell you, the scent of cocoa and sweet vanilla wafting from these creamy red velvet whoopie pies is enough to make anyone’s mouth water. The first time I baked these delightful treats, I was instantly hooked—the kind of moment where you pause, take a deep breath, and just smile because you know you’re onto something truly special. It was years ago, on a chilly Sunday afternoon, when I was knee-high to a grasshopper and helping my grandma in her cozy kitchen. She always had a knack for whipping up soul-soothing desserts, and these whoopie pies reminded me of those simple, sweet moments shared over a warm cup of tea.
Honestly, my family couldn’t stop sneaking them off the cooling rack (and I can’t really blame them). The creamy red velvet whoopie pies quickly became a staple for family gatherings and gift-giving occasions. You know what? They’re dangerously easy to make, delivering pure, nostalgic comfort in every bite. Perfect for potlucks or a sweet treat for your kids, these whoopie pies brighten up your Pinterest cookie board with their vibrant color and luscious filling. After testing this recipe multiple times in the name of research, of course, I can say it’s one you’re going to want to bookmark.
Why You’ll Love This Recipe
If you’re looking for a dessert that’s both impressive and approachable, these creamy red velvet whoopie pies have your name on them. They combine classic flavors with a smooth, luscious filling that feels like a warm hug. Here’s why this recipe stands out:
- Quick & Easy: Comes together in under an hour, perfect for busy weeknights or last-minute cravings.
- Simple Ingredients: No fancy grocery trips needed; you likely already have everything in your kitchen.
- Perfect for Any Occasion: Great for cozy dinners, holiday mornings, or sweetening up potlucks.
- Crowd-Pleaser: Always gets rave reviews from kids and adults alike—trust me, they’ll be asking for seconds.
- Unbelievably Delicious: The soft, tender cake paired with creamy, tangy filling is next-level comfort food.
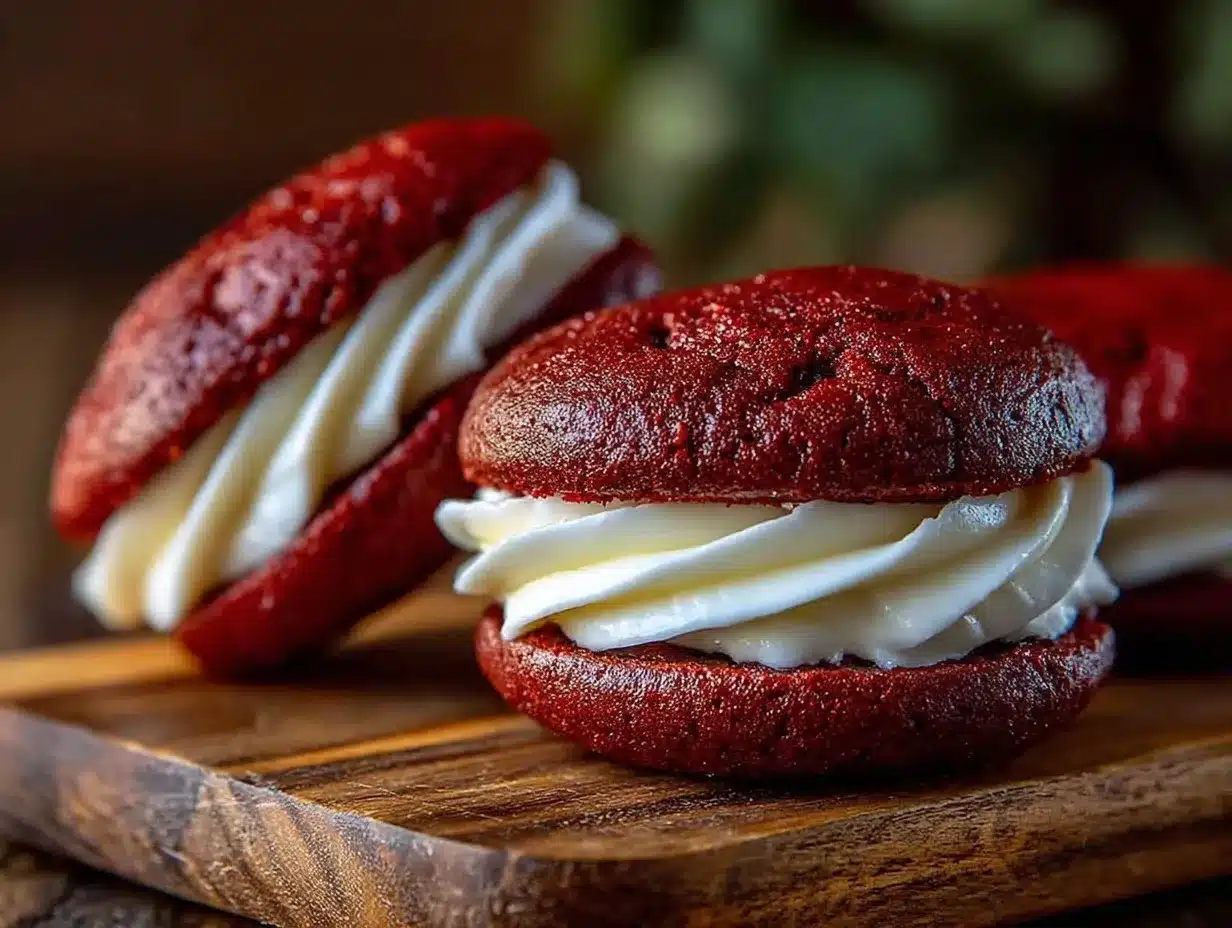
What makes these whoopie pies different? Well, it’s all in the luscious homemade filling—a creamy blend that balances tang and sweetness with a velvety texture. Plus, the red velvet cake itself is perfectly moist, with just the right hint of cocoa and that signature red hue that makes these treats pop. This recipe isn’t just good; it’s the kind that makes you close your eyes after the first bite. It turns a simple dessert into a memorable experience, ideal for impressing guests without the stress.
What Ingredients You Will Need
This recipe uses simple, wholesome ingredients to deliver bold flavor and satisfying texture without the fuss. Most of these are pantry staples, and substitutions are easy if needed.
- For the Red Velvet Cake:
- All-purpose flour (240g / 2 cups) – provides the structure
- Cocoa powder, unsweetened (15g / 2 tbsp) – adds that subtle chocolate note
- Baking soda (5g / 1 tsp) – leavens the batter for fluffiness
- Salt (2g / ½ tsp) – balances sweetness
- Unsalted butter (113g / ½ cup), softened – adds richness
- Granulated sugar (200g / 1 cup) – sweetens and tenderizes
- Large eggs (2), room temperature – binds ingredients
- Buttermilk (240ml / 1 cup), room temperature – for moisture and tang (use dairy-free milk with 1 tbsp lemon juice for substitute)
- Vanilla extract (5ml / 1 tsp) – deepens flavor
- Red food coloring (10ml / 2 tsp) – for that iconic red hue (natural beet juice works too)
- White vinegar (5ml / 1 tsp) – reacts with baking soda for lift
- For the Luscious Filling:
- Cream cheese (225g / 8 oz), softened – the creamy base
- Unsalted butter (57g / ¼ cup), softened – adds smoothness
- Powdered sugar (160g / 1⅓ cups), sifted – sweetens without grit
- Vanilla extract (5ml / 1 tsp) – aromatic boost
- Pinch of salt – balances sweetness
I recommend using a trusted brand like King Arthur for flour to get the best texture. For cream cheese, Philadelphia tends to yield the smoothest filling. If you want a gluten-free version, swap all-purpose flour for almond flour, but note the texture will be denser. In summer, fresh berries on the side add a lovely bright contrast.
Equipment Needed
- Mixing bowls (medium and large) – for combining ingredients
- Electric mixer or stand mixer – makes creaming butter and sugar a breeze (hand mixer works too)
- Sifter or fine mesh sieve – to avoid lumps in flour and powdered sugar
- Measuring cups and spoons – for accuracy
- Baking sheets lined with parchment paper or silicone mats – prevents sticking and ensures even baking
- Cooling racks – essential to cool the whoopie pies perfectly
- Spatula and offset spatula – for folding batter and spreading filling smoothly
If you don’t have a stand mixer, a sturdy hand whisk and some elbow grease can get the job done! Parchment paper is a budget-friendly tool that saves cleanup time and helps keep the pies shaped. I’ve found that silicone mats last longer and bake evenly, so if you bake often, they’re worth the investment.
Preparation Method
- Preheat your oven to 350°F (175°C). Line two baking sheets with parchment paper or silicone mats. This step ensures your whoopie pies bake evenly and don’t stick.
- Whisk together dry ingredients: In a medium bowl, sift 2 cups (240g) of all-purpose flour, 2 tablespoons (15g) cocoa powder, 1 teaspoon (5g) baking soda, and ½ teaspoon (2g) salt. Set aside. Sifting helps keep the batter smooth and lump-free.
- Cream butter and sugar: In a large bowl, beat ½ cup (113g) softened unsalted butter with 1 cup (200g) granulated sugar until light and fluffy—this usually takes about 3 to 4 minutes with an electric mixer. This step is key for tender, airy cakes.
- Add eggs: Beat in 2 large eggs, one at a time, scraping down the bowl after each addition. This keeps the batter smooth and well combined.
- Mix wet ingredients: In a separate small bowl, combine 1 cup (240ml) buttermilk, 1 teaspoon (5ml) vanilla extract, 2 teaspoons (10ml) red food coloring, and 1 teaspoon (5ml) white vinegar. Whisk until blended.
- Combine wet and dry: Alternately add the dry ingredients and wet mixture to the butter mixture, starting and ending with dry. Mix gently after each addition until just combined—overmixing can make the cakes tough.
- Portion batter: Using a tablespoon or small cookie scoop, drop rounded dollops about 1½ inches apart onto the prepared baking sheets. You should get around 18 to 20 whoopie pie cakes. The batter will be thick but scoopable.
- Bake: Bake for 10 to 12 minutes, or until the tops spring back when lightly pressed and a toothpick inserted in the center comes out clean. Keep an eye—overbaking dries them out.
- Cool completely: Transfer the cakes to a wire rack to cool fully. This is important so the filling doesn’t melt when assembled.
- Prepare the filling: Beat 8 oz (225g) softened cream cheese and ¼ cup (57g) softened unsalted butter until smooth and creamy. Gradually add 1⅓ cups (160g) sifted powdered sugar, 1 teaspoon (5ml) vanilla extract, and a pinch of salt. Beat until fluffy, about 3 minutes. Taste and adjust sweetness if needed.
- Assemble the whoopie pies: Pair the cooled cakes by size. Spread about 2 tablespoons of filling on the flat side of one cake and sandwich with its partner. Press gently to spread filling evenly to the edges.
- Chill before serving: For best results, refrigerate assembled whoopie pies for at least 30 minutes to let the filling set—it also makes them easier to handle and enhances flavor melding.
Cooking Tips & Techniques
Creme de la creme is in the details here. When creaming butter and sugar, patience pays—beat them until fluffy to trap air, which makes the cakes tender. You know, skipping this step is a common mistake that yields dense, flat whoopie pies.
Don’t overmix the batter once you add dry ingredients. Overworked gluten means toughness, and that’s the last thing you want in a soft red velvet cake. I once learned this the hard way after rushing through mixing, and it was a lesson I won’t forget.
For consistent sizing, use a cookie scoop or tablespoon to portion the batter. This helps the cakes bake evenly and stack nicely for assembly. If you’re multitasking, prep the filling while the cakes bake—time saved is always a win in the kitchen.
Finally, chilling the pies before serving is more than just a finishing touch; it firms up the filling and lets flavors marry. If you skip this, the filling might ooze out, making things a bit messy but still delicious!
Variations & Adaptations
- Dietary twists: For a gluten-free version, swap all-purpose flour for almond or a gluten-free blend. Use dairy-free cream cheese and butter alternatives to make it vegan-friendly.
- Seasonal flavors: Add a teaspoon of orange zest to the batter for a bright citrus kick. Or mix in finely chopped fresh strawberries into the filling for a summery surprise.
- Cooking methods: Instead of baking as whoopie pies, spread the batter in a sheet pan and bake as a cake layer, then cut into squares and fill for easier portioning at parties.
- Spice it up: Add a pinch of cinnamon or nutmeg to the batter for warm, cozy undertones.
- Personally, I once tried swapping the cream cheese filling with a marshmallow fluff and butter combo for a nostalgic, cloud-like texture—it was a hit at my nephew’s birthday!
Serving & Storage Suggestions
Serve these creamy red velvet whoopie pies chilled or at room temperature. They pair beautifully with a hot cup of coffee or a glass of cold milk—honestly, a match made in dessert heaven. For a fancier touch, dust with a little powdered sugar or garnish with fresh berries.
Store leftover whoopie pies in an airtight container in the refrigerator for up to 5 days. They also freeze well; wrap each pie individually in plastic wrap and place in a freezer bag for up to 2 months. When ready to enjoy, thaw overnight in the fridge and bring to room temperature before serving.
Reheating isn’t necessary, but if you prefer a slightly softer filling, let them sit at room temperature for 15-20 minutes. Over time, the flavors deepen, and the cream cheese filling becomes even more luscious—so sometimes, a day-old whoopie pie is pure magic.
Nutritional Information & Benefits
Each creamy red velvet whoopie pie contains approximately 250-300 calories, depending on size. Key nutrients come from the cream cheese, which provides calcium and protein, and the eggs, which add vitamin D and essential amino acids.
While these treats are indulgent, using buttermilk adds a nice tang and tender crumb without extra fat. You can also swap regular sugar for coconut sugar to lower glycemic impact slightly. Gluten-free and dairy-free adaptations make this recipe accessible to various dietary needs.
From a wellness perspective, these pies hit the comfort-food spot without being too heavy or overly sweet, making them a balanced treat to enjoy mindfully.
Conclusion
To sum it up, these creamy red velvet whoopie pies with luscious homemade filling are definitely worth the time and love they take. They’re simple to make, irresistibly delicious, and perfect for sharing. You can easily tweak the filling or cake to match your taste or dietary preferences, so don’t hesitate to get creative.
Personally, I adore this recipe because it brings back fond memories while still feeling fresh and fun to bake. Why not try it out and see if it becomes a favorite in your household too? If you do, I’d love to hear how you personalize it or any tips you discover along the way. Go ahead, share your thoughts and spread the joy—these whoopie pies are meant to be enjoyed and celebrated!
FAQs about Creamy Red Velvet Whoopie Pies
How long do whoopie pies stay fresh?
Stored in an airtight container in the fridge, they stay fresh for up to 5 days. You can freeze them for up to 2 months.
Can I make the cake batter ahead of time?
Yes, you can prepare the batter and refrigerate it for up to 24 hours before baking. Just give it a gentle stir before scooping.
What can I use instead of buttermilk?
Mix 1 cup of milk with 1 tablespoon of lemon juice or vinegar, let it sit for 5 minutes to curdle. Use this as a buttermilk substitute.
How do I prevent the filling from melting?
Make sure the cakes are completely cooled before assembling and keep the whoopie pies chilled until serving.
Can I use a different filling?
Absolutely! Marshmallow fluff, whipped cream cheese frosting, or even chocolate ganache work well as alternatives.
Pin This Recipe!


Creamy Red Velvet Whoopie Pies Recipe with Luscious Homemade Filling
Delightful red velvet whoopie pies with a moist cocoa-flavored cake and a smooth, tangy cream cheese filling. Perfect for family gatherings, potlucks, or a nostalgic sweet treat.
- Total Time: 45 minutes
- Yield: 18 to 20 whoopie pies 1x
Ingredients
- 2 cups (240g) all-purpose flour
- 2 tablespoons (15g) unsweetened cocoa powder
- 1 teaspoon (5g) baking soda
- ½ teaspoon (2g) salt
- ½ cup (113g) unsalted butter, softened
- 1 cup (200g) granulated sugar
- 2 large eggs, room temperature
- 1 cup (240ml) buttermilk, room temperature (or dairy-free milk with 1 tbsp lemon juice as substitute)
- 1 teaspoon (5ml) vanilla extract
- 2 teaspoons (10ml) red food coloring (natural beet juice works too)
- 1 teaspoon (5ml) white vinegar
- 8 oz (225g) cream cheese, softened
- ¼ cup (57g) unsalted butter, softened
- 1⅓ cups (160g) powdered sugar, sifted
- 1 teaspoon (5ml) vanilla extract
- Pinch of salt
Instructions
- Preheat your oven to 350°F (175°C). Line two baking sheets with parchment paper or silicone mats.
- In a medium bowl, sift together 2 cups (240g) all-purpose flour, 2 tablespoons (15g) cocoa powder, 1 teaspoon (5g) baking soda, and ½ teaspoon (2g) salt. Set aside.
- In a large bowl, beat ½ cup (113g) softened unsalted butter with 1 cup (200g) granulated sugar until light and fluffy, about 3 to 4 minutes.
- Beat in 2 large eggs, one at a time, scraping down the bowl after each addition.
- In a separate small bowl, combine 1 cup (240ml) buttermilk, 1 teaspoon (5ml) vanilla extract, 2 teaspoons (10ml) red food coloring, and 1 teaspoon (5ml) white vinegar. Whisk until blended.
- Alternately add the dry ingredients and wet mixture to the butter mixture, starting and ending with dry. Mix gently after each addition until just combined.
- Using a tablespoon or small cookie scoop, drop rounded dollops about 1½ inches apart onto the prepared baking sheets, yielding about 18 to 20 cakes.
- Bake for 10 to 12 minutes, or until tops spring back when lightly pressed and a toothpick inserted comes out clean.
- Transfer the cakes to a wire rack to cool completely.
- To prepare the filling, beat 8 oz (225g) softened cream cheese and ¼ cup (57g) softened unsalted butter until smooth and creamy.
- Gradually add 1⅓ cups (160g) sifted powdered sugar, 1 teaspoon (5ml) vanilla extract, and a pinch of salt. Beat until fluffy, about 3 minutes.
- Pair cooled cakes by size. Spread about 2 tablespoons of filling on the flat side of one cake and sandwich with its partner. Press gently to spread filling evenly to the edges.
- Refrigerate assembled whoopie pies for at least 30 minutes before serving to let the filling set.
Notes
Use a trusted brand of flour like King Arthur for best texture. For cream cheese, Philadelphia yields the smoothest filling. For gluten-free, substitute all-purpose flour with almond flour or gluten-free blend but expect denser texture. Chill pies before serving to firm up filling and enhance flavor. Avoid overmixing batter to keep cakes tender. Use a cookie scoop for consistent sizing. Variations include adding orange zest, cinnamon, or swapping filling with marshmallow fluff.
- Prep Time: 20 minutes
- Cook Time: 12 minutes
- Category: Dessert
- Cuisine: American
Nutrition
- Serving Size: 1 whoopie pie
- Calories: 275
- Sugar: 24
- Sodium: 210
- Fat: 14
- Saturated Fat: 8
- Carbohydrates: 34
- Fiber: 1
- Protein: 4
Keywords: red velvet, whoopie pies, cream cheese filling, dessert, easy baking, homemade, cocoa, sweet treat


